

Turn your presentation into a video
When you make a recording of a presentation, all its elements (narration, animation, pointer movements, timings, and so on) are saved in the presentation itself. In essence, the presentation becomes a video that your audience can watch in PowerPoint.
So you have two options for turning your presentation into a video that's ready to view:
Save/export your presentation to a video file format (.mp4 or .wmv).
Save your presentation as a PowerPoint Show (.ppsx) file. (A PowerPoint Show appears full-screen in Slide Show, ready to view immediately.)
Save as a video file
After you've created your slides and recorded any timing and narrations and laser pointer gestures that you want to include, you're ready to create a video file.

On the File menu, select Save to ensure all your recent work has been saved in PowerPoint presentation format (.pptx).
Click File > Export > Create a Video . (Or, on the Recording tab of the ribbon, click Export to Video .)
In the first drop-down box under the Create a Video heading, select the video quality you want, which pertains to the resolution of the finished video. The higher the video quality, the larger the file size. (You may want to test them to determine which one meets your needs.)
* The Ultra HD (4K) option is only available if you're using Windows 10 or later.
The second drop-down box under the Create a Video heading tells whether your presentation includes narration and timings. (You may switch this setting if you like.)
If you haven't recorded timed narration, by default the value is Don't Use Recorded Timings and Narrations .
The default time spent on each slide is 5 seconds. You can change that timing in the Seconds to spend on each slide box. To the right of the box, click the up arrow to increase the duration, or click the down arrow to decrease the duration.
If you have recorded a timed narration, by default the value is Use Recorded Timings and Narrations .
Click Create Video .
In the File name box, enter a file name for the video, browse for the folder that will contain this file, and then click Save .
In the Save as type box, choose either MPEG-4 Video or Windows Media Video .
You can track the progress of the video creation by looking at the status bar at the bottom of your screen. The video creation process can take up to several hours depending on the length of the video and the complexity of the presentation.
Tip: For a long video, you can set it up to be created overnight. That way, it’ll be ready for you the following morning.
To play your newly-created video, go to the designated folder location, and then double-click the file.
Save as a PowerPoint Show
When someone opens a PowerPoint Show file, it appears full-screen in Slide Show, rather than in edit mode. The viewer begins watching the presentation immediately.
On the File menu, select Save As .
Choose the folder location where you want to store your PowerPoint Show file.
In the Save as type box, choose PowerPoint Show (*.ppsx) .

Select Save .
Why turn your presentation into a video?
When you want to give a high-fidelity version of your presentation to colleagues or customers (either as an e-mail attachment, published to the web, on a CD or DVD), save it and let it play as a video.
You can save your presentation as either an MPEG-4 video file (.mp4) or a .wmv file. Both formats are widely supported and can be streamed over the internet.
Some tips to remember when recording your presentation as a video:
You can record and time voice narration and laser pointer movements in your video.
You can control the size of the multimedia file and the quality of your video.
You can include animations and transitions in your movie.
Viewers do not need to have PowerPoint installed on their computers to watch it.
If your presentation contains an embedded video, the video will play correctly without your needing to control it.
Depending on the content of your presentation, creating a video may take some time. Lengthy presentations and presentations with animations, transitions, and media content will likely take longer to create. Fortunately, you can continue to use PowerPoint while the video is being created
What parts of a presentation won't be included in a video?
The following items won't be included in a video that you create using PowerPoint:
Media inserted in previous versions of PowerPoint. To include these, you can convert or upgrade the media object.
For example, if you inserted the media using PowerPoint 2007, it will be linked and it will play in the presentation. However, when you export the file as a video, the linked media will be dropped. You can convert the file to the new file format (click the File tab, and under Info , click Convert ), or you can right-click the media object and then click to upgrade; it will embed the file and export it correctly.
QuickTime media (unless you have a third-party QuickTime codec named ffdShow installed and you have optimized for compatibility)
OLE/ActiveX controls
What to do with your video after creating it
After you create a video, you can share it with others by using the following methods:
Email your presentation to others
Save to a file share or other location
Upload it to your organization's Microsoft Stream video-sharing site , as described in the next section, "Save to a video-sharing site."
Save to the Microsoft video-sharing site
After you've created the video file, you can upload it to a video-sharing site. Microsoft Stream is an enterprise video service where people in an organization can upload, view, and share videos. Microsoft 365 business or education subscribers have access to this service from within PowerPoint for Microsoft 365.
Select File > Export , and then select Publish to Microsoft Stream .

Type a title and a description for the video.
Set other options, including whether you want others in your organization to have permission to see the video:

Select the Publish button.
The upload process can take several minutes, depending on the length of the video. A status bar at the bottom of the PowerPoint window tracks the progress, and PowerPoint shows a message when the upload is finished:

Click the message to go directly to the video playback page on Microsoft Stream.
For more information about this service, begin reading with What is Microsoft Stream? It includes information about Office 365 Video vs. Microsoft Stream.
1 The Ultra HD (4K) option is only available if you're using Windows 10 or later. 2 In PowerPoint 2016, the Ultra HD (4K) option isn't available in the Volume License edition.
When someone opens a PowerPoint Show file, it appears full-screen in Slide Show, rather than in edit mode. The viewer begins watching the presentation immediately.
Burn your presentation to a disc
Click File > Export > Create a Video .
PowerPoint 2013 and newer versions can save your presentation as either an MPEG-4 video file (.mp4) or a .wmv file. Both formats are widely supported and can be streamed over the internet.

Need more help?
Want more options.
Explore subscription benefits, browse training courses, learn how to secure your device, and more.

Microsoft 365 subscription benefits

Microsoft 365 training

Microsoft security

Accessibility center
Communities help you ask and answer questions, give feedback, and hear from experts with rich knowledge.

Ask the Microsoft Community

Microsoft Tech Community

Windows Insiders
Microsoft 365 Insiders
Find solutions to common problems or get help from a support agent.

Online support
Was this information helpful?
Thank you for your feedback.
From ideas to screen: How to make presentation videos that shine

Visuals can mean the difference between a killer presentation and a lost opportunity.
For salespeople, it’s difficult to close a deal without business presentations to back up your pitches. For marketers and business owners, video presentations help communicate ideas and share results from projects to ensure future success.
Customers also love high-quality visuals, like branded explainer videos and product tours. They’re the fuel that drives eight in 10 people to make online purchases.
But what makes a good presentation? And how can you engage viewers throughout your video? This guide covers what you need to know about creating video presentations, no matter the purpose.
What is a video presentation?
A video presentation refers to a sequence of visuals combined with audio to convey information, arguments, ideas, or narratives. It can be about a product, service, internal business reports, or even a topic of interest.
Video presentations can range from simple slideshow-style videos with voiceovers to more complex productions involving animations, live-action footage, music, sound effects , and more.
A good video presentation provides information clearly and concisely. But the best video presentations engage your target audience with professional video quality: a good camera and mic, skilled editing, and a confident presenter.
There are a ton of different types of video presentation formats you can choose from, including:
- Animated explainer videos
- Employee onboarding videos
- Screen recordings
- Training videos
- Product demos
- Microsoft PowerPoint presentations with a talking head
- Sales presentations
- Awards presentations
Benefits of a video presentation
These are great reasons to put in the effort to produce this type of video content.
Enhanced engagement
Video recordings—whether on social media or hosted on your website—are great for engagement and getting your audience’s attention. Wyzowl found that 95% of marketers have said video marketing has helped them increase brand awareness, 90% say it has helped generate leads, and 87% said it has helped them increase sales.
Visual clarity
There's a reason many people suggest something like "If you can learn it, you'll find it on YouTube." The presentation video format is unique in its ability to teach and demonstrate, similar to the in-person experience you'd get with a tutor or salesperson.
The same Wyzowl report found that 96% of marketers say videos have helped increase user understanding of products and services. In short: video helps customers retain your information.
Global reach and accessibility
Video presentations are a great way to reach a global audience. More than half of people say they’re more likely to share a video with others than any other type of content.
A video presentation is also better for accessibility than other content types. With video editing software , you can:
- Easily add subtitles and annotations to your video footage for those with hearing loss.
- Add an audio description voiceover for those with sight loss.
- Change the color filters for those with color blindness.
Personal connection
Building a personal connection with your audience is critical for overall brand engagement. A video presentation, especially one with a person in the video, helps you do that. Research shows that students have positive feelings for videos presented by an instructor, for example.
How to create a video presentation
Step 1. plan and prepare.
Proper planning and preparation can help the rest of your presentation creation process run smoothly.
Think about what you’ll say, and use a storyboard to build out a visual plan of your presentation ideas. Storyboarding your presentation, instead of making it on the fly, will help you stay focused when you fire up your presentation software. (You don’t need to be an artist; just set out the scenes in a way that makes sense to you.)
At this point, start writing the video script for your presentation. You’ll know what to say and when to say it, and won’t fill your presentation up with filler words like “um” and pauses when trying to think about what to say next.
Step 2. Gather resources
After you’ve completed your paper storyboard and script, it’s time to go digital. With Descript, you can build your slideshows into the video editor just like any slideshow tool .
To create a presentation video in Descript:
- Hit New project .
- Import any media (images, infographics, short video clips, GIFs, or sounds) you want to include in your presentation.
- Drop your visuals into the script and edit them into a sequence, or work scene by scene by adding a / at the beginning of each slide.
- Add the background of your presentation, then your script in the left panel.
- Add captions to your presentation by hitting the T icon at the top and choosing Captions.
When you've set up all your slides, you can get fancier and add transitions, extra media, and special effects later.
But maybe you’d prefer to create the presentation using more familiar software, like Prezi, PowerPoint slides, or Google Slides. In that case, you can import the presentation into Descript later or use its screen recording functionality. (If you upgrade your Descript plan, you can create your own video presentation templates to use over and over again, if that’s your style.)
Step 3. Record your presentation video
With your slides all set up, it’s time to turn them into a video. This step is pretty straightforward if you’ve used Descript to make the presentation slides. All you’ll need to do is go to the beginning of the presentation and hit the Record button at the top of the screen:
If, like in the image example above, you’ve written your script into the scenes, change the default setting Record into script to Record new layer . This preserves your script so you can read from it whil recording your presentation video.
Decide if you want to record a voiceover only (leaving the record option as Audio only ), or add a floating head video with your webcam to show yourself as the speaker by clicking the Screen option. Either way, go through your script as the slides move along.
If you created your presentation in another software like Google Slides, there may be no built-in option to record your presentation over the slides. In that case, use Descript’s screen recorder to film your screen with audio. The video file will be ready and waiting for you in the video editor when you finish recording.
Step 4. Edit and enhance
At this point, you’ve got the basic presentation down. It’s time to bring out your inner filmmaker and turn the slideshow into something special.
With Descript’s free video editor, you can:
- Add title screens to introduce your presentation.
- Choose from a library of background music.
- Change the fonts of your captions and any other text layer.
- Add cool slide transitions.
- Improve audio quality with Studio Sound .
Descript’s video editing is different (and easy) since you can edit the video using the script instead of a traditional timeline editor. This makes the process super efficient since you can quickly identify what needs cutting. Simply delete the part of the script you don’t want, and the accompanying video will disappear.
Step 5. Review and fine-tune your video
What makes Descript extra special is the ability to edit your audio by taking out filler words you might have accidentally recorded. Remove “ums,” “uhs,” and awkward pauses in a single click with filler word removal .
If, like me, you also have a habit of forgetting to say something important, you can use Descript's Overdub feature to add those few missed words without re-recording the whole scene. The software will create an AI clone of your voice to fix audio mistakes.
With your video presentation fine-tuned, you’re ready to save and share it with the world. Click the Publish button in the top right corner and download the MP4 file, or export it directly to a platform like YouTube or Wistia.
6 key elements for crafting a great video presentation
Now you know the practical how-tos of making a presentation video, let’s look at some key elements that turn a good video presentation into a great one.
Clear and engaging content
Visual appeal, narration and voice quality, engagement techniques, structure and flow.
- Audience-centric approach
No one likes feeling confused. If your presentation isn’t clear, you’ll end up frustrating your audience. A nice trick for clarity is to imagine you’re explaining your presentation to a child; don’t use big words to sound smart. Presentations that are clear from the start are naturally more engaging.
Gone are the days of 360p Nokia footage. Even if you don’t have a professional camera setup, you can still record a video on a PC, phone, or webcam with high quality. But don’t forget about the images and text overlays. No one wants to try deciphering pixelated visuals—use the highest quality video resolution you can.
Even the best-quality video presentation can be ruined by bad audio. Poor-quality narration is hugely frustrating to viewers. Prioritize your audio quality, especially for information-rich videos like presentations, and use Studio Sound to remove distracting background noise from your presentation video.
When it comes to video presentations, you should think like a salesperson. You can't expect your audience to believe the information you give them if they don't trust you. Engage your audience by telling a personal story, describing relatable scenes, or emphasizing important points throughout your video.
Treat your presentation like a story with a beginning, middle, and end. Information should flow nicely from one point to the next. Do a test run through your slides before you start recording to ensure any questions don't crop up prematurely because the viewer thinks you haven't covered it (when you do a few slides later).
Learn: Narrative structure: How to compose the best story for your footage
Audience-centric approach
It's pretty much always to the audience's benefit when you make a presentation video, so you shouldn't focus too much on yourself. Address your audience's needs and go above and beyond to answer any questions they may have. Otherwise, why would they listen to you?
5 tips to help you craft remarkable video presentations
Now we know what makes a great presentation video, here are five bonus presentation tips to create yours.
1. Practice and rehearse
You won’t always get it right the first time, and that’s okay. But the more you practice before hitting record, the better your presentation video will be—and the less legwork you’ll need to do throughout the video editing process.
2. Invest in good equipment
Top-notch equipment makes your life easier throughout the video creation process. Replace your webcam with your iPhone to improve picture quality, and invest in editing tools that allow you to record and edit in the same dashboard.
3. Optimize lighting
Another area where you can improve the quality of your video is the lighting technique . If you have the budget, you can use a simple ring light, but if you don’t have the cash to invest in video equipment, use natural light (such as a window) behind your camera.
4. Engage with eye contact
If someone was talking to you and they weren’t looking at you, you’d probably be a little confused or uncomfortable, right? It’s the same with video. Look into the camera when making video presentations to simulate real eye contact with your audience. If you forget, use Descript’s Eye Contact AI effect to fix it.
5. Keep it concise
If you waffle on with unnecessary information or get sidetracked on a story, you’ll lose your audience’s attention, and they’ll click away or switch off. Stick to your video script and keep your presentation concise.
Elevate your video presentations with Descript
Creating an informative and engaging video presentation isn’t the easiest task in the world. You’ve got to know your audience and what they want, present the information confidently, and do it with visually appealing content.
With Descript, you can take your presentation video to the next level with an editing experience that allows you to:
- Record your screen on a Mac or Windows device
- Create and record slides (with voiceover) in one dashboard
- Remove filler words with a single click
- Use Studio Sound to remove background noise from your presentation
- Turn your presentation into a YouTube video, or download it as an MP4 file
Take a free tour of Descript and see why thousands of creators love its video editing platform.
How to make presentation videos FAQ
How do i make a presentation video for free.
- Choose a slideshow software like Descript
- Create your slides
- Add transitions
- Record your voiceover
- Edit your presentation
- Share your video
How do I video myself when presenting a PowerPoint?
Use PowerPoint’s built-in recording feature and choose the “Cameo” option to record yourself when presenting. Or, use Descript’s screen recording feature and have the presentation ready for editing when you finish recording.
How do I make an audio-video presentation?
If you don’t want to record yourself on video, use a screen recorder to film your presentation slides. Video presentation makers like Descript allow you to record a voiceover.
Related articles

Featured articles:
Articles you might find interesting

Other stuff
How to screen record on Chromebook: 3 different ways
Learn how to screen record on Chromebook with ease. Discover 3 ways to capture, edit, and share your screen recordings effortlessly.

It's about character: Using character development to drive your story
The best stories are driven by the characters. Here's how to find the complexity in your characters to drive the story forward.

Creating the perfect shot list before filming a video
A shot list is a planning document that goes through every setup in your project shot-by-shot and lays out everything you and your crew need to know to make it happen.

What Is Personal Branding? Sharing Your Skill Sets and Strengths
Your personal brand is how you present yourself to the world through social media, content platforms like podcasts, your resume, or even your clothes and attitude towards others.

The ultimate guide to TikTok video dimensions: Everything you need to know
The size of your TikTok video is no minor detail—get it wrong, and it’ll look rough and unprofessional. Here’s everything you need to know to get it right.

Grow your podcast with promo swaps — here's how
Promo swaps are one of the easiest, most seamless, time-friendly, and effective ways to promote your podcast. Here's everything you need to know to make them happen.

Join millions of creators who already have a head start.
Get free recording and editing tips, and resources delivered to your inbox.
Related articles:
Share this article
Free online slideshow maker.
Combine photos and video clips with music to create a captivating slideshow in minutes. No experience required.
Free online slideshow maker .
Make a photo slideshow in minutes with adobe express..
Share your story as a captivating slideshow for your audience with Adobe Express. Quickly and easily create a unique wedding slideshow, promote your product and business, or make a recap video of your favorite travels in minutes. Start with free slideshow templates at your fingertips, drag and drop icons and text, then choose a royalty-free Adobe Stock soundtrack that best fits the theme of your video. In no time, you’ll be able to turn your vision to life with a video slideshow made in Adobe Express. No experience required.

Template IDs
(To pull in manually curated templates if needed)
Orientation
(Horizontal/Vertical)
( Full, Std, sixcols )
(number of templates to load each pagination. Min. 5)
Most Viewed
Rare & Original
Newest to Oldest
Oldest to Newest
(still/multiple-pages/video/animated)
(true, false, all) true or false will limit to premium only or free only.
Discover even more.
Facebook Video
Instagram Video
TikTok Video
YouTube Clip
Marketing Video
Animation Video
Outro Video
Intro Video
Promo Video
How to make a photo slideshow.

Personalize your slideshow with one-click video editing tools.
Cut, crop, & trim..
Select videos and photos to crop, cut, split, or trim in just a few taps.
Easy resize options.
Make content of any size in the same project. Use the Resize tool to adjust video dimensions anytime.
Stand out with animation.
Select any element in your project to add movement or dynamic transition effects.
Adjust video speed.
Speed videos up or slow them down in one click.
Send an edit link.
Invite other people to edit your video project directly, leave comments, or view it in real-time, from anywhere.
Share on social.
Connect your social channels to the Adobe Express Content Scheduler & share your video to your favorite platforms.
Add text to photos and videos.
Apply text to any photo or video with tons of unique font combinations to choose from.
Enhance with filters.
Try out filter effects or tweak the look and feel of your media using the Adjustments menu.
Make any kind of content from your browser.
All-in-one online content creation app..
Create slideshow videos, explainer videos, montages, and more and share to any digital destination.
Thousands of free Adobe Stock videos, images & music.
Tons of royalty-free stock music, videos, images, & design assets right in Adobe Express to add to your own content.
Free video templates for any occasion.
Find the perfect free template to start customizing with your own media.
Tons of free templates to make a video slideshow.
Whether you’re making a video slideshow to showcase your favorite memories, a how-to video, or a recap video, there are tons of stunning, free slideshow templates fit for any occasion right in Adobe Express. It’s free, easy to use, and all skill levels can make a video slideshow in minutes.

Turn any video or photo into a dynamic viewing experience.
Add a blend of photos and video clips to a single slideshow. Drag the corners of each clip to shorten scenes or split videos in one click. To add a whole new layer of dimension, you can even apply animated transition effects to any text, icon, or graphic in your project to capture – and keep your audience’s attention.
Frequently asked questions.

Cloud Storage

Custom Business Email

Video and voice conferencing

Shared Calendars

Word Processing

Spreadsheets
Presentation Builder

Survey builder

Google Workspace
An integrated suit of secure, cloud-native collaboration and productivity apps powered by Google AI.
Tell impactful stories, with Google Slides
Create, present, and collaborate on online presentations in real-time and from any device.
- For my personal use
- For work or my business

Jeffery Clark
T h i s c h a r t h e l p s b r i d g i n g t h e s t o r y !

E s t i m a t e d b u d g e t

Make beautiful presentations, together
Stay in sync in your slides, with easy sharing and real-time editing. Use comments and assign action items to build your ideas together.

Present slideshows with confidence
With easy-to-use presenter view, speaker notes, and live captions, Slides makes presenting your ideas a breeze. You can even present to Google Meet video calls directly from Slides.

Seamlessly connect to your other Google apps
Slides is thoughtfully connected to other Google apps you love, saving you time. Embed charts from Google Sheets or reply to comments directly from Gmail. You can even search the web and Google Drive for relevant content and images directly from Slides.

Extend collaboration and intelligence to PowerPoint files
Easily edit Microsoft PowerPoint presentations online without converting them, and layer on Slides’ enhanced collaborative and assistive features like comments, action items, and Smart Compose.

Work on fresh content
With Slides, everyone’s working on the latest version of a presentation. And with edits automatically saved in version history, it’s easy to track or undo changes.

Make slides faster, with built-in intelligence
Assistive features like Smart Compose and autocorrect help you build slides faster with fewer errors.

Stay productive, even offline
You can access, create, and edit Slides even without an internet connection, helping you stay productive from anywhere.
Security, compliance, and privacy

Secure by default
We use industry-leading security measures to keep your data safe, including advanced malware protections. Slides is also cloud-native, eliminating the need for local files and minimizing risk to your devices.
Encryption in transit and at rest
All files uploaded to Google Drive or created in Slides are encrypted in transit and at rest.
Compliance to support regulatory requirements
Our products, including Slides, regularly undergo independent verification of their security, privacy, and compliance controls .
Private by design
Slides adheres to the same robust privacy commitments and data protections as the rest of Google Cloud’s enterprise services .

You control your data.
We never use your slides content for ad purposes., we never sell your personal information to third parties., find the plan that’s right for you, google slides is a part of google workspace.
Every plan includes

Collaborate from anywhere, on any device
Access, create, and edit your presentations wherever you are — from any mobile device, tablet, or computer — even when offline.

Get a head start with templates
Choose from a variety of presentations, reports, and other professionally-designed templates to kick things off quickly..

Photo Album

Book Report

Visit the Slides Template Gallery for more.
Ready to get started?
Home Blog Presentation Ideas Video Presentations: A Guide for Engaging Content
Video Presentations: A Guide for Engaging Content

In a time when the Millennials’ attention span can be measured as little as 12 seconds, how can we create genuinely engaging presentations? Is continuously changing slides the answer these days?
A skilled presenter has to master different techniques; therefore, we will examine the potential for video presentations. Join us to discover what video presentations are, the reasons why you should use them amongst your presentation tools, and exciting tips on how to drive engagement from them.
Table of Contents
What video presentations are
Video presentation stats to consider, different types of video presentations, why should you use video presentations, what are the components of a winning video presentation, the role of accessibility: advanced research on video presentations, 5 tips on how to make your video presentations engaging.
- How to create a video presentation
Do you need special software to create video presentations?
Closing thoughts.
Presentations are a crucial part of business and academic environments. Thousands of presentations are delivered each day in different environments; still, many are doomed to fail. Although we can blame this on a lack of proper presentation skills , reality tells us there’s a change in how people prefer to see the content.
As a general rule, consider 10 minutes the Goldilocks Zone for traditional presentations in what comes to audience engagement . Inspirational presentations like the ones we see on TEDx don’t follow this rule, as the objective here is to share a compelling story as detailed as possible so the audience can relate. In some cases, academic presentations of the thesis defense style remain loyal to a specific format. Still, trends are also changing, and video presentations have much to offer in terms of exposing complex concepts more plainly.
A video presentation can be represented in multiple formats: as a compendium of animated slides in video format, video files and audio sources packed on a single video file, a video recording made in interview format, a video documentary, etc. Although this definition may sound redundant, the concept behind a video presentation is that they don’t require a presenter to change between slides or windows to browse different assets . Hence, the importance to create a story behind the video presentation, so the various elements don’t feel segregated without logic.
We can say people use the video format to convey information in courses, job training, edutainment, conferences, and any kind of message-sharing purpose that requires connecting with the audience for engagement.
Before dwelling on the specifics of building a video presentation, here we share some video presentation stats that speak about the importance of video presentations these days from a marketing perspective.
- Online search continues to be the most common way (45%) for users to find instructional and informational video content. ( source )
- The most commonly-created types of videos are explainer videos (72%) , presentation videos (49%), testimonial videos (48%), sales videos (42%), and video ads (42%). ( source )
- 57% of consumers said that product videos make them more confident in a purchase and less likely to return an item ( source )
- Millennials’ attention span can be measured as little as 12 seconds ( source )
- A minute of video is worth 1.8 million words in terms of information retention ( source )
As you can see, the effort of building a video presentation is well-paid in terms of consumption and content information retention from the audience.
Depending on the requirements of the presentation itself, we can classify video presentations as follows:
In-Company Video Presentations
These video presentations belong to the business and corporate world, but their purpose is to distribute information among coworkers or to coach the personnel for a specific requirement. In-company video presentations are used in workspace training, as part of internal recruitment processes, or other kinds of internal presentations.
In-company video presentations usually carry the company branding; they have restricted access for people outside the organization, so their distribution methods happen in meeting rooms dedicated to these purposes.
Business Video Presentations
Business video presentations are used for a variety of business purposes: business pitches, workspace training, advertisement, product releases, recruitment, and more. Business video presentations also include the ones dedicated to B2B or B2C relationships.
Like In-Company Video Presentations, they carry branding to identify the video presentation’s author quickly. They are shared through official mediums for the company (like a brand’s social media channels and website), during corporate meetings with investors or potential business partners, and through 3rd. party channels.

Examples of these kinds of videos are product launch sessions, much like what tech giants like Xiaomi do.
Another kind of business video presentation is the explainer video. Explainer videos can be defined as short online marketing videos that are used to explain the company’s product or service. Explainer videos are commonly used for sales, marketing, and training purposes. Here is a real example of a 1-minute video presentation introducing SlideModel.com.
Another application of business video presentations is when sponsorship deals are involved, as brands can present their value to influencers through short reels.
Resume Video Presentations
This is a relatively recent but incredible turn of resume presentations. In resume video presentations , the candidate offers a detailed introduction of their capabilities, skills, interests, and potential value to the employer in a visually engaging format.
Unlike traditional CV presentations, the video format gives little room for anxiety, answering most of the interviewer’s questions or even driving admiration for the effort and dedication to this job-hunting adventure.
We recommend the usage of resume presentation templates for this purpose, as they save tons of time in crafting a high-quality resume video presentation.
Educational Video Presentations
This category can be divided into three different sub-categories:
Academic Video Presentations
Intended for University-level presentations or post-Doctorate work, these presentations follow strict format guidelines. They are mainly designed to distribute data comprehensively, with proper documentation backup. Animations usually don’t take part in these video presentations.
Despite being commonly associated with business events, conferences also belong to the academic video presentations category, as the live sessions are recorded to spread the message about important research discoveries.
Teaching & Training Video Presentations
Teachers introduce the presentations to their students on various topics to understand abstract issues better. Chemistry, Physics, and Geography are typical examples of subjects that use video presentations. However, subjects like History and Philosophy can save countless hours of whiteboard sessions by using educational video presentations.
Webinars fall under this category, either being released to the public or in-company webinars, as they share common aspects in their structure. Do keep in mind that educational content recorded as video presentations is not the same as a webinar, as the latter requires the presence of a live audience, a moderator, and usually a Q&A session at the end of it. If we talk about educational content being recorded and released as a course platform, then we can say it is a workshop.
According to recent studies, visualizations through video presentations and video-based learning can enhance understanding. It is demonstrated that students who watched learning videos on Statistics, influenced engagement and motivation positively .
Student Video Presentations
Finally, students also make video presentations as requested by their teachers to present a lesson or project exhibition. These presentations vary as the students grow older, becoming less dependent on animated effects, setting the bases for future work or academic presentation formats.
Informal Video Presentations
If you remember seeing videos in situations like 50th birthday parties, baptisms, wedding anniversaries, etc., then you have already experienced informal video presentations.
These informal presentations are free from any format restriction. As the term implies, they are used for any kind of meetup, making it simpler to share a story rather than to tell a lengthy story.
Inspirational & Motivational Video Presentations
The final category belongs to the video presentations with a strong emotional component. They are built to connect, to empathize with the audience in specific situations or problems. Examples of this are TEDx , Evan Carmichael, or similar influencing platforms.
In general lines, motivational video presentations are recordings of live events shared with the purpose of getting the message to the biggest audience possible (internet consumers). Another possible format for these presentations is recorded interviews or testimonials intended to speak about a person’s contributions to society. An example of this, from an organization’s point of view, are the videos produced by the UK’s NHS to highlight and thank their medical personnel for their efforts during the COVID-19 pandemic.
Inspirational video presentations share common aspects with motivational speeches. A list of requirements for these video presentations would be:
- Have a clear purpose
- Make it personal
- Get the message tailored for the target audience
- A strong conclusion
Compared with traditional presentation methods, such as presentation slides or speaking in front of an audience, video presentations can offer a series of advantages.
For starters, as you write the “ story ,” you are also rehearsing the points to be covered. In that way, anxiety or shyness won’t trigger you to forget about essential points or lose track of time. The length of the presentation can be predetermined, depending on the external requirements of the organization party, or how comprehensive or concise you need it to be.
In the case of people struggling with camera shyness , an animated video presentation with voiceover is the answer to deliver quality work. Since psychologists and doctors agree the common point on fear of public speaking is the delivery of the presentation itself, video presentations shall reduce work-induced anxiety to a great degree. Since psychologists and doctors agree the common point on fear of public speaking is the delivery of the presentation itself, video presentations shall reduce work-induced anxiety to a great degree. You can also convert images to video online using video editor platforms to easily create video from images and voiceover on video.
Video presentations can be persuasive thanks to the usage of graphics and audio. It is far easier to convey emotions through video presentations than to put them in the presentation design. Also, research by Dr. James McQuivey proved that a minute of video is worth 1.8 million words in terms of information retention.
Regarding engagement, the popularity that both TikTok and YouTube gained among the younger generations reflects the behavioral changes in content consumption . It has come to the point that even professionals use TikTok to demystify health hoaxes and help users worldwide. Therefore, using video format for presentations can help to boost your presentation performance, making it attractive for your audience and less effort-demanding.
The most significant factor in delivering a successful video presentation is keeping the audience engaged. To ensure this, make sure the presentation doesn’t feel robotic-like but that it conveys a personal message. Don’t get this point wrong if we talk strictly about business or academic scenarios; making video presentations to deliver your personal touch can become as simple as selecting the proper color combination to enforce your message . Other solutions come from watching your voice tone not to make it too monotonous.
Structure your presentation accordingly. In business or academic video presentations is a good idea to introduce a slide in the fashion of a table of contents . It is an extra touch that brings the audience closer to the topics due to be discussed.
Consider the audience’s perspective as a vital element in video presentations. Check relevant examples of the topic discussed on platforms such as YouTube or DailyMotion. Compare their approach to yours and assert if you would watch your presentation as a spectator or not. This simple test gives insights into which aspects you should work on.
Winning video presentations never miss the usage of CTAs. It’s a good method to direct the audience’s interest to a specific goal.
Video presentations can become an incredible tool for driving engagement, yet there is a problem that not so many presenters address: accessibility. Think about how many times a presenter ends a phrase like “over here,” assuming the audience is watching the item being shown. But what if members of the target audience have visual impairments?
Much like we consider the importance of adding Closed Captioning (CC) to our videos, accessibility in terms of the narrative is a must. On this behalf, we want to introduce an interesting research that led to the production of a tool named Slidecho . Using state-of-the-art technology like video scene detection, AI, and OCR, Slideshow follows these very steps:
- Step 1: Extract slide frames
- Step 2: Selecting slide elements
- Step 3: Detecting described elements from the slide elements
- Step 4: Aligning slides with the speech
Therefore, Slidecho uses an algorithmic methodology to extract the visual elements from the slides, converting them to an audio reading format whilst aligning it with the original speaker’s narration. Moreover, its interface instantiates new interactions that augment the plain video interface with synchronized slide information and audio notifications to alert users to undescribed elements.
This technological advance helps the audience better understand what is being presented, regardless of the context of the presentation. Imagine an award ceremony where many references apply to visual cues. People with visual impairments get half of the message, with luck, when presenters fall into colloquial language usage, not understanding the context or having to ask for clarification. If instead, the synced narration is available, we then talk about making presentations available for everyone. This is an accurate definition of enriching an event experience.
If we talk about attending to the needs of people with hearing impairments, we have to consider the social factor as a motivator in presentations. It is a common mistake to leave slides filled with text and voiceover narration in the background providing detailed information. A study made by Stanford University speaks about the value of having the presenter’s face available through these slides, as it delivers both social cues plus helps users through lip reading. The human factor also reduces distractions since the audience must check the presenter’s input on written slides.

Tip #1 – Be mindful of the presentation topic
It’s not the same to create a presentation for a business audience as an inspirational presentation. The category of the presentation shall determine items like
- Background music
- Color theme
- Visual hierarchy
- Videos to include
Tip #2 – Limit the number of words to include
The whole idea behind the video presentation is to make a dynamic presentation, not having to pause every 5 seconds to allow the spectator to read.
Instead, use words to transmit powerful messages, such as quotes relevant to the presented topic, key information, or CTAs. Use the 7×7 rule: no slide should have more than 7 lines of text, and no sentence should have more than 7 words.
Tip #3 – Voiceovers can become your best friends
The whole point behind a video presentation is not to create a boring one-person video speaking in front of the camera. Use voiceovers effectively to introduce charts, data feedback, etc., with your voice connecting the points of the entire presentation.
Be mindful of the tone. A monotonous or flat tone can divert attention and induce people to ignore your work. Your voice skills should articulate the importance of the point being discussed as well as your interest in it.
Tip #4 – The power of transitions
Adding suitable transitions and animations makes the presentation more engaging . However, this isn’t equal to adding countless effects. Less is more.
Ask a professional for guidance if you don’t have experience with animation effects. The transition can be part of the conversation, being subtle if the presentation is flowing between data sets or similar topics, or contrasting and powerful to deliver a persuasive message. You may also want to insert a transition when you’ve used a video cutter to remove an unwanted part to smooth out the video flow. Don’t abuse any of the two extremes, or the audience may find it uncomfortable.
Tip #5 – Make video presentations accessible
As we mentioned before, quite often presenters assume the audience can understand every part of a video presentation. Reality tells us to attend to the needs of people with visual and auditory impairments by making audio and video media accessible .
Subtitles or translator screen-over using sign language is a perfect opportunity to help people with auditory impairments feel part of the presentation, making the message available to them as well.
For people with visual impairments, be mindful about how you create the narrative for your presentation, in particular, avoiding visual cues like: “over here,” “this,” and “there” and gesticulating over an object or person, assuming everyone can get the same reference information. Instead, opt to be descriptive in your speech; software solutions can help a great deal, but you can also use native PowerPoint or Google Slides tools such as voiceovers .
How to create a video presentation & recommended video presentation templates
You can create your own video presentations as easily as using Microsoft PowerPoint, Apple Keynotes, or Google Slides.
Check these links for relevant information on how to create a video presentation:
- How to Convert a Google Slides Presentation to a Video
- How to Convert a PowerPoint Presentation to a Video
- How to Embed a YouTube Video in PowerPoint
In case you feel stuck about which content to input or how to make your video presentation outstanding, a brainstorming technique can do wonders for interactive presentations and creative thinking. It is known as the SCAMPER technique .
Since video presentation templates make our life easier, we also recommend you check the following product categories to access extremely visually appealing designs created by professionals to help you deliver your message in style:
- Animated PowerPoint Templates
- Animated Text Banner Templates
- Academic PowerPoint Templates
- Business PowerPoint Templates
- Marketing PowerPoint Templates
Additionally, here you can preview some of our presentation templates that you can use to create a video presentation in PowerPoint.
1. Animated PowerPoint Charts Collection Template

Present data in a visually appealing format by using this collection of animated charts in PowerPoint. Fully customizable, this template brings ease to speak about data-driven presentations; hence becoming a vital asset for any presenter in the corporate world.
Use This Template
2. Animated Network Diagram PowerPoint Template

Simplify the different streams that take part in your project or product release with the help of this animated template design. This Animated Network Diagram template can help you expose the processes that, with integrated effort, evolve into a successful outcome. It has animations applied to the objects, plus transitions to make the presentation more fluid.
Fully editable with any version of PowerPoint.
3. Free Animated Editable Professional Infographics PowerPoint Template

Infographics are a powerful tool that every presenter must consider for their work. This Free Animated Infographics template allows presenters to communicate complex data pieces, build marketing strategies, or prepare professional-looking reports.
You can find a broad variety of charts and graphs. These are fully editable by using the chart filter option to edit on a spreadsheet.
4. Free Animated Editable Infographic PowerPoint Slides

If you intend to present financial data or KPIs for your marketing projects, look no further: this Free Animated Editable Infographic Template for PowerPoint has it all.
Arranged in an 8-slide deck, we find a compendium of graphic elements to represent complex data in a visually compelling manner. Fully editable in all versions of PowerPoint
5. Free Animated Business PowerPoint Template

This versatile free presentation template for PowerPoint makes the perfect tool for more than business presentations: it works perfectly for educational video presentations and even inspirational video presentations.
With 9 fully editable slides, you can build your video presentation by using a unique combination of graphic elements, animations, and transitions. The graphics elements on this template are oriented to highlight leadership concepts.
6. Free Animated Business Infographics PowerPoint Template

Use this free template to create powerful statements backed by data in your video presentations. With a broad selection of graphs, diagrams, and charts, this fully editable template can help presenters to discuss topics ranging from demographics, economy, marketing indicators, or other relevant research results in an easy-to-understand format.
Compatible with all versions of PowerPoint, Google Slides, and Keynote.
You also need to consider the output format of your video presentations. For maximum compatibility, you can use MP4 or MOV. Other alternatives include:
- MKV : The native format of most 4K videos due to being able to store multiple audio tracks. Ideal for presentations with different voiceover languages that presenters can pick from.
- WMV : It’s a quality format for rendering videos to be shared via e-mail, although not compatible with some devices. Installing codecs is advised.
- WebM : This format is one of the preferred choices for online video libraries or live streaming services, but it can present compatibility issues.
The answer to this question entirely depends on your aim for creating video presentations. For most presenters, PowerPoint and Google Slides will do a good job, allowing them to use features such as voiceovers, transitions, animations, and high-quality graphics.
If instead, you desire to make advanced effects, screen recordings, or toon-like animations with voiceovers, then you should check the following list of solutions:
- Camtasia (Techsmith) : It is a professional video editing software, much lighter and easier to use than Adobe Premiere or Sony Vegas. You can create professional transition or animation effects, work with layers to add multiple sounds or video sources and create screen recordings.
- Adobe Premiere Pro : The industry-leading software in video editing. This often intimidating software by Adobe has all the requirements for professional video editing, plus full integration with third-party plugins or other software from the Adobe suite to enhance the video result.
- Sony Vegas Pro : It is considered a direct competitor to Adobe Premiere Pro, less demanding in hardware requirements, and somewhat more user-friendly.
- Final Cut Pro : For Mac users, this is the option to consider if we talk about video editing. Powerful and tailored for the hardware the Mac device has.
As we have seen in this article, video presentations are far from obsolete. It is a truly engaging method to divulge our ideas, especially if we target a younger audience.
Take your time to write a compelling story to tell rather than spilling animations and transitions along the way. Professional-made video presentations always care about details and the takeaway message for the spectator.

Like this article? Please share
Presentation Videos, Video Filed under Presentation Ideas
Related Articles

Filed under Business • April 24th, 2023
How to Ace Your Zoom Presentation: Tips for Successful Virtual Presenting
Master the art of delivering Zoom presentations by checking this quick guide. We list suggestions, how to share a PPT presentation and more.

Filed under PowerPoint Tutorials • October 22nd, 2022
How To Convert a PowerPoint Presentation to a HD Video in 3 Steps
Learn how to convert a PowerPoint presentation to video and prepare video presentations in minutes.

Filed under PowerPoint Tutorials • September 6th, 2022
How to Embed a Youtube Video in PowerPoint
Give your presentations a dynamic performance thanks to embedding YouTube videos to them. In this article, we will explain 5 different methods to perform this task.
Leave a Reply
How to make a slide show
Learn how to make a slide show with photos, videos, music, and custom settings using a slide show maker.
Learn how to make a slide show with PowerPoint
Discover how to make a slide show with photos, videos, music, and custom settings using a slide show app like PowerPoint.
What is a slide show maker?
To create a slide show, you’ll want to use a slide show maker—or slide show app—which is a software program or online service that enables you create digital slide shows with text, photos, videos, music, and other special effects. The full range of slide show features and functionality varies from program to program.
Once you’ve created a slide show, it can be published on the internet or shared with others as a video file. Additionally, you can use slide shows to create dynamic, interactive content on websites.
Slide show software can be used for a variety of purposes, such as creating presentations for work, school, and even your personal life. For instance, slide shows are often used to:

Display photos during an event
Slide shows are a great way to share photos and videos with guests at a wedding, birthday, or other special event.
Create a digital photo album
Some slide shows are created for personal reasons, such as sharing important memories with family or friends.

Highlight products or services
Businesses can use slide shows to showcase their products, promote special offers and sales, or pitch their services to potential clients.
Enhance teaching, training, and public speaking
Slide shows can also provide helpful visuals in educational settings, classroom presentations, and public speaking forums.
What you need to make a slide show
When it comes to creating a slide show, there are a few things you'll need to get started. First and foremost, you'll need a device equipped with presentation software or access to an online slide show app. Secondly, you’ll need a way to display your slide show, which usually means connecting your device to a projector or big screen TV. Beyond that, you’ll need some visual aids and other media to bring your slide show to life.
Explore each of these slide show requirements in more detail:
Devices and equipment —To create a slide show, you’ll use a computer or other device—such as a tablet or mobile phone—with PowerPoint or a similar program installed. You will also need a way to project the slides onto a screen or wall. This can be done with a projector, but if you don't have one available, you can use your TV or computer monitor. Simply connect your device to the TV or monitor using an HDMI cable and select the correct input. Your slides will now be projected onto the screen.
Media —Of course, creating a slide show requires media that adds visual and even audio elements to your presentation. This can be anything from photos and videos to music and text. You can use search engines to find copyright-free media to use in your slide show.
Another option is to purchase royalty-free stock footage, images, and audio files from online media libraries. This could be a bit more expensive, but it guarantees that you have the legal right to use the media in your presentation.
Finally, you can also use your own videos, images, and even music. While this can be a time-consuming process, it does allow you to create custom content specifically for your slide show.
Slide show creator —To bring your slide show together, you’ll need a slide show creator. The slide show software you choose will depend on your presentation requirements and preferences. There are many slide show makers on the market, with Microsoft PowerPoint being one of the most popular and widely used programs globally.
How to choose a slide show maker
When choosing slide show software, it's important to consider the features and specifications that are most important to you. Some of the questions you might ask when choosing a slide show maker include:
- How easy is the software to use?
- Is the software Mac or PC compatible?
- Can I access and edit my slide show on the cloud?
- What kind of slide shows can be created with the software?
- How many photos and/or videos can be included in a slide show?
- Can text and other elements be added to slide shows?
- Are transitions and effects available for slide shows?
- Is music accompaniment an option?
- What are the options for saving and sharing your slide show?
Building a slide show doesn't have to be difficult. With the right software, you can create an engaging presentation in no time.
Six steps for creating a slide show

1. Plan your slide show
Before getting too deep into your slide show project, it’s a good idea to select and save the photos and videos you want to use. This helps you create a slide show more efficiently and purposefully, ensuring a better outcome.
4. Import media
Start adding photos, videos, and other desired media to your slides. You can upload these from your device or online media libraries. If you planned your slide show in advance, you should have all your media saved in one place.

2. Launch your slide show app
Once you’ve decided on a slide show maker, you’ll want to launch the app from whatever device you’ll be using to create your presentation.
5. Add text, music, and transitions
After you’ve arranged the visuals in your slide show, you can provide additional information and communicate sentiment using custom text, music, and timed slide transitions.

3. Choose your theme
Most slide show software offers a variety of pre-set themes, colors, and designs. You can choose one that best suits your slide show or create a custom theme using the program’s various tools and features.
6. Record, save, and share your slide show
Now you’re ready to record your slide show, which can include a voiceover or Cameo . Once your slide show is complete, you can save it as a video to your device or to the cloud, such as OneDrive . You can access your saved slide show at any time to display at events, use in meetings, share online, or send directly to other people.
How to make a slide show with photos
Adding photos to your slide show is a great way to enliven your presentation and make it more visually interesting. Here are a few different ways you can add photos to your slide show in PowerPoint.

Add photos from your device
Whether you’re using a computer, tablet, phone, or other device, you can use photos that are saved to your device to create your slide show. In PowerPoint, simply select “Insert” then “Pictures” from the program menu, then choose “This Device.” This will open your photo library and allow you to find the photos you want to use. Once you’ve selected the photos that you want to import, just click on the "Insert" button and they will be added to your slide show. If you’re using a pre-made theme, you can also right-click the image in the slide show and select “Change Picture.” Again, you will choose “This Device” to access your photo library. After inserting your photo, you can reposition it on your slide or resize it however you like.

Use stock photos
Another way to add photos in PowerPoint is to follow the same process you would when adding photos from your device, but when prompted to choose your photo source, select “From Stock Images” instead of “This Device.” This will display a library of photos that you can use in your slide show without worrying about copyright infringement. There are thousands of stock images available in most slide show maker programs. Once the library is open, you can explore existing photo categories or use keywords to search for photos that fit your needs.

Explore online photo sources
Online photos are images you can insert into a PowerPoint slide show directly from the internet, as opposed to using those you have saved on your device. This is a convenient option if you don't have photos already prepared for your slide show, or if you can’t find the right kind of photo in the stock image library. However, there are some potential risks associated with using online photos, namely that you must be careful to use royalty-free images so not to infringe on any copyrights. In PowerPoint, there is a filtering option to ensure your search results only show royalty-free photos. Inserting photos from online sources follows the same process as the previous two methods, but this time, you’ll select “From Online Sources.”
How to add videos, music, and text

How to add videos to PowerPoint slide shows
Adding videos to your slide show involves accessing videos from your device, a stock video library, or online video sources—just as you would when adding photos. In this case, however, you’ll navigate to the menu in PowerPoint and select “Insert,” followed by “Media,” then “Video.” Once your video appears on your slide, you can resize or reposition it to fit your presentation needs. You can also set your video to play automatically in the slide show by selecting “Playback” on the menu and choosing “Start Automatically.”

How to add music to PowerPoint slide shows
Much like adding videos, you can add music to individual slides in PowerPoint by navigating to “Insert” on the menu, then “Media,” and finally “Audio.” You can then import music from your device, or you can record your own audio directly in PowerPoint. However, if you want your audio to play across multiple slides in your presentation—for example, as background music for a slide show—you’ll have to take a couple of extra steps. Once you’ve imported your audio file, select “Playback” from the menu and choose the “Play in Background” option. Your music will now play across all slides. You can set one song to loop for the duration of the slide show, or you can add more songs to play continuously throughout the slide show.

How to add text to PowerPoint slide shows
Premade themes in PowerPoint make adding text slide shows easy. On slides that already have templated content, you can simply click on the text and begin editing. In addition to changing what the text says, you can resize, recolor, reposition, and add special effects to the text. Of course, you can also change the font—or style—of the text. Most of this can be done from the “Home” tab on the menu while certain effects, such as shadows, can be found on the “Shape Format” tab. If you’re designing your presentation slides from scratch, or want to create additional text, find “Insert” on the menu, then choose “Text Box” or “Word Art,” depending on your desired text effect.
Discover custom slide show settings
Add even more effects to your PowerPoint slide show with custom settings like timing, transitions, and looping.

Set slide show timing
Adding timing to your slide show is a great way to control the pacing and flow of your presentation. To add timing in PowerPoint, go to the "Transitions" tab on the menu and find the "Advance Slide" area. Make sure the box next to “After:” is checked, then input the amount of time you’d like each slide to appear on-screen. The slides will automatically advance, creating a movie-like effect that’s great for events and special occasions.

Create slide show transitions
Now that you’ve added automatic timing to your slide show, you can make it more visually appealing by creating slide transitions. Transitions are special effects that allow you to animate the way your slides change from one to the next, and there are a variety of different transitions in PowerPoint that you can choose from. You can add these transitions to your slide show from the "Transitions” tab. From there, you’ll select the transition you want to add. To preview the transition, simply click on it. You can click “Apply To All” to automatically add the same transition to every slide in your slide show, or you can manually add different transitions to different slides.

Loop your slide show
If you want your slide show to play continuously until you choose to turn it off, you can set your PowerPoint presentation to loop. This will ensure your slide show automatically starts over from the beginning once it reaches the end. To get started, navigate to the “Slide Show” tab on the menu and select “Set Up Slide Show.” When the settings window opens, check the box next to “Loop continuously until ‘ESC’” and then click “OK.” When you’re ready to turn your slide show off, simply press the Esc key on your keyboard.
Slide show template and theme tips
Search themes and templates online.
With numerous slide show themes and templates available, it’s easy to find one that fits your needs.
Customize your design
If you can’t find the perfect theme or template, you can change things like colors and fonts.
Build a custom template
If you want a blueprint to use with future slide shows, you can create your own template.
Add new slides
If you need more slides, you can choose a specific layout and your theme will be carried over.
Edit your slide layouts
Even when using a theme or template, you can rearrange slide content to highlight key information.
Add photos, videos, and text
Themes and templates make adding media easy since most slides have designated content areas.
Change or resize your fonts
If your theme’s font is too small, you can resize it or choose a new font to make it easy to read.
Reorder your slide show
Some themes and templates have a predefined sequence, but you can reorder slides to meet your needs.
Create your own slide show
Slide shows are a great way to engage your audience and present important information. Whether you're creating a slide show for personal or professional reasons, slide shows are an essential tool for anyone who wants to share information in a visually appealing manner.
Discover more ways to improve your slide show
What options are available to create a slide show?
Slide show makers come in many forms. Some slide show software can only be used on specific devices, while other slide show creators can be accessed via the cloud from any device at any time.
It’s a good idea to evaluate a variety of slide show makers to ensure that you find one with all the features you need. For instance, some slide show software skews toward business use cases and others toward personal.
Microsoft PowerPoint is a popular slide show app that allows you to save presentations to your device or the cloud, and is widely used for personal, professional, and educational purposes.
Frequently asked questions
What are slide show apps and software.
Slide show apps and software are used to create and share slide shows. Slide show programs are typically used to communicate information, diagrams, plans, or processes. They can also be used to display photos and videos at events or retail stores. Usually, slide show makers have a range of built-in features and layouts, making them easy to use, regardless of technical skill levels.
What should a slide show include?
An effective slide show should be engaging, visually appealing, and informative. To achieve this, you'll want to make sure to include the following elements:
- A catchy headline or title. This will help grab your audience's attention and set the tone for the rest of your presentation.
- A variety of images. Don't just rely on text—incorporate photos, illustrations, or even video to maximize viewership.
- Bullet points or short blocks of text. Keep your slide content concise and easy to digest; too much information will only overwhelm your viewers.
How do I make a picture slide show?
There are a few different ways to make picture slide shows. You can use online programs, or you can create a slide show directly on your computer, phone, tablet, or other device using slide show software. Some programs, such as Microsoft PowerPoint, can be accessed on your personal device and on the cloud.
How long should a slide show be?
The length of your slide show will depend on several factors, such as the topic of your presentation, the audience you're presenting to, and the amount of time you have. That said, slide shows are generally between five and ten minutes long.
How can I make a slide show better?
Here are a few tips to make your slide show more engaging:
- Add images, videos, and music to bring your slide show to life.
- Use a font that is easy to read from a distance.
- Try not to use too many words on each slide.
- Use custom transitions and timing to make your slide show flow.
- Ensure a cohesive slide show by using a theme or template.
- For live presentations, practice with the Speaker Coach feature .
Follow Microsoft 365
How to make a show-stopping video presentation in 5 simple steps
Learn how to make a show-stopping video presentation to engage your audience, using Dropbox Capture to record your screen, voice, and camera simultaneously.
Whether you’re a teacher, student, business professional, or even a YouTube content creator—for many of us, delivering presentations quickly becomes a standard part of everyday life.
But what happens if you can’t be there to deliver your presentation in person, need a key point to land perfectly, or you need your audience to watch it asynchronously in their own time? Have no fear, video presentations can be a great solution to all these challenges.
In this guide, we’ll cover everything there is to know about creating your own high quality video presentations, so your audience can benefit from your content whenever they need it.
Jump to section
- What is a video presentation
What makes a good presentation video?
What tools do you need to make a video presentation, how to make a video presentation.
- Making a video presentation in PowerPoint
- Making a video presentation in Keynote
Starting from the top: What is a video presentation?
A video presentation is a method of communication through which information is delivered partially or entirely through video. In other words, it’s the process of using video to deliver a message or presentation.
Common formats for video presentations might include pre-recorded slide presentations, instructional videos, sales material, inspirational talks, entertainment, or anything you can think of.
While the reaction to a video presentation will be subjective, there are a few general qualities that can be beneficial to keep in mind:
- Make your video valuable —have a clear intended outcome for the viewer and be sure to reach it
- Make sure your audio and video are clear —you want your audience to focus on your message, not your video quality
- Bring your key points to life —use stories, questions, and examples to illustrate key concepts and engage viewers
- Establish expectations —use your introduction to set clear expectations, either with an agenda or teasing where the session is heading
- Don’t rely on slides —if the slides added all the value, you could just send your audience a PDF. Ask yourself: what are you adding to the content by presenting it?
- Keep an eye on time —don’t make your video presentation longer than it needs to be.
- Mix it up —break the monotony and change pace at appropriate intervals
- Don’t start over for the sake of perfection —if you make a mistake during recording, you can always edit it out later
Before you can start creating your own video presentations, you’ll first need a few basic tools.
Hardware for a video presentation
Let’s start with the basics, your tech. In most cases, you’ll have everything you need if you have a standard laptop or desktop computer.
Here’s what you’ll need to start making video presentations:
- A laptop or PC —you’ll need something to make the presentation recording on
- A microphone —to record your voice-over, either built-in or USB
- A camera —if you want to include video of yourself, either as a built-in webcam or a USB camera
Video recording software
With your tech set up, you’ll need software to record your presentation. Depending on your needs, this might be something to record your screen, record your voice, or record yourself with your camera.
With Dropbox Capture , you can do all three at the same time .
Dropbox Capture is video and screen recording technology, designed to make it easy to quickly capture whatever you need. All without needing advanced editing skills or specialist equipment.
With Capture, it’s easy to:
- Record your screen, webcam, and microphone simultaneously
- Create GIFs
- Draw on or annotate recordings
- Automatically generate closed captions
- Share in just a few clicks
While presentation applications like PowerPoint and Keynote have some built-in screen and presentation recording capabilities, they only allow you to record the presentation.
Whereas with Dropbox Capture, you’re free to jump between windows and applications throughout your presentation recording—giving you greater freedom on what you present.
File storage and sharing tools
Ultimately, you’re going to want to make your video presentation available for viewers somewhere.
With Dropbox cloud storage , this is as easy as copying a link , with full control over access and permissions for your files.
We’ll now cover all the steps to create an impactful video presentation, starting from the very beginning—your plan.
1. Plan your topic, examples, and intended audience
You likely already have an idea of what you’ll want to cover in your video presentation, but it can help to formally get this down on paper:
- Presentation aim —what do you want your audience to understand by the end of the video?
- Approach —broadly, what will you cover to help them understand this concept?
- Resources —what examples will you be able to share to illustrate the key concepts?
To help with the planning process, Dropbox Paper has a number of pre-built templates to get your creative juices flowing, like the brainstorming template .
2. Create your presentation slides and your video presentation storyboard
If you haven’t already done so, it’s time to create your slides.
While doing this, you should also think about the overall storyboard of your video presentation—what are the key beats, how will you present them, and what slides do you need?
A storyboard is a visual tool, used by video producers to map out the narrative flow of a video and the visuals that will accompany it. In many cases, your presentation will almost act as a storyboard, but it might help to get this down on paper first.
You can learn more about the storyboarding process in our in-depth guide to storyboards .
3. Record your video presentation
With your storyboard and presentation ready, it’s time to go about creating your recording.
You can record your screen first, then later record a voice-over or video narration and edit the two together. Or with Dropbox Capture , you can record your screen, webcam, and microphone simultaneously. Using Dropbox Capture makes it easy to create your pre-recorded video lesson in one take. Perfect, if you don’t have access to advanced video editing software.
To record with Dropbox Capture , it’s a simple as the following steps:
- Open Dropbox Capture
- Click Screen recording & camera
- Choose which part of your screen you’d like to capture
- Click the Record icon to start recording, click it again to stop recording
- Click the Pause icon in the side panel while recording to pause or resume recording
- Click the Draw icon in the side panel while recording to draw on your recording
4. Edit your video presentation
If you’re already happy with your recording, there is no further editing required.
In any other cases, you can use video editing software to apply finishing touches to your video as you see fit. These edits might include:
- Editing your screen recording and voice-over together (if you have separate files)—with Dropbox Capture you can record your microphone and camera simultaneously, without the need to use editing software
- Cut and delete unwanted sections of video—like an awkward pause or a dog barking, with Dropbox Capture you can do this directly within the app, no editing software required!
- Remove awkward filler words—clean up those pesky “ums” and “ahs”, with Dropbox Capture you can do this automatically, directly in the app
- Adding text overlays to emphasize key points of video sections
- Additional flair and visual elements
- Adding background music to create an atmosphere
5. Share your video presentation
With your video presentation finished, you’ll need a way for your viewers to access it.
If you're using Dropbox Capture, sharing your presentation couldn’t be easier, simply click the Share button and the sharing link will automatically copy to your clipboard.
If you’re not using Capture, Dropbox cloud storage makes it easy to share your video files with anyone and see who’s viewed your video presentation. All you need to do is copy a link to the file.
If you want to send a copy of the full video, complete with its cumbersome file size, Dropbox Transfer makes it easy to send large files securely.
How to record a video presentation in PowerPoint
It’s worth keeping in mind that, when recording directly within PowerPoint, you can only record your slides and your editing options will be limited. The best way to give yourself complete control over what you record—and how you edit it afterwards—is with a purpose-built screen recording app like Dropbox Capture .
If you’d still prefer to record directly in PowerPoint, you can do this by following these steps:
- Open PowerPoint and open your presentation file
- Navigate to the slide you’d like to start recording from
- Select Record in the top-right corner of the PowerPoint window
- Click the red Record button, wait for the countdown, then start your presentation
With your presentation recorded, you can then save it to your Dropbox cloud storage , making it easy to share your video files with anyone and see who’s viewed your video presentation.
How to record a video presentation in Keynote
If you’re a Mac user and would prefer to record directly in Keynote, here’s how to do it:
- Open Keynote and open your presentation file
- Select Record Slideshow from the Play menu at the top of the screen
With your Keynote presentation recorded, you can then save it to your Dropbox cloud storage and share it simply by copying the link.
Again, your control over what you record and how the final edit turns out will be limited when recording directly within the Keynote app. To give yourself complete control over how your video presentation turns out, a purpose-built screen recording app like Dropbox Capture will be more suitable.
Elevate your video presentations with Dropbox Capture
It’s never been so simple to create an engaging and memorable video presentation, with Dropbox.
With Dropbox Capture , it’s never been easier to get your message across with video recordings of your presentations. So you can clearly say what you mean and nail the delivery, every single time.
Capture your audience’s attention.
Try Dropbox Capture
Video Presentation Maker
Empower your people and drive results with professional-quality video presentations

Transform your ideas into powerful video presentations
With VEED’s online professional video editor, you can create powerful video presentations that can empower your team and drive results—whether that’s for your company’s quarterly review, a marketing pitch, or a product launch. Use our online screen and webcam recorder and upload your Google Slides. Edit your recording with our full range of video editing tools. You can add annotations, images, text, and animations to make your presentation even more engaging.
Recording from your home office? You can remove clutter and noise in your background with our one-click video background remover and background noise remover . You can also add background music and sound effects; just select from our library of royalty-free stock audio and video clips. When you’re done with your video and screen recording, you can also add subtitles automatically to make your video presentation accessible to all audiences. Our video background and noise remover are available to premium subscribers. Check our pricing page for more info.
Get Inspired
Click on a Template to get started right away. Video creation in just a few clicks.

How to create a video presentation:

Upload, record, or start with a template
Upload your video to VEED or record your screen and webcam with our online webcam recorder. You can also start with our video presentation templates.

Add annotations, text, animations, and more!
Use our full range of tools to add annotations, animated text, music, and more! You can also add your company logo and other branding assets (available in premium).

Email, share, or save as a template
You can email the VEED link of your video presentation so your team doesn’t have to download the file. Or export it at the quality and file size you prefer. You can also save your video as a template for easier business communication in the future.
Watch this walkthrough of our video presentation maker:

Maximize your slides’ impact with our presentation maker
Upload your Google Slides or PowerPoint presentation inside our webcam and screen recorder, and go through your slides while recording yourself. Select from different themes, backgrounds, and layouts. When you’re done, you can edit your video presentation to make it even more engaging for your audience. Split, cut, and rearrange your clips on the timeline. Add transition effects between clips to maximize their impact.

Annotate, add text, images, music, and more!
VEED lets you quickly add annotations to your presentation slides and animate them. Add drawings and text. You can animate these elements and even add music and sound effects from our stock library. Draw arrows, underline key points, and create speech bubbles to emphasize your message. Make sure that you get your message across using our full range of tools!

Save your videos as templates for business communication
Our professional video editing software lets you save your videos as templates, letting you quickly edit and repurpose your video for future business video communications. You can automatically add subtitles to your video presentations and translate them to make them accessible to people all over the world. This is great if you need to talk to your international team.

Frequently Asked Questions
Upload your video to VEED or use our webcam recorder. You can also upload your slides and present them while recording yourself. Edit your video, add all the elements you want, and share!
VEED is free to use for everyone. Some tools require a premium subscription, but even with a free account, you can use our screen and webcam recorder, upload your slides, and edit your video with our pro tools!
There are many video presentation software out there, but VEED stands out because of its smooth user interface and design. Our drag and drop functionality makes video creation quick and efficient. Plus, it’s packed with a full range of tools that you won’t find in other free video editors.
To ensure that you will get your audience’s interest, your presentation needs to be compelling. Don’t just share information, tell a story! You can also add music, visual elements like photos and text, use humor, and add graphics.
VEED lets you edit your video to make it look like a presentation. You can split your video into clips and add transition effects in between. Animate elements like text, images, and subtitles. And much more!
VEED works smoothly on laptops, desktops, and mobile phones. It is compatible with Windows, Mac, and Linux. And it works right from your browser!
Discover more:
- Demo Creator
- Make Animated Presentation
- Tutorial Video Maker
- Webinar Video
What they say about VEED
Veed is a great piece of browser software with the best team I've ever seen. Veed allows for subtitling, editing, effect/text encoding, and many more advanced features that other editors just can't compete with. The free version is wonderful, but the Pro version is beyond perfect. Keep in mind that this a browser editor we're talking about and the level of quality that Veed allows is stunning and a complete game changer at worst.
I love using VEED as the speech to subtitles transcription is the most accurate I've seen on the market. It has enabled me to edit my videos in just a few minutes and bring my video content to the next level
Laura Haleydt - Brand Marketing Manager, Carlsberg Importers
The Best & Most Easy to Use Simple Video Editing Software! I had tried tons of other online editors on the market and been disappointed. With VEED I haven't experienced any issues with the videos I create on there. It has everything I need in one place such as the progress bar for my 1-minute clips, auto transcriptions for all my video content, and custom fonts for consistency in my visual branding.
Diana B - Social Media Strategist, Self Employed
More than a video presentation maker
If you have been looking for a video editor that can do it all, look no further! VEED is a professional, all-in-one video editing software that can take care of all your video editing needs—quickly and efficiently. You can resize your video for different video sharing and social media platforms, add text, images, music, and more. Whether you need to edit a video for business or personal use, VEED is the best tool you can use.

How-To Geek
How to add a video to a microsoft powerpoint presentation.
If a picture speaks a thousand words, a video speaks a million words!
Quick Links
Embedding videos versus linking to videos, supported video formats in powerpoint, how to insert a video into a powerpoint presentation, manage an embedded video's playback in powerpoint.
Videos can make presentations even more interesting or exciting. If you're looking to add a video to your Microsoft PowerPoint presentation, it's easy to do so. We'll show you how.
In PowerPoint, you can either embed a video or link to a video from your presentation. If you embed a video, your video becomes part of the presentation, which increases the overall size of the presentation file.
Related: How to Send PowerPoint Presentations With an Embedded Video
If you link to a video, PowerPoint only adds a reference to that video in your presentation. The downside of this method is that you need to send the video file separately if you share your presentation with someone. We have written a guide on how to send PowerPoint presentations with videos , so check that out.
In this guide, we'll focus on embedding a video in your presentation so you don't have to worry about sending separate files. And, if you're looking to add a YouTube video to your presentation , there's a way to do that, too.
Related: How to Embed a YouTube Video in PowerPoint
PowerPoint supports multiple video formats, including ASF, AVI, MP4, M4V, MOV, MPG, MPEG, and WMV. If your video is already in one of these formats, you can quickly add that to your presentation.
If your video is in another format, you can convert it to a supported format and then add it to your presentation.
Related: How to Use Handbrake to Convert Any Video File to Any Format
First, make sure the video you want to add to your presentation is saved on your Windows or Mac computer. Then, open your presentation with PowerPoint on your computer.
On the PowerPoint window, in the left sidebar, click the slide in which you want to add a video.
At the top of the PowerPoint window, click the "Insert" tab.
In the "Insert" tab, under the "Media" section (which is to the extreme right side of the interface), click "Video."
You'll now see an "Insert Video From" menu. Here, select "This Device."
Your computer's standard "open" window will open. In this window, access the folder that has your video file. Then double-click your video file to add it to your presentation.
You'll see your selected video in your presentation. To resize this video, click it and use the handles around the video to change its size. Then drag the video to place it at its desired location in your slide.
If you'd like to test the video, at the bottom-left corner of the video, click the play icon.
And you're all set.
Now that you have added a video to your presentation, you might want to change how it plays in your slides. In PowerPoint, you have multiple ways to change your video's playback.
To access these playback options, first, click your video in your presentation. Then, at the top of the PowerPoint window, click "Playback."
In the "Playback" tab, under the "Video Options" section, you will find various options to manage your video's playback.
For example, to change how your video starts to play in your presentation, click the "Start" drop-down menu and select one of these options:
- In Click Sequence : This plays your video in the click sequence. This means if you press the button for the next slide, your video will play.
- Automatically : This option automatically plays your video when the slide with your video opens.
- When Clicked On : Select this option to play your video only when you click it.
The other options are "Play Full Screen," which opens your video in full screen, and "Loop Until Stopped" that plays your video over and over again until you manually stop it.
Before you close PowerPoint, make sure you save your presentation so that your embedded video is saved with it. Do this by clicking File > Save in PowerPoint's menu bar.
And that's how you make your PowerPoint presentations even more engaging by including videos in them. Exciting!
If you don't want to add a video but you do want audio, you can add music to your presentations . This also helps enhance your presentation quality.
Related: How to Add Music to Your PowerPoint Presentation
April 4, 2024
11 Best Websites for Making a Presentation (And How to Choose One For Your Needs)
Here are 11 of the best websites and programs to create free presentations online
Co-founder, CEO
The best websites for making presentations equip you with all the tools needed to build a professional, attractive, and informative slide deck quickly and efficiently. But with dozens of slide makers claiming to be the best, it’s hard to choose an app that suits your needs best.
We’ve done the legwork for you and scoured the web for the best presentation websites. We based our evaluation on factors such as functionality, ease of use, AI sophistication, collaboration tools, and value for money. Below is the result — a comprehensive overview of the 11 best web-based slide creation apps based on our findings.
Short on time? Summary of the best sites for making a presentation
1. plus ai — best all-round presentation maker.

Key Features
- Adds easy-to-use AI to Google Slides
- Affords customization options for slide templates, colors, and logos
- Allows slide deck generation via different methods
- Facilitates collaboration within teams on Google Workspace
- Features a setting-rich but straightforward user interface
- $10/month for Basic and $20 for Pro versions when billed annually ($15 and $30, respectively, with monthly billing)
Plus AI is a powerful and user-friendly presentation maker that’s suitable for any purpose, whether you’re a professional, student, or amateur user.
Plus AI gives you a robust selection of AI slide creation methods. You can generate presentations straight from text, work on them slide-by-slide, design them from scratch, or use existing templates. Regardless of the method, the tool’s AI technology does all the heavy lifting design-wise and the interface is a breeze to navigate, so you can sit back and focus on the content.
Meanwhile, the customization options allow you to tailor the slides to your desired aesthetic, content type, and audience, and you can create your presentation in 80 languages. The resulting slide decks are elegant, professional, and appropriate for any use case.
Plus AI is an affordable presentation maker, with pricing that starts at $10 per month with annual billing, or $15 when billed monthly. Each of the plans includes an AI extension for Google Docs; this feature helps you compose and edit text. If you’d rather not spend money without taking the tool for a test drive, Plus AI offers you a 7-day free trial.
Here are the key pros and cons of Plus AI — they should help you decide if this presentation maker is right for you:
- Generates professional and visually appealing presentations in minutes — no design skills needed
- AI function allows you to edit and format slides without manual effort
- Lots of ways to customize the presentation
- Vast selection of templates and example presentations
- Text-to-slide and from-scratch creation
- Allows team collaboration in Google Workspace
- Integrates with Google Slides and Microsoft PowerPoint
- Budget-friendly plans and a 7-day free trial
- Plus creates presentations in Google Slides or PowerPoint format, which may be harder for newer users to edit
2. Canva — Best free presentation site

- Offers mobile presentation templates
- Web- or mobile-based Canva app supports collaboration
- Remote Control feature lets you run the presentation from your smartphone
- Canva live feature allows viewers to join QA sessions during a presentation
- Presenter mode lets you see your speaking notes and upcoming slides while you present
- AI assists in slide creation and can present on your behalf
- Individual Free Plan: $0 per month
- Individual Pro Plan: $14.99 per month
- Teams Plan: $29.99 per month
Canva is a web-based template editor with graphics creation tools and a powerful presentation builder in its free plan. Canva offers you an array of slide templates designed for virtually any purpose, along with a suite of customization tools to tailor the presentation to your topic and setting.
Canva has made a noticeable effort to optimize presentations for the smartphone. The app’s most striking feature is its selection of mobile presentation templates, which don’t lag their desktop-based peers in either aesthetics or utility. But whether or not your presentation is designed for a mobile screen, Canva lets you run it right from your smartphone, with a presenter view that shows your notes and upcoming slides. The audience can likewise engage with your presentation from their mobile devices during Q&A sessions.
Depending on your use case, you may be able to get away with Canva’s comprehensive free plan. The free Canva has presentation creation and editing tools and gives you access to a huge selection of professional templates. However, it’s the $14/month Pro plan that lets you unlock all the premium tools and graphic assets. And if you need Canva to collaborate with teams, you’re looking at $29.99 per month for the first 5 users.
To help you decide whether Canva is worth trying out, we’ve made this quick summary of the app’s pros and cons:
- Solid free plan with basic features and a large selection of graphic assets
- Optimized for mobile presentations
- Elegant templates for any use case
- Intermediate design skills required
- No direct integration with Google Workspace or Microsoft 365 (possible through third-party apps)
3. Prezi — Best slide tool for creative users

- Web-based tool for creating presentations, videos, and infographics
- Asset library includes templates, ready-to-use story blocks, and stock images from Unsplash and GIFs from
- Integrates with Webex, Zoom, Microsoft Teams, and other video conferencing apps to show presentations and the presenter on the same screen
- Lets you convert PowerPoint presentations to Prezi
Pricing (all plans are billed annually)
- For students/educators: $3-8 per month
- For individuals: $7-19 per month
- For businesses: $15-29 per month
Prezi is a web-based tool for creating presentations, videos, and infographics that are suitable for business and educational settings. The tool offers a wealth of image and icon assets, as well as templates to get you started on your slide deck. The templates do not constrain your creativity with linear slides the way PowerPoint does — you can create your presentations on an open canvas. Prezi even lets you import and customize PowerPoint presentations in its app. And, with the help of Prezi’s new AI tool, you can create and edit entire presentations quickly.
One of Prezi’s most defining features is its integration with popular video conferencing apps, such as Webex, Zoom, Teams, and Meet. Crucially, Prezi lets your slides appear on the same screen as your own video feed while you’re presenting.
Prezi offers three pricing tiers. Students and educators get the least expensive options, with plans that range between $3 and $8 per month. For individual users, plans cost $7-19 per month, while business users pay between $15 and $29 per month. All of Prezi’s plans are billed annually, but you can try the tool for 14 days without committing to a subscription.
If you’re not sure whether this presentation tool is right for you, consider Prezi’s pros and cons below:
- Design freedom and for creating unique and attractive slides
- Graphic assets are readily available
- Integrates with video conferencing apps
- AI assistant generates and edits presentations
- Inexpensive plans for students and educators
- Video and infographic creation part of each plan
- 14-day free trial
- Design skills required to create quality presentations
- Lack of integration with Google Slides and Microsoft PowerPoint
- No monthly billing options
4. Visme — Best for graphics and special effects

- Tools for creating special effects and animating graphics
- Ability to import and edit Microsoft PowerPoint presentations
- AI designer helps create a presentation draft
- Integration with Google Drive, DropBox, Mailchimp, Slack, and other apps
- Presentation analytics tools
- Basic package: $0/month
- Starter package (individual): $12.25/month
- Pro package (individual or team): $24.75-$79+/month
Visme is a web-based app for producing various types of visual content, including presentations. The app’s most distinct feature is its suite of special effects you can use to make the slides’ content and graphics more engaging. The app also lets you animate the images and insert video and audio features into the slides.
Visme integrates with a whole host of other platforms and apps. These integration options are largely designed to let you import content seamlessly into Visme. For example, you have the option of importing your PowerPoint files into Visme, enhancing them there, and exporting them back in the .ppt format if you like. That said, Visme does not work as an extension in popular slide makers, like Google Slides or PowerPoint.
You have three main pricing options with Visme. The Basic plan is free, but you’re limited in access to collaboration tools, assets, interactive, and AI features. The more comprehensive Starter plan costs $12.25 per month (billed annually), and equips you with Visme’s more premium tools. Finally, the Pro team plan sets you back $79/month for a team of 5 and lets you use Visme’s entire suite of interactivity and collaboration functions.
Here are a few vital pros and cons if you need help deciding whether Visme is right for you:
- Vast selection of special effects
- Ability to animate graphics on the slides
- Simple file movement between different web-based apps
- Free plan available
- Free plans extremely limiting
- No direct integration with Google or Microsoft slide tools
5. Powtoon — Best for slides with animation

- Templates with configurable graphics and animation
- Customizable fonts, colors, and logos
- Access to stock images, videos, and soundtracks
- Lite plan: $50/month ($15/month when billed annually)
- Professional plan: $190/month ($40/month when billed annually)
- Agency: $117/month (annual billing only)
Powtoon is a visual web-based content creation platform with tools for making videos, animations, and presentations. The app’s presentation function lets you build slides using professional templates, in which you’re free to customize the fonts, colors, logos, and graphics. You can even animate the graphics and build custom avatars to present on your behalf — it’s one of Powtoon’s unique selling features.
Powtoon’s suite of slide tools includes a database of royalty-free stock images, video footage, and music. You can use all of these assets in your slides, or upload your own as you see fit. However, how much of these shiny tools you can use in your slide decks depends on the chosen plan.
There are three pricing plans available, and the discrepancy between monthly and annual payments is striking. Most presentation sites charge a few dollars more if you opt for monthly instead of annual billing, but Powtoon’s monthly prices easily triple and quadruple. For example, the Lite plan costs $15/month with annual billing, but $50 if you wish to pay every month instead. You get very basic features with this plan, especially as far as animation and interactivity are concerned. Likewise, the Professional plan jumps from $40 to $190 if you choose monthly payments. You get a bit more for your buck, but some rudimentary features are still absent (like font uploads). Meanwhile, the Agency plan costs a whopping $1400 annually (no monthly option), and this plan gets you all of the app’s bells and whistles.
Not sure if investing in a product like Powtoon is worth it? Consider its pros and cons below:
- Comprehensive animation and video creation features
- Graphic and audio assets available with subscription
- Fonts and logos can be uploaded
- Most customization, animation, and AI features only come with the expensive Agency package
- Monthly payment options are not reasonable
6. Haiku Deck — Best site for image editing options

- Minimalistic interface
- Graphic design tools for improving slide aesthetics
- Pre-loaded templates and image assets
- Cloud-based file sharing for team collaboration
- AI presentation builder (Haiku Deck Zuru)
- Pro plan: $9.99 per month billed annually, or $19.99 monthly
- Premium plan: $29.99 per month, billed annually
Haiku Deck is a web, desktop, and mobile-based presentation builder with a significant focus on design aesthetics. The app’s design tools allow you to refine the graphics in the preloaded templates and images you’re using in the slides. You can source the images right from Haiku’s repository, which boasts over 40 million assets.
To help you create your slide decks, Haiku offers its AI assistant. The AI feature can create new presentations from your outline, or enhance your existing drafts. Since the AI learns from other Haiku users, its algorithms are now trained to outfit slides with contextually relevant imagery and graphics.
Haiku Deck’s pricing has two tiers: Pro and Premium. The Pro plan costs $9.99/month when billed annually and affords full access to the slide creation tools. Meanwhile, the Premium plan will set you back $29.99/month (again, billed annually), and equips you with features such as analytics, live web tracking, and priority support.
Here’s a summary of Haiku Deck’s most prominent pros and cons:
- Visually appealing slides
- Large database of graphic assets
- Advanced tools for editing images
- Capable AI-powered slide builder
- No free plan
- No integration with Google Slides or Microsoft PowerPoint
7. Zoho Show — Best presentation site for budget-minded users

- Clean interface with tools changing depending on the task
- Library for templates, slides, and fonts to facilitate team collaboration
- Over 100 templates
- Imports/exports PowerPoint files
- Presentations can be controlled from smartphone or smart watch
- For individuals: Free
- Professional Plan: $2.50/month and up (billed annually)
- With Zoho Workplace Standard: $3.00/month (billed annually)
Zoho is a web-based suite of business tools, and Zoho Show is its slide creation app. Zoho Show is a straightforward, inexpensive, yet fully functional slide maker that offers most of the same features you’ll get from pricier presentation sites. You can build your decks using over 100 preloaded templates, work on PowerPoint presentations before exporting them to their original file format, and run your slideshow from a smart device. Show’s most unique feature is its clean, contextual interface that only displays tools that are relevant to your current task (whether that’s handy or limiting depends on your preferences).
Zoho Show’s pricing has three tiers. First, there’s the Free plan. This package lets you build basic presentations, but you miss out on key collaboration features and have limited access to graphic assets. Next, you get the more comprehensive Professional Plan, which costs $2.50; you must sign up for Zoho WorkDrive and have a team of 3 people to get this plan. Finally, you can get the entire Zoho Workplace suite for $3/month — this option unlocks the full functionality of the Show app and lets you use other Zoho tools, such as their Office Suite, Mail, and Workdrive.
Have a look at Zoho Show’s pros and cons below to see if this presentation website is right for you:
- Interface automatically shows tools relevant to the task
- Ability to add custom fonts and embed files into slides
- Templates, graphic assets, and collaboration tools included
- Supports PowerPoint file formats
- Subscription to Zoho Workdrive or Workplace required to access paid plan — unnecessary if all you need is a presentation tool
- Some plans require a minimum of 3 users
- Free individual plan limits use of graphic assets, templates, and collaboration tools
- No direct integration with Google Slides
8. Pitch — Best presentation site for use in business and sales

- Lets you build presentations with AI, from a template, or from scratch
- Supports custom fonts and colors
- Provides team collaboration tools
- Allows you to embed presentations on the web
- Offers engagement analytics tools
- Pro plan: $25/month
- Business: $100/month
Pitch is a web-based presentation maker designed primarily for business use. The app helps streamline slide deck creation with its AI tool, which generates a first draft based on your prompts and leaves your team with the task of refining the slides to your liking. The slides have shareable links, so your entire team can collaborate on the slide deck. You can even invite consultants from outside your workplace to edit the presentations.
Once your slide deck is complete, Pitch allows you to embed it on the web in your CMS — much like you’d do with a YouTube video. And to give you a feel for how audiences engage with your presentation, Pitch equips you with engagement and analytics performance tools.
There are three pricing options with Pitch. The free plan comes with all the presentation creation functions, but you get no tracking and limited collaboration tools. The Pro plan costs $25/month (or $22 per month when billed annually), and gives you more freedom to use Pitch in a team environment. Finally, the Business plan costs $100/month (or $85/month with yearly billing) and gives you access to the full suite of features.
Can’t decide if Pitch is the best presentation website for your team? Have a look at its most vital pros and cons:
- AI slide creation feature
- Performance analytics tools
- Integration with various productivity and collaboration apps
- Media asset library
- Engagement tracking only available in paid plans
- No integration with Google Slides or Microsoft 365
9. Beautiful.ai — Best site for no-frills AI-generated presentations

- AI-powered presentation maker
- Slide creation from user’s prompts
- Automated slide formatting
- File sharing within the team (requires Team Plan)
- Graphic assets database
- Pro: $144 per year
- Team: $40/month per user with annual billing ($50 with monthly billing)
- Enterprise: Pricing available on request
Beautiful.ai is an AI-powered presentation builder that leverages full automation to make slide creation quick and easy. All you need to do is enter a prompt for your slide deck, and beautiful.ai will generate your first draft. These AI-generated drafts are quite simplistic in terms of both content and graphics, but they serve as a good starting point. Moreover, beautiful.ai’s presentations are formatted consistently, which should save you time as you edit each slide.
You get three pricing options with beautiful.ai — Pro, Team, and Enterprise. The Pro package is meant for individual use, and costs $144 per year (there’s no way to pay monthly). The plan equips you with the AI slide maker but limits your use of assets and team collaboration features. The Pro plan costs $50/month for each user, or $480 annual for each license you purchase. This plan affords access to more customization and teamwork functions and lets you use graphic assets. Finally, the Enterprise plan includes all the features of the Pro plan, but with more dedicated training and support for your team. You’d have to reach out to beautiful.ai’s sales team to get a quote for the Enterprise plan.
Beautiful.ai helps create slides quickly and with little skill. However, if you’re not sure this app is right for you, consider its most vital pros and cons below.
- Quick way to create and format slides
- Inexpensive plan for personal use
- Elegant slide templates
- No integration with Google Slides or Microsoft 365
- Slide content is very basic
- Limited customization and branding options
10. Google Slides — Best for Google Workspace Users With Basic Presentation Needs

- Basic presentation creation tool
- Limited selection of templates, fonts, and colors
- Supports import/export of PowerPoint files
- Allows collaboration within the Google Workspace
- Free with a Google account
Slides is the web-based presentation tool you get with your Google account. This rudimentary app features a limited library of templates, fonts, and colors, along with a basic suite of tools for formatting the text and graphics in your slides. You can insert your own image, video, and audio files into the slides, but there is no access to a library of royalty-free assets.
Despite its functional constraints, Google Slides is a useful app because it lets teams using Google Workspace collaborate easily on presentations. To get the most of Slides, though, you need to boost its functionality with a suitable extension. Google Gemini now works as an extension within the app, but for the $30 it costs you, the output is disappointing. All Gemini knows does is generate simple, low-quality images; it won’t help you produce, format, or edit presentations.
In contrast, an app like Plus AI leverages artificial intelligence algorithms to give Google Slides powers it lacks on its own. By using the Plus AI extension, you can create entire Slides presentations from a single prompt, automate slide editing and formatting, and access a rich library of templates and ready-made slide decks. Meanwhile, Plus AI’s customization features help you brand your presentations with custom fonts, colors, and your company logo.
Not sure if Google’s slide creation tool is right for you? Have a look at its pros and cons below.
- Allows collaboration in the Google Workspace
- Compatible with PowerPoint files
- Supports AI-powered slide-creation extensions, such as Plus AI
- Free to use with a Google account
- Limited capabilities without third-party apps
- No library with image, video, or audio assets
11. Microsoft PowerPoint — Best For Highly Skilled Presentation Designers

- Vast library of slide themes, variants, and layouts
- Database of stock images and videos
- Massive array of slide editing, formatting, and customization tools
- Supports collaboration in the Microsoft 365 ecosystem
- As a standalone product: $159.99 (one-time fee)
- With Microsoft 365 apps, for home use: $6.99-$9.99/month
- With Microsoft 365 apps, for business use: $6.00-22.00/user/month
PowerPoint is one of the world’s oldest presentation builders that’s been part of Microsoft’s arsenal since the early 1990s. To this day, PowerPoint has been the most commonly used presentation app. But there’s a reason we’ve ranked it last on our list. Buoyed by its popularity, PowerPoint hasn’t evolved much over time; you won’t get anything beyond the most basic and uninspired presentations out of it unless you’re an advanced user with lots of time on your hands.
The app’s user interface immediately overwhelms you with options and settings. Some of these seem similar in how they function, and you won’t know which tool to use until you’ve experimented with them all. Apart from the cluttered interface, PowerPoint disappoints with its simplistic selection of templates and designs.
You can use Microsoft’s Copilot to forgo the tedious task of creating your own PowerPoint presentation, but beware: like Gemini, Copilot is still limited in its slide-making abilities. You can get it to create a slide deck from a single prompt, but the output will feature basic and repetitive along with lifeless images.
PowerPoint’s pricing is a bit convoluted at a glance — you get different options whether you want the standalone product ($159.99) or the entire Microsoft 365 suite. If you choose the latter, the Home options range in price between $6.99 and $9.99 per month, while the Business plans cost between $6.00 and $22.00 per month per user.
We don’t believe that PowerPoint is worth your time considering the vast selection of more powerful and user-friendly presentation apps on the market. However, you can review the app’s pros and cons below and decide for yourself.
- Massive selection of design and customization tools
- Integrates with Microsoft Copilot
- Lets team members using Microsoft 365 work on the same presentation simultaneously
- Overwhelming user interface
- Very basic templates and designs
- Creating professional presentations is a challenge for novice users
- AI assistant cannot produce elegant, content-rich slide decks
How we ranked the best presentation sites
To make your selection process simple and effective, we ranked the best presentation websites based on these vital criteria:
- Functionality
- Level of AI sophistication
- Ease of use
- Collaboration options
Integration with popular slide creation tools
Value for money, functionality .
The best presentation sites are loaded with handy functions that enable you to make visually appealing, info-rich, and engaging presentations with little effort and minimal editing. These include customization tools, templates, image assets, and graphics refinement features.
Level of AI sophistication
AI technology is at the forefront of slide makers’ drive to create the best product for their clients. AI-powered presentation sites save you from spending long hours on writing content, digging up graphics, and then formatting every slide — AI handles these tasks for you. But not all AI slide creators are made equal. Some leave you with rudimentary decks that feature repetitive content and unrelated imagery. Others give you a solid starting point for an informative and captivating presentation.
Ease of use
The best presentation sites greet you with an intuitive and uncluttered interface that takes you minutes (if not seconds) to master. But usability goes beyond navigating the UI. That’s why we also assess the simplicity with which you can actually produce presentations. Simply put, how easy is it to create and edit slides? Do you need advanced design skills to manipulate the graphics and give the slide deck your desired aesthetic ? The best slide makers take these questions into account, so that their product makes presentations a breeze. You worry about the content, and let the app do the rest.
Collaboration options
High-quality presentation apps allow team members to create, edit, and give feedback on presentations remotely. That’s because today’s business needs, along with hybrid work arrangements, mean that more and more teams are forced to collaborate electronically. Features such as cloud-based file sharing and integration with communication platforms help different members of your team work on the presentation from wherever they are.
Google Slides and Microsoft PowerPoint are the most commonly used presentation programs in the world. These two giants are the natural, go-to option for slide creation in the corporate, educational, and institutional world. Any presentation app that’s worth its salt should integrate with at least one of these tools. At the very least, a quality independent slide app should be able to import and export files that can be used in Google Slides or PowerPoint.
The best presentation apps are usually not free, but the money you pay for them should be worth the features and benefits you get in return. That’s why we’ve evaluated each of the slide makers above based on the balance between their price point and their offerings.
How to choose the best presentation website for your needs?
You can’t really go wrong by opting for any of the 10 presentation sites above; however, to get a tool that’s tailored to your use-case, you’ll have to do a bit more research and analysis. The four steps below should help you zero in on the optimal presentation maker for your needs.
- Consider the purpose of the presentation. Some slide tools cater to sales teams (think Pitch), others to graphic-minded users (Haiku Deck comes to mind), while others, like Plus AI, are excellent all-rounders.
- Decide on the level of customization you need. How concerned are you with personalizing and branding your slide decks? If a generic, templated presentation is all you need for a school project, investing in a feature-rich, customizable tool may be overkill. But if you need your slide decks to feature custom colors, fonts, and convey your brand identity, opt for a tool (and pricing package) that has this functionality.
- Decide if you want AI help. Unless you’re a skilled designer with a passion for creating and formatting slides, AI can be incredibly useful. Consider this: would you rather spend hours on refining your slides and ensuring consistency, or have the AI tool produce a uniformly formatted first draft? Check out the best AI presentation makers here.
- Factor in your budget. Most presentation sites have similar pricing, with monthly plans ranging between $0 and $40. However, some charge more — much more. Of course, the higher price points generally translate into richer offerings that may include other apps for visual content creation. Consider whether you need these extras or if a capable slide creation tool will suffice.

Latest posts
Latest post.

The Best GPT-4 Apps and Demos (so far, April 2024)
The best GPT-4 powered apps we have seen so far
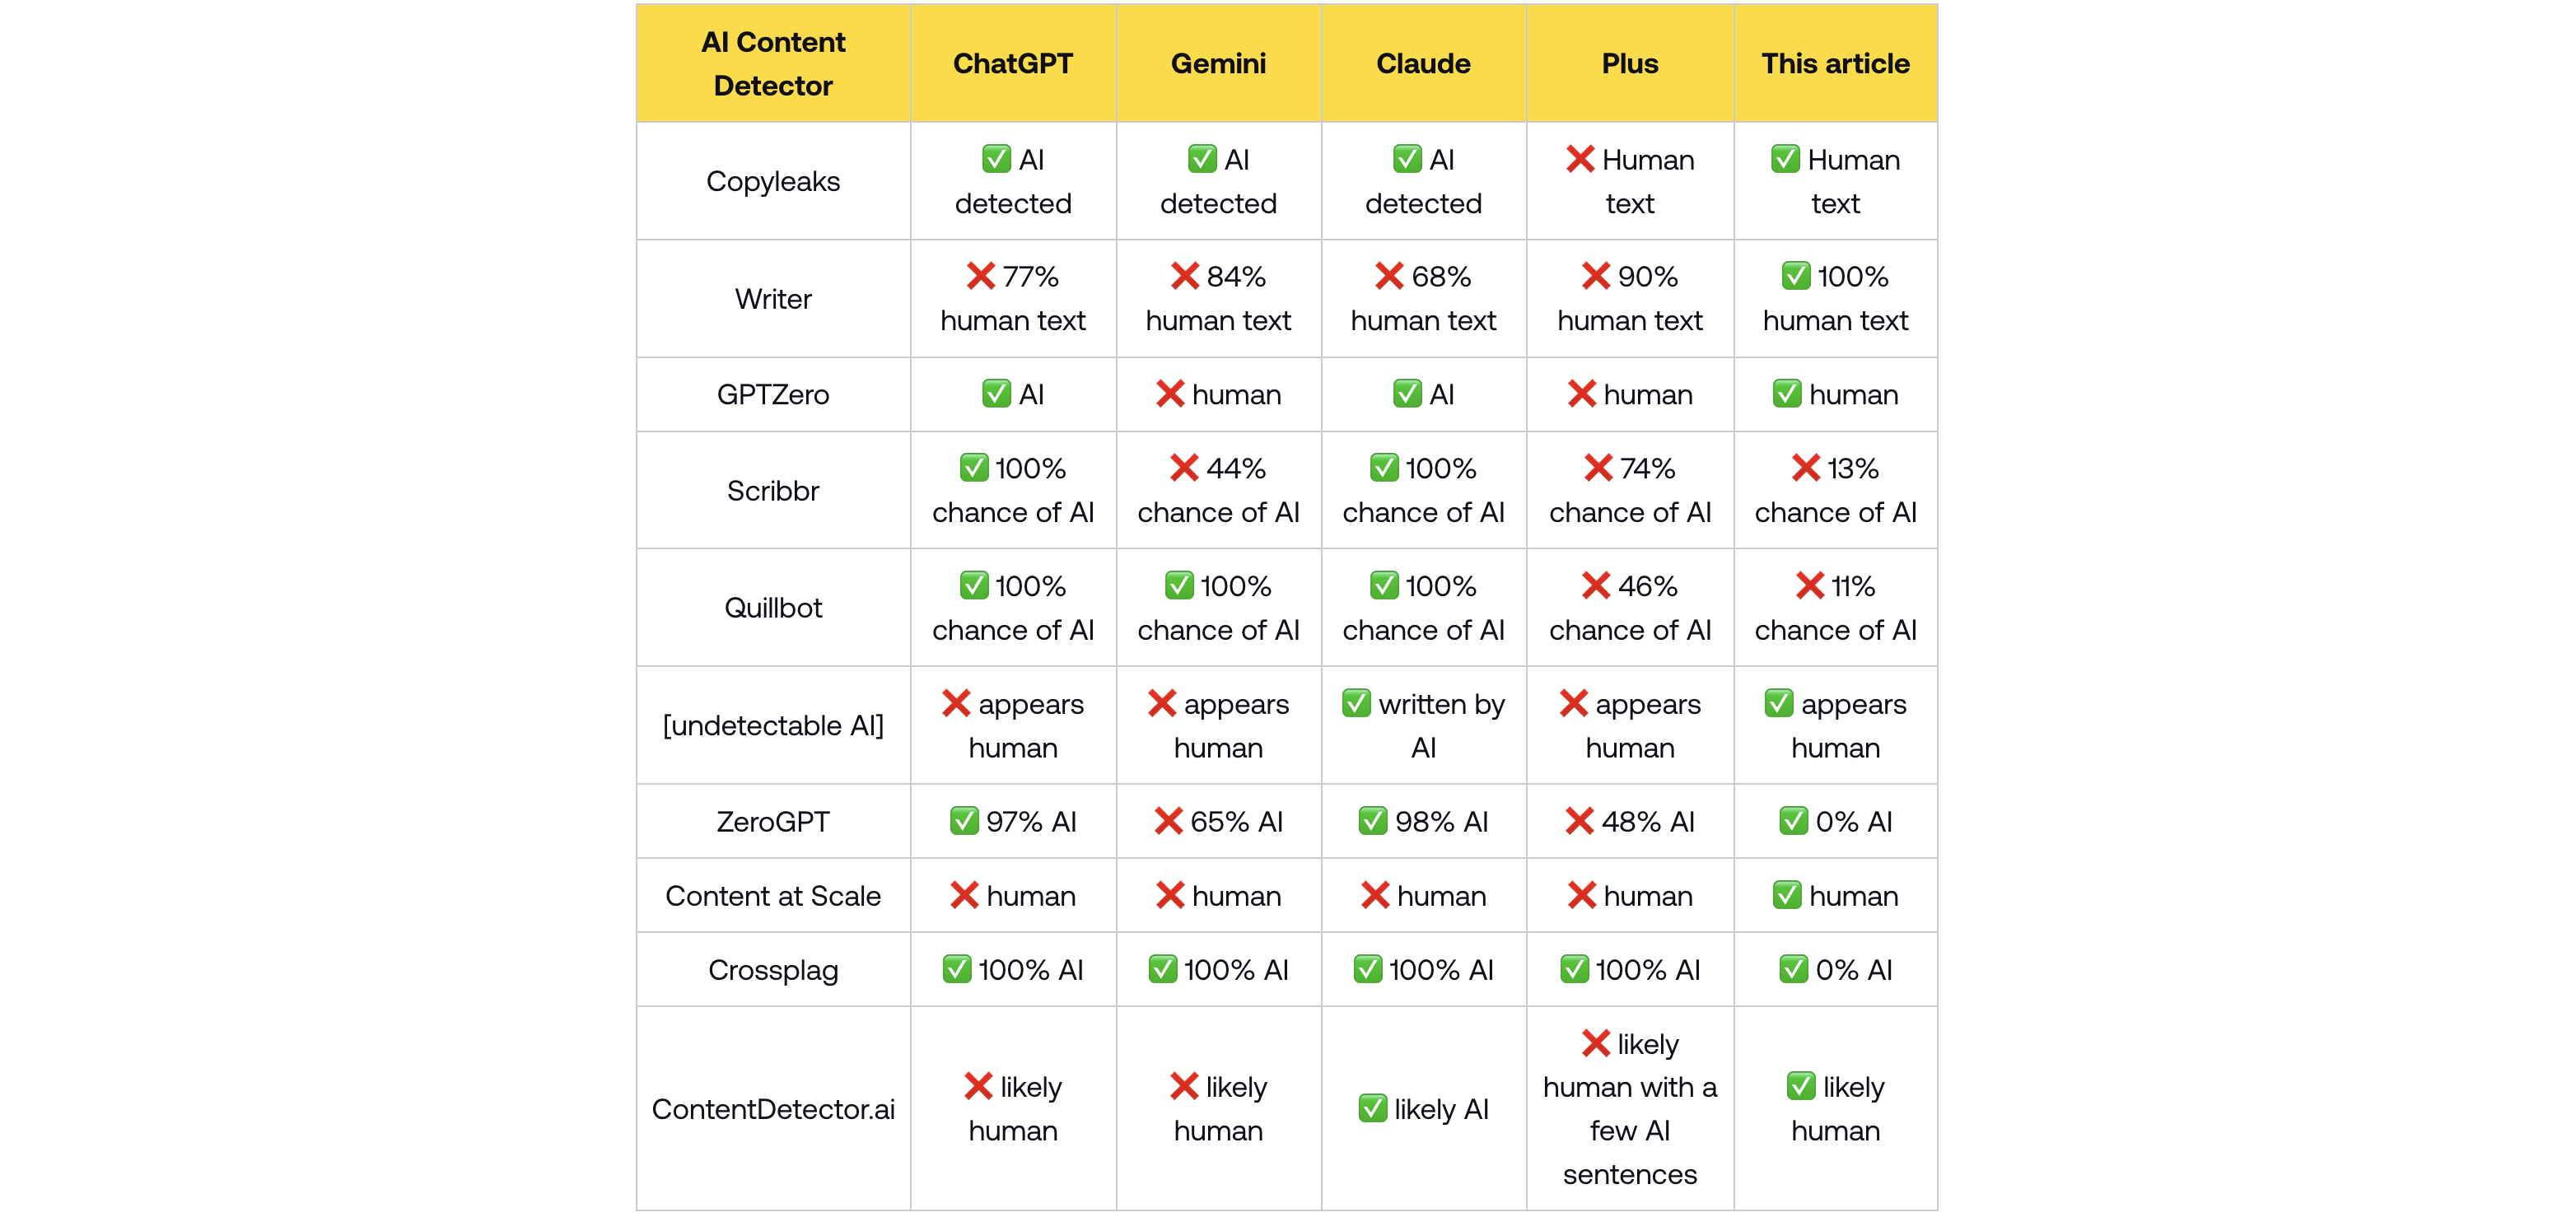
How do AI content detectors work — and can you trust them?
We tested 10 of the most popular AI content detector tools, their accuracy, whether they can be trusted — and how to bypass detection.
How to use ChatGPT to create PowerPoint presentations
Step-by-step guide to using AI tools to create presentations. Looking for ChatGPT for PowerPoint? Here's a guide to using AI in PowerPoint and Google Slides

Tome vs. Gamma: In-depth comparison, pricing, and recommendations
In-depth comparison of Tome and Gamma with recommendations for which tool is right for you
More resources
The best screenshot tools in 2024.
Comprehensive guide to choosing the best screenshot tool.
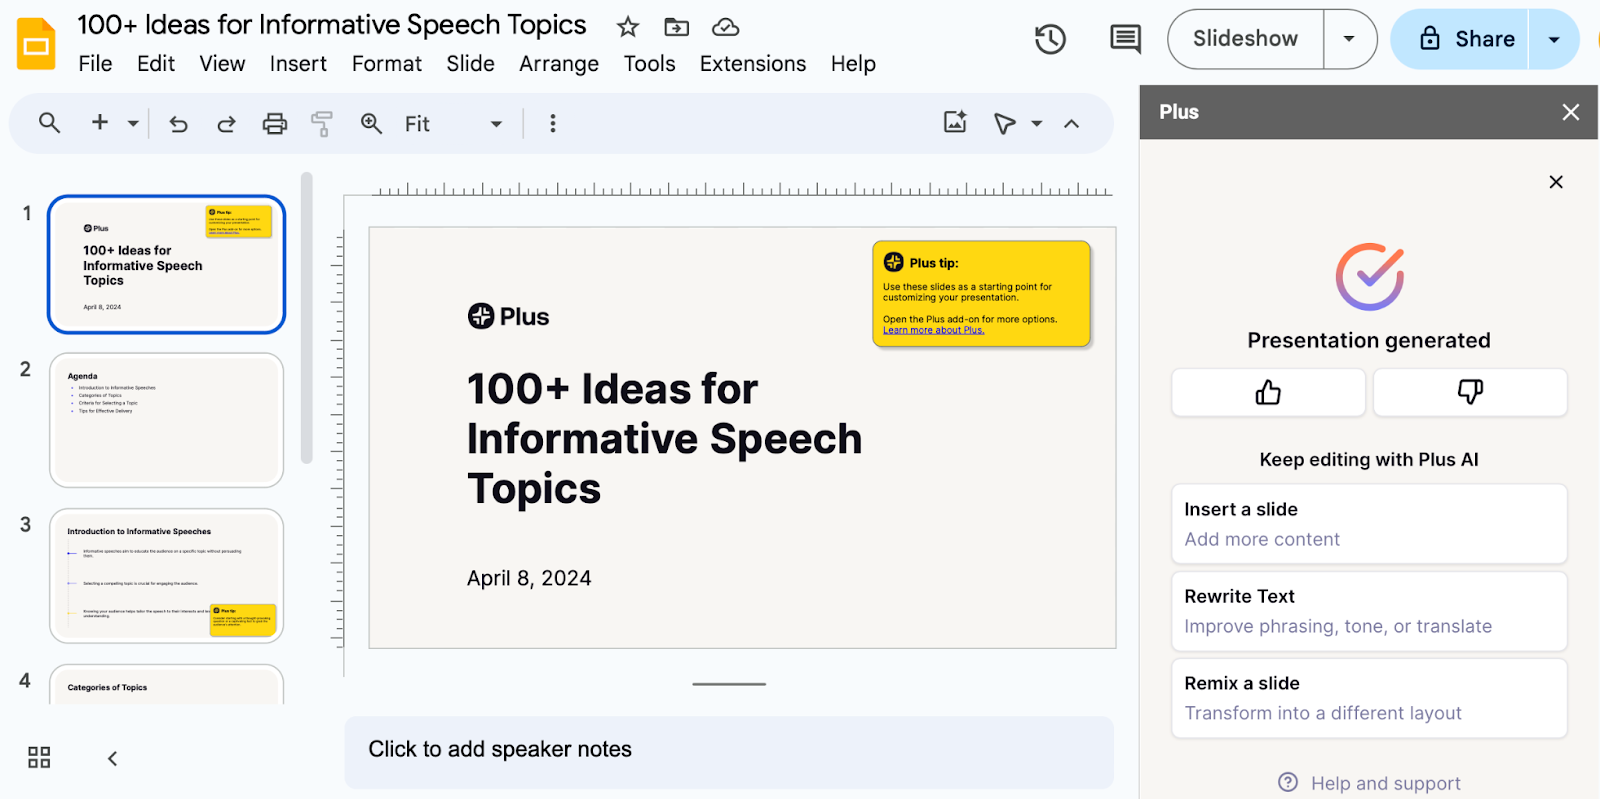
100+ Ideas for informative speech topics
Easy, fun, and educational ideas and inspiration for your next informative speech. Check out these starter topics and example presentations
How To Wrap Text In Google Slides: A Quick Guide
A step-by-step guide on how to wrap text in Google Slides and how to save time on formatting with Plus AI

- SUGGESTED TOPICS
- The Magazine
- Newsletters
- Managing Yourself
- Managing Teams
- Work-life Balance
- The Big Idea
- Data & Visuals
- Reading Lists
- Case Selections
- HBR Learning
- Topic Feeds
- Account Settings
- Email Preferences
How to Make a “Good” Presentation “Great”
- Guy Kawasaki

Remember: Less is more.
A strong presentation is so much more than information pasted onto a series of slides with fancy backgrounds. Whether you’re pitching an idea, reporting market research, or sharing something else, a great presentation can give you a competitive advantage, and be a powerful tool when aiming to persuade, educate, or inspire others. Here are some unique elements that make a presentation stand out.
- Fonts: Sans Serif fonts such as Helvetica or Arial are preferred for their clean lines, which make them easy to digest at various sizes and distances. Limit the number of font styles to two: one for headings and another for body text, to avoid visual confusion or distractions.
- Colors: Colors can evoke emotions and highlight critical points, but their overuse can lead to a cluttered and confusing presentation. A limited palette of two to three main colors, complemented by a simple background, can help you draw attention to key elements without overwhelming the audience.
- Pictures: Pictures can communicate complex ideas quickly and memorably but choosing the right images is key. Images or pictures should be big (perhaps 20-25% of the page), bold, and have a clear purpose that complements the slide’s text.
- Layout: Don’t overcrowd your slides with too much information. When in doubt, adhere to the principle of simplicity, and aim for a clean and uncluttered layout with plenty of white space around text and images. Think phrases and bullets, not sentences.
As an intern or early career professional, chances are that you’ll be tasked with making or giving a presentation in the near future. Whether you’re pitching an idea, reporting market research, or sharing something else, a great presentation can give you a competitive advantage, and be a powerful tool when aiming to persuade, educate, or inspire others.
- Guy Kawasaki is the chief evangelist at Canva and was the former chief evangelist at Apple. Guy is the author of 16 books including Think Remarkable : 9 Paths to Transform Your Life and Make a Difference.
Partner Center
- Data, AI, & Machine Learning
- Managing Technology
- Social Responsibility
- Workplace, Teams, & Culture
- AI & Machine Learning
- Diversity & Inclusion
- Big ideas Research Projects
- Artificial Intelligence and Business Strategy
- Responsible AI
- Future of the Workforce
- Future of Leadership
- All Research Projects
- AI in Action
- Most Popular
- The Truth Behind the Nursing Crisis
- Work/23: The Big Shift
- Coaching for the Future-Forward Leader
- Measuring Culture

The spring 2024 issue’s special report looks at how to take advantage of market opportunities in the digital space, and provides advice on building culture and friendships at work; maximizing the benefits of LLMs, corporate venture capital initiatives, and innovation contests; and scaling automation and digital health platform.
- Past Issues
- Upcoming Events
- Video Archive
- Me, Myself, and AI
- Three Big Points
How to Create Slides That Suit Your Superiors: 11 Tips
When you’re pitching ideas or budgets to execs in your organization, you need to deliver slides that fit those particular people just right. This checklist identifies the key considerations.

- Workplace, Teams, & Culture
- Leadership Skills

Carolyn Geason-Beissel/MIT SMR | Getty Images
I recently interviewed 20 of my customers, all in senior roles at Fortune 100 companies, and asked them their biggest pain point in presenting to higher-ups and even colleagues. What I heard consistently was that it can feel like Goldilocks bouncing from one option to the next, testing to figure out what’s “just right.” Does the audience want deep reports? Sparse slides? Something in between? Like … what?
Teams often come to presentation meetings with vast amounts of backup content just in case an exec wants to take a deep dive on any given point. There’s often a struggle to anticipate every direction attendees might want to go. It’s frustrating, and it’s not efficient.
Get Updates on Transformative Leadership
Evidence-based resources that can help you lead your team more effectively, delivered to your inbox monthly.
Please enter a valid email address
Thank you for signing up
Privacy Policy
There are many ways to build slides. I’m not just talking about crafting them well versus poorly. I’m talking about all of the important decisions regarding how to organize them, how much text to use, when to lean into a chart, the best ways to use bullets and color, and whether to include an appendix with additional information. Before you make your next proposal or request of the executive team, use this list of 11 tips for your next set of slides as a guide.
Four Things You Must Have in Every Exec’s Slides
Before we drill down into the harder aspects, the ones where your executives’ tastes may vary widely, let’s quickly cover four aspects that you can consider the building blocks — the basics you should never proceed without.
Start with an executive summary. Begin the slide deck with a tight executive summary that follows a three-act structure. First, start with stating the current realities. Second, clearly state the problem or opportunity your idea addresses and its potential impact. Third, explain how your recommendation solves the problem or exploits the opportunity and the next steps you’re proposing.
Have a logical organization. The arc of the deck — the package from beginning to end — should make sense. If your audience reads only the headline of every slide, the order should be coherent and make most of the case for you. The content below each slide’s headline must support the statement made in the title. Remove everything that doesn’t support your point; as writers will tell you, you sometimes need to “kill your darlings” when you’re editing.
Begin the slide deck with a tight executive summary that follows a three-act structure.
Make it skimmable. Help your audience to quickly grasp the point without getting bogged down in details. Create a clear visual hierarchy. Guide the reader’s eye through the content: Use bold headings, bullet points, and numbered lists to break down information into digestible pieces. Highlight key takeaways or conclusions in a different color or font size to draw attention to these critical points.
Focus on concise insights. Succinct statements with clear insights are everyone’s jam. Every slide should serve a purpose and contribute directly to the decision-making process. Distill complex information. Don’t use 100 words when 20 words will nail it. If you’re having difficulty trimming, consider using company-approved AI tools to help you take out the fluff.
Five Preferences to Confirm With the Person You Want to Reach
Now we’ll delve into what your particular audience does and does not want. If you haven’t yet, start by asking the person you’re presenting to what they generally prefer. They probably know themselves well but have not been asked to articulate how they like to receive information.
Ask how dense is too dense. Some executives prefer detailed slides with comprehensive data. Others favor a more high-level approach. You’re weighing how to balance informative content with readability, ensuring that slides are not overloaded yet are sufficiently detailed to support decision-making.
Confirm the delivery format and timing. Some execs like information presented to them. Others prefer a pre-read of the material followed by a discussion. I always recommend our tool Slidedocs (I’ve written a free e-book on them), which are visual documents using both words and images. The templates help presenters organize their thoughts into a document for a pre-read or a read-along. They are designed to be skimmable and able to travel through your organization without the help of a presenter.
I’m a huge fan of pre-reads and prefer to use my time in meetings to ask questions and build alignment. If your audience didn’t review your material in advance, ask at the top of the meeting whether they would like you to present it or would prefer to read through it and then discuss it.
Find out how much data visualization they prefer. Charts, graphs, photos, and illustrations often communicate complex data more clearly than words alone. When execs can see what you’re saying, they often can better understand the impact of your idea. Does the exec want to understand exact numbers? Bar charts allow them to move their eyes across a series of specifics. Does the exec want to know the shape of a trend over time? Line charts can show the pattern. (See “Classic Charts Communicate Data Quickly.”) Some prefer charts with annotations that draw attention to what you think is the most important point. Others want to make their own conclusions from the data.
One of my clients, the CEO of a massive commercial real estate company, doesn’t want anything visualized. He prefers numbers, only in a table, and only in two colors — black and red. You might think this is archaic. But the fact that he’s clear to his teams about what he wants takes all the mystery out of how to communicate with him.
When the stakes are high, have a conceptual thinker help with diagrams and concepts. If you don’t have one on your team, and when it’s high stakes, find an internal designer to help you or hire one. You can’t afford to have the baby (your idea) thrown out with the bathwater (terrible slides).
Identify which details need spelling out. How well do the people you’re presenting to know the landscape and function of the company and products you’re talking about? For example, if your engineering team threw a slide into a deck about an issue that requires executive approval, do the execs all speak geek? Or do you need to explain the technology so that they will really understand the ask? Either eliminate internal jargon and acronyms or unpack those bits, especially if your proposal deeply involves expertise outside of the executives’ domain.
Ask whether appendices will be useful. When you’re organizing a presentation, you often troll data, read through complicated reports, and even hire external experts to figure out what’s best for the company. Do your execs want access to that supporting data? You can add a document to the end of the presentation as an appendix to show all of the data and source material. This allows the main content of the slides to remain focused and accessible while still providing comprehensive background information for those who want more.
Two Tips to Improve Your Presentation Skills
Getting materials in place is the biggest step. They will be your best tools for selling your ideas. But there are two extra areas to pay attention to as a presenter: how you handle questions and how you use every experience to improve.
Anticipate questions, and practice your answers. Before you have your meeting, gather a small team to challenge every point you make. Invite colleagues you trust to role-play as “a rapidly inquisitive exec” or “the doubting naysayer exec” so you are prepared to present your idea well. They’re gonna grill you, and practicing will help you remain unruffled when it happens.
Related Articles
Ask for feedback after the presentation. Establish a feedback loop with those you presented to. Ask what worked well and how you can improve. If attendees don’t have the time, find people who have had their ideas funded and talk to them about what they did that worked. Advice and some perspective will help you nail your performance even better next time.
Empathetically understanding your audience members and how they process information, whether it’s executives or peers, sets up your ideas for success. Clarity creates efficiency. When a presentation fits just right, you’ve given your great thinking the best chance of moving through your organization and having maximum impact.
About the Author
Nancy Duarte is CEO of Duarte Inc. , a communication company in the Silicon Valley. She’s the author of six books, including DataStory: Explain Data and Inspire Action Through Story (Ideapress Publishing, 2019).
More Like This
Add a comment cancel reply.
You must sign in to post a comment. First time here? Sign up for a free account : Comment on articles and get access to many more articles.
- Artificial Intelligence
- Generative AI
- Cloud Computing
- Computers and Peripherals
- Data Center
- Emerging Technology
- Augmented Reality
- Enterprise Applications
- IT Leadership
- IT Management
- Remote Work
- IT Operations
- Operating Systems
- Productivity Software
- Collaboration Software
- Office Suites
- Vendors and Providers
- Enterprise Buyer’s Guides
- United States
- Netherlands
- United Kingdom
- New Zealand
- Newsletters
- Foundry Careers
- Terms of Service
- Privacy Policy
- Cookie Policy
- Copyright Notice
- Member Preferences
- About AdChoices
- E-commerce Affiliate Relationships
- Your California Privacy Rights
Our Network
- Network World
Google Slides cheat sheet: How to get started
How to use google slides to create, collaborate on, and lead business presentations..

Need to build a slide presentation for a meeting, training, or other event? Google Slides is an easy-to-use web app that comes with the essential tools and more. It stores your presentations in the cloud with Google Drive. Anyone with a Google account can use Slides and Drive for free, and they’re also included with a Google Workspace (formerly G Suite) subscription for business and enterprise customers. There are Google Sheets mobile apps for Android and iOS, too.
This guide will help you become familiar with the Google Slides web interface and show you how to start a new presentation, upload a Microsoft PowerPoint file to edit in Google Slides, collaborate with others on your presentation, and finally, present it to others.
Create or open a presentation
Log in to your Google or Workspace account. Then:
From Google Slides : At the top of the home page, you’ll see a “Start a new presentation” header, with a row of thumbnails underneath. To start a new, blank presentation, click the Blank thumbnail. To start a new presentation in a template, select one of the thumbnails to the right or click Template gallery toward the upper-right corner, then click any thumbnail on the page that appears.

The Google Slides home page. (Click image to enlarge it.)
Below the “Start a new presentation” area you’ll see a list of presentations that are stored in your Google Drive or shared with you. To open a presentation, click it in this list.
The list of your presentations appears in reverse chronological order starting with the presentation you most recently opened. Clicking the “AZ” icon at the upper right of this list changes the sort order to Last modified by me , Last modified , or in alphabetical order by presentation title. You can also browse to a specific folder by clicking the folder icon next to the “AZ” icon.
From Google Drive : Presentations stored in your Google Drive are listed in the main window of the Drive home page. To see a listing of presentations that others are sharing with you, click Shared with me in the left column. From either list, double-click a presentation to open it in Google Slides.
To start a new, blank presentation, click the New button at the upper-left of the screen and then click Google Slides .
If you want to use a template to start a new presentation, click the New button, then move the cursor over the right arrow next to Google Slides and select From a template . The template gallery for Google Slides will open; click a thumbnail to start a new presentation in that template.

Creating a new presentation from Google Drive.
From Google Slides or Drive: You also can use the search box at the top to find presentations in your Google Drive or shared with you. Enter words or numbers that may be in the presentation you’re looking for.
Upload a PowerPoint presentation to Slides
You can edit a Microsoft PowerPoint presentation in Google Slides, but first you must upload it to Google Drive.
From Google Slides: Click the folder icon ( Open file picker ) that’s above and toward the right corner of your presentations list. On the panel that opens, click the Upload tab. Drag-and-drop your PowerPoint file (.ppt or .pptx) onto this panel, or browse your PC’s drive to select it.
From Google Drive: Click the New button, then File upload , and select the PowerPoint file from your PC’s drive and click Open .
Traditionally, when you uploaded PowerPoint files to Google Drive, they were automatically converted to Slides format. That’s still the case when you upload PowerPoint files via the Google Slides home page .
However, Google now supports the ability to edit Microsoft Office files in their native format. By default, any .pptx files that you upload via Google Drive will remain formatted as PowerPoint documents. You can edit and collaborate on a PowerPoint file right in Slides, with all changes made by you or your collaborators saved directly to the PowerPoint file.
On the Google Slides and Drive home pages, native PowerPoint files will be denoted with an orange “P” icon, and when you open a native PowerPoint file in Sheets, you’ll see a “.PPTX” flag to the right of the document title.

Native PowerPoint files show the PowerPoint icon (top) instead of the Google Slides icon (bottom).
If you’d rather have Google convert PowerPoint files to Slides format automatically when you upload them via Google Drive, click the gear icon in the upper-right corner of the Drive home screen and select Settings from the drop-down menu. In the Settings box next to “Convert uploads,” check the checkbox marked Convert uploaded files to Google Docs editor format .
Work in a presentation
When you open a new or existing presentation, its first slide appears in the main window of Google Slides. Here’s a breakdown of the toolbars, menus, panes, and sidebars that appear around your presentation.
The left pane shows thumbnails of all the slides in your presentation. Click a thumbnail, and the slide it represents will appear in the main window, where you can edit it.

The Google Slides editing interface. (Click image to enlarge it.)
Your presentation’s title appears along the top of the screen. To change it, click anywhere inside the title and start typing.
The menu bar below your presentation’s title has a complete set of tools for working with presentations. These are the main submenus to know:
- File has commands for taking action on the whole presentation, including Print, Rename, and Share.
- Edit lists the standard editing commands such as copy, cut, paste, delete, duplicate, and find and replace.
- View lists several ways that you can view your slides as you design and edit them. This includes arranging them into a grid, previewing them as a slideshow, or zooming in on them. You can also watch the transition effect that takes place between slides when they’re played in a slideshow.
- Insert lets you add several objects to your slides, including charts, diagrams, pictures, tables, and text. You can also add links to YouTube videos or sound or video files that are stored in your Google Drive.
- Format lets you change the look of your slides. Certain functions on this submenu become clickable depending on whether you’ve selected an image or text on a slide, or selected the slide itself.
- Slide is where you can add, delete, or duplicate a slide that you’ve selected. You can also add a preset layout to a slide, change its background or theme color, or add and edit a transition effect that takes place between slides when your presentation is played as a slideshow.
- Arrange lists tools that let you group or reorder objects on a slide in relation to another. For example, you can place an image behind another image or group an image and a block of text together to make them easier to move at once.
- Tools leads to several miscellaneous functions. These include letting you record a voice clip to go with a slide, running a spell checker, and showing you a list of objects in your presentation that are linked to other files.
The toolbar directly above your presentation puts commonly used commands in easy reach. From this toolbar, you can click buttons to add to a slide or change its background, comments, layout, objects (images, lines, shapes, text), text style, theme colors for the whole presentation, transition effects during a slideshow, and more. The buttons on the toolbar change depending on whether you’ve selected image or text on a slide or the slide itself.
Notice that there’s no Save button in the toolbar — or anywhere in Google Slides. That’s because Slides automatically saves any changes you make to your presentation.
Speaker notes: Along the bottom of each slide you’ll see an area marked Click to add speaker notes . Here you can type in brief notes to remind yourself what to do or say when the slide is being shown. Only you will see these notes when you show your presentation to an audience.
Themes sidebar: When you start a new blank presentation, the Themes sidebar opens on the right side of the screen. (You can also open this sidebar at any time by clicking Theme on the toolbar above your presentation.) Themes apply the same fonts, colors, and other design elements to all the slides in a presentation, giving it a consistent look and feel. Click a thumbnail in this sidebar to change your presentation to that theme.
Create and manage slides
Here are the basic things to know about working with slides in a presentation.
Add a new, blank slide to your presentation: Click the + button at the left end of the toolbar above your presentation. Alternatively, if you click the down arrow next to the +, you can choose a layout to use as the basis for a new slide.

Click the down arrow next to the + button in the toolbar to choose a layout for a new slide.
Apply or change a slide’s background: Select the slide’s thumbnail in the left sidebar and click Background on the toolbar above your presentation. On the panel that opens, you can change the slide’s background color or use an image file from your Google Drive, Google Photos account, or PC as the background.
Apply or change a slide’s layout: Select the slide’s thumbnail in the left pane, then click Layout on the toolbar above your presentation. On the panel that opens, select the layout you want to apply to this slide.
Apply or change a slide’s transition: Select the slide’s thumbnail in the left sidebar and click Transition on the toolbar above your presentation. In the Motion sidebar that opens along the right side of the screen, you can apply or change the animated transition effect that is played before this slide.

Choosing a transition style in the Motion pane.
Move a slide to a different spot in the slideshow sequence: Click and hold its thumbnail in the left sidebar, drag it up or down to another place in the sequence, and release it.
Delete a slide: Right-click its thumbnail in the left sidebar and select Delete from the pop-up menu. Alternatively, select its thumbnail and select Edit > Delete from the menu bar or just press the Delete key.
Share and collaborate on a presentation
Presentations are often a group effort, with several team members contributing to and polishing a presentation. In Slides, it’s easy for multiple collaborators to work on a presentation together.
First, you need to share the presentation. When you’re viewing your presentation in Google Slides, click the Share button at the upper-right. Or, from your Google Drive homepage, click to highlight the presentation that you want to share. Then, in the toolbar toward the upper right, click the Share icon (a head-and-shoulders silhouette with a +).
Either way, the “Share” panel will open.

Setting permissions for a file being shared privately.
Share a presentation privately
In the entry box, enter the email addresses (or names of your Google Contacts) of the people with whom you want to share. By default, the people you invite to your presentation can edit it and reshare it with others.
To change access permissions for invitees: Click Editor to the right of the entry box and choose another option from the drop-down menu. Commenter means they can view your spreadsheet and add comments but can’t change it. Viewer means they can view your presentation but can’t edit it or add comments.
To prevent your presentation from being reshared, downloaded, or printed: Click the gear icon at the upper-right of this panel. On the smaller panel that opens, uncheck the boxes by Editors can change permissions and share and Viewers and commenters can see the option to download, print, and copy .
When you’re done setting permissions (and, optionally, typing in a message to your invitees), click Send , and everyone you’ve added will receive an email with a link they can click to access the document.
The shared presentation icon.
A presentation you’ve shared (or that others have shared with you) will have an icon of two silhouetted heads next to it in the presentations list on your Google Sheets and Google Drive home pages.
To limit or change a person’s access to your presentation: With the presentation open in Google Slides, click the Share button at the upper-right. Or, from Google Drive, highlight the presentation and click the Share icon.
The Share panel reopens showing a list of all the people you’ve invited, along with their permission status. Click the down arrow to the right of a person’s name, change their permission level or remove their access entirely, and click Save .

You can change permissions for people you’ve shared a presentation with on an individual basis.
If you have a Google Workspace subscription, another option is to select Give temporary access and, next to Access expires , select a date within one year of the current date. If you set an expiration date for a person that you’ve assigned as Editor, their access will be downgraded to Commenter on the expiration date.
Share a presentation publicly
Most business users will want to share presentations privately with select colleagues or clients, but you do have the option to share a presentation publicly. At the bottom of the Share panel is a “General access” area where you can copy a link to the document. By default, this link is restricted to those you invite to the document. To change it to a public link, click Restricted and select Anyone with the link from the menu that appears.
Click Copy link and the link to your presentation will be copied to your PC’s clipboard. You can share this link by pasting it into a chat message, document, email, forum post, or most other means of online written communication. Anyone who clicks this link will be able to view your presentation online. (Be aware that anyone can copy and reshare this link.)
To allow anyone in the public to comment on or edit your presentation: At the bottom right of the Share panel, click Viewer and select Commenter or Editor from the drop-down menu. Then click the Done button. Now the web link to your presentation will let anyone who clicks it add a comment or edit it.

Sharing a spreadsheet publicly.
To turn off public sharing for your presentation: Bring up the Share panel again. Near the bottom, click Anyone with the link and select Restricted from the menu, then click the Done button.
Note: You can apply both public and private sharing methods to your presentation. For example, you could allow the public to only view your presentation, but allow specific people that you’ve invited to comment on or edit it.
Collaborate on a presentation
The people you’ve shared a spreadsheet with can view or work on it at the same time as you or at other times. Remember that people who have Editor privileges to your presentation can change all aspects of it. Having multiple people making changes to a presentation can get confusing. In most cases, setting everyone to Commenter is the best way to collaborate in Slides: People can attach comments to a slide or to objects in a slide, but their comments won’t alter your presentation’s information or design.
To add a comment to a slide: Right-click its thumbnail in the left sidebar and select Comment from the menu that opens. Alternatively, you can select its thumbnail and select Insert > Comment from the menu bar or click the Add comment button (a speech balloon with a + sign).
A blank comment card with your name on it opens to the right of the slide in the main window. On this card’s entry line, type a brief comment, and when you’re finished, click the Comment button.

Typing in a new comment.
To add a comment to an object on a slide: Right-click the object (a block of text, chart, image, picture, etc.) and select Comment from the menu that opens. Alternatively, you can select the object and select Insert > Comment from the menu bar.
To draw someone’s attention to a comment: As you’re composing the comment, type the @ symbol and begin typing their name, then select the person from the list of suggested Google contacts that appears. They’ll receive an email notifying them of the comment and linking to it.
To read, reply to, or remove a comment: A slide that contains a comment is denoted in the left sidebar with a speech balloon by its thumbnail. Click the slide’s thumbnail to make the slide appear in the main window, and you’ll see all its comment cards on the right.
To reply to a comment, click its card. The card will expand to reveal an entry line where you can add a comment in response.

Replying to a comment.
Clicking the checkmark at the upper right marks the comment card as “resolved” and removes the card from the presentation. Clicking the card’s three-dot icon opens a menu that lets you edit or delete your comment.
To see a list of all comments: Click the Open comment history icon (the speech balloon) to the left of the Slideshow button. A sidebar will open along the right side of the screen; it lists all the comment cards in your presentation. When you click a comment on this list, the view of your presentation in the main window will jump to the cell where the comment is located and open its comment card.

The Comments pane lets you quickly review all comments and jump to specific ones.
For more details about collaborating on your presentation, including what it’s like to collaborate in real time, see “ How to collaborate on a document ” in our Google Drive guide. You can also collaborate on a presentation in Google Chat; that’s covered later in this story.
Recover older versions of a presentation
It’s easy to go too far when making tweaks to a presentation. Fortunately, it’s also easy to roll back to an earlier version of the presentation. Click File > Version history > See version history . This opens a panel on the right that shows a list of older versions of your presentation.

Using Version history to view an earlier version of a presentation. (Click image to enlarge it.)
To view an earlier version of your presentation: Click the date for it in the list. That version of the presentation will then appear in the main window.
To restore an earlier version so it replaces your current presentation: With the version you want to restore showing in the main window, click the yellow Restore this version button at the top of the screen. The restored version will then appear at the top of the version history list.
To give an older version a unique name: Click on its date. You’ll be prompted to type in words to replace the date. (The date and time will then appear in smaller size underneath the new name.)
Give a presentation
When it’s time to play your presentation to an audience, Google Slides has two modes: Slideshow and Presenter view. Slideshow mode essentially shows what your audience will see. Presenter view mode provides additional tools for your eyes only that run alongside Slideshow mode.
Slideshow mode: Click the Slideshow button at the upper-right corner of the screen. Google Slides will expand to full-screen view and show the slide that’s currently in the main window. (If you want to start the slideshow from the first slide in your presentation, click the down arrow to the right of the Slideshow button and select Start from beginning .)

The control bar in Slideshow mode lets you click through the slides, turn on auto-play, use a laser pointer effect, and more. (Click image to enlarge it.)
When you move the on-screen pointer to the lower-left corner of your presentation, a control bar appears. You use this to click forward and back through the slides. Clicking the three-dot icon on the control bar opens a menu with other controls, such as starting auto-play and adjusting how quickly it moves from slide to slide.
On this menu, Turn on the laser pointer turns the mouse pointer into a simulated red laser dot. Captions preferences — available only if you’re using a Chrome browser or Chromebook — lets you turn on real-time, automatic transcribing of your words as you say them (English only) and shows them to your audience as on-screen captions. Open speaker notes takes your presentation out of full screen and opens a separate “Presenter view” window, as described below.
Presenter view mode: Click the down arrow to the right of the Slideshow button and select Presenter view . This shows the presentation in your browser window and launches a separate window that assists you while you’re giving your presentation.

Presenter view lets you (but not your audience) see your speaker notes while presenting. (Click image to enlarge it.)
From the Presenter view window, you can jump to any slide in your presentation, read the speaker notes you wrote for a slide, and control the Q&A feature. There’s also a timer that you can set to remind yourself how much time you’re spending showing a slide — or the entire presentation — to your audience.
Click the AUDIENCE TOOLS tab to use the Q&A feature, which lets you take questions from your audience. To open questions for a slideshow, click the Start new button. A web link appears at the top of your presentation. An audience member watching your presentation on their computer, phone, or tablet can click/tap that link, which will take them to a page where they can type a question for you. You’ll see the question in your Presenter view window, and you can choose whether to show their question to the rest of your audience during the presentation. To close questions for a presentation, turn the switch from ON to OFF .

Audience members can submit questions from their devices, and the presenter can decide whether to display them as part of the slideshow. (Click image to enlarge it.)
Present in Google Meet
Need to give a presentation during a Google Meet video meeting? As long as you’re using a Chromium-based browser (Chrome, Microsoft Edge, Opera, etc.), it’s easy: Toward the upper right of the Google Slides page, click the Google Meet icon. From the panel that opens, select a meeting that’s scheduled on your Google calendar today, start a new meeting, or type/paste in the web link or code that you have for another meeting.

Click the Meet icon to get started presenting to a video meeting.
If you start a new meeting, a sidebar for the meeting will open on the right. At the bottom of the sidebar, click the Present now icon (a box with an up arrow). On the panel that appears, select your presentation and click the Share button, and you’ll be presenting to the meeting.

Choose which tab or window you want to share and click the Share button. (Click image to enlarge it.)
If you join a scheduled meeting, you have two choices: “Join the call” and “Just present this tab.” If you click Join the call , a sidebar for the meeting will open on the right. Follow the same steps as above to present to the meeting. If you click Just present this tab , you’ll go directly to the panel where you select your presentation and click Share , but you won’t have a sidebar where you can follow the main meeting.
To stop sharing your presentation to the meeting, click the Stop sharing button at the top left of your browser window.
For more details about using Google Meet, see our Google Meet cheat sheet .
Download and export a presentation
Google Slides lets you download presentations for use offline. On the top menu, select File > Download and choose a file format. You can save your presentation to your PC as a PowerPoint (.pptx) file or in other formats such as PDF, or as JPG or PNG for an individual slide.
5 tips for working with Google Slides
Now that you’re comfortable working in Google Slides, try these intermediate tips.
Use the Google Slides mobile app
With the exception of the “Version history” tool, the Google Slides app for Android , iPhone , and iPad has many of the same features described in this guide.
When you have a slideshow open, the toolbar at the top of the screen lets you take a variety of actions:
- To present your slides on your phone or tablet, on a Chromecast device, or in a Google Meet meeting, tap the triangle icon.
- To share your presentation with other people, the headshot silhouette. (See “How to share from the Google Drive, Docs, Sheets, and Slides mobile apps” in our Google Drive cheat sheet .)
- To view all the comments in the presentation, tap the Comments icon (a chat balloon) if you see it in the toolbar, or tap the three-dot icon and select View comments from the menu that appears.
- The three-dot menu also lets you see the presentation’s Q&A history, export it, make it available offline, and more.

The Google Slides Android app.
To edit or comment on a slide: Tap the slide, and a menu will appear that lets you add or view comments for that slide or edit it. Tap an element on a slide, such as text or an image, and tools to edit that element will appear.
Any changes you make to your presentation in the mobile app are automatically saved and will appear the next time you open it in the Google Slides web app.
Get suggested slide layouts and content
Click the Explore icon at the lower-right corner of the screen. The Explore sidebar will open along the right side. In most cases, you’ll be presented with thumbnails of suggested layouts that Google Slides has automatically customized for the slide that’s open in the main window. Click the one you want, and it will be applied to the slide.

Use the Explore tool to get suggested layouts (left) and search for images (right).
At the top of the Explore sidebar is a search box. You can type in a word or phrase to find related content on the web or in your Google Drive. Search results appear on separate Web, Images, and Drive tabs in the sidebar. Click a web or Drive result to open it in a new browser tab. On the Images tab, click the + icon on the upper-right corner of an image to insert it onto your slide.
Create custom slide layouts to use as templates
You can design your own slide layouts to use as templates in any future presentation. First, open a new, blank presentation as described above. Then:
- On the menu bar over the blank presentation, select View > Theme builder .
- The main window switches to a layout editor. Toward the left you’ll see a column with the heading THEME on top and LAYOUTS just below that. Click the thumbnail of any layout in the LAYOUTS list. It will appear in the main window.
- You can remove objects that are already in any layout. For example, click on a block of text. A frame appears around the text. Without selecting the text itself, move the pointer to ward an edge of the frame, right-click, and select Delete from the menu that opens.

Creating a custom slide layout. (Click image to enlarge it.)
- Using the formatting toolbar above the slide, you can add new objects to the slide, including images, image placeholders, shapes, lines, and blocks for text. (Tip: enter placeholder words inside the text blocks.) When you click on any object, a frame appears around it. Drag and drop the frame to relocate it on the slide, or drag its edges to change its shape or size. You can also add or change the border and background colors for any object on the slide and/or change the background color for the whole slide.
- When you’re finished designing your layout, click the Rename button above the slide and give the layout a unique name.
- If you want to create another custom layout, click on the thumbnail of another layout under the column LAYOUTS and repeat the above steps starting from #3.
- When you are finished custom-designing all your layouts, click the X toward the upper-right of the slide layout in the main window.
- Along the top of the screen, click anywhere inside Untitled presentation and start typing. Tip: Use a name that indicates this is a template (e.g., “Annual Budget Presentation – Template”).
In the future, you can make new presentations starting from this template, and your custom slide layouts will be available.
- Open the template presentation you created in the steps above. On the menu bar, click File > Make a copy > Entire presentation . On the panel that opens, type in a name for the new presentation you want to create and click the Make a copy button. Google Slides will open this new presentation in a new browser tab.
- On the toolbar above the first slide of your new presentation, click Layout . From the panel of thumbnails that opens, select one of the layouts that you created. It will then be applied to the slide in the main window.
Collaborate on a presentation in Google Chat
An alternative way to collaborate on a presentation is to share it in Google Chat. Other people in your chat can add comments and help make changes to your presentation.
Start in Google Chat . To the left of the box where you type in your chat messages, click the + icon and select Drive file from the menu that opens. A panel will open over the screen listing the files in your Google Drive. Find and click your presentation to highlight it, then click INSERT on the lower-right corner.
You’ll be taken back to the chat message box. Click the blue right-pointing arrow to the right of the box, and a panel will open over the screen designating permissions for the shared presentation. By default, permissions are set to Comment. To change this, click Comment and select View or Edit . You can also allow the people in the chat to share a web link to your presentation with others outside of the chat by selecting Turn link sharing on .

You can share a presentation to individual or group chats in Google Chats. (Click image to enlarge it.)
After you’ve set the permissions, click SEND , and your message will appear in the chat stream with a large thumbnail of your presentation. To open a presentation in the chat, click the thumbnail. The presentation will open inside a large window that’s laid out alongside the right of the chat stream.
This is actually Google Slides running inside the chat window with your presentation loaded in it. Thus, most of the Slides commenting and editing tools are available for you and others in the chat to use on your presentation (if you granted them permission to comment or edit). The user interface is the same, except there’s no menu bar.

Collaborating on a presentation from within a Google Chat. (Click image to enlarge it.)
Use keyboard shortcuts
Save time in Slides by using keyboard shortcuts for common tasks. Below are some of the most useful to know. For more, select Help > Keyboard shortcuts from the top menu when you have a spreadsheet open or press Ctrl + / (Windows, Chrome OS) or ⌘ + / (macOS).
Handy Google Slides keyboard shortcuts
This story was originally published in September 2019 and updated in August 2022.
Related content
How to use pivottables and pivotcharts in excel, 18 ways to speed up windows 10, google adds a premium option for chrome enterprise, jamf brings powerful new compliance tools to apple it, from our editors straight to your inbox.
Howard Wen ( www.howardwen.com ) is a longtime contributor to Computerworld . He specializes in explainer guides, how-tos, and reviews of office applications and productivity tools.
More from this author
Google docs cheat sheet: how to get started, 8 highly useful slack bots for teams, microsoft onedrive cheat sheet, 9 chrome extensions that supercharge google drive, most popular authors.
- Howard Wen Contributing Writer

Show me more
Google workspace gets new genai pricing options, vids app.

The AI talent shortage — can companies close the skills gap?

What everyone's getting wrong about Google's Chrome incognito saga

Is AR/VR set for another growth spurt? | Ep. 143

Voice cloning, song creation via AI gets even scarier

The link between smartphones and social media addiction

Is AR/VR set for another growth spurt?

- (855) 776-7763
Training Maker
Survey Maker
Webinar Ninja
ProProfs.com
All Products
- Get Started Free
Want to host a webinar for free?
Use WebinarNinja to teach, improve marketing, and grow your sales.
How to Create Webinar Presentation Slides

Founder, WebinarNinja
Omar Zenhom founded WebinarNinja, an all-inclusive, easy-to-use webinar platform to teach, improve marketing, and grow sales. With over a decade of experience in entrepreneurship, Omar brings a wealth of practical insights into generating passive leads and sales with webinars.

Live or automated , your our webinar presentation slides are the heart of your webinars.
It’s the roadmap for your whole presentation. It keeps you grounded, on track, and moving steadily towards the goal (that’d be sales conversions ).
So, let’s nail it.
Based on my experience with WebinarNinja, let’s explore the structure, key elements, and flow of a slide presentation that keeps the audience enraptured.
6 Steps to Create Webinar Presentation Slides
These webinar presentation tips will benefit both presenters and the audience by ensuring that webinars are informative, engaging, and impactful.
1. Find a Relevant Topic to Cover
“The secret of getting ahead is getting started.”
The first step is to choose a topic that is relevant and interesting to your target audience. Consider their needs, challenges, and interests to ensure the content is valuable to them.
You can conduct market research, analyze trending topics, or seek feedback from your audience to identify a topic that will resonate with them.
For example , if you are hosting a webinar for a marketing audience, you might choose a topic like “Mastering Social Media Marketing Strategies” or “Building an Effective Email Marketing Campaign.”
Remember , the goal is to select a topic that not only aligns with your expertise but also addresses the needs or curiosities of your audience. Pro Tip: Use social media platforms, discussion forums, and surveys to gather insights into the topics your target audience is interested in. This can help you create a presentation that meets their expectations.
2. Determine the Outline of the Presentation
Outline the key points and structure of your presentation. Decide what information you want to cover and in what order. This will help you organize your thoughts and ensure a logical flow of content during the webinar.
The outline should clearly define the flow of your presentation, starting with an introduction of yourself and the topic, followed by the main content divided into manageable sections, and concluding with a summary and Q&A session.
The outline will ensure that the webinar is coherent and maintains the audience’s interest throughout.
What You Can Do: Use the rule of three – break your content into three main sections or key points. This will help your audience absorb and remember the information better.
Example: For a webinar on social media marketing strategies, the outline could include sections on understanding the target audience, choosing the right webinar platforms , and measuring success.
3. Decide the Template
Choose a professional and visually appealing template for your webinar slides. The template should align with your branding and enhance the overall visual experience for the audience. It should also be easy to read and navigate.
Choose a template that reflects the theme of your webinar . Many platforms provide a variety of customizable templates designed for webinars and you can select one that best fits your content.
For instance , Google Slides and Microsoft PowerPoint offer a variety of pre-designed templates to choose from. They can help you understand the different webinar presentation examples you can deploy.
Ensure the template is not too cluttered, has enough space for text and visuals, and includes a consistent color scheme and font style to maintain visual harmony. Use high-quality images or graphics.
Choose a clean design that allows the content to stand out. Make sure it conveys your brand identity.
Note: If you’re representing a corporate brand, you might choose a template with a clean and minimalist design. If your webinar is aimed at a creative industry, you could opt for a more vibrant and visually engaging template.
4. Keep Slides Light & Engaging
“If you can’t explain it simply, you don’t understand it well enough.”
Your slides should support and enhance your presentation, rather than overwhelming or distracting your audience.
Keep the text concise and use bullet points or visuals to convey information effectively. Images, graphs, or charts can make the slides visually appealing and break the monotony of text. But avoid overcrowding slides with too much text or complex graphics; add what is just required.
Remember , the slides should support your spoken content, not replace it, by highlighting key points and keeping the audience focused.
Pro Tip: Use visual elements like infographics or icons to represent complex information. Use animations sparingly to add interest to your slides without distracting from the content.
Here’s what you can do : Instead of listing detailed information about social media statistics, use a graph or chart to represent the data and highlight the key points visually.
Unsplash and Pexels offer free high-quality images that you can use in your webinar slides.
5. Include a Call-to-Action Slide

Towards the end of your presentation, include a slide that prompts your audience to take action. It could be a request to sign up for your newsletter, follow you on social media, register for a future event, or purchase a product/service.
A call-to-action (CTA) slide is crucial in a webinar presentation as it directs your audience on what to do next.
Make sure your CTA is clear, compelling, and easy to follow. Use concise language and bold visuals to draw attention to the CTA, and explain the benefits of taking the action to encourage participation. Provide the necessary links or contact information.
Example: “Sign up for our weekly marketing tips newsletter to stay updated with the latest industry trends. Visit www.example.com/newsletter to subscribe!”
6. Review Your Slides
Before finalizing your webinar presentation, it’s important to review your slides thoroughly.
Check for any typos, grammatical errors, or inconsistencies in design and content. Ensure that the flow of the presentation is smooth and logical, and that all visuals are high quality and relevant.
It’s also helpful to rehearse the presentation using the slides to ensure that the timing is appropriate and the content aligns with your speech.
Make sure all the slide transitions, animations, and visuals work as intended.
Getting feedback from colleagues or friends can also provide insights for improvement to ensure your webinar is polished and professional.
Additional Resource: SlideShare is a platform where you can find inspiring presentations and gain ideas for your own slides.
That was all about how to create a webinar presentation using slides. Continue reading for additional information on the topic.
Creating a Webinar Presentation Slideshow Flow
For maximum impact, I’d recommend that you follow this slideshow structure. It’s designed for maximum engagement, retention of information, and likelihood of follow-through on your CTA or offer.
The Webinar Title Slide
It’s First Impression time. The opening slide should have the following elements:
- The webinar title. It should be the most prominent thing, but not just because it’s the title slide. The title is your promise, the reason attendees came, the solution to their pain point.
- Your company name and logo (see the “Tips on Branding Your Slides” section below for more on that).
- Your company URL.
The Webinar “Table of Contents”
This is where you lay out exactly what attendees can expect. In bullet points, list the learning outcomes of the webinar — this is how you expand and get specific on the “promise” of the webinar title.
Ambushing attendees with an offer does not create trust. Instead, assure them that you are there to give them something first, and that 90% of the webinar will be about fulfilling what the title promises, not opening wallets.
Your “About” Slide
This is where many hosts run into trouble. It can be very tempting to babble about oneself, listing your accomplishments and “sharing your journey.” Not that you shouldn’t do those things; stating your qualifications is key to your credibility, and journey-sharing is crucial to making a personal connection.
But too much of either will quickly turn people off.
Keep this part short and sweet, and remember that most of your attendees are patiently waiting for you to deliver on the promise. They don’t give a squirrel’s tail how proud you are of yourself, or where you spent your vacation. There’s a fine line between being relatable and being off-topic.
The Meat: Creating Webinar Instructional Slides
These are the most important or interesting parts of a presentation.
Now, we often think “more is better,” and therefore, more information is more valuable. But we have to remember one thing: attendees can only use the amount of information that they can process and retain.
That means stripping it down.
As discussed in this post, your webinar should be narrowly focused in the first place. Think How to Build 10 Pounds of Lean Muscle in 6 Months , not How to Get In Shape . Beyond that, your instructional slides should be limited to what an average person can actually keep in their brain long enough to act on.
Don’t Forget the Testimonials
You can be compelling. Your instructions can be understandable and actionable. You can have experience and accolades. But nothing convinces people to buy like user reviews or social proof.
It’s the 21st century. Consumers don’t trust salespeople. They don’t even trust “influencers” and “thought leaders” that much. They trust fellow consumers. That’s why Amazon is so effective: each of its product pages includes a wealth of reviews.
In other words, don’t expect your audience to take your word for it. Give them someone else’s.
A testimonial page should include three things:
- A short quote that makes your product/service sound effective and wonderful.
- The name of the person whose quote it is (and a picture, if possible).
- The person’s company, or some other “consumer credential” that establishes the quote as credible.
Here’s an example:
“Pet Style Coach helped me take my labradoodle’s holiday sweater game to the next level, and 4 of my 6 guinea pigs can pull off black tie. Now I have TOO many offers from pet food companies.”
Bring it Home: The Offer Slide
And here it is. The part where all your webinaring literally pays off. At this point, you should have given your attendees all the value they came for, and fulfilled your promise to empower them. Now, they trust you enough to be open to an offer.
Include three things on this slide:
- The offer, in as few words as possible. “6 months of coaching for $XXX”
- A bonus. “Sign up today and get 2 months free!”
- Whatever info is needed to redeem the offer/bonus, either by following a link, entering a coupon code, etc.
Keep it minimalist and to the point. Emphasize the value of the specific offer, not the value of the product.
Q&A Slide

Not much to this one. Just create a branded slide to mark the point in the presentation where you open the floor to questions.
Thank You Slide
The final slide, where you express your gratitude for everyone who stayed to the end. To get the last bit of juice out of this webinar for your business, include the following:
- An expression of gratitude (“Thank you” tends to work, but feel free to get creative.)
- An email address for post-webinar questions or concerns
- Instructions for accessing the replay (live webinars only)
- Instructions on accessing your offer, again
For live webinars, the replay part is especially crucial — you’ll find a significant percentage of registrants skip the live show and convert on the replay.
Tips on Branding Your Slides
“Branding” is a nebulous concept that involves the full spectrum of human-company interaction. Words, ideas, shapes, colors, it’s all part of the subconscious seduction that is marketing.
All of this is a wildly pretentious way of saying that your slides have to look like your own, even when you use a template.
Every slide should include your logo. On the title slide, go big, literally. Have a large version of it, centrally located above or below the title itself.
On subsequent slides, I recommend leaving a smaller logo discreetly (but not too discreetly) in one corner.
You’ll also want to keep your brand’s color scheme consistently woven throughout the slides. As long as it’s reading-friendly and visually appealing, I recommend that your company’s primary color be the background color of each slide.
That’s it. You now know the steps of how to make a good webinar presentation – the structure, the flow, the narrative, and the tone. It’s time to put them into action to start seeing the results.
Get Your Webinar Presentation Slides Right the First Time!
With slides as with most marketing materials, the fewer words, the better. Think of the slides as guideposts for a conversation.
Always remember to see things from the attendees’ perspective. As someone who’s sat through many terrible presentations, I can tell you nothing is worse than being read to. If you read, attendees will only wonder why you can’t just send them the thing you’re reading! It totally negates the value of a spoken presentation.
Put the effort into your slides, and they’ll reward you. They’ll give you the confidence to relax, speak naturally, and let yourself shine — which is the whole point of a great webinar.
A robust webinar software system can help you hit the ground running, whether you’re a teacher, coach, corporate trainer, or consultant. Create effective live, automated, series, and hybrid webinars with ease. Get Started Free or Get a Personalized Demo today.
Frequently Asked Questions
1. what is a webinar presentation.
A webinar presentation is an online event or seminar where information is presented, exchanged, and shared in real time using webinar software. These presentations can include slides, video, audio, and multimedia components, and are a popular format for various industries and educational purposes. For more on this, watch this video: What’s a webinar? (and how to run one)
2. How long should a webinar presentation be?
The ideal length of a webinar presentation can vary, but most experts recommend keeping it between 30 and 60 minutes to maintain attendee engagement and attention. However, the length can also depend on the content being delivered and the audience’s preferences.
3. How do I engage attendees during a webinar?
To engage attendees during a webinar, consider using interactive elements such as polls, Q&A sessions, live chat, and breakout rooms. Encourage participation by asking questions, sharing engaging visuals, and ensuring the content is relevant and valuable to the audience. Here’s a quick guide on how to answer the audience’s questions during a live webinar .
4. How can I measure the success of my webinar presentations?
Success metrics for webinar presentations can include factors like attendance rate, engagement level (questions asked, polls answered), post-webinar surveys, leads generated, and conversion rates. Analyzing these metrics can help evaluate the effectiveness of a webinar and identify areas for improvement.

About the author
Omar zenhom - founder, webinarninja.
Omar Zenhom founded WebinarNinja, an all-inclusive, easy-to-use webinar platform to teach, improve marketing, and grow sales. With over a decade of experience in entrepreneurship, Omar brings a wealth of practical insights into generating passive leads and sales with webinars. Omar and WebinarNinja have been featured in Inc, Forbes, Fast Company, Entrepreneur, and Product Hunt. He is also the host of the Best of iTunes podcast - The $100 MBA Show.
Popular Posts in This Category

How to Become a Business Coach

How to Wow Your Attendees With Canva Webinar Templates

How to Get More Clients From Your Webinars: The TOKYO Method

How to Improve Your On-Camera Presence

How to Create Webinars That Convert [+8 Proven Examples]

Webinars on Mobile Devices: Should You?
Slideshow Video Maker

Create a slideshow for any occasion, with no experience
Take the videos and photos you have and turn them into a slideshow video easily. With a simple drag-and-drop feature, you can upload as many video clips or pictures you want in seconds.
Choose from 100+ different songs or upload your own favorite song to use as background music for your slideshow. Browse and use our slideshow templates to easily replace clips with your own. Kapwing’s video slideshow maker is available to anyone online – no downloads or payment required.

How to Make a Slideshow

- Upload media Open a blank project and upload as many video clips or photos you want to add to your video slideshow.
- Arrange videos and photos for the slideshow Place the videos or pictures in the order you want them on the timeline. Then, apply transitions and add music to the video slideshow using the video effects and audio library in the editor.
- Export and share When you’re finished editing, click “Export project” in the upper right-hand corner. Kapwing will process your video in high quality for you to download in seconds.
The video slideshow maker made for anyone and everyone
Capture people’s attention, slide by slide.
Keep people watching your slideshow video when you use Kapwing’s slideshow maker to add music, photos, and animations. Browse from 100+ different audio tracks in the built-in music library to use as background music for your slideshow.
Celebrate right with slideshows for graduation, birthdays, and more
Set the tone right at any celebration or gathering. Use any of our slideshow video templates to create graduation, funeral, and birthday videos. Impress your friends and family, even without any video-editing experience.
Design eye-catching video slideshows completely online
With just a free account, you have the complete freedom to jump on Kapwing, make a video slideshow, then post directly to any social media channel. Create scroll-stopping slideshow videos that turn viewers into followers or customers.
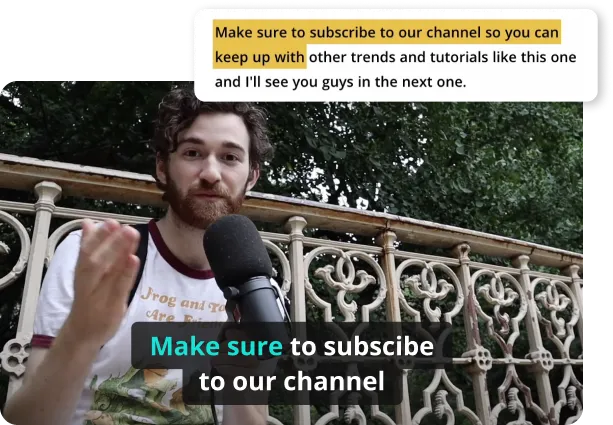
Frequently Asked Questions

What is the best free video slideshow maker online?
How do i make a slideshow video for free, can i make a video slideshow on windows 10, what's different about kapwing.

Kapwing is free to use for teams of any size. We also offer paid plans with additional features, storage, and support.
- Video Editor
- Video Converter
VideoProc Converter AI
Record and Edit Instructional Videos in One Place
- • Record the screen with/without your face, voice, and system sound
- • Customize the capture area, audio devices, recording format, etc
- • Cut, trim, crop, add subtitle, watermark, and 29+ quick editing tools
- • AI-driven features to enhance/upscale video to the maximum quality
- • Plenty of extra features: compress, convert, fix, and download videos

How to Make an Instructional Video from Scratch
The significance of instructional videos is on the rise. They simplify complex topics, making them more digestible for students, working professionals, and everyday learners alike. This isn't simply a subjective view; statistics back it up. For instance, research by Wyzowl shows that an overwhelming 96% of consumers rely on videos to gain insights into products or services. Furthermore, Google reported that 70% of YouTube users turn to video content to help solve problems related to work, educational studies, or hobbies.
And instructional videos aren't just for learning. They're also great for businesses. It can make your brand more visible and make others trust your brand more. And the best part is that creating an instructional video can be super easy if you have the right tools and some knowledge. In this post, we're going to take you step by step through the process of making an instructional video from beginning to end.

What Is an Instructional Video
An instructional video is a visual medium that aims to teach viewers how to perform a task, understand a concept, explain a process, etc. These videos are designed to be engaging and visually appealing by incorporating visual effects, text overlays, and audio elements. They may also include animations, graphics, and on-screen annotations to emphasize key points and enhance comprehension.
Instructional videos serve as an effective tool for delivering learning, training, and educational content to employees, students, or any audience seeking knowledge. They offer a more engaging and personalized learning experience compared to traditional methods like textbooks or emails, helping viewers retain information and grasp complex concepts more effectively. Additionally, instructional videos can be a valuable asset for digital marketing strategies, providing evergreen content that can attract new customers and enhance return on investment.

How to Make an Educational Video
Step 1. understand your target audience.
Understanding your target audience is the foundation of making an effective instructional video. First, you need to figure out who your ideal viewers are. What are their interests, capabilities, and the challenges they are facing that your video could address? You also need to consider their age, skill level, language proficiency, and even the devices they're most likely going to watch your video on.
It's not enough to just have this information, you need to apply it. Tailor your video's terminology, pacing, and visual aids to suit your audience. For example, a video aimed at beginners should be slower and avoid using jargon. Meanwhile, a video for more advanced viewers might be faster and more complex. Spending the time to understand your intended viewers will ensure your instructional video is efficient, effective, and appreciated by its intended recipients.
Step 2. Find the Right Software and Equipment
The right tools can greatly enhance the quality of your instructional video.
Video Editing Program: Your choice will largely depend on what type of video you wish to create and your editing skill level. Below I list some of the most commonly-used editing tools that you can use for creating instructional videos.
Screen Recorder: If you're making video presentations, or other similar types of instructional videos that require you to record your screen, webcam, or voice, having a decent piece of screen recording program is a must. I recommend you use VideoProc Converter AI . It lets you record all of your screen or just part of it, and you can include webcam video, your voice, and other system sounds. Plus, it has quick editing tools so you can edit and polish your recordings right in the program, without needing extra video editing software.
Camera & Microphone: A good-quality camera can give your instructional video a professional touch. This doesn't necessarily mean a high-end professional camera; even a smartphone with a good camera can work well for starters. Clear audio is just as important as good video quality. A good-quality microphone is essential.
Step 3. Write the Outline and Script
Now, let's make a rough plan or outline. This needs to include what steps you'll show and a basic idea of what these will look like on-screen. It's best to have a specific order - introduce your idea, explain the steps to make it happen, and then end with a quick recap of the main points.
Once that's done, it's time to write the script. This is where you'll nail down what you'll say and what's going to happen on screen. You need to make sure your instructions are very clear and easy to understand - think of how you'd explain it to your friend.

Step 4. Record Your video
Depending on your instructional video's topic, you might need to capture a recording of a process happening on your screen, demonstrate something in real life, or both. Below is a demonstration of how to record your screen for an instructional video.
- Tidy up your computer screen and close any apps you don't need. Open the application you want to capture.
- Download, install, and run VideoProc Converter AI on your computer.

Note: The Windows version now supports AI-powered Super Resolution, Frame Interpolation, and Stabilization to enhance video and image quality. These AI features are not yet available in the Mac version but will be coming soon.
- Choose the needed recording mode. For example, choose Screen & Webcam to record your screen with your webcam.
- Click Crop and drag the selection box to set the recording area.
- Select your audio source - this can be your microphone, speaker, or both.
- When everything's set, hit REC and start following your script.
- Once you're done, click Stop recording. You can see the recording on the right side.

Step 5. Edit the Instructional Video
After you've finished shooting or recording, it's time to edit. For quick tasks like trimming parts, cutting extra pixels, or adjusting speed, VideoProc Converter AI's inbuilt tools should suffice. If you want more advanced editing options like PiP and animated text, and you don't have much previous editing knowledge, VideoProc Vlogger is a great choice. Its interfaces are straightforward but still offer comprehensive tools for creating standout instructional videos, complete with impressive titles, transitions, LUTs, and presets.
6 Types of Instructional Videos
Instructional videos come in various types, each serving a unique purpose and catering to different learning needs. Here are some common types:
1. Explainer Videos
An explainer video is a short ((typically between 30 seconds and 3 minutes), engaging video that provides a quick and straightforward explanation or demonstration of a company, product, service, concept, or idea. It's designed to be simplistic in nature, utilizing animations, live-action footage, or other visual aids to portray its message. This form of visual storytelling can quickly grab a viewer's attention, making it a powerful tool for businesses to increase brand awareness, and customer engagement, and ultimately drive sales or conversions.
2. Microvideos
A microvideo is a type of instructional video that delivers information within a short, concise duration of time, typically from a few seconds up to one minute. They're designed with simplicity and brevity in mind, presenting one single idea or concept to the viewer. Some common examples might include a quick tip, an interesting fact, or a step in a process.
Designed for today's fast-paced, digital environment where the attention span of audiences is decreasing, microvideos are perfect for viewers who want information quickly and prefer to digest content bit by bit. For content creators, these bite-sized pieces of content are effective in capturing and retaining the viewer's attention more efficiently than longer-form videos.
3. Training Videos
A training video is a type of instructional video designed to teach or train individuals on a specific topic, skill, process, or concept related to their field of work or study. These videos are often used in corporate settings for employee onboarding, professional development, and workflow steps. They provide consistent training across all members of an organization, ensuring everyone receives the same information in a standardized manner. They allow for self-paced learning, as viewers can pause and repeat content as needed, aiding in better comprehension. The length of a training video can vary, ranging from a few minutes to longer durations, depending on the depth and complexity of the information it covers. Training videos could include demonstrations, illustrations, animations, or even real-life scenarios that guide the viewer through the learning process.
4. Tutorial Videos
A tutorial video is an instructional guide that walks you through detailed steps to complete a specific task.This could range from creative tasks like creating a stop-motion video or starting your own YouTube channel to more technical ones like using specific software, such as recording your screen with VideoProc Converter AI. A tutorial video presents a process in a sequential manner, with the goal of teaching the viewer how to accomplish something specific.
While the terms "training video" and "tutorial video" are often used interchangeably, there are distinct differences between them. Training videos often cover broader topics and provide in-depth explanations or training on a specific skill, process, or concept, and they are mainly used to educate learners in a more formal or professional environment such as within companies or organizations.
On the other hand, tutorial videos are often more narrowly focused, breaking down complex tasks into manageable steps in an easy-to-understand manner. They're typically meant to guide a user on how to do a specific task from start to finish. For instance, tutorial videos can cover topics such as how to bake a cake, how to use a software program, how to create a piece of art, and so on.
5. Screencasts
Screencasts are used to demonstrate how to use a software program, illustrate a technical process, or present a slide show. This type of instructional video captures actions taking place on a computer screen and is often accompanied by a voice-over that narrates the actions occurring on the screen. Thus, it's great for explaining complex tasks that are performed on a computer or for demonstrating the functionality of software applications.
6. Video Presentations
A presentation-type instructional video features a subject matter expert explaining concepts, often through a presentation program like PowerPoint. It is easy to watch and helps people learn at their own speed. If something is hard to understand, they can just pause or replay the video until they get it. The person who created the video can also watch it later to see how to make their teaching even better. It's also not hard to make these videos; you need a slideshow, a voice to explain things, and maybe a camera to record the person talking.
Instructional Video Mistakes to Avoid
Ignore Your Audience: Having a clear idea of your target audience is the backbone of creating an effective instructional video. Recognize their needs, preferences, and level of understanding related to the topic. It will guide you in creating content that is helpful, engaging, and easy to understand.
Bad Video/Audio Quality: Both sound and visuals strongly impact viewer engagement. Therefore, ensure your video has clear audio and bright, sharp visuals to keep your audience focused.
Lacking Detail in Instructions: When explaining a process or steps, be detailed, and include visual cues. It's important that your audience can easily understand and follow the instructions given.
Create Too Lengthy Contents: Long instructional videos can lose a viewer's interest. Keep the content of your instructional video brief, direct, and engaging to capture the attention of viewers until the very end.
Overlook Editing: Post-production editing makes your instructional video look professional and captivating. Edit the video to remove any unnecessary parts, enhance visuals, and improve overall content flow.
About The Author

Cecilia Hwung is the marketing manager of Digiarty Software and the editor-in-chief of the VideoProc team. She pursues common progress with her team and expects to share creative content and useful information with readers. She has a strong interest in copywriting and rich experience in editing tips.
VideoProc is a primary branch of Digiarty Software that is a leading multimedia software company founded in 2006. It endeavors to provide easier hardware-accelerated video audio editing and conversion solutions. The installed base of the VideoProc product has reached 4.6 million units from 180 countries since its release 5 years ago.
Subscribe to VideoProc
Stay current with our latest updates, guides, and subscriber-only offer.
Choose Language
Copyright © 2024 Digiarty Software, Inc. All rights reserved.
License Agreement
Privacy Policy
Refund Policy
Any third-party product names and trademarks used on this website, including but not limited to Apple, are property of their respective owners.

Android Police
Google vids looks like a fancy, ai-powered version of powerpoint.
Your next presentation could be a video instead of a slideshow, complete with AI voiceovers
- Google Vids offers an AI-based solution for easy video creation, making it accessible for Workspace users even without video editing skills.
- The tool is set to launch in June as part of Google Workspace updates, along with other AI-based enhancements like a security add-on and new features for Sheets.
- Google continues to integrate AI into its products, pushing boundaries by creating innovative tools for tasks like video creation and shopping assistance.
Like it or not, it’s becoming easier to find tools and services that have integrated AI technology to make common tasks easier. Google's suite of apps has quickly become a hub of products that feature Gemini AI , which can then be used everywhere from the workplace to your home. If presentations have been a pain point for you at work, for example, Google has now developed an AI-based tool just for that — but it’s being positioned as an easy-to-use video creator.
Google Gemini: Everything you need to know about Google's next-gen multimodal AI
As Google announced on its blog, the company has debuted a new Workspace app called Vids. Not to be confused with the ill-fated Google Video platform or the still-active Google Videos search tool , Vids is a standalone AI-based app that was developed to help users create video content, positioned right alongside other productivity tools like Google Docs and Slides.
The tech giant is rolling out Google Vids as a part of several updates launched for Google Workspace, in particular. Some of the other developments that were revealed include an AI-based security add-on, a new tables feature for Google Sheets, and a translation tool for Google Meet.
How Google wants to make video creation easier
Vids is designed to make video creation a task that anyone can handle, even without refined video editing skills. With the AI tool, you can piece together a video with everything from stock footage to background music. Vids also frames your creation in a storyboard-like setup for easy editing — simply move around portions of your generated video until you have the final look you want. Upon announcing the tool, Google specified that Vids will officially launch this June for Workspace Labs.
It could be argued that Vids is little more than a fancier presentation developer tool, but at the least, it’s one more way Google is trying to integrate AI into its products and services. Recently, the company even went as far as to refine its shopping tool by adding AI to the mix — you can now queue up images to help you create a new style or find specific items of clothing. While you might not have envisioned such a tool ever being created, Google is delivering on this front, whether its audience wants it or not.
IMAGES
VIDEO
COMMENTS
Canva's free video presentation maker lets you record your voice and face as you present your slides online. You can also share your recordings with others, edit them with Canva's design tools, and access features like remote control and screen recording. Learn how to create engaging video presentations with Canva.
Join 400,000+ professionals in our courses here 👉 https://link.xelplus.com/yt-d-all-coursesLearn how to create a video using PowerPoint. I'll first show you...
For slides with added video, make the transition happen either when the video ends or at a calculated time after the video has ended. Both are available options in the transition settings. Transitions can be set in different styles, slide from the side top or bottom, or a simple fade or zoom.
Drag and drop your media onto the timeline side-by-side to create a slideshow video. Step 2. Edit your video presentation. To trim the length of your video, click on the video on the timeline so it's highlighted green. Move the green handles to the left of the timeline to trim the video length.
51 seconds. On the File menu, select Save to ensure all your recent work has been saved in PowerPoint presentation format (.pptx). Click File > Export > Create a Video. (Or, on the Recording tab of the ribbon, click Export to Video .) In the first drop-down box under the Create a Video heading, select the video quality you want, which pertains ...
To create a presentation video in Descript: Hit New project. Import any media (images, infographics, short video clips, GIFs, or sounds) you want to include in your presentation. Drop your visuals into the script and edit them into a sequence, or work scene by scene by adding a / at the beginning of each slide.
How to make a photo slideshow. Open Adobe Express. Launch Adobe Express in your browser, then upload your own photos and videos to get started or select the kind of video you want to create. Pick a template. Search "slideshow" to find tons of free slideshow templates. Narrow down your search even further when you search by industry ...
Make a video presentation in under 10 minutes. Jump directly into the editor and generate a video presentation using the slideshow generator. Edit the generated subtitles accordingly and make any additional changes to your video. Create and edit a video presentation all on one platform—no download or software installation required.
Present slideshows with confidence. With easy-to-use presenter view, speaker notes, and live captions, Slides makes presenting your ideas a breeze. You can even present to Google Meet video calls ...
Learn how to publish your own video using Microsoft PowerPoint with narration, annotations, animations, and timings. As full disclosure, I work at Microsoft ...
Tip #3 - Voiceovers can become your best friends. The whole point behind a video presentation is not to create a boring one-person video speaking in front of the camera. Use voiceovers effectively to introduce charts, data feedback, etc., with your voice connecting the points of the entire presentation.
This Google Slides tutorial for beginners is a complete crash course, taking you by the hand and showing you step by step how to make some amazing and mesmer...
Create a storyboard or outline to plan out your content and develop a logical order for presenting each video clip, photo, and text. Then, use Vimeo's slideshow editor to add all your video clips, images, and other elements, add text, customize colors and fonts, and fine-tune your project to create a professional slideshow that flows ...
Let VEED's free slideshow maker help you out! With VEED, you can make beautiful slideshows in only a few clicks of the mouse. Use our transitions, templates, stickers and emojis to make engaging slideshow videos for your audience. Annotate, add text, background music, voice commentary, sound effects, and more!
Six steps for creating a slide show. 1. Plan your slide show. Before getting too deep into your slide show project, it's a good idea to select and save the photos and videos you want to use. This helps you create a slide show more efficiently and purposefully, ensuring a better outcome. 4.
Choose which part of your screen you'd like to capture. Click the Record icon to start recording, click it again to stop recording. Click the Pause icon in the side panel while recording to pause or resume recording. Click the Draw icon in the side panel while recording to draw on your recording. 4.
VEED is a professional, all-in-one video editing software that can take care of all your video editing needs—quickly and efficiently. You can resize your video for different video sharing and social media platforms, add text, images, music, and more. Whether you need to edit a video for business or personal use, VEED is the best tool you can ...
Make it consistent. Each frame of your presentation should look like it belongs there. Try to keep a consistent theme throughout each video clip or slide. Audio and ambience should remain similar along the way, as should the video's coloring, branding, and messaging. Get started.
On the PowerPoint window, in the left sidebar, click the slide in which you want to add a video. At the top of the PowerPoint window, click the "Insert" tab. In the "Insert" tab, under the "Media" section (which is to the extreme right side of the interface), click "Video." You'll now see an "Insert Video From" menu.
For individuals: $7-19 per month. For businesses: $15-29 per month. Prezi is a web-based tool for creating presentations, videos, and infographics that are suitable for business and educational settings. The tool offers a wealth of image and icon assets, as well as templates to get you started on your slide deck.
When in doubt, adhere to the principle of simplicity, and aim for a clean and uncluttered layout with plenty of white space around text and images. Think phrases and bullets, not sentences. As an ...
Start with an executive summary. Begin the slide deck with a tight executive summary that follows a three-act structure. First, start with stating the current realities. Second, clearly state the problem or opportunity your idea addresses and its potential impact.
Open the template presentation you created in the steps above. On the menu bar, click File > Make a copy > Entire presentation. On the panel that opens, type in a name for the new presentation you ...
6 Steps to Create Webinar Presentation Slides. These webinar presentation tips will benefit both presenters and the audience by ensuring that webinars are informative, engaging, and impactful. 1. Find a Relevant Topic to Cover. "The secret of getting ahead is getting started.". The first step is to choose a topic that is relevant and ...
In PowerPoint, you can create a presentation from scratch, or from a theme with built-in graphics, fonts, and placeholders for your text, images, and content...
Arrange videos and photos for the slideshow. Place the videos or pictures in the order you want them on the timeline. Then, apply transitions and add music to the video slideshow using the video effects and audio library in the editor. Export and share. When you're finished editing, click "Export project" in the upper right-hand corner.
Video Presentations. A presentation-type instructional video features a subject matter expert explaining concepts, often through a presentation program like PowerPoint. ... It's also not hard to make these videos; you need a slideshow, a voice to explain things, and maybe a camera to record the person talking. Instructional Video Mistakes to Avoid.
Your next presentation could be a video instead of a slideshow, complete with AI voiceovers Summary Google Vids offers an AI-based solution for easy video creation, making it accessible for ...