
April 11, 2023
Share this page


Remapping 101: How to change your keyboard key output
Your PC or laptop keyboard doesn’t have to be one-size-fits-all. If you’re not a fan of certain key placements or find that you aren’t using some of your keys, you can rearrange the functions of your keys however you like. Most keyboards are laid out in the same way, but Windows 11 features allow you to make the necessary adjustments to help you type more comfortably. Learn how you can remap your keys and change keyboard outputs on Windows 11 .
Why remap your keyboard?
If you’re used to a standard keyboard layout, you may not initially see the value in remapping your keys. Here are some common reasons for changing keyboard outputs:
- Typing on a foreign keyboard. If you want to type in any language besides English, it can be difficult to type seamlessly on an English-only keyboard. By switching your key functions, you can cater to different language settings.
- Using your keyboard for PC gaming. PC gamers rely on their keyboards to play their favorite games. Remapping your keys to best suit your gaming needs can improve performance and make your frequently used keys more accessible.
- Repurposing underused keys. Not everyone uses their keys the same way. If it seems like a key that you don’t often use is taking up valuable space on your keyboard, you can reassign its function to find a good use for it and increase productivity.
Popular QWERTY alternatives
You may notice that top row of letters on your keyboard, going left to right, spells QWERTY. However, there are other popular keyboard layouts that can help you type faster or more comfortably. Learn more about each layout and how they might benefit your typing:
- AZERTY. The AZERTY layout simply moves the output of the Q , W , and M keys. It is most often used in France and other surrounding countries.
- Dvorak. The Dvorak layout puts the most used keys in the middle row, which decreases finger movement. This typing method can help reduce strain in your fingers, which makes for a more ergonomic experience.
- Colemak. The Colemak layout offers a slight improvement on the Dvorak layout. It also places the commonly used keys in the middle row, but it keeps the useable features of the QWERTY layout intact.
How to remap your keys on Windows 11
The easiest way to change your keyboard functions on Windows 11 is to use the Keyboard Manager utility. The Keyboard Manager is one of many utilities available in Microsoft PowerToys , which are a collection of productivity tools that allow users to customize their Windows experience.
How does Keyboard Manager work?
Once you’ve downloaded PowerToys onto your device, select Keyboard Manager and toggle Enable Keyboard Manager. You’ll find separate sections for remapping keys and remapping shortcuts, each of which can be adjusted to your liking. Some keys and shortcuts cannot be remapped in Keyboard Manager, and these limitations are highlighted on the platform. PowerToys must be running for the key mapping to work, so make sure you don’t close out of the program after making your selections.
What other keyboard mapping functions are available on Windows?
If you are still running Windows 10 on your PC, you can download Microsoft Keyboard Layout Creator to create your own keyboard layouts. Microsoft keyboard users can also try the Mouse and Keyboard Center app to get the most out of the customization features within the accessories. Other keyboard mapping options can be downloaded on Microsoft Apps .
By learning how to remap your keys, you can break the mold and take control of how you use your keyboard. Shop for Microsoft Keyboards to find the perfect keyboard to test your remapped keys on Windows 11 .
Products featured in this article

More articles

How to check your GPU and why it matters
Get to know the purpose and value of your computer’s GPU.

How to use Windows Remote Desktop to access a PC
Learn how Windows Remote Desktop allows you to access your PC from anywhere.

How to find and enjoy your computer's accessibility settings
Find the features to help with specific vision, hearing, or mobility needs.
How-To Geek
How to remap any key or shortcut on windows 10.
Swapping the keycaps between keys doesn't count as "Remapping."
Quick Links
Remap keys with powertoys, how to remove the new key mapping, how to disable or remap keys using sharpkeys [alternative method], use your keyboard's software to remap keys, key takeaways.
Install Microsoft PowerToys from GitHub, launch it, and then navigate to Keyboard Manager > Remap a Key. Click the plus button, and then select the key you want to rebind from the list. You can click the trash can icon to remove a remapping at any time.
Would you like to use a different keyboard key to perform a certain task in Windows 10? Thanks to PowerToys , it's easy to remap any key to another key or even a shortcut combination on your keyboard. Here's how to set it up.
Microsoft makes it easy to remap keys with PowerToys , a free utility available for download online. Using PowerToys, you can make any key on your keyboard act like any other key — and even remap shortcuts.
If you don't already have PowerToys installed, download it for free from Github. After you install it, launch PowerToys Settings, then click "Keyboard Manager" in the sidebar. In the "Keyboard Manager" settings, click "Remap a Key."
When the "Remap Keyboard" window pops up, click the plus button ("+") to add a new key mapping.
After that, you'll need to define which key you want to remap (in the "Key:" column), and what key or shortcut you want it to perform (in the "Mapped To:" column).
First, select the key you'll be remapping in the "To:" column by either clicking the "Type" button and pressing the key on your keyboard, or by selecting it from the list in the drop-down menu. For example, we'll pick Scroll Lock here, since it often sits unused.
Next, select the key or shortcut you want to perform in the "Mapped To" column. For a single key, you can either choose it from the drop-down menu or click the "Type" button, then press it on your keyboard.
If you want to use a shortcut key combination, press the "Type" button, then press the combination on your keyboard. For example, here we've typed "Ctrl+C" for the standard Windows "Copy" shortcut.
After you have both "Key:" and "Mapped To:" columns defined, click "OK."
If you see a warning that one key will be left unassigned, click "Continue Anyway." This means that you won't be able to access the original function of the key that you just remapped.
(In our example, there will be no way to use Scroll Lock unless you remap another key to perform the original Scroll Lock function).
Next, you'll see the resulting mapping listed in the "Keyboard Manager" settings. That means your custom mapping has been saved and is now active.
If you want to add more mappings, click "Remap a key" again. When you're done, close PowerToys Settings completely, and your remapped key (or keys) will remain in effect. Use them as much as you'd like. You can always go back and adjust your mappings later if necessary.
Later on, if you want to remove the custom mapping you made, relaunch Power Toys Settings, then click "Keyboard Manager" and "Remap a key" again. In the list of mappings, click the trash can icon beside the mapping you'd like to delete.
The mapping will be removed. After that, click "OK" to close the window. Then you can either exit PowerToys completely or create a new mapping using the guide above. Have fun!
The major problem with PowerToys is that the remappings only work if the PowerToys application is running, so they won't work on the login screen. There also seem to be issues with the remappings not working properly in games and some other places. The solution? Use the old-school Windows Registry key remapping technique... but do it the easy way, using the open-source SharpKeys application.
SharpKeys won't let you remap shortcut key combinations, so you can't remap ALT+C to CTRL+C, for example, but you can do things like remap or disable the Caps Lock key on any version of Windows .
Install the application from their Github project page or from the Microsoft Store , open it up (clicking through the annoying Windows SmartScreen warnings), and then click the Add button to open up the Add New Key Mapping dialog.
We've been using SharpKeys literally since Windows Vista was around. That's a long time.
Many modern keyboards also have special software that allows you to remap keys as well. Since all of their software is different we can't definitively say "Here is how you do it." Generally speaking, you'll be looking for an option like "Customize," "Keybind," "Bind," or "Remap."
Here is a quick list to some of the specialized software available for different keyboard brands, though keep in mind that this is not an exhaustive list.
- Logitech G Hub
- Corsair iCUE
- SteelSeries Engine
- Razer Synapse
- HyperX NGENUITY
- Roccat Swarm
Your keyboard software probably lets you do other things besides modify keybinds. For example, if your keyboard has extra keys, or RGB, the manufacturer software is typically required to utilize them.
- Great Tech Gifts for Any Occasion
- The Best Gadgets for The Beach or Pool
How to Remap a Keyboard in Windows 10
Use Microsoft PowerToys to reassign keys and change keyboard shortcuts
:max_bytes(150000):strip_icc():format(webp)/jonfishersquare-93eb80e77a004035887f56816d3623c5.jpg "keyboard assignment windows 10")
- Wichita Technical Institute
- The Ultimate Guide to Keyboard Shortcuts
- The Ultimate Guide to Keyboards
- The Ultimate Guide to Computer Mice
- The Quick Guide to Webcams
- Printers & Scanners
- Raspberry Pi
What to Know
- Download Microsoft Power Toys, open it, and then go to Keyboard Manager > Remap a Key or Remap a Shortcut .
- To reset keys and shortcuts to the default, select the Trashcan icon beside the entry.
- If you have an external keyboard and mouse, use the Windows Mouse and Keyboard Center tool to customize both.
This article explains how to remap a keyboard in Windows 10. Instructions apply to external keyboards and the built-in keyboards of Windows-based laptops.
How to Change a Keyboard Layout in Windows 10
The easiest way to customize your keyboard is by using PowerToys, a free program made by Microsoft. It allows you to reassign keys and change your keyboard shortcuts using a simple interface. PowerToys also enables you to personalize the layout and appearance of the operating system.
Can You Reassign Keyboard Keys?
Follow these steps to reassign keys in Windows 10:
Download Microsoft Power Toys and install it on your PC.
Open Power Toys and select Keyboard Manager in the left sidebar.
Select Remap a Key .
If the keyboard options are grayed out, select the Enable Keyboard Manager switch.
Select the Plus ( + ) under Key .
Under Key , choose the key you want to reassign from the drop-down menu, or select Type and enter a key.
Under Mapped To , choose the new key. If you want to switch two keys, repeat steps 5 and 6 to create another entry, reversing the keys.
To reset the key to its default, return to this screen and select the Trashcan icon beside the entry.
Select OK .
Select Continue Anyway , if you see a notice telling you you'll no longer be able to use the keys for their original purpose.
How to Remap Windows 10 Shortcuts
You can change keyboard shortcuts for specific apps or your whole system:
Open Microsoft Power Toys and select Keyboard Manager in the left sidebar, then select Remap a Shortcut .
Select the Plus ( + ) under Shortcut .
Choose the key you want to reassign from the drop-down menu under Shortcut or select Type and enter a keyboard shortcut.
Under Mapped To , choose the new key or shortcut.
Under Target Apps , enter the name of an app (if you leave this section blank, the change is applied system-wide).
How to Reset Keyboard Mapping
To set your key reassignments back to the defaults, go to Keyboard Manager in PowerToys, select Remap a shortcut , and then select the Trashcan icon beside the entry you want to delete.
How Can I Customize My Keyboard?
PowerToys lets you reassign keys and shortcuts, but some keyboards come with customization software that gives you even more control over how your device works. For example, you could create multi-key macros and insert blocks of text with a single keystroke. You can customize both with the Windows Mouse and Keyboard Center tool if you have an external keyboard and mouse.
If you need to reassign a key because it isn't working, you can enable the Windows 10 on-screen keyboard to access all keys.
Remapping a keyboard on a Mac works differently than on a Windows PC. While you can't wholly remap the keyboard, you can set up custom shortcuts. Go to the Apple menu > System Preferences > Keyboard and click the Shortcuts tab. Select a shortcut and highlight its existing key combination. Then, type in your new key combination, which will replace the previous shortcut.
If you want a hotkey to access a different shortcut or command, download the Windows Mouse and Keyboard Center and connect the keyboard you wish to configure. Open the Microsoft Mouse and Keyboard Center and choose the key you'd like to reassign, then select a command from the command list to become the key's new function.
You don't need to remap a Windows PC keyboard for use on a Mac, but you'll need to be aware of the Windows keyboard equivalents for Mac's special keys . For example, the Windows key is equivalent to the Mac's Command key. Also, key locations are different on a Windows keyboard. If you want to reassign a Windows keyboard key's location for use with your Mac so it's easier to find, go to the Apple menu > System Preferences > Keyboard . Select Modifier Keys , then switch the keys' functions to your liking.
Get the Latest Tech News Delivered Every Day
- The Best Windows Keyboard Shortcuts in 2024
- How to Unlock a Keyboard That's Locked
- How to Turn off Sticky Keys on Windows
- What Is Ctrl+C Used For?
- How to Remap a Keyboard on a Mac
- How to Switch the Mouse Buttons in Windows 10
- How to Use a Mac Magic Keyboard on a Windows PC
- The Best Ergonomic Keyboards of 2024
- Windows Keyboard Equivalents for the Mac's Special Keys
- How to Create or Reassign Keyboard Shortcuts in Microsoft Office
- How to Disable the Function Key on a Dell Laptop
- How to Screenshot on a Logitech Keyboard
- The 30 Best Gmail Keyboard Shortcuts for 2024
- How to Turn Off Keyboard Sounds in Windows 10
- What Is a Keyboard?
- How to Disable a Laptop Keyboard in Windows 11
- All about AI
- Google Bard
- Inflection AI Pi Chatbot
- Anthropic Claude
- Generative AI
- AI Image Generation
- AI Regulation
- AI Research
- Large Language Models (LLM)
- Surface Pro
- Surface Laptop
- Surface Book
- Surface Duo
- Surface Neo
- Surface Studio
- Surface Hub
- Surface Pen
- Surface Headphones
- Surface Earbuds
- About WinBuzzer
- Follow Us: PUSH, Feeds, Social
- Write for Us
- Cookie Policy and Privacy Policy
- Terms of Service
How to Reassign Keyboard Keys on Windows 11 or Windows 10

Table of Contents:
Most of us are used to the classic qwerty or azerty layout on our keyboards, but that doesn’t mean they’re perfect. Default keyboard layouts are meant to apply to a broad range of people, not cater to individual needs. As a result, you may be wondering how to remap keys in Windows 11 and Windows 10 to suit your preferences.
PowerToys: A Great Key Remapper From Microsoft
For this purpose, we’ll be using a Microsoft-published tool called PowerToys. PowerToys is an application-suite designed to help you get more out of your PC, and that includes the ability to remap your keyboard. If you don’t have PowerToys already, you can download it from the official PowerToys GitHub page. Follow the installer’s instructions and you’ll be good to go.
How to Remap your Keyboard in Windows 11 with PowerToys
PowerToys is a suite of utilities designed to allow power users to streamline their Windows experience for greater productivity. Among its various tools, the Keyboard Manager utility stands out for its ability to remap keys and shortcuts easily. Opting for PowerToys means benefiting from a Microsoft-supported tool that’s not only reliable but also regularly updated with security enhancements and new features.
The Best Freeware Tools to Move and Remap Keys
If you’d prefer not to install a general-purpose tool like PowerToys, there are several third-party tools to choose from. Popular choices include:
SharpKeys is a simple and easy-to-use tool that has been around for a while. Its interface is nothing fancy but is perhaps more efficient because of it. Once you’re done making the changes, SharpKeys lets you easily write them to the registry and then reboot to get started.
Key Remapper
Key Remapper is one of the more popular and well-reviewed key remappers for Windows 10. Though you do have to pay for its full version, you can grab a restricted version for free here . The best thing about Key Remapper is its ability to additionally remap mouse buttons. You can therefore add keyboard keys to your mouse for very easy access.
KeyTweak is a good alternative if you’re looking for a key remapper with a more visual interface. Rather than lists, it displays a virtual keyboard and allows you to click each button on it to remap them. You can also save different sets of mappings to separate profiles so that you can easily switch between them.
Key Mapper stands out for its flexible interface. Everything works through a drag and drop interface that allows you easily reassign, disable, and activate keys. However, you can also use methods such as double-clicking keys on the keyboard or manually creating a new mapping. Importantly for international or dvorak users, Key Mapper also supports several alternate keyboard layouts.
RemapKeyboard
If you’re looking for something small and lightweight, RemapKeyboard does the job. It comes in at just 79KB and consists of simple, three-column list interface that is very easy to navigate. It requires a registry entry to change the keys, so you’ll need to log in and out for the changes to take effect.
FAQ – Frequently Asked Questions About Key Remapping with PowerToys
Can i remap keyboard shortcuts in addition to individual keys using powertoys.
Absolutely. The Keyboard Manager component of PowerToys allows you not only to remap single keys but also to customize keyboard shortcuts. This includes creating new shortcuts or altering existing ones to better suit your workflow and productivity needs. It’s a versatile feature that extends your customization capabilities well beyond simple key remapping.
Is it possible to remap mouse buttons using PowerToys?
Currently, PowerToys does not support the remapping of mouse buttons directly. For users looking to customize their mouse button actions, alternative third-party software will be necessary. There are numerous tools available that offer mouse button customization, including the ability to set up complex actions and gestures.
Can I export my PowerToys keyboard remappings to another computer?
While PowerToys does not offer a built-in feature for exporting and importing keyboard remapping profiles directly through the GUI, you can manually transfer the necessary configuration files. These files are typically located in the PowerToys settings folder within your user profile directory. Copying these to the corresponding location on another computer with PowerToys installed will replicate your key remapping setup.
How do alternative key remapping tools compare to PowerToys in terms of features?
Alternative key remapping tools vary widely in their approach and features. For instance, SharpKeys offers a straightforward, no-frills interface for directly writing remaps to the Windows registry, making it less flexible but very simple to use. Key Remapper , on the other hand, includes the ability to remap both keyboard keys and mouse buttons, providing a wider range of customization than PowerToys’ current keyboard-only focus. Other tools might offer unique user interfaces, such as drag-and-drop mapping, or support for creating conditional remappings based on the application in focus.
Can I use PowerToys to remap keys on external keyboards?
Yes, PowerToys supports key remapping for both built-in laptop keyboards and external keyboards. This means that any remapping you apply through PowerToys will affect the selected keys regardless of whether they’re on an internal or USB/Bluetooth-connected external keyboard. It’s important to note, however, that remappings are global and not device-specific; the same remappings apply to all keyboards connected to the system.
Does remapping keys with PowerToys affect performance or security?
Key remapping with PowerToys is designed to be both secure and efficient, having a negligible impact on system performance and no known security vulnerabilities as long as you download PowerToys from the official Microsoft GitHub repository. Microsoft actively develops and supports PowerToys, ensuring it adheres to modern security standards.
How can I contribute to the development of PowerToys or suggest new key remapping features?
Microsoft welcomes community contributions to PowerToys. If you’re interested in suggesting new features, reporting bugs, or even contributing code, the best place to start is the PowerToys GitHub repository . There, you can open an issue to suggest a new feature or report a problem, or you can fork the repository to work on your own code improvements. The project’s README and contributing guidelines provide a wealth of information on how to get started.
Can I set key remappings in PowerToys to be application-specific?
As of the current version, PowerToys does not support the ability to create application-specific key remappings. All key and shortcut remappings applied via the Keyboard Manager are global, affecting all applications. For specialized remapping needs—including application-specific configurations—users may need to look into more advanced scripting or software solutions.
Is PowerToys compatible with Windows versions older than Windows 10?
PowerToys is specifically designed for Windows 10 and later, leveraging modern Windows features and APIs for its functionality. As such, it is not compatible with or supported on older versions of Windows, such as Windows 8.1 or Windows 7. Users on these older platforms would need to explore alternative tools or upgrade their operating system to use PowerToys.
How does PowerToys manage remapping of special keys like function or media controls?
PowerToys’ Keyboard Manager supports remapping a wide array of keys, including function keys and many special keys like media controls. This allows users to customize their keyboards extensively, tailoring functionality like volume control or track skipping to keys of their choosing. Keep in mind that while most keys are remappable, there may be some special keys or hardware-specific keys that cannot be remapped due to their direct handling by the system or hardware-level firmware.
What steps should I take if I encounter a conflict during key remapping in PowerToys?
When you encounter a conflict during key remapping with PowerToys—such as overlapping shortcuts or remapped keys affecting crucial system functions—PowerToys will alert you through its interface. You can opt to proceed with the remapping, knowing the conflict, or revise your remappings to avoid the issue. For optimal results, it’s advisable to carefully plan your remappings to minimize conflicts, particularly for commonly used shortcuts and keys.
Are there communities or forums where I can share or learn about PowerToys remapping setups?
Yes, there are several communities and forums where PowerToys users share tips, remapping setups, and troubleshoot issues together. The PowerToys GitHub repository is a central hub for technical discussions and feature requests. Additionally, forums like Reddit’s r/PowerToys and Microsoft’s own community forums serve as platforms for broader discussions, user tips, and shared configurations.
Do I need administrative privileges to use PowerToys for key remapping?
Running PowerToys and accessing its key remapping feature requires administrative privileges primarily during installation or when updating PowerToys. This ensures that PowerToys can interact securely with system-level settings and apply remappings effectively. Once installed, key remapping doesn’t require additional permissions for daily use.
Will my PowerToys key remappings persist through system reboots?
Yes, any key remappings or shortcut customizations you apply using PowerToys’ Keyboard Manager are permanent changes that persist through system reboots. This ensures that your custom keyboard configurations remain consistent across all your computing sessions, eliminating the need to reapply settings after a reboot.
Can I revert to the original key settings easily in PowerToys if I change my mind?
Reverting to the original key settings in PowerToys is straightforward. Within the Keyboard Manager, you can remove individual key mappings or reset all custom remappings to default with just a few clicks. This flexibility allows you to experiment with different configurations and easily undo changes if they don’t meet your needs.
Extra: How to Disable the Windows Key in Windows 11

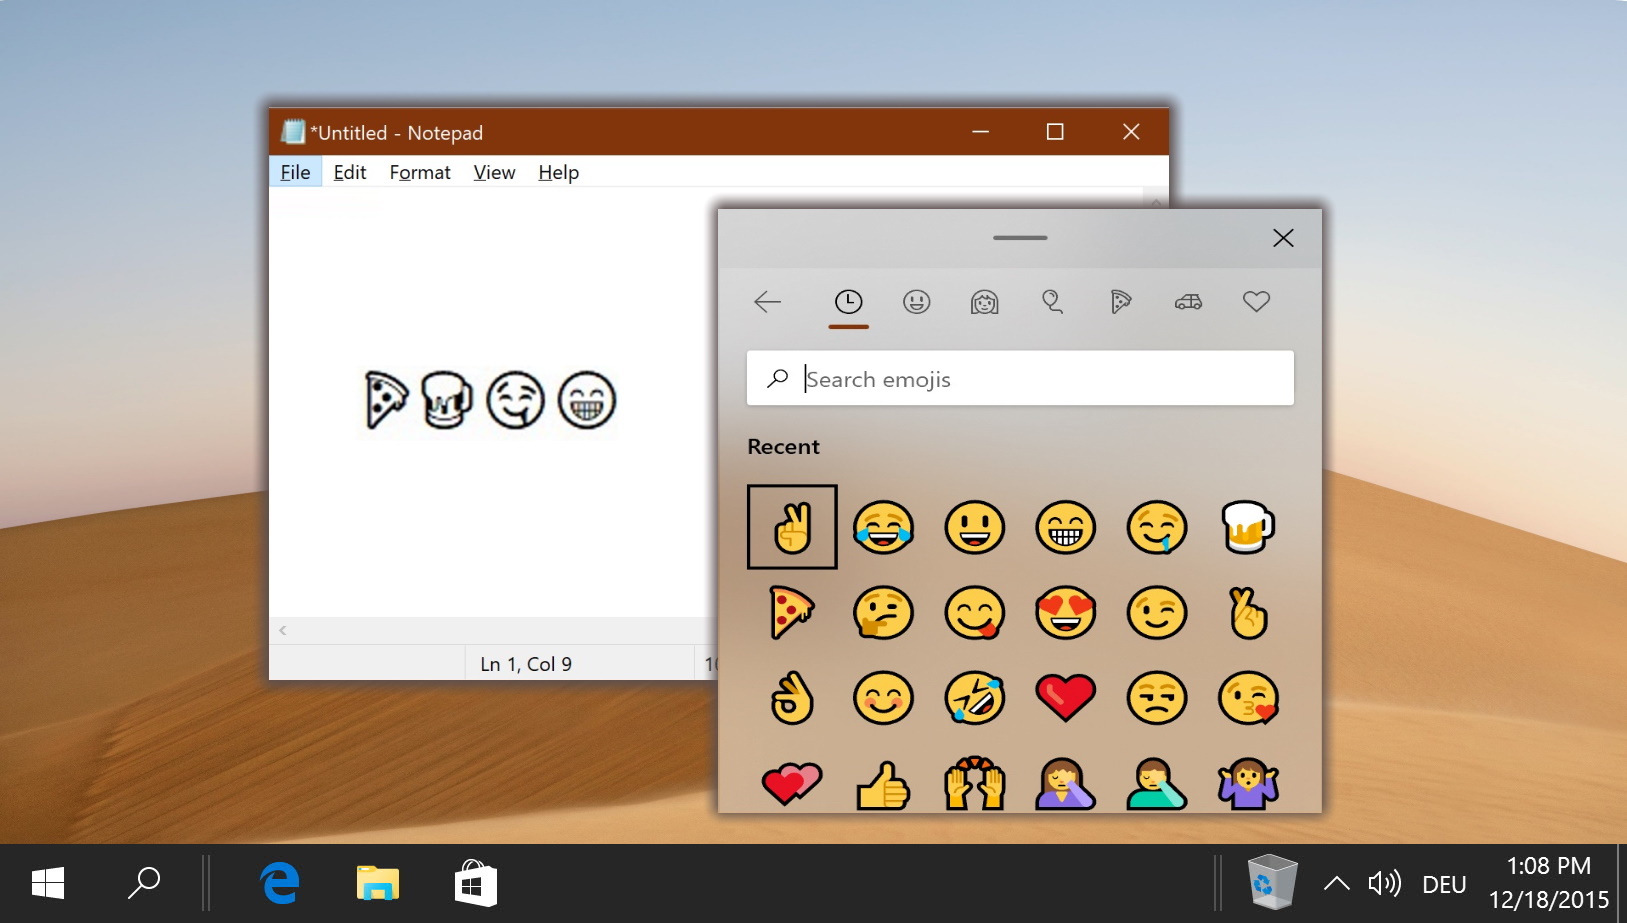
Related: How to Make Emoji, Kamoji, and GIFs on Your Keyboard
Related: How to Enable or Disable the Touchpad on Windows 11

- change keyboard bindings
- Desktop Operating Systems
- how to change keyboard bindings
- how to change keyboard keys
- Key remapper
- Microsoft Windows
- Operating Systems
- remap keyboard
Recent News
New NSA Cybersecurity Information Sheet Targets AI System Security

Brave Search Integrates AI to Enhance Query Responses Globally
Subscribe to WinBuzzer on Google News

- Dragon’s Dogma 2
- Genshin Impact
- Honkai Star Rail
- Lego Fortnite
- Stardew Valley
- NYT Strands
- NYT Connections
- Apple Watch
- Crunchyroll
- Prime Video
- Jujutsu Kaisen
- Demon Slayer
- Chainsaw Man
- Solo Leveling
- Beebom Gadgets
How to Remap Keyboard in Windows 10, 8, 7, and Vista
Remap Keyboard in Windows 10 Using Third Party Tools
Why the need of remapping windows keyboard.
- If you break any of the keys on the keyboard or it stops working on its on, remapping your Windows 10 keys is a good option.
- If you work interchangeably on Windows and Mac and want to use a Windows keyboard on Mac . I have found that remapping left Alt button to Ctrl helps a lot.
- If you use your PC primarily for gaming, than remapping some keys can help you improve your gameplay.
- If you work a job where you have to use one key a lot, remapping it to a key which is easily reachable can improve your workflow.
So, if any of these reasons make sense to you, here is how you can remap keyboard on your Windows 10, 8,7, and Windows machine.
Remap Keys on Windows 10 with SharpKeys
- On the main screen of SharpKeys, click on “Add.”

- This will open a key mapping window. Here, from the left pane, select the key that you want should perform some other action . And from the right pane, select the key whose function you want it to perform . You can also click on “Type Key” available at the bottom of both the panes, and then tap your desired key to make that selection. Once you’ve made your selection, click on “OK” to continue. On my computer, I wanted to turn off the Scroll Lock, so I selected “Special: Scroll Lock” from the left pane and “Turn Key Off” from the right.

- When you come back on the main screen of the tool, you should now see the entry of the remapping that you want to do. To finalize this, click on “Write to Registry.”

Reassign Keyboard Keys in Windows 10 Using Other Tools
1. keytweak.
KeyTweak is a tool which offers multiple ways – three, to be precise – to remap a key. The first is using the virtual keyboard. This method allows you to choose a key that you want to map, and then select the key, from a drop-down menu, to which you want to map it. The second way, the Half Teach Mode, works very similarly. The third (and the last) way is the Full Teach Mode. This allows you to press both the from and to mapping keys. Using this tool can get a bit of confusing as this uses scan-codes instead of the usual characters.

2. Microsoft Keyboard Layout Creator

3. AutoHotkey
AutoHotkey takes a different approach for remapping the keys. Instead of the standard registry tweaking, it allows you to create scripts that you can run . A major advantage that you get with this tool is the ability to export the scripts as executable files. Though this does not have an interface as such, the steps for creating and executing scripts can easily be found in the tutorial of the tool. This tool brings more features and is really powerful. Not only you can remap keyboard keys but you can also create key binds, create keyboard executable automation, and more . Note that all these pro features also mean that you will have to invest time in learning this app. If you just want to remap your Windows keyboard, the above tools will be more than enough.

4. Key Remapper

Remap Keys on Windows 10 with PowerToys

Install: ( Free )
Frequently Asked Questions
How do you fix keyboard typing wrong characters, why is my laptop not typing, how do i change my laptop keyboard back to normal, what are keyboard hotkeys, how do you fix keys on a laptop keyboard.
You’ll have to replace the laptop keyboard or remap the non-functional keys with functional ones using one of the apps like SharpKeys, KeyTweak, or PowerToys.
What is key mapping?
How do i unlock my keyboard on windows 10, why are my keyboard buttons messed up, how do you check if all keyboard keys are working, remap keyboard in windows 10 easily with these tools.

Team Beebom
Beebom provides useful digital tips and resources on software, apps and gadgets you can’t live without. Our aim is to become your favorite digital resources destination on the web.
Thanks, works like a charm.
tried keytweak and it worked for me
Programmable keyboard like Corsair. Take it with you.
I think it’s better to go with standard one: https://support.microsoft.com/en-us/surface/mouse-and-keyboard-center-download-f5b10905-7887-eedb-2f1c-d0737a36a3b2
Works with microsoft products only
Thanks will try. I spilled beer over my keyboard, cleaned it, almost all keys work except k and p for some reason. So i will switch keys with ; or [
Another reason to need this: my Lenovo Yoga 510 has the right-hand shift key *outside* the up arrow, meaning I keep hitting UP and finding I’m typing in the middle of the line above, when I meant to capitalise a word. I might eventually get used to this but looked for a way of remapping instead – a new skill for me, delighted to find it can be done. Off to try SharpKeys now, and if it’s easy as it sounds, I can see myself customising my keyboard in lots of ways… Having a right-hand Function key instead of the AltGr that I almost never use, for example… yabbadabbadoo, fun fun fun.
Thx for add end of the software, i really like that software :3 (i am not friend with that person, i am a person download this software for osu)
ANOTHER REASON TO REMAP: If you have a weak right hand pinky like me, you can remap the Shift key to the never used (by me anyway) but thumb-pressable right ALT key (just to the right of the spacebar).
I want to be able to press the “star” key and have it print my name. I could do this in windows 7.
AutoHotKey can do that. See the description in the article above.
Todas o no servían o era demasiado complicadas Excepto por la 4. Key Remapper
Muchas gracias
Do any of these solutions let you quickly switch between mappings? A *lot* of laptop keyboards nowadays are coming without the embedded numeric keypad, and it’s driving me nuts – I don’t want to have to carry a separate keypad that is easily broken or lost. The ability to quickly switch between normal and custom with a quick keypress would be invaluable.
I have a laptop PC with a US key layout. Which is mostly OK, except that I have the machine set to UK, and I also sometimes use a separate UK keyboard. If I remap the keys so that they do what they say on the keycaps, it will be wrong when I plug in the external keyboard.
Is there a way to have a different keyboard map depending on whether an external keyboard is attached or not?
Willing to use AutoHotKey if it’s clever enough.
thnx a lot realy helped me <3
Add new comment

Change your keyboard layout
Add a language.
Swipe in from the right edge of the screen, tap Settings , and then tap Change PC settings . (If you're using a mouse, point to the lower-right corner of the screen, move the mouse pointer up, click Settings , and then click Change PC settings .)
Tap or click Time and language , and then tap or click Region and language , and then tap or click Add a language .
Browse for the language you want, and then tap or click it to add it to your language list.
Download and install a language pack
Tap or click Time and language , and then tap or click Region and language .
If the language says Language pack available , tap or click Options .
Note: If you don't see Language pack available , you might be able to download the language pack at the Download Center.
Tap or click Download . The download process might take a while, depending on your PC and the size of the language pack.
Set a language as your primary language
Tap or click the language that you want to see Windows in, and then tap or click Set as primary . The Will be display language after next sign-in message will appear under the language.
Tap or click Set as primary to move the language to the top of the list. If the language can become your Windows display language, you'll see Will be display language after next sign-in appear under the language.
Sign out of Windows, and then sign back in.
Warning: When you change your primary language, your keyboard layout might also change. When signing back in to Windows, make sure you're using the right keyboard layout for entering your password. Otherwise, you might not be able to sign in. You can change your keyboard layout on the sign-in screen by tapping or clicking the language abbreviation button in the lower-right corner.
Change the keyboard layout or other method you use to type
Whenever you add a language, a keyboard layout or input method is added so you can enter text in the language. If you want to use a different keyboard layout or input method, you can add a new one or switch between the ones you have.
Add a keyboard layout or input method for a language
Tap or click the language you want to add a keyboard to, and then tap or click Options .
Tap or click Add a keyboard , browse the input method list for the one you want to use, and then tap or click it.
Switch between keyboard layouts or input methods
You can enter text with different keyboard layouts or input methods by switching between them. There are a few different ways to switch between keyboard layouts or input methods:
On a hardware keyboard, press and hold the Windows logo key , and then press the Spacebar to cycle through your input methods.
If you have a touchscreen, you can switch your touch keyboard layout by tapping or clicking the keyboard icon, and then tapping or clicking the keyboard layout you want to switch to.

Language abbreviation button in the touch keyboard
On the desktop taskbar, tap or click the language abbreviation in the notification area at the far right of the taskbar, and then tap or click the keyboard layout or input method you want to switch to.

Language abbreviation button in the desktop taskbar
Change the default keyboard layout or input method
Your default keyboard layout or input method is the one that’s automatically used with the language you see Windows in (for example, the QWERTY keyboard for American English). If you want to keep your Windows language the same but use a different keyboard automatically, follow these steps:
Open Control Panel by swiping in from the right edge of the screen, tapping Search (or if you're using a mouse, pointing to the upper-right corner of the screen, moving the mouse pointer down, and then clicking Search ), entering Control Panel in the search box, and then tapping or clicking Control Panel .
Enter Add a language in the search box, and then tap or click Add a language .
Tap or click Advanced settings .
Under Override for default input method , choose the keyboard layout or input method you'd like to be your new default, and then tap or click Save .
Note: If you don't see the keyboard layout or input method you want, then you haven't added it to your input method list. For instructions, see the Add a keyboard layout or input method for a language section.
Install or change a display language
You can change the language Windows uses to display text in wizards, dialog boxes, menus, and other items in the user interface. Some display languages are installed by default, while others require you to install additional language files.
To install a display language
To install a Language Interface Pack (LIP), double-click the file to open the setup program. To install a language pack, follow these steps:
Open Region and Language by clicking the Start button , clicking Control Panel , clicking Clock, Language , and Region , and then clicking Region and Language .
Click the Keyboards and Languages tab.

Note: The Display language section will be visible only if you have already installed a Language Interface Pack or if your edition of Windows supports a language pack. Language packs are available only in Windows 7 Ultimate and Windows 7 Enterprise.
To change your display language
When you change the display language, the text in menus and dialog boxes for some programs might not be in the language that you want. This happens because the program might not support Unicode.
Open Region and Language by clicking the Start button , clicking Control Panel , clicking Clock , Language , and Region , and then clicking Region and Language .
Under Display language , choose a language from the list, and then click OK .
Note: If you don't see the list of display languages, you need to install additional language files.
To change the keyboard layout

Click the Keyboard layout button, and then select a keyboard layout.
Note: If you don't see the Language bar, right-click the taskbar, point to Toolbars , and then click Language bar .
To change the keyboard layout on the Welcome screen

Note: If you don't see the Keyboard layout button, you might not have more than one input language, or your regional and language settings might not be applied to reserved accounts.

Need more help?
Want more options.
Explore subscription benefits, browse training courses, learn how to secure your device, and more.

Microsoft 365 subscription benefits

Microsoft 365 training

Microsoft security

Accessibility center
Communities help you ask and answer questions, give feedback, and hear from experts with rich knowledge.

Ask the Microsoft Community

Microsoft Tech Community

Windows Insiders
Microsoft 365 Insiders
Find solutions to common problems or get help from a support agent.

Online support
Was this information helpful?
Thank you for your feedback.
'ZDNET Recommends': What exactly does it mean?
ZDNET's recommendations are based on many hours of testing, research, and comparison shopping. We gather data from the best available sources, including vendor and retailer listings as well as other relevant and independent reviews sites. And we pore over customer reviews to find out what matters to real people who already own and use the products and services we’re assessing.
When you click through from our site to a retailer and buy a product or service, we may earn affiliate commissions. This helps support our work, but does not affect what we cover or how, and it does not affect the price you pay. Neither ZDNET nor the author are compensated for these independent reviews. Indeed, we follow strict guidelines that ensure our editorial content is never influenced by advertisers.
ZDNET's editorial team writes on behalf of you, our reader. Our goal is to deliver the most accurate information and the most knowledgeable advice possible in order to help you make smarter buying decisions on tech gear and a wide array of products and services. Our editors thoroughly review and fact-check every article to ensure that our content meets the highest standards. If we have made an error or published misleading information, we will correct or clarify the article. If you see inaccuracies in our content, please report the mistake via this form .
How to remap keys using Keyboard Manager in Microsoft's PowerToys

Windows takes advantage of a variety of keyboard keys and shortcuts to run different actions and commands.
More how-tos
- How to install and configure fail2ban for even more SSH security
- How to share your location with someone in MacOS - and why you'd want to
- How to upgrade Windows Home edition to Pro
- How to order Apple Vision Pro: Tips, tricks, and my secret to a good face scan
Num Lock turns on the number pad. F1 conjures up a Help screen. Ctrl+C copies an item. Windows key+E opens File Explorer.
But you're not stuck with the existing keys or shortcuts. You can modify many of them with the help of a PowerToys tool called Keyboard Manager.
Using Keyboard Manager, you're able to set various commands to use different keys and shortcuts other than their default ones. For example, maybe you want F1 to turn on the number pad or Windows key+C to copy an item.
As long as the key or shortcut follows certain rules and doesn't conflict with keys and shortcuts reserved by Windows, you can redefine it however you'd like. Here's how this works.
Also: Yes, you can still get a free Windows 10 upgrade. Here's how
1. Download the PowerToysSetup.exe file
If you don't yet have PowerToys on your PC, download and install the PowerToysSetup.exe file from the program's GitHub page . PowerToys and its tools work the same in Windows 10 and Windows 11 .
2. Turn on Run at startup
For the changes you make in Keyboard Manager to always be in effect, PowerToys needs to run at startup. To confirm this, open PowerToys, select General , and make sure the switch is turned on for Run at startup . Next, select Keyboard Manager and confirm that its switch is on.
Open Keyboard Manager in PowerToys.
3. Figure out what you can and can't do
Before you try remapping specific keys and shortcuts, you'll want to find out what you can and can't do. Click the link for Learn more about remapping limitations to see which keys can't be remapped.
For example, you can't remap Win+L (locks Windows) or Ctrl+Alt+Del (gives you access to Task Manager) as those are reserved shortcuts. But you can remap the function keys F1-F12. If you try to redefine a reserved key in Keyboard Manager, you'll get a slap on the wrist to prevent you from proceeding.
4. Remap a key
Click the entry for Remap a key . To choose the physical key you want to remap, click the + button. For example, maybe you want to redefine F12 to open a Help screen. You can select it one of two ways.
Click the dropdown window and scroll through all the choices until you find the one you want.
Alternatively, click the Type button and press the key you wish to redefine. Then click OK to submit it.
Also: How to use free PowerToys FancyZones in Windows and why you should
Choose the physical key for remapping.
Type the physical key for remapping.
5. Select the key to which you want to remap the physical one
Next, select the key to which you want to remap the physical one.
For example, to replace F1 with F12 as the Help command, choose F1 as the mapped-to key. Either click the dropdown menu and select the mapped-to key from the list, or click the Type button and press the key. When you're done, click OK to activate the remapping.
Define the mapped-to key.
6. Check if you receive a notice
Depending on the physical key you chose, you may receive a notice telling you that the keys do not have assignments. Though the message sounds strange, it appears simply to warn you that the physical key will no longer be assigned to its previous command. Click Continue Anyway to confirm the remapping.
Continue Anyway.
7. Open an application or window
Now, open an application or window in which you can try the new key assignment. For example, if you replaced F1 with F12 to display a Help screen, open an app that offers help and press F12.
Try out the remapped key.
8. Click Remap a key
Return to Keyboard Manager and click the entry for Remap a key . Here, you can redefine either key for the remapping you just created, delete the remapping altogether, or click the + button to create another remapping. Instead, though, let's look at how to remap a keyboard shortcut.
Also: How to keep track of your mouse pointer with the PowerToys Mouse utilities
Add another key to remap.
How to remap a shortcut
At the main Keyboard Manager screen, click the entry for Remap a shortcut . Click the dropdown menu to select the physical shortcut or click the Type key to type it. The shortcut must start with a modifier key, meaning Alt, Ctrl, Shift, or Win. After choosing or typing the modifer key, select or type the accompanying key. For example, if you wish to redefine Win+F, choose Win in the first column and F in the second column.
Choose the physical shortcut.
Next, choose the shortcut or key that you wish to remap to the physical shortcut you selected. For example, if you want Win+E to be the mapped-to shortcut, choose Win in the first column and E in the second. You can also select an individual key instead of a shortcut.
Choose the mapped-to shortcut or key.
By default, your new mapping will work across Windows and all applications. But you may want to limit it to just a specific app, such as Microsoft Word or Google Chrome.
To do this, you first need to find the name of the app's executible file. Right-click on the shortcut for the app in the Start menu, go to More , and select Open file location . Right-click on the app's icon in File Explorer and select Properties . The name of the executable file appears in the Target field. Copy and paste or type that filename in the field under Target App. When done, click OK .
Also: How to shrink your images with the PowerToys Image Resizer
Limit the shortcut to a specific application.
If you limited the remapping to a specific app, open that app. Otherwise, go anywhere in Windows. Press the new keystroke you defined to make sure that it triggers the command from the original physical keystroke.
Try out the new shortcut.
Logitech mouse and keyboard users are getting a free AI upgrade
The best ipad pro keyboard cases you can buy, can microsoft cure pc makers of the crapware habit.
- PRO Courses Guides New Tech Help Pro Expert Videos About wikiHow Pro Upgrade Sign In
- EDIT Edit this Article
- EXPLORE Tech Help Pro About Us Random Article Quizzes Request a New Article Community Dashboard This Or That Game Popular Categories Arts and Entertainment Artwork Books Movies Computers and Electronics Computers Phone Skills Technology Hacks Health Men's Health Mental Health Women's Health Relationships Dating Love Relationship Issues Hobbies and Crafts Crafts Drawing Games Education & Communication Communication Skills Personal Development Studying Personal Care and Style Fashion Hair Care Personal Hygiene Youth Personal Care School Stuff Dating All Categories Arts and Entertainment Finance and Business Home and Garden Relationship Quizzes Cars & Other Vehicles Food and Entertaining Personal Care and Style Sports and Fitness Computers and Electronics Health Pets and Animals Travel Education & Communication Hobbies and Crafts Philosophy and Religion Work World Family Life Holidays and Traditions Relationships Youth
- Browse Articles
- Learn Something New
- Quizzes Hot
- This Or That Game New
- Train Your Brain
- Explore More
- Support wikiHow
- About wikiHow
- Log in / Sign up
- Computers and Electronics
- Operating Systems
How to Change the Default Keyboard Settings in Windows 10
Last Updated: January 20, 2023
Changing the Language
Customizing hot keys, expert q&a.
This article was written by Scott St Gelais and by wikiHow staff writer, Darlene Antonelli, MA . Scott St Gelais is an IT Consultant and the Owner of Geeks in Phoenix, Arizona. With over two decades of experience, Scott specializes in computer service and repair, development, computer graphics, and website authoring. Scott received his Technical Associates Degree from High Tech Institute and completed the IT Support Professional Certificate by Google. Geeks in Phoenix is a member of the Microsoft Partner Network and an Intel Technology Provider Gold Partner. This article has been viewed 59,350 times.
It's frustrating and confusing when a key you press doesn't type the same thing on the screen. Luckily, you can easily change that setting so what you press on your keyboard is the same thing that's typed on the screen. This wikiHow article teaches you how to change the default keyboard language and settings in Windows 10.

- Your list of saved keyboards may include different languages, alphabets, or just different layouts for the English keyboard.

- If you don't see the language you want here, click Language preferences in the pop-up, and download the language or layout you want to use.
- To switch between your list of languages, you can press Win + Spacebar . [1] X Trustworthy Source Microsoft Support Technical support and product information from Microsoft. Go to source

- In the "Advanced Key Settings" tab you can change the keyboard shortcuts to alternate between keyboard languages. The default is either Alt + Shift or Win + Shift , but you can change them.
- You can also switch to the "Language Bar" tab and change where the language icon is. By default, your language icon is located in your taskbar. Click Apply if you've made any changes before closing the window.

You Might Also Like

- ↑ https://support.microsoft.com/en-us/windows/manage-the-input-and-display-language-settings-in-windows-12a10cb4-8626-9b77-0ccb-5013e0c7c7a2
About This Article

1. Find the language icon on your computer's taskbar. 2. Click the language icon on the taskbar (it shows your current keyboard layout). 3. Select the language or layout you want to use. Did this summary help you? Yes No
- Send fan mail to authors
Is this article up to date?

Featured Articles

Trending Articles

Watch Articles

- Terms of Use
- Privacy Policy
- Do Not Sell or Share My Info
- Not Selling Info
Keep up with the latest tech with wikiHow's free Tech Help Newsletter
How to Assign Keyboard Shortcuts to Programs in Windows
Want to be snappier and get more done quickly? Set up keyboard shortcuts for your most used programs in Windows 10.
Key Takeaways
- Easily assign keyboard shortcuts to desktop, Start menu, and Taskbar items for improved productivity.
- Use the latest version of Microsoft PowerToys to set up keyboard shortcuts for programs.
- Tweak how and when to deploy keyboard shortcuts by leveraging the strength and depth of PowerToys.
Did you know that you can set a keyboard shortcut for just about any program in Windows? When you want to open a specific program in a hurry, all you need to do is quickly press a few keys and you’re in. Here’s how.
1. How to Assign a Keyboard Shortcut to a Shortcut Link on Your Desktop
One of the best ways to improve your productivity is to navigate using as few clicks and keystrokes as possible. One way to do that is by setting up keyboard shortcuts. If you’re interested, check out our ultimate guide to Windows keyboard shortcuts .
Once you’ve settled on the programs you want to assign a keyboard shortcut to, do the following:
- Right-click on the program shortcut and select Properties .
- Under the Shortcut tab, in the Shortcut key field, simply type the shortcut you want to assign to the program and click the OK button.
Windows shortcuts must take the form:
- Ctrl + Alt + [key]
- Ctrl + Shift + [key]
- Ctrl + Shift + Alt + [key]
Now, when you press the shortcut key combination, the program will be launched.
2. How to Assign a Keyboard Shortcut to a Shortcut Link in the Start Menu
The process is pretty much the same here, with a few extra steps. Here’s how:
- Open the Start menu.
- Find the item to which you want to assign a keyboard shortcut.
- Right-click on the shortcut and select Properties .
- In the Shortcut key field, type in the keyboard shortcut you want to have assigned to the program.
3. How to Set up a Keyboard Shortcut for a Shortcut Link on the Taskbar
Creating a keyboard shortcut for an item on your taskbar is easy. Here’s how to do it:
- Right-click on an item appearing on the Taskbar.
- Add a keyboard shortcut to the Shortcut key field.
4. How to Remove Previously Assigned Keyboard Shortcuts
To remove a keyboard shortcut, navigate to the program shortcut’s properties and delete the entry in the Shortcut key field. This should reset it to None and remove the associated keyboard shortcut.
5. How to Add a Keyboard Shortcut to Literally Any Program in Windows, Using Microsoft PowerToys
There are so many things you can do with PowerToys ; it’s just that powerful a tool. The latest edition of PowerToys—version 0.79—includes the ability to create a keyboard shortcut for just about anything. This makes it much easier to set up keyboard shortcuts in Windows.
To download and install PowerToys , you’ll need to go to the official Microsoft page for the utility and follow a few simple steps.
You can either get it from the Microsoft PowerToys GitHub releases page or the Microsoft Store, and you can also install it using the Windows Package Manager.
Here’s how to set up a keyboard shortcut in Windows using Microsoft PowerToys:
- Once installed, open PowerToys.
- In the left pane, scroll down to Keyboard Manager .
- Make sure the checkbox labeled Enable Keyboard Manager is enabled.
- If you leave the Start in field blank, the shortcut will work throughout the Windows environment. If you select a path here, the shortcut will only work when you are in that environment or program.
- The If running field tells Windows how to handle the command if the program is already open and running. You can set this to one of several options: show the open window; open another instance of the program (if possible); close the program; do nothing; or end the entire program task.
To remove a shortcut set up using PowerToys, simply open the utility, navigate to Keyboard Manager , select Remap a shortcut , and click on the delete button to the right of the specific shortcut you wish to remove.
With Windows keyboard shortcuts set up, your work should be a lot more productive. Microsoft PowerToys can help you achieve this easily, but there’s so much more you can do with this utility for power users , all in one place.

How to change key bindings in Windows 10
Hello Tecnobits! Ready to master your keyboard? Now, change the key assignments in Windows 10 and personalize your experience to the maximum. Let's give technology a go!
1. How can I change the key mappings in Windows 10?
- Open the Windows 10 Start menu and click “Settings.”
- Select “Devices” and then “Keyboard.”
- In the “Special Keyboard Features” section, click “Advanced Keyboard Settings.”
- In the window that opens, click “Shortcut Keys.”
- Select the key to which you want to assign a new function and click on “Change function”.
- Choose the new function you want to assign to the selected key and click “OK”.
- Repeat this process for all keys that you want to assign new functions.
2. What special functions can I assign to keys in Windows 10?
- You can assign special functions such as opening applications, activating system commands, activating shortcuts, among others.
- Some popular features include opening file explorer, opening start menu, activating task manager, and more.
- The possibilities are almost limitless and can be tailored to your specific needs.
3. Is it possible to assign custom key combinations in Windows 10?
- Yes, you can assign custom key bindings in Windows 10.
- To do this, open the Windows 10 Start menu and click “Settings.”
- Select "Devices" and then "Keyboard."
- In the Special Keyboard Features section, click Advanced Keyboard Settings.
- In the window that opens, click on “Keyboards” and select the combination you want to modify.
- Click “Change Combination” and select the new key combination you want to assign.
- Click “OK” to save the changes.
4. How can I undo a key mapping in Windows 10?
- To undo a key mapping in Windows 10, open the Start menu and click “Settings.”
- Select “Devices” and then “Keyboard”.
- Select the key you want to unassign and click “Reset”.
- Confirm the action and the key will return to its default function.
5. Is it possible to assign special functions to specific keys in Windows 10?
- Yes, you can assign special functions to specific keys in Windows 10.
- To do so, follow the steps mentioned in question 1.
- Once in the Shortcut Keys window, select the key to which you want to assign the special function and click Change Function.
- Select the special role you want to assign and click “OK.”
- Repeat this process for each key to which you want to assign a special function.
6. What benefits can I get from changing key bindings in Windows 10?
- By changing key bindings in Windows 10, you can customize the way you interact with your computer.
- This allows you to optimize your workflow and perform common tasks more efficiently.
- You can adapt key assignments to your personal preferences and the specific needs of your work or daily activities.
- Additionally, you can improve accessibility by adapting the keys to the needs of users with disabilities or physical limitations.
7. What should I keep in mind when changing key assignments in Windows 10?
- It is important to keep in mind that by changing key assignments, you could interfere with the default functions of the system or certain applications.
- Before making changes to key assignments, make sure you are clear about your needs and know the default functions of the keys you want to modify.
- Additionally, it is recommended to keep track of the changes you make so you can revert them if necessary.
8. How can I reset key bindings to default settings in Windows 10?
- To reset key bindings to default settings in Windows 10, open the Start menu and click “Settings.”
- Select “Devices” and then “Keyboard”.
- Click on “Reset to default” and confirm the action.
- Key assignments will be reset to factory default settings.
9. Can I save my custom key assignments in Windows 10?
- At the moment, Windows 10 does not have a native feature to save custom key assignments.
- If you have made changes to the key assignments and want to keep them, we recommend making a record of your changes so you can replicate them in the future if necessary.
- You can also explore third-party apps that let you manage and save custom key assignments.
10. Is there an external tool that makes it easy to change key assignments in Windows 10?
- Yes, there are several external tools that make it easy to change key mappings in Windows 10.
- Some of these tools offer friendlier interfaces and advanced functionality for key customization.
- Explore options like AutoHotkey, SharpKeys, KeyTweak, and more that allow you to modify key assignments in more detail and with additional features.
See you later, Tecnobits! Remember that you can change key bindings in Windows 10 to personalize your computing experience. Until next time!
You may also be interested in this related content:
- How to change a folder icon in Windows 10
- How to minimize all windows in Windows 10
- How to play Carmen Sandiego on Windows 10

I am Sebastián Vidal, a computer engineer passionate about technology and DIY. Additionally, I am the creator of tecnobits.com, where I share tutorials to make technology more accessible and understandable for everyone.
List of all Windows 10 keyboard shortcuts: The ultimate guide
Windows 10 includes many keyboard shortcuts to make your experience around the desktop easier, and you can check them out here.

Windows 10 includes a long list of keyboard shortcuts you can use to quickly navigate and perform actions using one or multiple key combos, which otherwise would take many more clicks and time to complete the task with the mouse.
The system has many shortcuts, but you don't need to learn every shortcut on Windows 10 . You only need to remember those that can help you make your workflow easier.
In this how-to guide , I'll outline all the most helpful keyboard shortcuts to navigate and operate the desktop and apps. You can also check out these additional shortcuts you need to know for Windows 11.
Windows 10 keyboard shortcuts
This comprehensive list includes the most helpful keyboard shortcuts to perform tasks on Windows 10.
Essential shortcuts
In this list I'm including the most essential keyboard shortcuts you should know on Windows 10:
Desktop shortcuts
On Windows 10, you can use these keyboard shortcuts to open, close, navigate, and perform tasks more quickly throughout the desktop experience, including the Start menu, Taskbar, Settings, and more.
File Explorer shortcuts
These are the most useful keyboard shortcuts you can use on File Explorer:
Get the Windows Central Newsletter
All the latest news, reviews, and guides for Windows and Xbox diehards.
Settings page shortcuts
This list includes the keyboard shortcuts for the dialog box legacy settings pages (for example, Folder Options).
Command Prompt shortcuts
On Command Prompt, you can use these keyboard shortcuts will help to work a little more efficiently:
Microsoft Edge shortcuts
On Microsoft Edge, you will benefit from these keyboard shortcuts. These shortcuts apply to any version of Windows.
Windows key shortcuts
The "Windows key," combined with other keys, allows you to perform many useful tasks, such as launch Settings, File Explorer, Run command, apps pinned in the Taskbar, or open specific features like Narrator or Magnifier. You can also complete tasks like controlling windows and virtual desktops, taking screenshots, locking the computer, and more.
This list includes all the most common keyboard shortcuts using the Windows key.
More resources
For more helpful articles, coverage, and answers to common questions about Windows 10 and Windows 11, visit the following resources:
- Windows 11 on Windows Central — All you need to know
- Windows 10 on Windows Central — All you need to know

Mauro Huculak is technical writer for WindowsCentral.com. His primary focus is to write comprehensive how-tos to help users get the most out of Windows 10 and its many related technologies. He has an IT background with professional certifications from Microsoft, Cisco, and CompTIA, and he's a recognized member of the Microsoft MVP community.
- 2 Why THIS Kickstarter-backed game is the must-play Xbox Game Pass title this month
- 3 From new Xbox games to AR glasses, here are my favorite things I saw at my very first GDC
- 4 How to turn down brightness on Windows 11
- 5 Microsoft News Roundup: Xbox takes over PlayStation Store, Fallout tops charts, and Microsoft's project Stargate
How To Customize Gaming Keyboard Settings In Windows 10

- Gaming & Entertainment

Introduction
Are you an avid gamer looking to enhance your gaming experience through personalized keyboard settings on your Windows 10 system? Customizing your gaming keyboard settings can significantly improve your performance and overall enjoyment during gameplay. Windows 10 offers a range of options to tailor your keyboard to your specific gaming needs, from reassigning keys to creating macros and adjusting lighting effects.
In this guide, we will walk you through the process of customizing your gaming keyboard settings in Windows 10, providing you with the tools to optimize your gaming setup. Whether you're a casual gamer or a dedicated esports enthusiast, mastering these customization features can give you a competitive edge and make your gaming sessions more immersive and enjoyable.
Let's dive into the step-by-step process of accessing and adjusting your keyboard settings, allowing you to unlock the full potential of your gaming keyboard in Windows 10. Whether you're aiming for faster response times, more intuitive key assignments, or a visually captivating lighting display, this guide will equip you with the knowledge and skills to tailor your gaming keyboard to your unique preferences and play style.
Step 1: Accessing Keyboard Settings
Before delving into the customization process, the first step is to access the keyboard settings on your Windows 10 system. Windows 10 provides a user-friendly interface for managing various hardware settings, including those for your gaming keyboard.
To access the keyboard settings, begin by clicking on the Start menu in the bottom-left corner of your screen. From the Start menu, select “Settings,” which is represented by a gear icon. Alternatively, you can press the Windows key + I to directly access the Settings app.
Within the Settings app, navigate to the “Devices” category. Here, you will find a range of options for managing your hardware devices, including keyboards, mice, and other peripherals. Click on “Devices” to proceed to the next step.
Once you are in the Devices settings, select “Typing” from the left-hand menu. This section houses the keyboard-related settings, including typing, autocorrect, and keyboard shortcuts. By clicking on “Typing,” you will be able to access the specific keyboard customization options available in Windows 10.
Upon accessing the keyboard settings, you are now ready to proceed with customizing your gaming keyboard to suit your preferences and gaming style. With the keyboard settings readily accessible, you can seamlessly move on to the next steps of reassigning keys, adjusting lighting effects, creating macros, and setting up gaming mode to optimize your gaming experience.
Step 2: Customizing Key Assignments
Customizing key assignments is a fundamental aspect of optimizing your gaming keyboard for a personalized gaming experience. Windows 10 offers a straightforward method for remapping keys, allowing you to tailor your keyboard to your preferred layout and functionality.
To begin customizing key assignments, return to the “Typing” section within the Devices settings in Windows 10. Under the “Keyboards” section, you will find the option to configure the keyboard’s advanced settings. Click on “Advanced keyboard settings” to access the additional customization options.
Within the advanced keyboard settings, you can select “Input language hot keys” to modify the key assignments and input methods. This feature enables you to redefine the functions of specific keys, such as remapping a key to perform a different action or assigning a complex key combination to a single key press.
Through the “Advanced keyboard settings” interface, you can also manage keyboard shortcuts and explore further customization options to streamline your gaming experience. Whether you prefer a modified layout for gaming-specific commands or seek to optimize key assignments for a particular game, Windows 10 empowers you to tailor your keyboard to your exact specifications.
By customizing key assignments, you can create a more intuitive and efficient gaming keyboard layout that aligns with your gaming preferences and play style. Whether you’re focused on maximizing your in-game actions or simplifying complex commands, the ability to remap keys provides a versatile solution for enhancing your gaming performance.
With key assignments tailored to your individual needs, you can elevate your gaming experience and achieve greater precision and control, ultimately enhancing your overall enjoyment and success in your favorite games.
Step 3: Adjusting Keyboard Lighting
Adjusting keyboard lighting can add a captivating visual dimension to your gaming setup while also serving a functional purpose by enhancing visibility and aesthetics. Windows 10 provides options for customizing keyboard lighting, allowing you to create an immersive gaming environment tailored to your preferences.
To begin adjusting keyboard lighting, navigate to the “Devices” category within the Windows 10 Settings app. From there, select “Typing” and proceed to the “More keyboard settings” link. This will lead you to the “Typing settings” page, where you can access additional keyboard customization features, including keyboard lighting adjustments.
On the “Typing settings” page, you can explore the “Keyboard” section to find options for managing keyboard lighting. Depending on your keyboard model and compatibility, you may have access to various lighting customization features, such as adjusting brightness, choosing lighting patterns, or customizing individual key colors.
By fine-tuning the keyboard lighting settings, you can create an ambiance that complements your gaming experience, whether you prefer a dynamic and vibrant display or a more subdued and focused lighting configuration. The ability to personalize the lighting effects adds a layer of personalization to your gaming environment, enhancing the overall immersion and enjoyment of your gaming sessions.
Customizing keyboard lighting also provides practical benefits, as it can improve visibility and make it easier to locate specific keys during intense gaming moments. Additionally, the visual appeal of a well-coordinated lighting setup can contribute to a more engaging and aesthetically pleasing gaming space.
With the flexibility to adjust keyboard lighting to your liking, you can create a gaming setup that reflects your unique style and preferences, elevating the overall gaming experience and contributing to a more enjoyable and visually captivating environment.
Step 4: Creating Macros
Creating macros is a powerful way to streamline and automate complex sequences of actions, providing a significant advantage in gaming scenarios that demand quick and precise inputs. Windows 10 offers the capability to create and customize macros, allowing you to assign intricate command sequences to a single keystroke or button press on your gaming keyboard.
To begin creating macros, access the keyboard settings within the Windows 10 Settings app. From there, navigate to the “Devices” category and select “Typing.” Within the “Typing” section, you can find the “Advanced keyboard settings,” which houses the macro customization options.
Upon entering the advanced keyboard settings, look for the “Input language hot keys” section, where you can access the “Change language bar hot keys” feature. This functionality allows you to create and manage macros, enabling you to define custom key sequences that can be triggered during gameplay to execute complex actions or commands.
By creating macros, you can optimize your gaming keyboard for enhanced efficiency and precision, automating repetitive tasks and executing intricate maneuvers with ease. Whether you need to perform a series of rapid inputs or execute a combination of commands with perfect timing, macros empower you to elevate your gaming performance and responsiveness.
Furthermore, the ability to customize macros provides a tailored solution for optimizing your gaming experience, allowing you to adapt your keyboard to the specific requirements of different games and genres. Whether you’re engaged in fast-paced first-person shooters, strategic real-time strategy games, or immersive role-playing adventures, macros can be customized to suit the unique demands of each gaming experience.
By integrating custom macros into your gaming keyboard settings, you can gain a competitive edge, enhance your in-game capabilities, and unlock new levels of efficiency and precision. The versatility and adaptability of macros empower you to optimize your gaming performance and take your gameplay to the next level.
Step 5: Setting up Gaming Mode
Setting up gaming mode on your keyboard is a crucial step in optimizing your gaming experience, as it allows you to minimize distractions and focus on your gameplay without interruptions. Windows 10 provides the functionality to enable gaming mode, which can enhance your gaming sessions by preventing accidental interruptions from background processes, notifications, or system functions.
To initiate gaming mode, access the keyboard settings within the Windows 10 Settings app. Within the “Devices” category, select “Typing” to access the keyboard-related settings. From there, navigate to the “More keyboard settings” link, which will lead you to the “Typing settings” page where you can activate gaming mode.
On the “Typing settings” page, you can explore the “Keyboard” section to find the option to enable gaming mode. Activating gaming mode ensures that your gaming keyboard is optimized for uninterrupted gameplay, allowing you to focus on your gaming experience without the risk of accidental interruptions or disruptions caused by non-essential functions.
Gaming mode is designed to suppress non-critical system notifications and prevent interference from background processes, ensuring that your gaming sessions remain uninterrupted and free from distractions. By enabling gaming mode, you can create an environment that prioritizes your gaming experience, providing a seamless and immersive platform for your gaming endeavors.
Furthermore, gaming mode can enhance the performance of your gaming keyboard by optimizing its responsiveness and minimizing input lag, ultimately contributing to a more fluid and precise gaming experience. With distractions minimized and system resources allocated for optimal gaming performance, gaming mode helps you achieve a heightened level of focus and immersion during gameplay.
By setting up gaming mode on your gaming keyboard, you can create an environment that is tailored to prioritize your gaming experience, allowing you to immerse yourself fully in your favorite games and perform at your best. The implementation of gaming mode ensures that your keyboard is optimized to support uninterrupted and responsive gaming sessions, providing an essential feature for gamers seeking a distraction-free and immersive gaming environment.
Customizing your gaming keyboard settings in Windows 10 offers a wealth of opportunities to enhance your gaming experience, providing you with the tools to optimize your keyboard for improved performance, efficiency, and personalization. By following the step-by-step process outlined in this guide, you can unlock the full potential of your gaming keyboard and tailor it to your unique gaming preferences and play style.
From accessing the keyboard settings to customizing key assignments, adjusting keyboard lighting, creating macros, and setting up gaming mode, each aspect of the customization process contributes to a more immersive and tailored gaming experience. Windows 10’s intuitive interface and versatile customization options empower you to fine-tune your gaming keyboard to meet your specific needs, whether you’re aiming for enhanced responsiveness, streamlined commands, or a visually captivating gaming environment.
By delving into the keyboard settings within the Windows 10 operating system, you can explore a range of features that enable you to optimize your gaming keyboard for peak performance. Whether you’re a competitive esports enthusiast seeking every advantage or a casual gamer looking to enhance your gaming setup, the ability to customize your gaming keyboard settings in Windows 10 opens up a world of possibilities for personalization and optimization.
Ultimately, the process of customizing your gaming keyboard settings in Windows 10 is a gateway to a more immersive, efficient, and enjoyable gaming experience. By leveraging the customization features available in Windows 10, you can create a gaming environment that aligns with your unique preferences and empowers you to elevate your gaming performance to new heights.
With a personalized keyboard layout, dynamic lighting effects, custom macros, and gaming mode at your disposal, you can immerse yourself in your favorite games with a heightened sense of control, precision, and focus. The customization journey outlined in this guide equips you with the knowledge and tools to transform your gaming keyboard into a tailored extension of your gaming prowess, enhancing your overall gaming experience and enjoyment.
Leave a Reply Cancel reply
Your email address will not be published. Required fields are marked *
Save my name, email, and website in this browser for the next time I comment.
- Crowdfunding
- Cryptocurrency
- Digital Banking
- Digital Payments
- Investments
- Console Gaming
- Mobile Gaming
- VR/AR Gaming
- Gadget Usage
- Gaming Tips
- Online Safety
- Software Tutorials
- Tech Setup & Troubleshooting
- Buyer’s Guides
- Comparative Analysis
- Gadget Reviews
- Service Reviews
- Software Reviews
- Mobile Devices
- PCs & Laptops
- Smart Home Gadgets
- Content Creation Tools
- Digital Photography
- Video & Music Streaming
- Online Security
- Online Services
- Web Hosting
- WiFi & Ethernet
- Browsers & Extensions
- Communication Platforms
- Operating Systems
- Productivity Tools
- AI & Machine Learning
- Cybersecurity
- Emerging Tech
- IoT & Smart Devices
- Virtual & Augmented Reality
- Latest News
- AI Developments
- Fintech Updates
- Gaming News
- New Product Launches
- Fintechs and Traditional Banks Navigating the Future of Financial Services
- AI Writing How Its Changing the Way We Create Content
Related Post
How to find the best midjourney alternative in 2024: a guide to ai anime generators, unleashing young geniuses: how lingokids makes learning a blast, 10 best ai math solvers for instant homework solutions, 10 best ai homework helper tools to get instant homework help, 10 best ai humanizers to humanize ai text with ease, sla network: benefits, advantages, satisfaction of both parties to the contract, related posts.

How To Go Full Screen On Windows 10

15 Amazing Small Keyboard for 2024

13 Best Prebuilt Gaming Pc for 2024

12 Best Backlit Keyboard And Mouse for 2024

14 Best Gaming Trackpad For 2024

9 Amazing Macro Keyboard for 2024

How To Turn Off Tablet Mode

15 Amazing Brown Switch Keyboard for 2024
Recent stories.

Fintechs and Traditional Banks: Navigating the Future of Financial Services

AI Writing: How It’s Changing the Way We Create Content

How to Know When it’s the Right Time to Buy Bitcoin

How to Sell Counter-Strike 2 Skins Instantly? A Comprehensive Guide

10 Proven Ways For Online Gamers To Avoid Cyber Attacks And Scams

- Privacy Overview
- Strictly Necessary Cookies
This website uses cookies so that we can provide you with the best user experience possible. Cookie information is stored in your browser and performs functions such as recognising you when you return to our website and helping our team to understand which sections of the website you find most interesting and useful.
Strictly Necessary Cookie should be enabled at all times so that we can save your preferences for cookie settings.
If you disable this cookie, we will not be able to save your preferences. This means that every time you visit this website you will need to enable or disable cookies again.
What Do The Function Keys (F1 ~ F12) Do On Windows 10
A keyboard is necessary for you to communicate with your computer. You can type words in a document, open system settings page, and do many other things with the keyboard. Each keyboard button has its own function. There is a row of function keys at the top of the keyboard; they are labeled F1 ~ F12 in order. This post on MiniTool will introduce these function keys to you.
Function Keys Windows 10
The keyboard is essential for using laptops and desktops. You can save important information, adjust system settings, browse the internet easily with the help of a keyboard. There are many buttons on a keyboard with different functions, including a multi-purpose set of keys in the “function” row. The function keys, labeled F1 to F12 in order, are located at the top of a keyboard. By default, each of these F keys has a special function defined by the operating system or the running program. If you are wondering the usages of function keys Windows 10 , please keep reading.

MiniTool Power Data Recovery Trial Click to Download 100% Clean & Safe
What Do the F Keys Do in Windows 10
Though the F key (F1 ~ F12) is indispensable, some users don’t know its exact function. Actually, they can be used together with the Alt and Ctrl keys to achieve different purposes. What are the F1 through F12 keys? Please find out yourself in the following content.
What Does F1 Do
#1: Open a new browser window or tab.
- If you press F1 on Windows 10 desktop, you’ll be brought to the how to get help in windows 10 search page in Edge.
- If you press F1 in an opening browser, you’ll get a new tab (often shows the corresponding support page).
- Press Windows + F1 will also take you to the Microsoft Windows help and support center.
Is Microsoft Edge The Same As Internet Explorer – Check It Out!

#2. Open a help screen.
You can get the help screen in almost all programs by pressing the F1 function key.
#3. Enter the CMOS/BIOS setup.
On many computers, you can press the F1 key during startup to enter the BIOS or CMOS setup, which allows you to configure the basic settings of your computer.
What Is HP Boot Menu, How To Access Boot Menu Or BIOS?
#4. Open Task Pane.
By default, the Task Pane is opened on the right side of the Office program window. If you don’t see it, you can bring it up by pressing the F1 or Ctrl + F1 keys.
What Does F2 Do
#1. Rename a file/folder/icon.
You can press F2 to rename a file, folder, or icon after selecting it (making it highlighted) in all versions of Windows.
#2. Enter the CMOS/BIOS setup.

#3. Edit the cell.
You can edit the selected cell directly in Microsoft Excel by pressing F2.
#4. Open the document preview window.
Pressing Ctrl + F2 in Microsoft Word will bring up the print preview window.
#5. Open the document open window.
Pressing Alt + Ctrl + F2 in Microsoft Word will bring up the Open window.
What Does F3 Do
- Open a search feature in an opening program/app.
- Find the next search value in some programs.
- Repeat the last command in MS-DOS or Windows command line.
- Start typing in the search box of Windows Explorer.
- Open the Advanced find window in Microsoft Outlook by pressing Windows Key + F3.
- Choose from changing the capital letter from upper to lowercase (or vice versa), capitalizing the whole word, and changing the whole word to lowercase by pressing Shift + F3 in Microsoft Word.
What Does F4 Do
- Go to the address bar in Windows Explorer and Internet Explorer.
- Repeat the last action performed in Word 2000 & later versions.
- Open find window in the previous Windows 95 to Windows XP.
- You can close the active program window by pressing Alt + F4.
- You can close the opening window/tab by pressing Ctrl + F4.
What Does F5 Do
- Refresh the list of contents in a folder.
- Start a slideshow in Microsoft PowerPoint.
- Open a find, replace, and go to window in Microsoft Word.
- Refresh or reload the page in all modern browsers.
- You can force refresh the webpage by pressing Ctrl + F5.

What Does F6 Do
- Go to the address bar in all common browsers.
- Reduce the speaker volume of some laptops.
What Does F7 Do
- Check spell and grammar in Microsoft Office programs.
- Increase the speaker volume of some laptops.
- Turn on Caret Browsing in Firefox.
- Do a Thesaurus check in Microsoft Word by pressing Shift + F7.
What Does F8 Do
- Enter Windows startup menu and access Windows Safe Mode .
- Access the Windows recovery system on some computer.
What Does F9 Do
- Send & receive e-mail in Microsoft Outlook.
- Reduce the screen brightness of some laptops.
- Refresh the document in Microsoft Word.

Do you know what to do when you encounter the Microsoft Word has stopped working error? This post helps you find answers.
What Does F10 Do
- Enter the CMOS/BIOS setup.
- Increase the screen brightness of some laptops.
- Open the right-click menu of a file, folder, or icon.
- Activate the menu bar of an opening app.
- Access the hidden recovery partition on some computers: HP, Sony, etc.
What Does F11 Do
- Enter & exit full screen mode in common browsers.
- Access the hidden recovery partition on some computers including Lenovo.
- Press Ctrl + F11 to access hidden recovery partition on many Dell computers.
What Does F12 Do
- Access the list of bootable devices during startup so as to change boot order.
- Open the Save as window in opening Microsoft Word.
- Open the document open window in Microsoft Word by pressing Ctrl + F12.
- Save the current Microsoft Word document by pressing Shift + F12 (or Ctrl + S).
- Print a document in Microsoft Word by pressing Ctrl + Shift + F12.
Please note that there is also an Fn key on keyboard of some laptops. Click here to know what does the Fn key do .
About The Author
Position: Columnist
Stack Exchange Network
Stack Exchange network consists of 183 Q&A communities including Stack Overflow , the largest, most trusted online community for developers to learn, share their knowledge, and build their careers.
Q&A for work
Connect and share knowledge within a single location that is structured and easy to search.
How to see the current keyboard layout in Windows, i.e. which keys will give which symbols
I'm using a Swedish keyboard on my Windows 11 laptop, with three languages installed: English UK, English US, Swedish. I find it hard to work out where various symbols are if I'm using a different language than Swedish, since the location depends on current windows keyboard layout.
If I use Win + Space to change keyboard layout to Swedish then I can look at the physical keyboard. The symbols on each key indicate what character I'll get if I press that key. Obviously. But when I've switched to English UK or English US, is there a way to get a similar picture of the current windows keyboard layout, so I can see what character I'll get when I press each key? So I can see for example what happens if I press the key beneath the Esc key, or press the key to the left of the Backspace key.
Right now I tend to either
- fumble around pressing all the keys I can think of whenever I want a ~ , # , \ etc
- or I use Win + Space to switch to a language that I know where the key is, type the symbol, then Win + Space a few times to switch back again.
It seems like xkeycaps does this sort of thing in Unix land.
- keyboard-layout
6 Answers 6
I use the KbdEdit software for that purpose. It's paid software but does the job beautifully. Here's how English UK keyboard looks with SHIFT key pressed

I've used it for years to customize my keyboard layout (turn right CTRL into DEL among others)
- 1 Looks olde skool but great, thanks – Rory Nov 17, 2021 at 10:54
- Author is a great guy, I've been getting my lifetime updates for the last 10 years or more. Always works flawlessly. – 8ctopus Nov 17, 2021 at 12:15
- The problem is not all keyboard layouts are shown in kbedit. For instance, the Kannada phonetic layout is not shown at all - perhaps because it is not strictly a conventional layout, but a "smart" one that pops up a dynamic suggestion list. – Milind R Jul 29, 2023 at 19:52
Since this is a setting which will not change dynamically, I'd suggest you save the relative layouts as images on your desktop, or print them out on paper: this will be in any case much faster to access than to fumble around in Windows settings. Since you're using Windows 11, you could also create a snap layout with the image of the keyboard and of your favorite text-editing software.
You can find the relative keyboard layouts for US and UK in this Wikipedia article , from which I've copied the images for you.

The Windows On-Screen Keyboard can show your keyboard layout and is also a means for entering keys via the mouse.
See the Microsoft article Use the On-Screen Keyboard (OSK) to type .
The OSK is the biggest help that Windows can give. Otherwise, you could post it a a background image on your desktop, post stickers on the keys, or any other method you could think of and can do yourself.
- 4 My on screen keyboard is always completely different, eg has lots fewer symbol keys. It doesn’t look like it’s trying to depict the physical keyboard I have, rather it’s an alternative that’s probably always the same (for a given language) regardless of hardware. – Rory Oct 28, 2021 at 10:36
- 1 Link fixed. OSK shows a simplified (working) image of the layout which can be used to identify the placement of the keys. Windows has no way of knowing what your physical keyboard is like, it just receives key-codes when you press keys. – harrymc Oct 28, 2021 at 10:41
- 1 thanks, I kind-of get that windows doesn't know what my physical keyboard looks like ... but on the other hand there's probably a 'normal' layout for a Swedish keyboard and/or for certain keys. It knows where the number keys usually are and it knows what symbols it'll output when i press SHIFT-3, so I wish it would make it easy for me to find out. – Rory Oct 28, 2021 at 12:31
- The OSK is the biggest help that Windows can give. Otherwise, you could post images on your desktop, or other methods that you do yourself. – harrymc Oct 28, 2021 at 13:39
You need to open the settings from the bottom panel - or press the Windows key and choose settings. From there press language and time.

Scroll/go to language and region - you'll see the list on installed languages. Press the 3 dots next to your language.

Choose add a keyboard layout.

I apologize as my system is in Hebrew, but I think you'll do fine if you follow the above steps.
- 1 Thanks for the pics & steps. But do you get to see a picture of a keyboard anywhere showing which buttons will give which symbols? PS: welcome to superuser! – Rory Nov 13, 2021 at 12:37
You can use the official MS Keyboard Layout Creator for that: https://www.microsoft.com/en-us/download/details.aspx?id=102134
MS Keyboard Layout Creator
- Install the MSKLC
- Start the App
- Klick File > Load Existing Layout
- Select your layout (e.g. United States-International)
Microsoft lists all their supplied keyboard layouts on their website. You can see them here https://learn.microsoft.com/en-us/globalization/keyboards/kbdusx
- 1 Your answer could be improved with additional supporting information. Please edit to add further details, such as citations or documentation, so that others can confirm that your answer is correct. You can find more information on how to write good answers in the help center . – Community Bot Aug 22, 2023 at 20:31
You must log in to answer this question.
Not the answer you're looking for browse other questions tagged windows keyboard keyboard-layout windows-11 ..
- The Overflow Blog
- Why configuration is so complicated
- Is GenAI the next dot-com bubble?
- Featured on Meta
- New Focus Styles & Updated Styling for Button Groups
- Upcoming initiatives on Stack Overflow and across the Stack Exchange network
- Google Cloud will be Sponsoring Super User SE
Hot Network Questions
- Why aren’t there advanced computers in an advanced society?
- University is killing my passion [for mathematics]
- How many lands in total can be put into play with Map the Frontier?
- What legal basis exists for challenging absurd (but technically-correct) invoices?
- How to answer pre screening question "do you have a car" if I currently don't but could get one?
- How to plan a trail route?
- i really need to know how to concave a circle svg file please
- Are countries not allowed to require proof of revaccination (booster) against the yellow fever as a condition of entry?
- Make the number 606 50 percent bigger
- How do I write this Theorem with quantifiers?
- Vietnamese and Cantarell
- Why does the USAF still use the C-17 Globemaster III?
- Economists Working At the Intersection of Pure Math and Economics
- Is using "oe" in place of "œ" perceived as a mistake in writing?
- How do believers in hell respond to the argument "What finite crime deserves an infinite punishment?"?
- How long would it take for nature to reclaim a completely abandoned city?
- Any solution to play Roblox on Linux?
- How can we find professors influence over Committee?
- Possible to dot your Is with hearts?
- Are winged characters still prohibited in Adventurers League, as of April 2024?
- On the bounded derived category of sheaves with coherent cohomology
- What is the formal version of the word "whopping"?
- Is it necessary to repeat the axis labelling if the images have the same axis?
- Is the mind infinite?
Contribute to the Windows forum! Click here to learn more 💡
April 9, 2024
Contribute to the Windows forum!
Click here to learn more 💡
Windows 10 Top Forum Contributors: neilpzz - Ramesh Srinivasan - _AW_ - questions_ - Volume Z 👍✅
April 17, 2024
Windows 10 Top Forum Contributors:
neilpzz - Ramesh Srinivasan - _AW_ - questions_ - Volume Z 👍✅
- Search the community and support articles
- Search Community member
Ask a new question
Windows 10 Wrong Keyboard Layout
I know there are similar questions about this.
I have upgraded to Windows 10 (Live)
It looks beautiful.
But I am having a problem with my keyboard, the layout is all wrong.
Yes I have checked the Language and Location.
English (Ireland), Irish
But the symbol keys are wrong.
@\" are opposite
Hash is missing all together.
Report abuse
Replies (6) .
Had the same issues - it defaults the keyboard to US style, found a quick fix here:
http://www.howtogeek.com/121169/how-to-change-your-keyboard-layout-in-windows-8/
1 person found this reply helpful
Was this reply helpful? Yes No
Sorry this didn't help.
Great! Thanks for your feedback.
How satisfied are you with this reply?
Thanks for your feedback, it helps us improve the site.
Thanks for your feedback.
Hi GKPutzy ,
Thanks for the reply, I had already found that feature but it does not fix the problem,
I only have a single language input
English (Ireland) Windows display language: Enabled
Keyboard layout: Irish
Date, time and number formatting
It is the same on my laptop after I upgraded to Windows 10 on that.
I think that the keyboard layout have been setup incorrectly.
When I shift I should get
There are no keys for tilde or hash, there normal key produces \| which is also the key left of z key.
When I was installing the English (Ireland) language pack I noticed that it downloaded English (United Kingdom)
Don't know if that is relevant.
Anybody from Microsoft know how to fix this issue?
92 people found this reply helpful
Ok I managed to fix it myself.
I set English (United Kingdom)
As default language.
Removed English (Ireland)
Re-added English (Ireland)
Removed English (United Kingdom)
and restarted pc.
Worked straight away.
And I just repeated on laptop and it worked on that also.
10 people found this reply helpful
I have a different problem.
With my Toshiba laptop, on converting to 10, the keyboard numbers 1-5 and the spacebar only work if the FN key is pressed. Checking in Device Manager, it thinks the keyboard is a Lenovo Thinkpad PS/2 keyboard plugged into the external socket.
As it's a Toshiba laptop without an external socket, that's quite clever!
I deleted the Lenovo keyboard and changed it to a Standard keyboard, but the problem remained. As every time I make a change in Device Manager I have to restart, I gave up after two changes and went back to 8.1
Any ideas?
I have the exact same problem on my Toshiba L775D-S7220
Any suggestions? Toshiba wants $$$$ to fix it
Question Info
- Windows settings
- Norsk Bokmål
- Ελληνικά
- Русский
- עברית
- العربية
- ไทย
- 한국어
- 中文(简体)
- 中文(繁體)
- 日本語
Tutorial: Set Up Keyboard Macros in Windows 10 [Step-By-Step Guide]
Setting up keyboard macros in Windows 10 is a simple process and can save a lot of time for users who frequently perform the same tasks.
The first step in setting up keyboard macros in Windows 10 is to install a macro software. There are many free and paid options available online such as AutoHotKey and Macro Recorder. Once the software is installed, it can be used to create and edit macros.
To create a new macro, the user simply needs to click on the “New Macro” button in the macro software. They can then begin recording the keystrokes and mouse clicks they wish to automate. Once the recording is complete, the user can give the macro a name and assign a keyboard shortcut to it. This allows them to easily access the macro in the future.
When setting up keyboard macros in Windows 10, it is important to keep in mind that macros can be used to automate almost any task. This includes typing frequently used phrases, opening specific programs or files, and even completing entire tasks such as filling out forms. It is also important to keep macros organized by creating separate macros for different tasks.
In addition to saving time, keyboard macros in Windows 10 can also help users to avoid repetitive strain injuries. By automating repetitive tasks, users can reduce the number of keystrokes and mouse clicks they need to perform, which can help to prevent pain and discomfort.
What Do You Know About Keyboard Macros?
Keyboard macros in Windows 10 are a powerful tool that allows users to automate repetitive tasks by recording a series of keystrokes and mouse clicks, which can be played back to perform the same actions quickly and easily. This can save a lot of time and effort for users who frequently perform the same tasks.
To create a keyboard macro in Windows 10, a user can use software such as AutoHotKey or Macro Recorder. These programs allow users to record a sequence of keystrokes and mouse clicks, and then assign a keyboard shortcut to the macro so it can be easily accessed in the future.
Once a macro is created, it can be used to automate almost any task, from typing frequently used phrases to completing entire forms.
It is also worth noting that macros can be used to automate more complex tasks such as opening specific programs or files and even automating entire workflow.
Advantages of Keyboard Macros in Windows 10
Saving Time:
One of the main benefits of keyboard macros in Windows 10 is that they can save a lot of time for users who perform the same tasks on a regular basis. For example, a user who frequently fills out the same form can create a macro that automatically fills in the form with the required information, which can save a lot of time and effort.
Increasing accuracy:
Another benefit of keyboard macros in Windows 10 is that they can help to reduce the risk of repetitive strain injuries. By automating repetitive tasks, users can reduce the number of keystrokes and mouse clicks they need to perform, which can help to prevent pain and discomfort.
Did you think there is a default Windows 10 Macro Recorder?
Currently, Windows 10 does not have a built-in application for recording macros. However, there are several third-party keyboard macro recorders available that allow users to edit, record, and share various macros.
Steps To Set Up Keyboard Macros
Creating Macros on Windows 10:
Step 1: Create a keyboard shortcut for the app you want to create a macro for. This is typically an app that you use frequently and can be pinned to the start menu or taskbar.
Step 2: Open the Command Prompt as Administrator and paste the following command in the quotation marks “explorer shell:AppsFolder”. This will open a new window displaying all the apps on your Windows 10 PC.
Step 3: Locate your preferred app and right-click on it. Select the ‘Create Shortcut’ option.
Step 4: When prompted that the new shortcut cannot be created in the current location, choose ‘Yes’ to place the shortcut on the desktop.
Step 5: Go to the desktop and locate the new shortcut. Right-click on it and select ‘Properties’.
Step 6: In the App’s Properties pop-up, select the ‘Shortcut’ tab and enter a shortcut key combination. This should begin with Ctrl + Alt. For example, in this case, we’ve input the letter L. Once done, click ‘Apply’ and then ‘OK’.
Your keyboard macro for the chosen app has been successfully configured. Press the set key combination and the app will open immediately.
Steps To Create Hotkeys
To create hotkeys in Windows 10:
- Install or download the Microsoft Keyboard Center or Mouse
- Attach the keyboard you want to configure with hotkeys
- Press the Windows Start button and select ‘Microsoft Mouse and Keyboard Center’
- Go to the Hotkeys tab and select ‘create/add new hotkey’ or choose an existing hotkey from the list to reassign it a different function
- Choose the key you want to make a hotkey
- Select a command from the list for your new hotkey
- Click ‘OK’ to create your hotkey.
Creating Hardware Or Software Keyboard Macros
When creating keyboard macros, you have the option to either use hardware or software.
Keyboard Macros For Hardware
Benefits of creating keyboard macros on the keyboard includes:
- One of the benefits of using hardware for keyboard macros on Windows 10 is that it allows you to create macros without the need for additional software. This means that you don’t have to worry about compatibility issues or potential conflicts with other programs.
- Additionally, hardware-based keyboard macros are typically more responsive and reliable than software-based macros, as they bypass the operating system and communicate directly with the keyboard.
One way to create hardware-based keyboard macros on Windows 10 is by using a dedicated macro keypad. These keypads are typically small, USB-powered devices that sit next to your keyboard and allow you to create and assign macros to specific keys.
They usually come with software that allows you to program and customize your macros, including the ability to record and play back actions. This can provide a quick and easy way to create keyboard macros for Windows 10.
Another option for creating hardware-based keyboard macros on Windows 10 is by using a gaming keyboard. Many gaming keyboards come with built-in macro keys that allow you to create and assign macros without the need for additional hardware.
They also often come with software that allows you to program and customize your macros to suit your needs.
Keyboard Macros For Software
Another way to create keyboard macros on Windows 10 is through the use of software. These macros are recorded through a PC program and then stored in a file. Some popular macro-recording software include AutoHotkey and TinyTask.
- One of the benefits of using software-recorded keyboard macros is the ability to share them with others. These macros can be shared as small files, as long as the recipient has the same macro software installed on their PC.
- Another advantage of using software-recorded keyboard macros is the flexibility it provides. A GUI or text-script of the procedural performance of your macros allows you to easily edit, view, and customize the macros for optimal performance.
Conclusion:
In conclusion, setting up keyboard macros in Windows 10 can help you automate repetitive tasks and streamline your workflow. You can use software or hardware to set up your keyboard macros, depending on your preference and needs.
Whether you choose to use Auto Hotkey, a macro keypad, or a gaming keyboard, you can be sure that you will be able to create powerful keyboard macros that will save you time and effort.
RECOMMENDED FOR YOU
IMAGES
VIDEO
COMMENTS
Here are some common reasons for changing keyboard outputs: Typing on a foreign keyboard. If you want to type in any language besides English, it can be difficult to type seamlessly on an English-only keyboard. By switching your key functions, you can cater to different language settings. Using your keyboard for PC gaming. PC gamers rely on ...
After you install it, launch PowerToys Settings, then click "Keyboard Manager" in the sidebar. In the "Keyboard Manager" settings, click "Remap a Key." When the "Remap Keyboard" window pops up, click the plus button ("+") to add a new key mapping. After that, you'll need to define which key you want to remap (in the "Key:" column), and what key ...
Download and install the Microsoft Mouse and Keyboard Center. Connect the keyboard that you want to configure. Select the Start button, and then select Microsoft Mouse and Keyboard Center. From the displayed list of key names, select the key that you want to reassign. In the command list of the key that you want to reassign, select a command.
Open Power Toys and select Keyboard Manager in the left sidebar. Select Remap a Key . If the keyboard options are grayed out, select the Enable Keyboard Manager switch. Select the Plus ( +) under Key . Under Key, choose the key you want to reassign from the drop-down menu, or select Type and enter a key. Under Mapped To, choose the new key.
stands out for its flexible interface. Everything works through a drag and drop interface that allows you easily reassign, disable, and activate keys. However, you can also use methods such as ...
To remap a key, click the Add button and choose your keys from the two columns. The left column denotes the key you'll press (for example, the Caps Lock key) and the right column denotes the ...
To add a new keyboard layout on Windows 10, use these steps: Open Settings. Click on Time & Language. Click on Language. Under the "Preferred languages" section, select the current default ...
1 Right click or press and hold on the shortcut (ex: "Command Prompt") on your desktop, and click/tap on Properties. (see screenshot below) 2 Click/tap in the Shortcut key field, press the key you want to use as the shortcut key, and click/tap on OK to assign it to this shortcut. (see screenshots below) Note.
1. KeyTweak. KeyTweak is a tool which offers multiple ways - three, to be precise - to remap a key. The first is using the virtual keyboard. This method allows you to choose a key that you want to map, and then select the key, from a drop-down menu, to which you want to map it.
Change the keyboard layout or other method you use to type. Whenever you add a language, a keyboard layout or input method is added so you can enter text in the language. If you want to use a different keyboard layout or input method, you can add a new one or switch between the ones you have.
8. Click Remap a key. Return to Keyboard Manager and click the entry for Remap a key. Here, you can redefine either key for the remapping you just created, delete the remapping altogether, or ...
3. Click Language preferences. A new window will open. 4. Click Keyboard. It's under the header "Language" next to an icon of a keyboard. 5. Click Input Language hot keys. You'll see this in blue text under the checkboxes for "Switching input methods."
Hi, this is a tutorial for key mapping! Map Any Key to Any Key on Windows 10, 8, 7, or Vista. This method does not map keys permanently like registry mapping...
Here's how: Open the Start menu. Find the item to which you want to assign a keyboard shortcut. Right-click it and go to More > Open file location . Right-click on the shortcut and select Properties . In the Shortcut key field, type in the keyboard shortcut you want to have assigned to the program. 3.
To undo a key mapping in Windows 10, open the Start menu and click "Settings.". Select "Devices" and then "Keyboard". In the "Special Keyboard Features" section, click "Advanced Keyboard Settings.". Select the key you want to unassign and click "Reset". Confirm the action and the key will return to its default ...
Windows key + Home. Minimize or maximize all but the active desktop window. Windows key + Shift + Up arrow key. Stretch desktop window to the top and bottom of the screen. Windows key + Shift ...
To initiate gaming mode, access the keyboard settings within the Windows 10 Settings app. Within the "Devices" category, select "Typing" to access the keyboard-related settings. From there, navigate to the "More keyboard settings" link, which will lead you to the "Typing settings" page where you can activate gaming mode.
Copying and pasting commands into a command prompt used to be a hassle. But with Windows 10, you can use the standard Ctrl + C and Ctrl + V shortcuts to copy and paste text back and forth. To open ...
Function Keys Windows 10; Function Keys Windows 10. The keyboard is essential for using laptops and desktops. You can save important information, adjust system settings, browse the internet easily with the help of a keyboard. There are many buttons on a keyboard with different functions, including a multi-purpose set of keys in the "function ...
Since you're using Windows 11, you could also create a snap layout with the image of the keyboard and of your favorite text-editing software. You can find the relative keyboard layouts for US and UK in this Wikipedia article, from which I've copied the images for you. US International keyboard layout: United Kingdom Extended keyboard layout:
English (Ireland) Windows display language: Enabled. Keyboard layout: Irish. Date, time and number formatting. It is the same on my laptop after I upgraded to Windows 10 on that. I think that the keyboard layout have been setup incorrectly. When I shift I should get. 2=" '=@
Step 2: Open the Command Prompt as Administrator and paste the following command in the quotation marks "explorer shell:AppsFolder". This will open a new window displaying all the apps on your Windows 10 PC. Step 3: Locate your preferred app and right-click on it. Select the 'Create Shortcut' option.