Google Slides

How to Add a Timer to Google Slides: Easy Step-by-Step Guide

Table of Contents
In professional presentations, timing is crucial. Adding a timer to your Google Slides can keep you on track and your audience engaged. In this guide, we’ll explore simple ways to integrate timers, like embedding YouTube countdowns or using timer add-ons. These techniques ensure your presentation flows smoothly and captivates your audience from start to finish.
How Does a Timer Work in Google Slides Presentations?
- Google Slides doesn’t have a built-in timer, but you can include a timer video in your slides.
- Once you add the timer video, you can adjust how it looks to match your presentation.
- Both you and your audience can see the timer ticking down during your presentation.
- You can move the timer around and place it next to your text and pictures, or make it the main focus on a slide.
Two Effective Methods to Add a Timer to Your Google Slides Presentation
Method 1: embedding youtube videos as countdown timers in google slides presentation:.
Step 1: Open Your Google Slides Presentation:
- Go to slides.google.com on your computer.
- Open an existing presentation or create a new one.
Step 2: Select the Desired Slide:
- Choose the slide where you want to embed the timer.
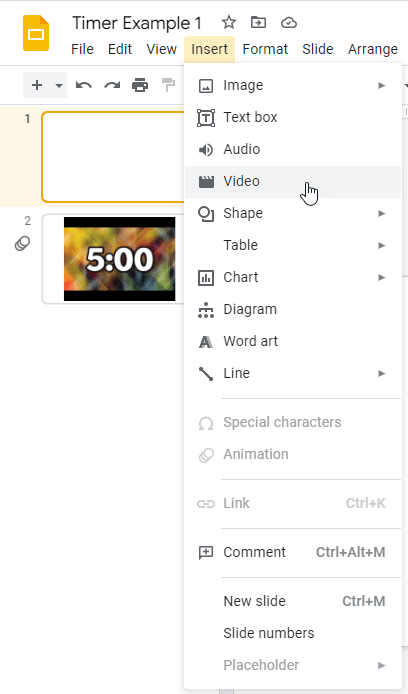
Step 3: Insert the Video:
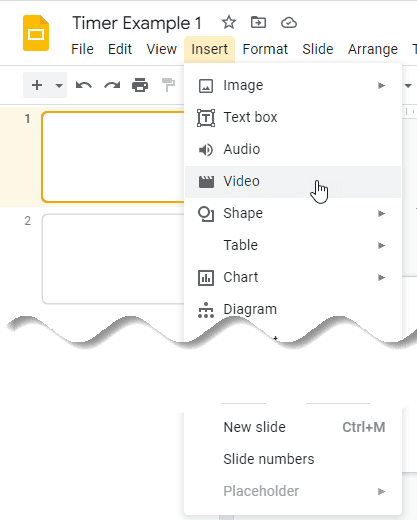
- Navigate to the top toolbar, click on “Insert,” then select “Video.”
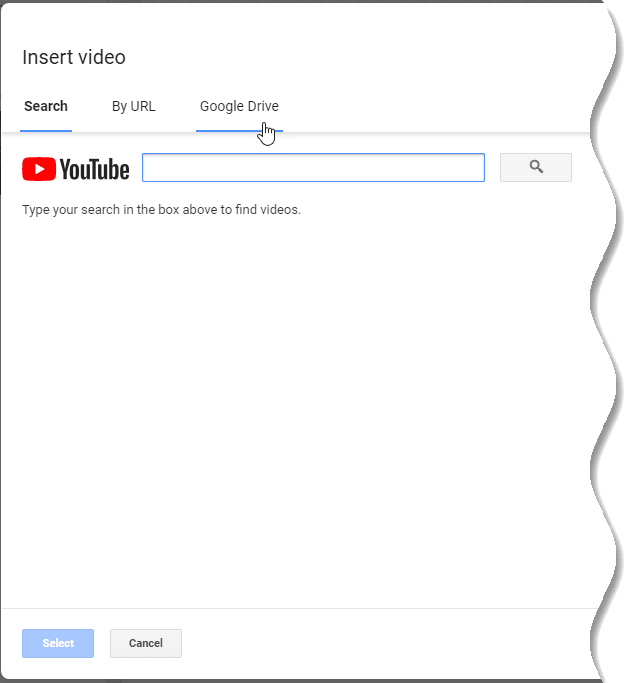
Step 4: Search for the Timer Video:
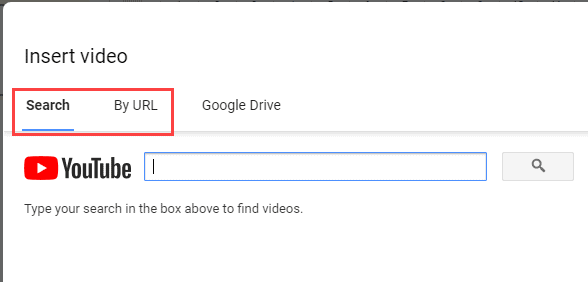
- In the “Insert video” window, you have multiple options:
- Search directly on YouTube for a countdown timer (e.g., “five-minute timer”).
- Paste a URL of a specific YouTube timer video.
- Use a video from your Google Drive.
- Consider using specific keywords or desired timer lengths for more accurate results.
Step 5: Select and Insert the Timer Video:
- Click on the desired video from the search results or paste the URL.
- Click “Select” to insert it into your slide.
Step 6: Resize and Reposition the Video:
- Click and drag the corners of the video to adjust its size.
- Move the video to the desired position on the slide.
- For precise dimensions and placement, right-click the video, select “Format options,” and then adjust under “Size & Rotation.”
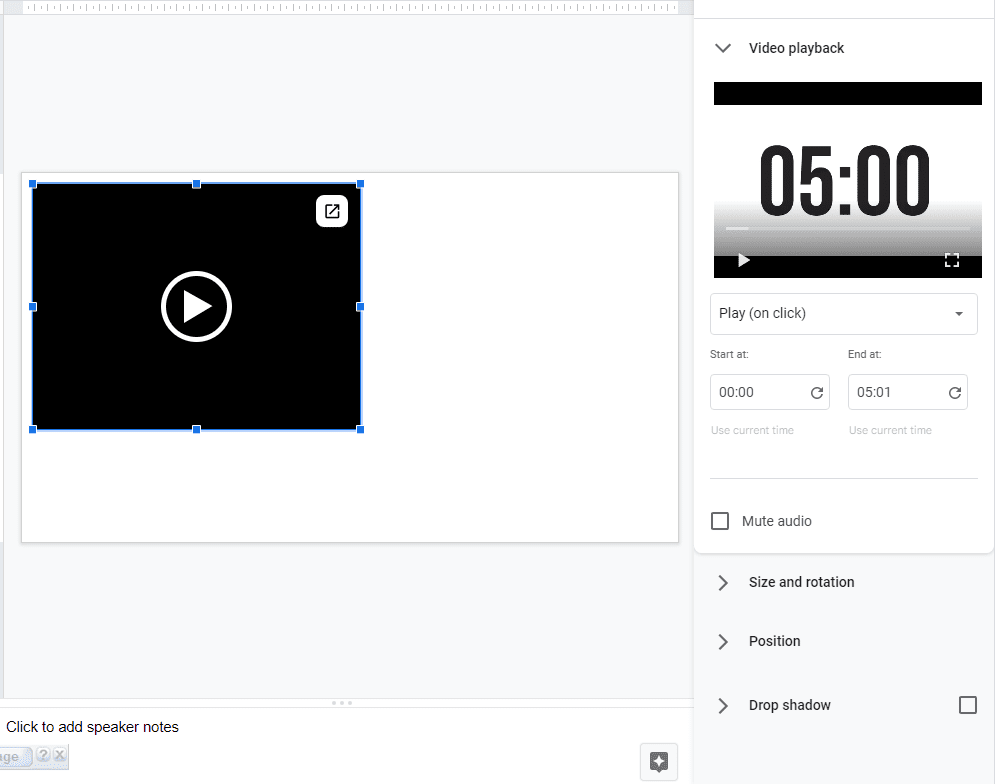
Step 7: Set Video Playback Options:
- Right-click the video and select “Format options.”
- In the “Video playback” section, choose your preferred playback mode:
- “Play (on click)” – to start the video when clicked.
- “Play (automatically)” – for the video to start automatically when the slide appears.
- “Play (manual)” – to control the play manually during the presentation.
- Optional settings include muting the audio and setting specific start and end times.
Step 8: Repeat for Additional Slides (If Necessary):
- If you need the timer on multiple slides, repeat the process for each slide.
Step 9: Adjust as Needed:
- Ensure the timer fits well with your slide’s content and presentation style.
By following these steps, you can effectively embed a YouTube video as a countdown timer in your Google Slides presentation, enhancing its functionality and audience engagement .
Ready to mesmerize your audience? Uncover the secrets to flawless video integration with our comprehensive guide.
Discover more now!
Method 2: Using the Timer Extension for Google Slides:
Step 1: Install the Slides Timer Extension:
- Open Google Chrome or Microsoft Edge.
- Search for “Slides Timer Chrome extension” in the browser’s address bar.
- Click on the “Slides Timer extension” in the search results.
- In the Chrome Web Store, select “Add to Chrome” and then “Add extension” in the notification pop-up.
Step 2: Restart Your Browser:
- After installation, restart your browser to activate the extension.
Step 3: Using Slides Timer in Google Slides:
- Open your Google Slides presentation.
- Click on a slide where you want to add a timer.
- Create a new text box or use an existing one on the slide.
- To set a countdown timer, use the format <<mm:ss>> (e.g., <<05:00>> for a five-minute timer). This will count down to zero.
- For a count-up timer, use the format <<mm:ss+>> (e.g., <<00:00+>> to start counting from zero).
- Advanced timing formats like <<hh:mm:ss>> can also be used for longer durations.
- Place the formatted text within the text box on your slide.
Step 4: Check the Timer Functionality:
- Start the slideshow to see the timer in action.
- During the presentation, you can pause the timer by pressing ‘d’ or reset it by pressing ‘e’.
By following these steps, you can easily incorporate a functional timer into your Google Slides presentations using the Slides Timer extension.
Benefits of Adding a Timer to Your Google Slides Presentation:
- Managing Your Pace : Ensures you cover all points within the allotted time, avoiding rushing or overextending on certain slides.
- Timing Breaks Efficiently : Setting specific times for breaks, helps maintain engagement and focus.
- Optimizing Quiz Duration : Allows precise timing for quizzes, making the session interactive and well-paced.
- Cue for Slide Transitions : This acts as a visual reminder to move to the next slide, ensuring a smooth flow in your presentation.
- Anxiety Relief : Reduces the stress of time management, as the timer visually tracks progress.
- Respectful Timing : Demonstrates consideration for the audience’s time, keeping the presentation concise and on point.
- Enhanced Activities : Improves the efficiency and effectiveness of in-presentation activities through timed visual aids.
- Organized Confidence : Builds presenter confidence with a well-structured and timely managed presentation.
Closing Thoughts
Adding a timer to Google Slides presentations is more than just a technical feature – it boosts professionalism and keeps the audience interested.
While there are some limits to how much you can customize it, the advantages of better time management and focused content delivery are clear.
Practicing with the timer helps you deliver a smooth, well-paced presentation, so it’s a great tool to use for any impactful Google Slides presentation.
Can I set different times for different slides using timers?
Yes, you can choose different times for specific slides to control the pace of your presentation using timers.
Can I customize the appearance of timers to match my presentation theme?
You can personalize the look of timers to match your presentation theme by adjusting font, color, and style options available in many timer tools.
Do timers work smoothly on different devices and browsers?
While timers are designed to work on various platforms, it’s a good idea to test your presentation across different devices and web browsers to ensure seamless compatibility.
How do I add a timer to a specific slide in Google Slides?
To include a timer on a particular slide in Google Slides, you can insert or embed a timer video. You have the option to create your own timer video or download one from the internet.
How can I make sure the timer Is visible but doesn’t distract from the main content?
Place the timer strategically on the slide to ensure it doesn’t obscure important information and blends well with the overall theme. Once you master adding timing to Google Slides, you can effectively leverage timers to enhance your presentations.
Frequently Asked Questions
While timers are designed to work on various platforms, it's a good idea to test your presentation across different devices and web browsers to ensure seamless compatibility.
Place the timer strategically on the slide to ensure it doesn't obscure important information and blends well with the overall theme. Once you master adding timing to Google Slides, you can effectively leverage timers to enhance your presentations.
Save Time and Effortlessly Create Presentations with SlidesAI

How to Insert Timer Into Google Slides? [An EASY Way!]
By: Author Shrot Katewa
![How to Insert Timer Into Google Slides? [An EASY Way!]](https://artofpresentations.com/wp-content/uploads/2021/12/Featured-Image-How-to-Insert-a-Timer-in-Google-Slides.webp "timer for google slides presentation")
Whether you want to allow your audience a few seconds to answer a quiz question, or whether you want to let your audience know the time left for the break to end, having a ticking timer on Google Slides is a great way to do that!
But, Google Slides doesn’t provide the option to add a timer by default. So, how do you insert a timer in Google Slides?
To insert a timer in Google Slides, you can add a video that contains a countdown timer. Alternatively, you can also use the “Slide Timer” extension. Using the extension allows cusotmization of text formatting, and a few additional features which are not available when using a video!
This article will provide you with more insights on adding a timer in Google Slides. We will be discussing a few different methods. You will get the step-by-step process along with the images so you too can add it to your presentation!
So, let’s get started!
1. How to Insert a Timer in Google Slides?
I’ve captured all the steps in a video format as well. If you wish to learn by watching a video instead of reading this article, you can do so by clicking on the play button on the video below –
If you prefer learning through reading, you can continue to do so by going through the steps in the rest of the article!
When you need to give your audience time to complete an action such as think of an answer, writing a solution, responding to a question, or perhaps even ensuring that people come back on time after a break, it is good to have a timer displayed on the screen.
This will make sure that everyone is aware of the time left to finish the task required!
Although Google Slides doesn’t offer a direct option to add a timer in the presentation, there are multiple ways to insert a timer in Google Slides.
In this article, we shall take a look at two different methods.
1a. Method 1 – Inserting a Video
The first method includes inserting a video that has a timer. You can use any video for this purpose. The easiest way to find such a video is through YouTube.
One thing to keep in mind is that when you add a YouTube video to the presentation, you will need to make sure that your computer is connected to the internet for the video to work when you are giving the presentation.
For safety purposes, you can perhaps download the video and upload it to the presentation to make sure it works. However, for the purpose of this example, I’ll show you how to add a timer by inserting a video in Google Slides .
Let’s take a look at the steps one-by-one:
Step-1: Search for a Video with a Timer on YouTube
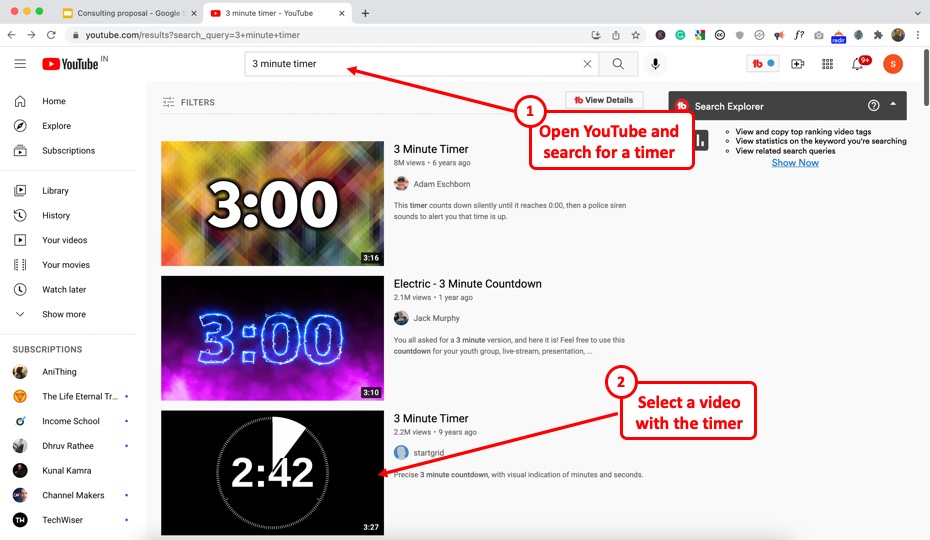
There are a ton of different video options available on YouTube for a timer video. Simply type in the duration of the timer that you want in the search bar.
For the sake of this example, I’ve gone with a 3 minuter timer.
From the options that appear in the search, go with single color background (ideally black). You’ll get to know why, in a minute!
Step-2: Copy the Video URL
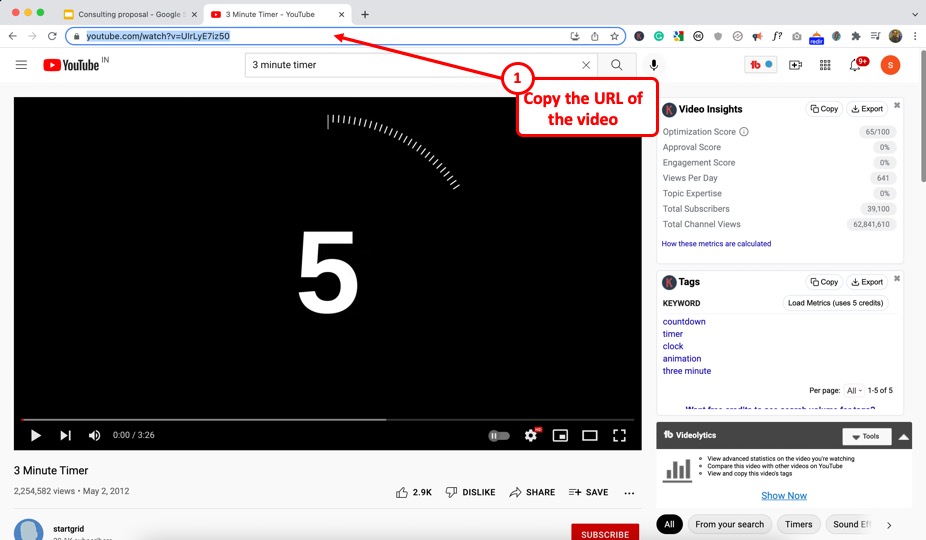
Once you have chosen a video, open it by clicking on it.
Then, click on the address bar. Select the URL and copy it using the “ Ctrl+C ” options. You can also right-click on it and click on “ Copy “.
Step-3: Click on the Option to Insert a Video

Now, go back to your Google Slides presentation. Open the slide where you want to insert the timer.
Then, click on the “Insert” tab in the menu bar and select the “Video” option from the “Insert” menu. This will prompt an “Insert video” dialog box.
Step-4: Insert the Video in your Presentation
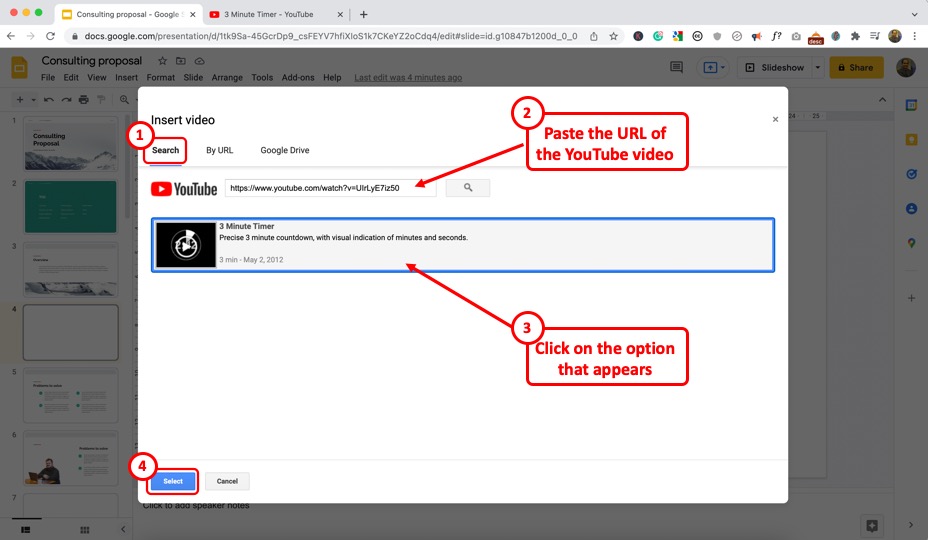
The next step is to insert the video. Click on the “ Search ” tab first. Here, in the search bar, paste the URL (link) that we copied in step 2 and hit enter.
You can also search for a term instead of pasting the link. So, for instance, instead of going on YouTube to find a video, you can also use the search bar here to do the same. But, I usually get much better results faster when I search it on YouTube and paste the link here.
Once you have the video appear below, click on it to select it. Then, click on “ Select ” to insert it on your slide.
You can also upload a video at this point by clicking on the “ Google Drive ” option. That option will allow you to add a video that you may have either downloaded or perhaps received from your colleague.
Step-5: Adjust the Playback Settings
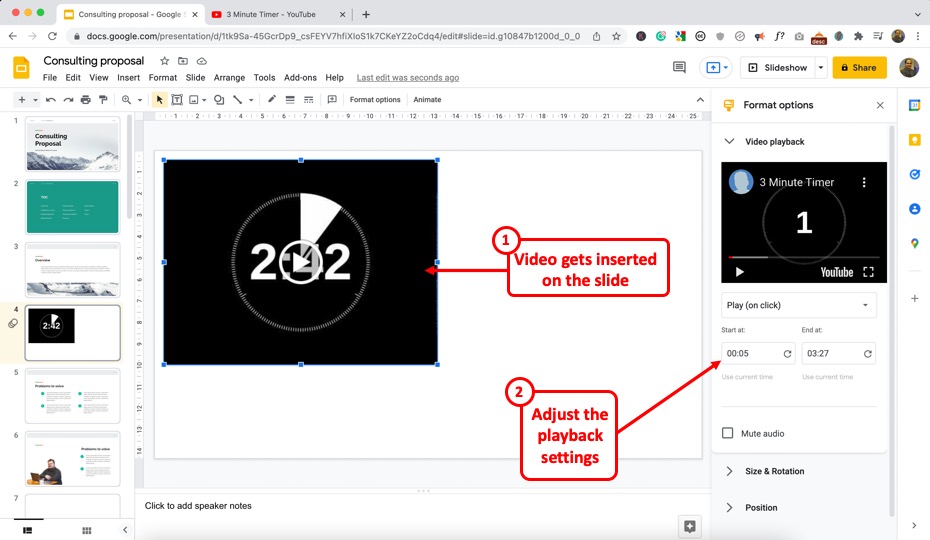
Now, the next step is to adjust the playback settings for the video.
When you insert the video on the slide, the “ Format ” panel on the right should automatically appear. If it doesn’t, simply right-click on the video, and click on the “Format” option.
Here, you can adjust the starting and ending point of the video along with tweaks to a few additional settings.
Step-6: Adjust the Video and Slide Background
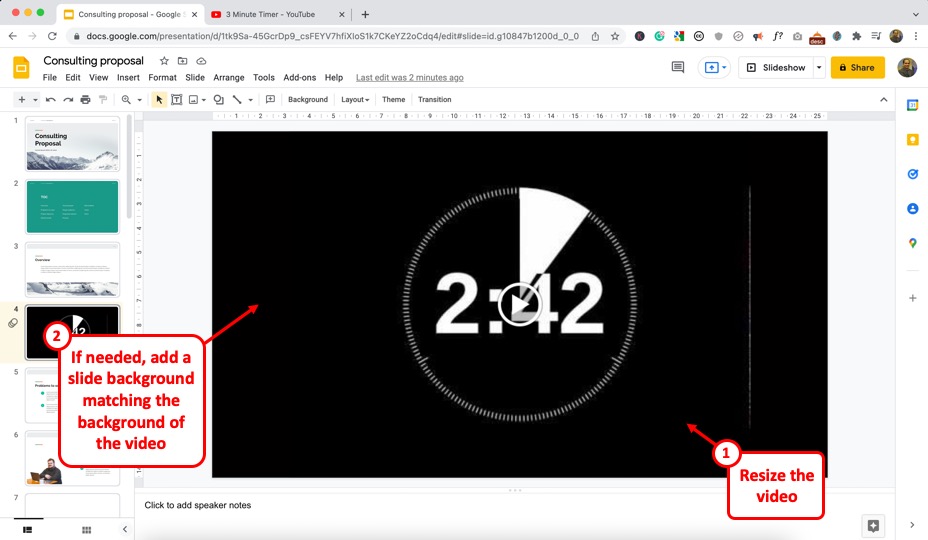
Now, the last thing that I recommend you do is first, make the video as big as possible such that it fits the slide on the top and the bottom.
This will display the video on the complete slide during the slideshow mode.
If there is still some blank space left on the slide, then you can choose to change the slide background to match the background of the video (just the way I’ve done it in the image above).
This is where choosing a video with a monotone background (as mentioned in step 1) comes in handy!
If you are unable to find the color for your slide back in the default options provided that match with the background of the video, you can use the eyedropper tool for color matching in Google Slides .
Once you’ve made the changes, simply enter the presentation in the “ Slideshow ” mode and watch the timer tick!
Method 2 – Using the Slides Timer Extension
If you don’t want to add a video to your presentation or if you want more customization to the way the text looks for the timers, and make a few changes to it, you can use the “ Slides Timer ” extension.
The “Slides Timer” extension has been designed by ClayCodes ; a third-party open-source creator.
The Slides Timer extension comes as a Google Chrome browser extension rather than an “Add-on” item.
Through this add-on, all you need to do is type in a simple text-based code and it will convert the code into a function. We shall take a look at the
To add the extension, you have to first click here to find the Slides Timer extension in the Chrome Web Store.
Then follow the 3 quick steps.
Step-1: Click on “Add to Chrome”
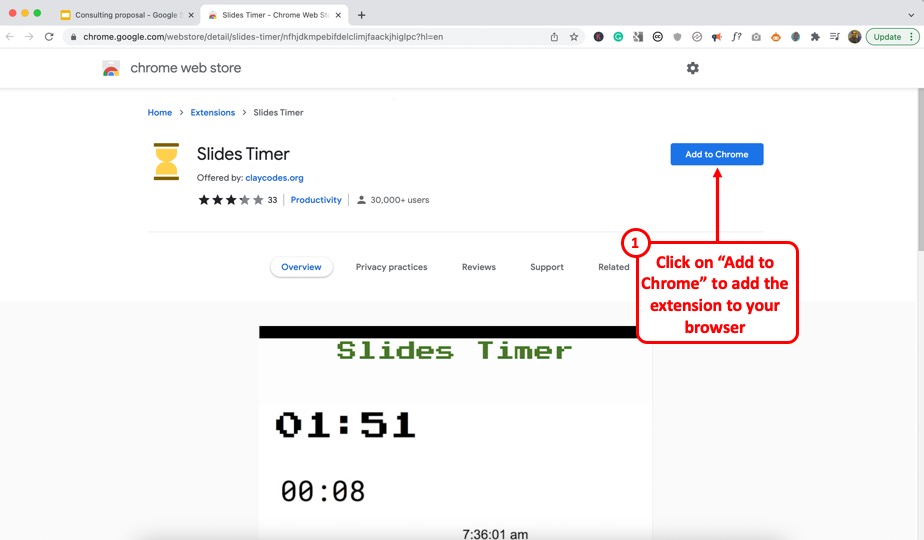
The first step is to click on the “Add to Chrome” button located on the right side of the screen. This will prompt a dialog box.
Step-2: Click on the “Add Extension” button
In the dialog box, click on the “Add Extension” button to allow access to the extension. You will now see another dialog box notifying that the Slide Timer extension has been added.
Step-3: Click on the “Slides Timer” extension

Now all you have to do is open the Google Slides presentation. Then click on the “Extensions” icon which looks like a puzzle piece beside the browser “Search bar” . In the “Extensions” dialog box, click on the “Slides Timer” extension to access a tutorial.
How to Use the Slides Timer Extension?
The Slides Timer extension has various features that you can use. You can create a timer, stopwatch, clock, etc.
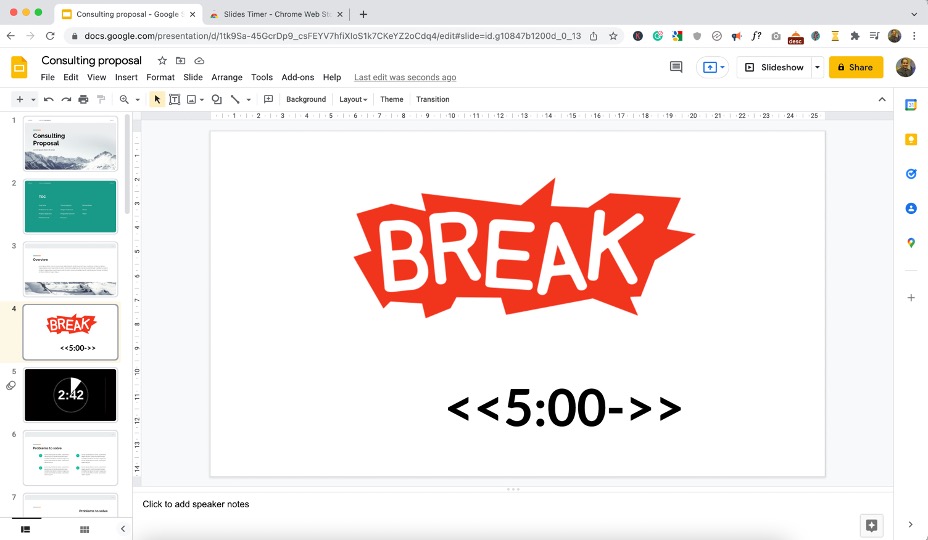
To create a countdown timer, you have to first click on the “Text box” icon in the toolbar located right under the menu bar.
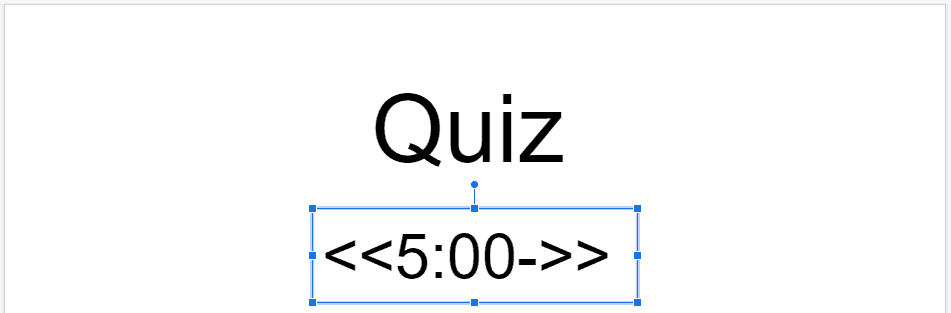
In the text box, type in “<<“preferred time”->>” . For example, for a five-minute countdown, type in “<<5:00->>” in the text box.
Next, click on the “Slideshow” or “Present” option and the text will be automatically converted to a countdown timer.

To create a count-up timer or a stopwatch, type in “<<“preferred time”+>>” in a text box in the slide where you want to add the timer.
For example, if you want the stopwatch to start at zero seconds, type in “<<00:00+>>” . It will be automatically turned into a stopwatch on the “Present” screen.

In the example above, I’ve started my stopwatch from “5:00”. You can see the stopwatch counting up in the slideshow mode in the image above.
You can also display the current time in the local time zone using the Slides Timer extension. To do so, insert a text box in the preferred slide and type in “<<time>>” . In the “Present” screen, this will show the time in the AM/PM format.
To add the current date in your Google Slides presentation slide, insert a text box and type in “<<date>>” . In the “Present” screen, this will turn into “mm/dd/yyyy” format date. This will always show the current date when you present without any manual adjustment.
Move to Next Slide
With Slides Timer, you can also add a timer that automatically moves to the next slide when time is up. For example, you can create a countdown trigger that moves to the next slide after 2 minutes. All you have to do is insert a text box and type in “<<02:00-+>>” .
2. How to Time Your Slides to Autoplay in Google Slides?
Google Slides does provide you with an option to time the slides such that you can set it on “Autoplay” and let the slides automatically keep changing!
This is a great option especially when you are at an event, and you just want put the presentation on the screen, set it, and forget it!
This topic actually deserves an entire article! Thus, I’ve written a separate post to cover the nuances of this topic in great detail in a step-by-step manner. Check out my other article on this topic here !
Credit to benzoix (on Freepik) for the featured image of this article (further edited)
How to Add Timers to Google Slides (Quick Guide)

To add a timer to google slides, go to ‘Insert’ tab > press “Video” > search “5 minutes timer” > choose a video and “Select”. Alternatively, you can install a timer extension. Adding timers in your slides can help you manage your time effectively during presentations.
They can also be a valuable visual aid for your audience, letting them know how much time they have to ask questions or explore the topic in more depth. While Google Slides doesn’t have a built-in timer, you can do this with just a few clicks.
Here’s a quick step-by-step guide on how to do it:
Step 1: Open Insert Tab
Step 2: search the video, step 3: add the timer video, step 4: resize the video, can i set the timer on autoplay, alternative method to add timers to google slides.
Open your Google Slides presentation. Then go to the ‘Insert’ tab and select “ Video .”

In the video tab, use the search option , and type “ 5 minutes timer ” in the search box. You can also search for timers of different durations or copy a timer video URL from YouTube.

Find your preferred timer video, select it, and click “ Select ” to add it to the current slide of the presentation.

Next, resize and reposition the video to your liking. Keep the video small and place it in one of the corners of the slide.

Note that the timer will be added only to the current slide . So if you want to add the timer to all slides, you need to repeat these steps for each slide . And you will need to click on the video every time you want to start the timer.
You can set the timer video to autoplay. To do this, right-click on the video and then select “ Format Options .”

A new pop-up window will appear. Then, under the Video Playback section, press on “ Play (on click)” and change the option to “ Play (automatically).”

The timer video will start automatically as soon as you move to that particular slide. Now you will not have to worry about starting the timer manually.
You can add timers to Google Slides using the “ Slides Timer ” browser extension, which requires some additional steps.
First, open up your Google Chrome browser and go to the “ Slides Timer ” extension page (search for it). Once you are on the page, press “ Add to Chrome .”

A new pop-up window will appear. Click “ Add extension ” to confirm the installation.

Download and install the extension on your browser. Open your Google Slides presentation, add a text box to your slide, and enter the text “ <<5:00->> ” to set a five-minute countdown timer. You can adjust the duration as needed.

That’s it! you are done. Simply click “ Slideshow ” or “ Present ” to begin the presentation. The countdown timer will replace the text box.

You can also add count-up time by entering “ <<5:00+->> ” in the text box (replace “5” with your preferred duration).

Timers can be a great addition to your presentations, and we recommend using them whenever needed. By using this guide, you can now add timers to your slides using two methods. The first method uses a built-in video search feature from Google, while the second method uses a Chrome extension.
Both methods are pretty easy to follow and only require a few minutes to set up. If you have any questions or comments, please feel free to leave them below.
Related Posts:
")
How to add a timer to your Google Slides presentation by inserting a video
- You can easily add a timer to your Google Slides presentations, to help you keep track of how long you're taking during a presentation.
- However, Google Slides has no built in timer function, which means the best way to do it is to add a YouTube video with a timer to each slide.
- Visit Business Insider's homepage for more stories .
Time can be vital when you're giving an important presentation at work. Spend too much time on one slide and you could end up running too long and losing your audience, or go too fast and risk leaving people confused.
Adding a countdown timer to your Google Slides presentation can help you avoid those missteps and stay on track.
Here's how to set it up.
Check out the products mentioned in this article:
Lenovo ideapad 130 (from $299.99 at best buy), macbook pro (from $1,299.99 at best buy), how to add a timer to google slides.
1. Go to slides.google.com on your PC or Mac computer and create or open a presentation.
2. Select the slide you want to add a timer to in the left sidebar.
3. In the top toolbar, select "Insert" and then "Video."
4. Search for "five-minute timer," or whatever length timer you desire. If you already have a URL handy, paste it into the search bar and click the video thumbnail when it appears.
5. Alternatively, you can also open a new tab, find a specific timer video on YouTube, and copy and paste that video's URL. You can also use a video from your Google Drive.
6. Click "Select."
7. Resize and reposition the video as desired.
Repeat this process for as many slides as you need. Remember, though, that the video on your slide will be visible to everyone you're giving the presentation to as well.
When you give your presentation, you'll need to click the video to start your countdown timer. Or, you can set it to autoplay when the slide appears in your presentation:
1. Right-click the video and select "Format options."
2. In the side menu that appears, click "Video playback."
3. Check the box that's labeled "Autoplay when presenting."
Related coverage from How To Do Everything: Tech :
How to change the background on your google slides presentation, how to hide specific slides in google slides so they won't show up during a presentation, how to print google slides from your preferred browser on a computer, how to add a gif to google slides using a url, how to change the text color in google slides on your computer or mobile device.
On February 28, Axel Springer, Business Insider's parent company, joined 31 other media groups and filed a $2.3 billion suit against Google in Dutch court, alleging losses suffered due to the company's advertising practices.
Insider Inc. receives a commission when you buy through our links.
Watch: These basement renovations hide slides and secret rooms
- Main content
- PC & Mobile
- Google Slides
How To Insert a Timer into Google Slides
Lee Stanton Lee Stanton is a versatile writer with a concentration on the software landscape, covering both mobile and desktop applications as well as online technologies. Read more September 29, 2023
During a Google Slide presentation, you should time how long you stay on one slide or give your audience the chance to engage in discussions or answer any questions. You may also need to use a screen countdown during activities or breaks.

Adding a timer to your Google Slides helps you do this seamlessly. In this article, we’ll tell you everything you need to know.
Add a Video Timer to Your Google Slides Presentation
Here are detailed steps for inserting a timer into a Google Slides presentation and how to format the settings.
Select Your Slide
You might want to insert a timer into a slide with content. Alternatively, you might want to create a separate timer slide if you plan on doing a timed activity in your Google Slides presentation. If you need one timer for several slides, insert the video in each slide and adjust the settings individually.
Go to the Video Selection Page
Follow these steps to navigate to your video selection page in Google Slides:

Your video selection page with three tabs will open, and you can select a video timer to insert on your page.
Choose a Video Timer
In the video selection page, choose a video timer for your Google Slides presentation by selecting from these options:
- Look for a video on YouTube

When looking for a video, search for the timer length you’d like to use, for example, “five-minute timer.“ Note that the video hyperlinks to a third-party account when you use the URL or search option. If the uploader deletes the video, you won’t be able to use the timer in a Google Slide presentation.
Using a video timer you’ve uploaded to your Google Drive is a more reliable way of having one for your Google Slides presentation.
Reposition and Resize Your Video
To move your video to a different position or resize it in your Google Slide, click on it and use one of these options:

Edit the Video’s Playback Options
You can set your video in Google Slides to start playing as soon as you switch to a slide, or you can edit when a video plays. Here’s what you need to do:

In the video format options, you can also adjust more playback settings, like muting the audio in the video. if you can’t source a timer with specific requirements, you can make your video timer start and end at a particular time. For example, if you need a 50-second timer or a 10-second timer.
Add a Google Slides Timer Using the Slides Timer Extension
If you’re not keen on adding a video timer to your Google Slides presentation, or if you’d like a more customizable timer, you can try the Slides Timer Google Chrome browser extension. This add-on allows you to input a text-based code which it converts to a function.

- Go to “Slides Timer.”
Uses of the Slides Timer Extension
You can use several useful features with the Slides Timer in your Google Slides presentations.
Here are steps for creating a countdown timer with the Slides Timer:
- Go to the “Text box” icon in the toolbar under the menu.
- In the text box, input “<<“specified time”->>”. For instance, if you want a 3-minute countdown, you’d type “<<3:00->>” in the text box.
- Select “Slideshow” or “Present,” and your text is converted automatically into a countdown timer.
To add a stopwatch or count-up timer using the Slides Timer, input “<<“specified time”+>> in a text box where you like to insert the timer.
Here’s an example: If you need a stopwatch to begin at zero seconds, input “<<00:00+>>.” This automatically turns it into a stopwatch on the “Present” screen.
The Slides Timer Chrome extension can display the current time in a local time zone. To display this, add a text box to your Google Slide, then input “<<time>>.” This shows the time in AM/PM format on the “Present” screen.
To insert the date in a Google Slides presentation slide, add a text box, then input “<<date>>.” This formats the date into “mm/dd/yy” in the “Present” screen. This continuously displays the current date if you present it with no manual adjustment.
Move to the Next Slide
You can also use the Slides Timer to move onto another slide automatically when the time is up. For instance, if you’d like to move to another slide after five minutes, you can add a text box and input “<<05:00-+>>.”
Benefits of Using a Timer in Google Slides
When you’ve mastered how to use timers in your Google Slides presentations, you’ll experience some of these great benefits.
Pace Your Presentation
A video timer in your Google Slides presentation can help you track the time you take to discuss each slide. If your presentation time is limited during a meeting, allocating the time you’d like to take on each slide and using a timer helps you pace yourself. Additionally, you can include everything you need to discuss within your time frame.
There’s also the option to set your timer to automatically advance by moving to the next slide after a specified time so you remain on schedule.
Respecting Other People’s Time
Using a timer in Google Slides ensures your presentation doesn’t infringe on another speaker’s time. Timers also show your audience how much time they have to ask questions or prepare for a transition to the next speaker.
Provides Flexibility
In Google Slides, you can stop a timer early if you’re ready to move to the next slide and have the flexibility to adjust your timer. For example, if you’ve provided time for questions but didn’t get many requests. Or if you’re asked an interesting question that might take longer to answer, or have thought of another idea you’d like to incorporate into your presentation.
Using Visual Aids for Activities
If you’ve incorporated activities in your Google Slides presentation, timers help your audience remain focused as they can see how much time they have to complete an activity.
Timing Breaks
Timers in Google Slides presentations let your audience know how long breaks are, which is especially useful for teachers giving long online lessons.
Organize Your Presentation With Ease
Using a timer in your Google Slides presentations helps track your time on each slide and the time given for activities that your audience can see. Inserting a timer using the steps outlined above includes using the Video and Insert options, and the Slides Timer Google Chrome browser extension. Once you’ve inserted your video in Google Slides, you can resize and position it and edit its playback settings.
Have you ever used timers in your Google Slides presentations? Did they help you keep your presentations well organized? Let us know in the comments section below.
Related Posts

Disclaimer: Some pages on this site may include an affiliate link. This does not effect our editorial in any way.
Lee Stanton September 27, 2023
Lee Stanton September 14, 2023
Send To Someone
Missing device.
Please enable JavaScript to submit this form.
Home Blog Google Slides Tutorials How to Add a Timer to Google Slides
How to Add a Timer to Google Slides

A countdown timer can be used before a presentation starts or during a break to inform the audience regarding the time remaining in the presentation. It can also help alert the audience to take their seats when the session is about to begin. If you have been wondering how to insert a timer into Google Slides templates , follow the simple instructions below.
How to Insert a Timer in Google Slides
Unlike PowerPoint templates that timer add-ins can customize, you can add a timer to Google Slides by adding a timer video. To do this, go to Insert -> Video .

Add a timer video on YouTube or upload it via Google Drive. You can search for it via YouTube if you don’t have a video available. The countdown timer can include a specific duration (e.g., 5 minutes or 10 seconds).

Select the required video and click Insert to add it to your slide.

Once the timer video is added, it can be customized. You can use drag and drop to place it on a specific location on the slide or resize it. Additional options can be adjusted via the sidebar ( Format Options ). This includes the opportunity to add video duration, select video trigger, and the option to select size, rotation, drop shadow, and alt text. You can also mute the video by checking the Mute option.

Make sure you select what triggers the countdown video. It can be automatically played once you reach the slide in Slideshow mode or enable a manual or on-click trigger for the video playback.

The video can be played and previewed in Google Slides, and you can also run it in Slideshow mode to assess the playback for the audience.

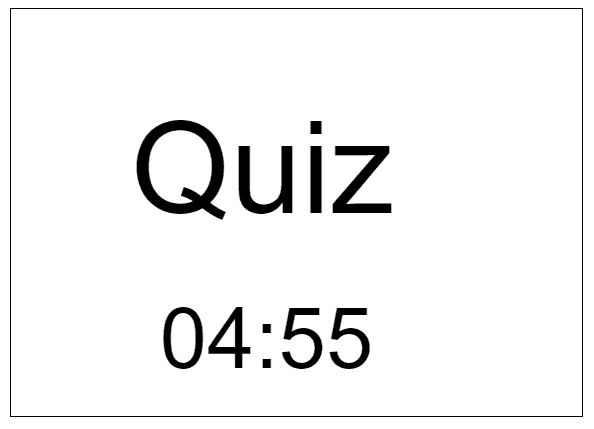
5 Minute Countdown Timer Example in Google Slides
This can help create a customized countdown. Below is an example of a 5-minute countdown timer playing in Slideshow mode in Google Slides.

10 Seconds Countdown Timer Example in Google Slides
Below is an example of a 10-second countdown timer playing in Slideshow mode in Google Slides.

Final Words
To add a countdown timer in Google Slides, you can insert a video from Google Drive or YouTube for the duration you wish to display on screen. The timer can be triggered according to need (automatically, manually, or on-click) to run during the presentation session.

Like this article? Please share
Google Slides, Presentation Ideas Filed under Google Slides Tutorials
Related Articles

Filed under Google Slides Tutorials • March 22nd, 2024
How to Share a Google Slides Presentation
Optimize your presentation delivery as we explore how to share a Google Slides presentation. A must-read for traveling presenters.

Filed under Presentation Ideas • February 15th, 2024
How to Create a 5 Minutes Presentation
Master the art of short-format speeches like the 5 minutes presentation with this article. Insights on content structure, audience engagement and more.

Filed under Design • January 24th, 2024
How to Plan Your Presentation Using the 4W1H & 5W1H Framework
The 4W1H and 5W1H problem-solving frameworks can benefit presenters who look for a creative outlook in presentation structure design. Learn why here.
Leave a Reply
How to add a timer to Google Slides
- Categories: Google Slides
- Comments: 4

One question our incredible Google Slides experts are asked all the time is ‘how do I add a timer to Google Slides?’. And, as we love to delight clients and fellow presentation enthusiasts alike, we’ve come up with an answer!
Now, if you’re not one of the people who’ve asked us this question, you might be wondering why you’d need a timer in Google Slides. Surely, it’s just a case of clicking through each slide as you talk, right? Not so! Our curious questioners have a good point. What do you do if you want to stay on a slide for a set period of time? Perhaps to let your audience engage in a discussion or answer a question? Or what if you want to set a countdown on your screen so your audience know how long their coffee break is?
Sounds great, where do I find the Google Slides timer function?
Erm, we hate to break it to you, but this is a question with no easy answer. Essentially, there are two options. Option A is the in-built autoplay function in Present mode, which allows you to set your deck to switch from slide to slide at set intervals, with no visible timer on the screen. If you want a visible timer on your slides, the only current option is to embed a YouTube video of a timer directly onto your slide. The option you choose will depend on what kind of timer you’re after. We’ll look at the autoplay function first, and then tackle the slightly more complex art of embedding a video.
Using the Autoplay function in Google Slides
Step 1: Enter Present mode
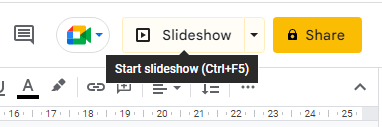
Open up Google Slides and put your chosen deck into Present mode. To do this, either press Ctrl+5 or click on the Slideshow button in the top right-hand corner of your screen.
(If you’ve been presenting without using this function, you’re missing out on a golden opportunity to make yourself look more professional. Find out how to use Present mode effectively in Google Slides .)

Step 2: Locate the Autoplay function
Once you’re in Present mode, hover over the three dots in the bottom left of your screen and you’ll see a box that says Open the options menu .

Click on the dots and a menu will appear.

Step 3: Choose your timings
You can then choose how frequently you’d like your slides to move on, ranging from once a second to once a minute.

You can also choose to play them on a loop, which is handy if you want to play something like a photo presentation in the background during an event.

Step 4: Play your presentation
Once you’ve chosen the timing settings you want, click Play at the top of the pop-up menu.

And that’s it! Your presentation will play automatically following the timings that you’ve specified.
Embedding a timer on screen in Google Slides
If you want to add a visible countdown timer to your slide to give your audience a set period of time for a break or a group activity, the easiest way to do this (at the time of writing) is to head over to YouTube and search for a timer video (yes, these are a thing!).
Step 1: Search for a timer video on Youtube
You can do this without leaving Google Slides. To start, go to Insert in the toolbar and then select Video .

A pop-up will appear that allows you to search YouTube. Type the length of timer you want into the search bar and click the blue Search button. A range of options will pop up. You can choose from different backgrounds and even different music options, but for the purposes of this tutorial I’m going to choose a two-minute timer with a plain black background.

Step 2: Insert the video into your presentation
Click on the video you want to insert and then click Select . The timer will appear on your slide, along with a Format options box to the right of the screen (we’ll cover this in a minute).

You can resize the timer to suit your needs; here, I’ve resized it to fit the slide.

You can use the Format options bar to choose how you want to start the timer – either on a click, automatically, or manually by pressing play.

You can also adjust the exact start and end times of your video.

And finally, if your ideal timer is cursed with irritating background music, you can choose Mute audio (but remember that, if you do mute the video, you won’t be able to hear any audio signals when the timer hits zero).

Voila! One countdown timer to keep your audience on track.
The verdict
Autoplay in Google Slides offers a really straightforward way to pace your presentation if you don’t want to rely on manual clicks to move between slides. However, it’s not visible, so your audience won’t know when the slide is going to advance. Embedding a video timer offers you an easy way to let your audience know what’s happening and when. It’s worth playing around with both functions to see which best meets your needs. The drawback here is that you have to rely on the options available on YouTube, so it’s less customizable. Whichever option you go for, it’s important to rehearse your entire slideshow beforehand to make sure that all the timings fit together as planned. Everyone gets pre-presentation nerves; but practice makes perfect! Visit our ULTIMATE guide to powerful, panic-free presenting for tips that’ll make your next presentation smooth, straightforward, and (dare I say?) enjoyable.
If you’ve found this blog post useful, check out our other blog posts written by our Google Slides gurus, including our handy guide to Google Slides accessibility tools and our six top tips for getting the most out of collaboration with Google Slides . Or, for a deeper dive, check out our ULTIMATE guide to Google Slides .
Related articles
How to present to a meeting in google slides.
- Google Slides
At BrightCarbon, we're always excited to find features that make presenting a more seamless experience! This blog post covers how to use the 'Present to a meeting' button in Google Slides.

The best free Google Slides templates
Google Slides templates are a great starting point to improve the look and feel of your presentation. They’re fab as they’re accessible and low cost, but it’s important to remember that even well-designed presentations can be ineffective if the content is text heavy.

Google Slides: The ULTIMATE guide
- Google Slides / Presentation technology
- Comments: 55
As presentation nerds, we at BrightCarbon have had plenty of opportunity to get to know ins and outs of Google’s browser-based presentation tool. This guide will cover everything you need to know about Google Slides - from the very basics to the most advanced features - and will provide you with the know-how to make brilliant slides, quickly and easily.

thanks dude
Thanks that helped me a lot!!!!!!!!!!!!!!!!!!!1
How can I get my slides to transition by itself after 15 minutes. I have a timer embedded, but I have to click to go to the next slide.
hi thanks for the help
Leave a Reply Cancel reply
Save my name and email in this browser for the next time I comment.
Join the BrightCarbon mailing list for monthly invites and resources
BrightCarbon is our “go to” for all of our professional presentations, always delivering high quality projects on time and on budget. Cynthia Rogan Apex Learning

Home » Google Slides » How to Insert a Timer in Google Slides
How to Insert a Timer in Google Slides
You can insert a timer in a Google Slide to count time down or up. For example, this shows your audience know how much time they have left to answer a quiz.
Google Slides does not provide a built-in function to insert a timer. This tutorial shows you how to insert a timer in Google Slides.
3 Methods to insert a timer in Google Slides:
- Add a video of a timer from YouTube
- Add a video of a timer from Google Drive
- Use the Slide Timer extension
Let us begin.
Method #1: Add a Video of a Timer from YouTube
This method makes use of available timer videos on YouTube. You will need to be online for this kind of timer to work.
Step #1: Open your Google Slide presentation
Open your presentation from the Google Slides home screen at slides.google.com .
In the navigation pane on the left, click the slide in which you want to insert the timer.
Step #2: Add the timer video
From the main menu bar, click on the Insert tab.
From the dropdown menu, click on Video .
In the Insert Video dialog box that pops up, you can use either of the two options for inserting a YouTube video:
- Search YouTube
- Enter YouTube video URL
Option #1: Search YouTube
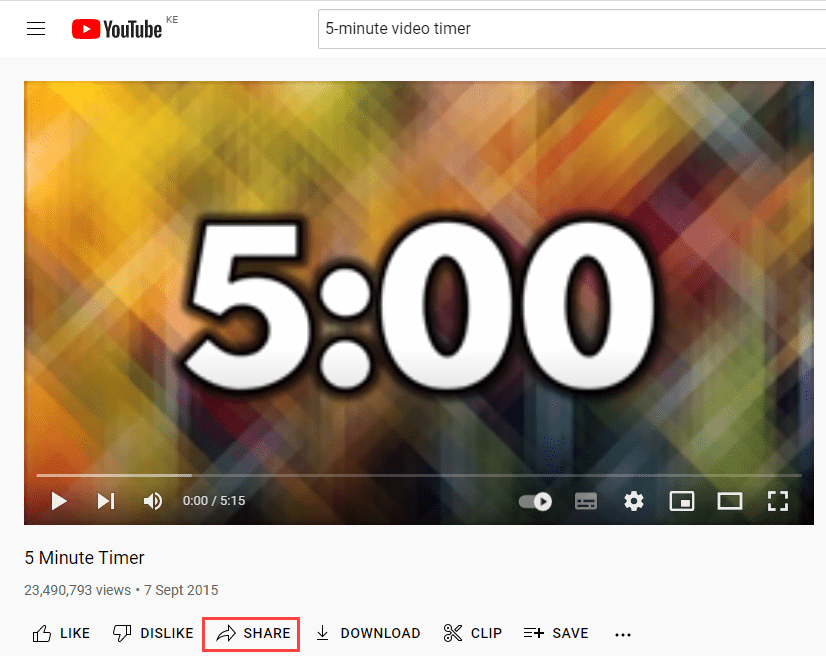
Enter a phrase such as “5-minute video timer” in the search box.
Press Enter or click the magnifying glass icon to start the search.
You will get a list of results, as in the example search below:
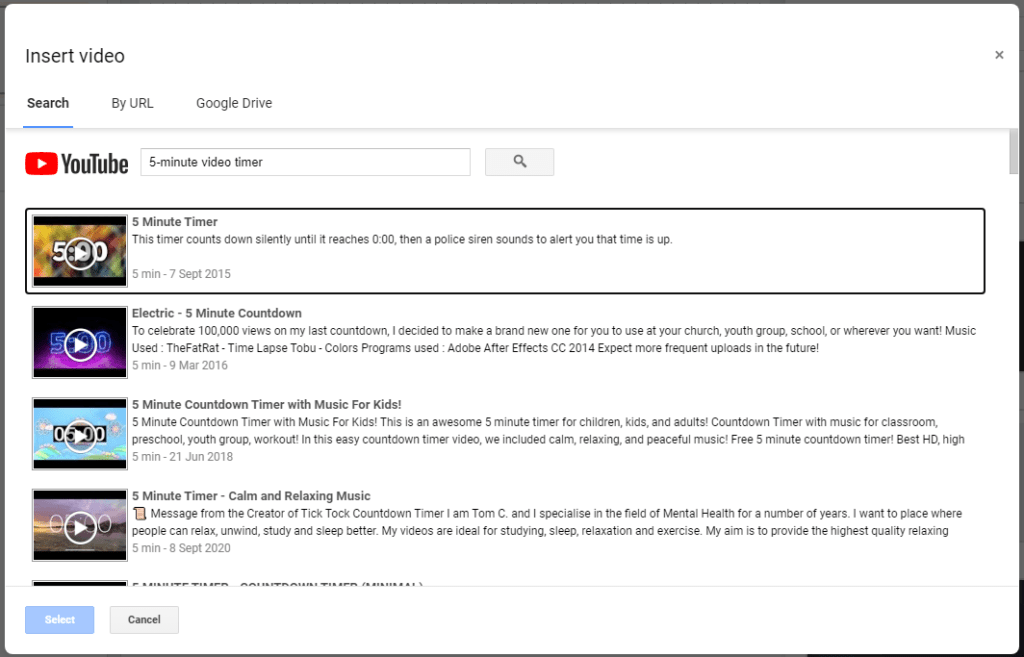
Click the timer that you prefer and click the blue Select button.
The timer video is added to the slide.

Option #2: Enter YouTube video timer URL
This option is the quickest way to get the exact YouTube timer video you want for your presentation.
Click By URL in the Insert video dialog box.
Open the YouTube timer video you want in another browser tab.
Click the Share button at the bottom of the video to open the Share dialog box.
In the Share dialog box that pops up, click COPY to copy the video URL.

Switch back to the Insert video dialog box.
Click in the Paste YouTube URL here box, and press Ctrl + V to paste the timer video URL.
The preview of the video you selected will show up. Click the blue Select button to add the timer video to the slide.
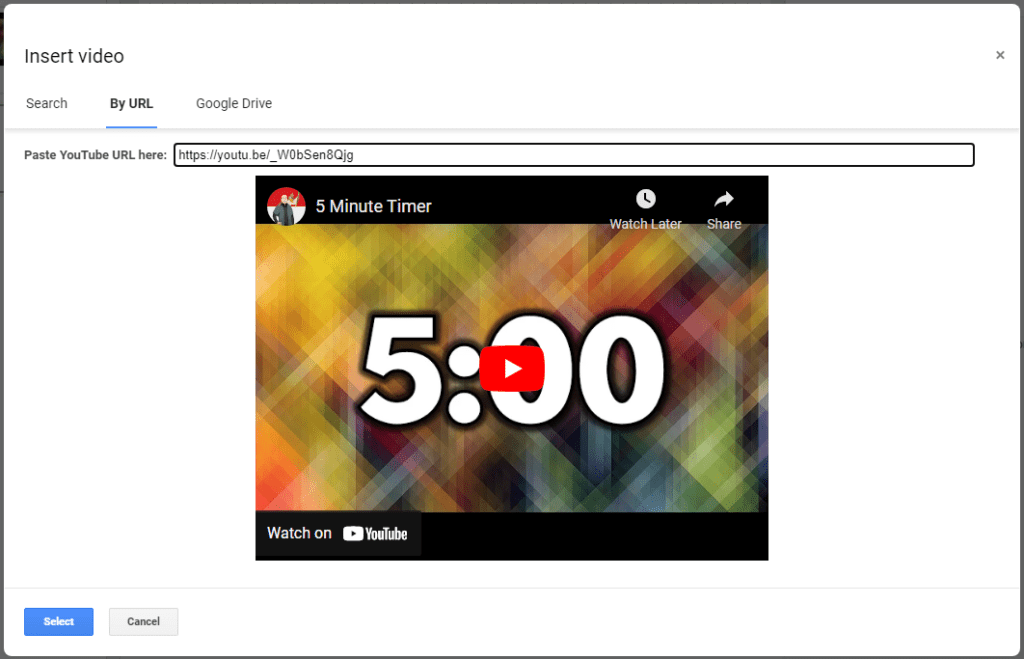
The timer video is added to the slide, as in the example below:
Step #3: Position and resize
Hover the mouse pointer over the timer video and see the cursor turn into a four-headed arrow.
Click and drag the video to your desired location on the slide. As you drag the video, red guidelines appear to assist you in centering the video within the slide.

Resize the video by clicking on and dragging one of the blue boxes on the border of the video.
We suggest you only use the corner boxes when resizing the video to avoid distortion.
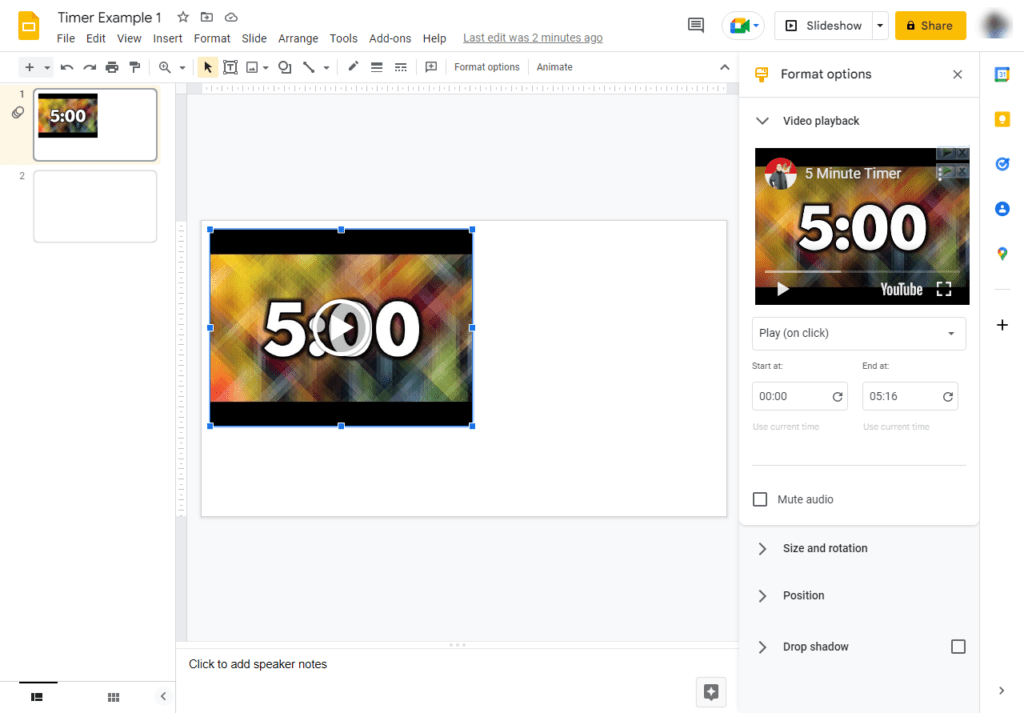
Step #4: Set the format options
The behavior of the YouTube timer video depends on the settings you set. You adjust settings in the four options on the Format options pane on the right side of the slide:

Option #1: Video playback
Click on the arrow next to the Video playback option to open the settings.
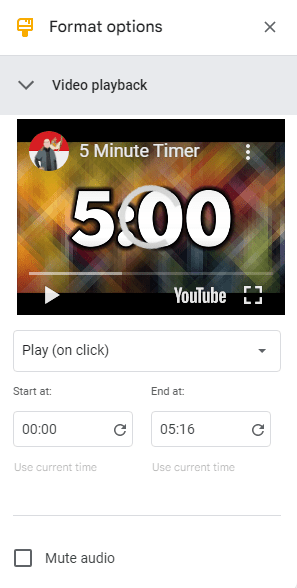
Click the down arrow in the Play drop-down control to see the options that control video playback:

Play (on click ) is the default setting. It means the timer video plays when you advance the slide by a remote clicker, pressing a key, or clicking a mouse.
Play (automatically) – The timer video starts to play without your intervention.
Play (manual) – The timer video plays when you click the play icon on the embedded video.
You can mute the audio on videos by checking the Mute Audio checkbox.
Option #2: Size and rotation
Click the arrow next to the Size and rotation option to open its settings:

You can change the settings in this option to change the size of the video, flip the video or even rotate it. We recommend that you check the Lock aspect ratio checkbox. This ensures that you do not distort the shape of your video as you adjust the settings.
Option #3: Position
Click the arrow next to the Position option to open the settings:

You can change the vertical (x) position and/or the horizontal (y) position of the timer video. Use either the Top left or Center of the video as the starting point or origin.
Option #4: drop shadow.
Click the arrow next to the Drop shadow option to open the settings.

You can adjust these settings to add a shadow effect to the frame of the timer video. Then adjust its color, transparency, angle, distance, and blur radius.
For more information, read How to Embed a YouTube Video in Google Slides .
Method #2: Insert a Timer Video from Your Computer
To insert a timer video stored on your computer in a Google Slide, you must first upload it to Google Drive. If your slide is set to be available offline, your timer video will still be available even if internet connection is lost.
Step #1: Upload the timer video to Google Drive
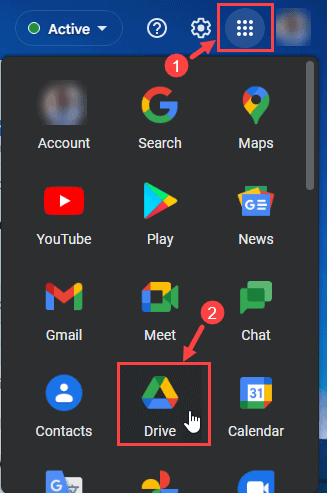
In your Google account, click the Google apps button to open the Google apps list.
Click the Drive app button to open Google Drive.
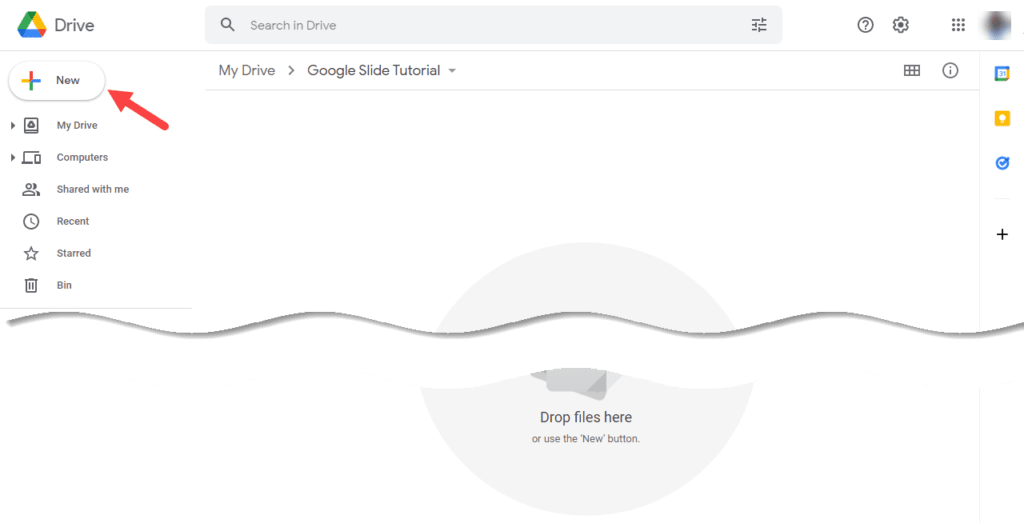
Click the + New button in the top left of Google Drive.
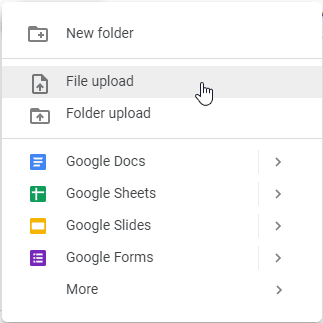
Click File upload on the menu that pops up.
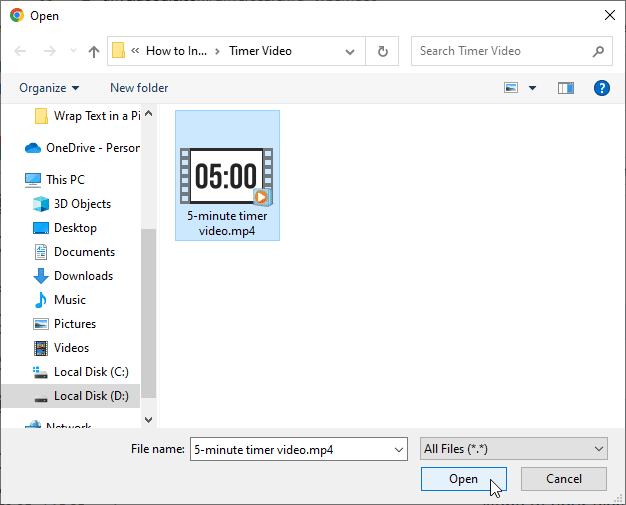
In the Open dialog box that appears, navigate to the folder that stores your video file.
Select the timer video file and click the Open button.
Your timer video file is uploaded to Google Drive as shown in the example below:

Step #2: Insert the video into Google Slide
Click the Google apps button in your Google account.
Click the Slides app button from the apps list to open the Google Slides home screen.

Open your Google Slides presentation. Select the slide to which you want to add the timer video.
From the main menu, click on the Insert tab.
From the drop down that opens, click the Video option.
Click the Google Drive tab on the Insert video dialog box that pops up:
Select the timer video file you uploaded onto Google Drive.
Click the blue Select button to add the video to the Google Slide.
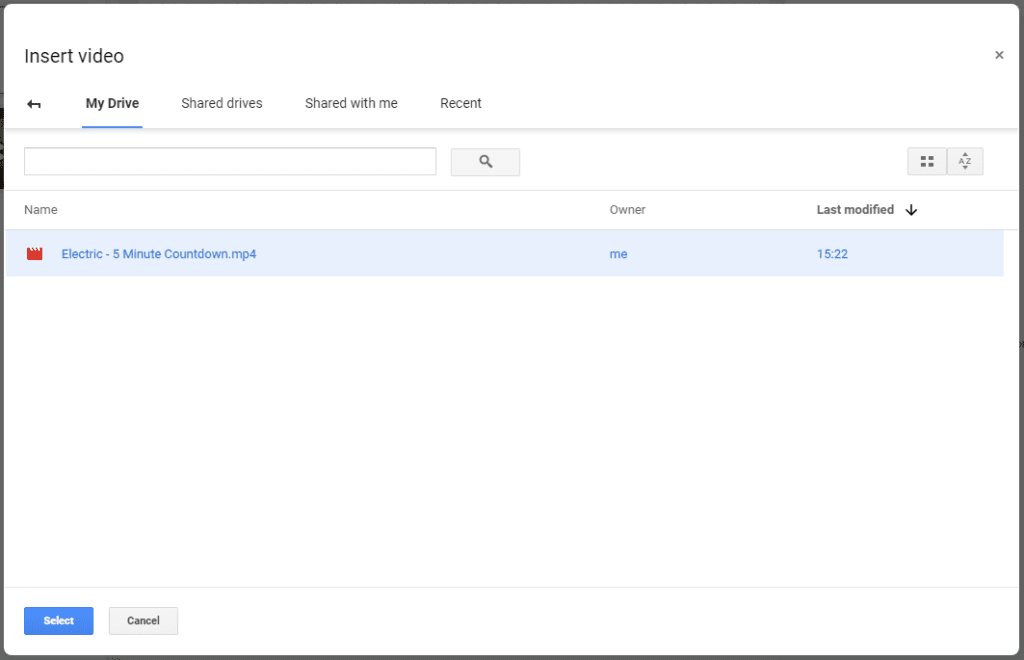
The timer video is inserted.
Resize, position, and apply format settings to the timer video as explained in Method #1.
Method 3: Use the Slides Timer Extension
You can use the Slides Timer extension to insert a timer in Google Slides. The extension allows you to add more customization to the way the text in the timer looks.
Step #1: Open your Google Slides presentation
In the left navigation pane, click the slide in which you want to insert the timer.
Step #2: Insert the timer
Click here to find the Slides Timer extension on Chrome Web Store.
Click the Add to Chrome button to add the extension to the Chrome browser.
Click the Extensions button on the toolbar.
Then click the pushpin button on Extensions menu to pin the Slides Timer on the toolbar.

Ensure that the Slides Timer extension is visible on the toolbar.
Switch back to your Google Slides presentation.
Click the newly added Slides Timer extension.

You can use the Slides Timer extension to create a count-down or count-up (stopwatch) timer.
Create a count-down timer
In the navigation pane on the left, click the slide to which you want to add the timer.
Click the Text box command on the Google Slides toolbar.
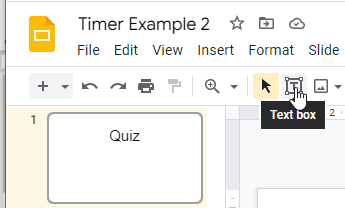
Click inside the slide to insert a textbox.

Type in the textbox your preferred time in the format << time->> . For example, for a 5-minute countdown type in <<5:00->> .
Press Ctrl + F5 or click the Slideshow button on the top right of the slide.
The text is converted to a count-down timer.
Create a count-up timer
Type in the textbox your preferred time in the format << time+>> . For example, if you want the count-up timer to start at 0 (zero) seconds, type in <<00 :00+>> .

The text is converted to a count-up timer.

Google Slides does not have built-in functionality to insert a timer in a slide. This tutorial demonstrated three methods to insert a timer in Google Slide. They involve external means.
You can either insert a video from YouTube or your computer or use the Slide Timer Extension.
Leave a Comment Cancel reply
Save my name, email, and website in this browser for the next time I comment.
- PowerPoint Themes
- Latest PowerPoint Templates
- Best PowerPoint Templates
- Free PowerPoint Templates
- Simple PowerPoint Templates
- PowerPoint Backgrounds
- Project Charter
- Project Timeline
- Project Team
- Project Status
- Market Analysis
- Marketing Funnel
- Market Segmentation
- Target Customer
- Marketing Mix
- Digital Marketing Strategy
- Resource Planning
- Recruitment
- Employee Onboarding
- Company Profile
- Mission Vision
- Meet The Team
- Problem & Solution
- Business Model
- Business Case
- Business Strategy
- Business Review
- Leadership Team
- Balance Sheet
- Income Statement
- Cash Flow Statement
- Executive Summary
- 30 60 90 Day Plan
- SWOT Analysis
- Flow Charts
- Gantt Charts
- Text Tables
- Infographics
- Google Slides Templates
- Presentation Services
- Ask Us To Make Slides
- Data Visualization Services
- Business Presentation Tips
- PowerPoint Tutorials
- Google Slides Tutorials
- Presentation Resources
How to Insert Clock/Timer in Google Slides Presentations?
Master the art of punctual presentations by going through our step-by-step guide to insert a clock/timer into Google Slides. Your audience's attention and your confidence will thank you for that, making your slides visually engaging and impactful.

Ever wondered how to insert a clock into Google Slides? Adding a clock can give you an understanding of how much time to spend on each portion during your presentation. When you add a timer to Google Slides, you are able to maintain a steady and focused pace throughout.
Adding a timer to your Google Slides presentation can substantially enhance its impact. The inclusion of a clock provides your audience with an intuitive and visual indicator, enabling them to effortlessly gauge the time remaining for your presentation or anticipate upcoming breaks.
So, let’s look at the advantages of adding a timer/clock to your Google Slides presentation and learn how to insert a clock in Google Slides professionally.
Benefits of Including a Timer in Google Slides
By having a constant reminder of the time constraints, you can effectively manage your time, ensuring that you cover all key points without rushing or overextending. The following are a few benefits of using a timer in your presentation:
- Balanced Timing: Adding a timer in Google Slides allocate suitable time to each topic, ensuring a well-paced delivery.
- Anxiety Relief: Timers combat presentation anxiety by providing a clear time reference, enabling focused delivery.
- Respectful Timing: Use timers to honor others’ schedules, fitting your presentation within allocated time slots.
- Enhanced Activities: Timers aid activities like timed writing prompts, improving engagement and adherence.
- Organized Confidence: Incorporating timers elevates presentation organization, boosting confidence and engagement.
When you insert a timer into Google Slides presentation, it contributes to a more engaging, organized, and professional experience for both yourself and your audience alike.
How does a Timer for Google Slides work?
Although Google Slides does not include an inbuilt timer function, you can embed or insert a video timer into Google Slides as per your choice. Here are some critical details about its functionality:
- You can alter the formatting options after embedding the video timer in the slide based on how you want the timer to appear and function.
- You and the audience can watch the slide’s video timer as it counts down.
- The timer can be moved around the page adjacent to text and pictures, or you can make it the only thing on the slide.
How to Add a Timer to Google Slides?
The addition of a timer to Google Slides leads to both the audience’s engagement and your seamless time management. There are two ways in which you can insert a timer into Google Slides:
- Using the auto-play option
- Embedding a timer on screen in Google Slides
Using the Auto-play Option
The process to add a timer or clock into your Google Slides presentations is super easy and convenient. Follow these steps below to add a timer to Google Slides using AutoPlay button:
- Open your Google Slides presentation and switch to Present Mode on the desired deck by pressing “Ctrl+F5”.
- Hover your cursor over the three dots in the lower left corner to reveal a box that says “Open the options” menu. Click on the three dots.
- When you click on the dots, a menu will show up. Go to “Autoplay” to select how frequently you want your slides to move forward, with options ranging from two seconds to a minute.
- After selecting your preferred time options, click “Play” at the top of the pop-up menu.
- Your Google Slides presentation will automatically follow the timings you’ve chosen.
How to Add a Timer using Autoplay
Note: You would not be able to see the timer on the slides. Once the selected time-frame is over, your presentation will move on to the next slide.
Embedding a Timer on Screen in Google Slides
Embedding a timer to your Google Slides presentation is a very unique way to present. The quickest way to insert a timer to your Google Slides by embedding a video is to:
- Open your Google Slides presentation or a slide you want to put a timer in.
- Go on “Insert” > “Video” from the top toolbar.
- Search for the timer you wish to dedicate on that particular slide. For example, look for a “five-minute timer” or another desired timer length.
- Alternatively, if you have a URL enter it into the search window and click the video’s thumbnail when it displays.
- Once selected, adjust the video’s dimensions and placement as needed.
- Repeat this procedure for as many slides as you wish to.
How to Embed a Timer on Screen in Google Slides
Note : The video on your slide(s) will also be visible to everyone in your audience.
READ MORE: How To Add A Video To Your Google Slides?
Adding a timer to Google Slides presentations is a wise option. A visual representation of time ensures professionalism and audience attention, while enabling structured rehearsals and Q&A sessions. With the help of these clocks, you can effectively manage your time and maintain your focus on your content and audience.
Now that you have learnt how to insert clock/timer into Google Slides presentation, it’s time to put your skills to test and boast in front of your peers by exploring our vast gallery of Google Slides templates . If you wish to learn more of such tips and hacks to master the art of Google Slides presentation, check out our Google Slides tutorials .
Can I set different times for different slides using timers?
Yes, you can set various times for specific slides to adjust the tempo of your presentation depending on the timer tool or technique you select.
Can I customize the appearance of timers to match my presentation theme?
Many timer tools let you change the font, color, and style of their look to match the aesthetics of your presentation.
Do timers work smoothly on different devices and browsers?
Although timers are intended to function on all platforms, testing your presentation across a range of tools and web browsers is advisable to verify compatibility.
How do I add a timer to a specific slide in Google Slides?
You can add or embed a video to the slide typically to insert a timer to your Google Slides presentation. You can create a timer video or can download it online.
How can I make sure the timer is visible but doesn't distract from the main content?
Position the timer in such a way that it doesn’t block any crucial information, and its appearance blends perfectly with the overall theme of your slide. Once you learn how to add timing to Google Slides, you can take advantage of their benefits each time you deliver a presentation.
Table Of Content
Related presentations.

Business Case Google Slides Template

Business Review Google Slides Template

Milestone Google Slides Template
Related blogs.

10 Bad PowerPoint Slides Examples to Avoid

10 Best Business PowerPoint Templates for Presentations

10 Best Google Slides Templates And Themes For Presentations

10 Best PowerPoint Templates for Finance Presentations
Tags and categories, privacy overview.
Necessary cookies are absolutely essential for the website to function properly. This category only includes cookies that ensures basic functionalities and security features of the website. These cookies do not store any personal information
Any cookies that may not be particularly necessary for the website to function and is used specifically to collect user personal data via ads, other embedded contents are termed as non-necessary cookies. It is mandatory to procure user consent prior to running these cookies on your website.
Android Police
How to add a timer to google slides.
Pace your presentation better by placing a timer in Google Slides
When you plan to deliver a time-sensitive pitch, add a timer to your slides to pace the presentation accordingly. A visual time indicator also gives your audience a better idea of the time remaining and improves your pitch impact. Although Google Slides doesn't have a native countdown timer or clock feature in the web or Android app, there are a few hacks you can use to get the job done.
Whether you want to deliver a presentation to investors or in classrooms or online workshops, a countdown timer can help keep your audience engaged. You can track and finish a presentation with the help of a live clock and save time for conducting a live Q&A session with the audience.
Add a timer using YouTube videos in Google Slides
Google Slides doesn't have an in-built timer function. However, you can use the option to insert a video, which you can use to add a live timer from YouTube. Let's check it in action.
- Navigate to Google Slides on the web and open a presentation you want to edit.
- Check your added video in a slide. You can resize it and place it in a relevant location.
When you type Countdown video in the YouTube search bar, you may notice dozens of videos in suggestions. If you want to insert a specific video, go to YouTube on the web and find your video.
You can copy the video URL from the address bar at the top and insert it into Google Slides. Now, move to a presentation slide, go to Insert > Video , enter the video URL, and add the countdown clip.
What's the difference between Google Slides templates and themes?
Video formatting options in google slides.
There are several video formatting options that you can explore in Google Slides. When you insert a video, click on the thumbnail and expand the Video playback menu.
- Autoplay: You can start video playback by clicking automatically or manually.
- Duration: If a video starts a timer with a specific duration, tweak it from the Start at and End at menus.
If you want to be specific about the video thumbnail's width and height, tweak the size from the Size and rotation menu.
Use a third-party extension to add a timer to Google Slides
If you don't want to deal with YouTube videos, use a third-party extension like Slides Timer to add a timer to Google Slides. It's available via the Chrome Web Store and remains compatible with all Chromium browsers like Microsoft Edge, Google Chrome, Vivaldi, Opera, and Brave. Here's what you'll do.
- Visit the Chrome Web Store and search for Slides Timer .
- Move to Google Slides and select a slide in a presentation.
- Other options include <<time>> to display the current time in AM/PM format and <<date>> to display the date in word format.
If the live timer doesn't work, refresh the tab and click Slideshow again. Press the d key to pause and the e key to reset timers.
Slides Timers extension is free to download and use.
The best Google Slides templates for work, school, and home
Benefits of including a timer in google slides.
Here are the top reasons for using a timer in Google Slides:
- When you want to cover certain topics in a presentation, adding a timer lets you strike a balanced timing.
- You can honor others' timings and schedules and complete your presentation in the allocated time.
- A dedicated timer lets you deliver an engaging presentation. Your audience also appreciates your professional approach.
- A timer is an ideal add-on for quiz presentations.
Don't bore your audience with long presentations
Apart from adding a timer, there are other ways to make a strong impact with your presentation. For instance, if you have a pitch with media files, turn on the autoplay function and keep your PPT file in a loop for your audience.
How To Insert a Countdown Timer in Google Slides Presentations
Adding a countdown timer to your Google Slides presentations can be extremely useful to help pace your presentation and keep your audience engaged. With a timer counting down on your slides, you can effectively manage time limits for discussions, activities, breaks, and more.
While Google Slides does not have a built-in timer function, there are a couple easy workarounds:
Table of Contents
Embed a YouTube Countdown Timer Video
Use the slides timer chrome extension, customize the timer appearance, tips for using timers effectively, can i add multiple timers to google slides, do the timers work when presenting remotely, can i start timers automatically or manually, what do i do if the timers aren’t showing up.
The easiest way to add a visible countdown timer is to embed a countdown timer video from YouTube directly on your slide. Here are the steps:
- Open your Google Slides presentation and navigate to the slide where you want to add the timer.
- Click Insert > Video in the toolbar.
- In the search bar, type in your desired timer duration, like “5 minute countdown timer”.
- Select the countdown timer video you want and click Select .
- Resize and position the video as needed on your slide.
You can set the video to play automatically when you start presenting or manually on click. Just right click the video, choose Format options , and toggle Autoplay when presenting .
Another option is to install the Slides Timer Chrome extension and add a simple text code to your slides to display a countdown timer.
- Install the Slides Timer extension in Chrome.
- In your Google Slides, add a text box to the slide.
- Type your timer code in the format: <<mm:ss>> For example, <<05:00>> would be a 5 minute timer.
- The timer will automatically start when you begin presenting that slide.
You can customize the appearance of your embedded YouTube timer video:
- Resize the frame by dragging the corners
- Reposition by dragging the video around
- Set a colored background
For the Slides Timer extension, you can style the text box with different colors, fonts, sizes, and positions.
Here are some tips to help you utilize timers effectively in your Google Slides presentations:
- Pace discussions – Set a timer for discussion prompts to keep groups focused.
- Manage activities – Give groups a set time limit for activities with a countdown timer.
- Insert breaks – Add a quick timer before the next section to remind attendees to take a break.
- Limit sections – Embed timers to ensure you spend an appropriate amount of time on key sections.
- Add urgency – A ticking countdown can add energy and urgency to spur action.
Frequently Asked Questions
Yes, you can add a separate timer to any slide in your presentation. Just repeat the video or text box embed process for each one.
Yes, the YouTube and Slides Timer options will work both when presenting in-person through a projector or TV and when presenting through Google Slides remotely.
Embedded YouTube timer videos can be set to start automatically when you reach that slide or manually on click during your presentation. The Slides Timer text code starts automatically when presenting that slide.
If your embedded YouTube video or Slides Timer text box isn’t displaying the timer properly, try refreshing the Google Slides browser tab and restarting your presentation. Also ensure any ad blocker extensions are disabled.
Adding a countdown timer can be a great way to boost engagement, manage time limits, and pace your Google Slides presentation effectively. With just a few simple steps, you can embed customizable timers to display on your slides. Experiment with the options to find what works best to keep your audience attentive from start to finish!
[1] https://youtube.com/watch?v=cgqaaWgu-lc
[2] https://bookdown.org/yihui/rmarkdown/some-tips.html
[3] https://youtube.com/watch?v=A-PYCsFA6e0
[4] https://www.hostinger.com/tutorials/write-seo-friendly-content
[5] https://youtube.com/watch?v=nA9fiHhS3fU
[6] https://github.com/gadenbuie/countdown
[7] https://youtube.com/watch?v=z_iPy5nMwXs
[8] https://yoast.com/seo-friendly-blog-post/
[9] https://www.indeed.com/career-advice/career-development/timer-for-google-slides
[10] https://www.simpleslides.co/blog/timer-for-google-slides
[11] https://youtube.com/watch?v=N0BnjbFVuww
[12] https://www.semrush.com/blog/seo-writing/
[13] https://www.brightcarbon.com/blog/add-a-timer-to-google-slides/
[14] https://support.google.com/docs/answer/12014036?hl=en
[15] https://youtube.com/watch?v=LIwkkigS1L8
[16] https://alicekeeler.com/2022/06/10/slides-timer-countdown-in-google-slides/
[17] https://mention.com/en/blog/how-to-create-seo-friendly-content/
[18] https://youtube.com/watch?v=h7o7Ww9W5s4
[19] https://youtube.com/watch?v=vNA5sBXej5Q
[20] https://www.getresponse.com/blog/tips-and-tools-to-write-seo-friendly-content
[21] https://www.businessinsider.com/guides/tech/how-to-add-a-timer-to-google-slides
[22] https://cran.r-project.org/web/packages/countdown/countdown.pdf
[23] https://www.smartbugmedia.com/blog/seo-friendly-content-writing-tips
[24] https://support.google.com/docs/thread/2965253/i-want-to-insert-a-countdown-timer-into-a-classroom-slide-is-this-possible?hl=en
About The Author

AsapGuide Staff
Related posts, how to compare data and highlight differences between columns in google sheets, how to change the condition of a shoe listing on stockx, how to unlock shadow midas skin in fortnite battle royale, how to export and backup google chrome browser extensions, how to ping or notify your followers in the clubhouse app, how to set up and use your laptop like a desktop pc.


Cloud Storage

Custom Business Email

Video and voice conferencing

Shared Calendars

Word Processing

Spreadsheets
Presentation Builder

Survey builder

Google Workspace
An integrated suit of secure, cloud-native collaboration and productivity apps powered by Google AI.
Tell impactful stories, with Google Slides
Create, present, and collaborate on online presentations in real-time and from any device.
- For my personal use
- For work or my business

Jeffery Clark
T h i s c h a r t h e l p s b r i d g i n g t h e s t o r y !

E s t i m a t e d b u d g e t

Make beautiful presentations, together
Stay in sync in your slides, with easy sharing and real-time editing. Use comments and assign action items to build your ideas together.

Present slideshows with confidence
With easy-to-use presenter view, speaker notes, and live captions, Slides makes presenting your ideas a breeze. You can even present to Google Meet video calls directly from Slides.

Seamlessly connect to your other Google apps
Slides is thoughtfully connected to other Google apps you love, saving you time. Embed charts from Google Sheets or reply to comments directly from Gmail. You can even search the web and Google Drive for relevant content and images directly from Slides.

Extend collaboration and intelligence to PowerPoint files
Easily edit Microsoft PowerPoint presentations online without converting them, and layer on Slides’ enhanced collaborative and assistive features like comments, action items, and Smart Compose.

Work on fresh content
With Slides, everyone’s working on the latest version of a presentation. And with edits automatically saved in version history, it’s easy to track or undo changes.

Make slides faster, with built-in intelligence
Assistive features like Smart Compose and autocorrect help you build slides faster with fewer errors.

Stay productive, even offline
You can access, create, and edit Slides even without an internet connection, helping you stay productive from anywhere.
Security, compliance, and privacy

Secure by default
We use industry-leading security measures to keep your data safe, including advanced malware protections. Slides is also cloud-native, eliminating the need for local files and minimizing risk to your devices.
Encryption in transit and at rest
All files uploaded to Google Drive or created in Slides are encrypted in transit and at rest.
Compliance to support regulatory requirements
Our products, including Slides, regularly undergo independent verification of their security, privacy, and compliance controls .
Private by design
Slides adheres to the same robust privacy commitments and data protections as the rest of Google Cloud’s enterprise services .

You control your data.
We never use your slides content for ad purposes., we never sell your personal information to third parties., find the plan that’s right for you, google slides is a part of google workspace.
Every plan includes

Collaborate from anywhere, on any device
Access, create, and edit your presentations wherever you are — from any mobile device, tablet, or computer — even when offline.

Get a head start with templates
Choose from a variety of presentations, reports, and other professionally-designed templates to kick things off quickly..

Photo Album

Book Report

Visit the Slides Template Gallery for more.
Ready to get started?
- Generative AI
- Office Suites
- Collaboration Software
- Productivity Software
- Augmented Reality
- Emerging Technology
- Remote Work
- Artificial Intelligence
- Operating Systems
- IT Leadership
- IT Management
- IT Operations
- Cloud Computing
- Computers and Peripherals
- Data Center
- Enterprise Applications
- Vendors and Providers
- United States
- Netherlands
- United Kingdom
- New Zealand
- Newsletters
- Foundry Careers
- Terms of Service
- Privacy Policy
- Cookie Policy
- Copyright Notice
- Member Preferences
- About AdChoices
- E-commerce Affiliate Relationships
- Your California Privacy Rights
Our Network
- Network World
Google Slides cheat sheet: How to get started
How to use Google Slides to create, collaborate on, and lead business presentations.

Need to build a slide presentation for a meeting, training, or other event? Google Slides is an easy-to-use web app that comes with the essential tools and more. It stores your presentations in the cloud with Google Drive. Anyone with a Google account can use Slides and Drive for free, and they’re also included with a Google Workspace (formerly G Suite) subscription for business and enterprise customers. There are Google Sheets mobile apps for Android and iOS, too.
This guide will help you become familiar with the Google Slides web interface and show you how to start a new presentation, upload a Microsoft PowerPoint file to edit in Google Slides, collaborate with others on your presentation, and finally, present it to others.
Create or open a presentation
Log in to your Google or Workspace account. Then:
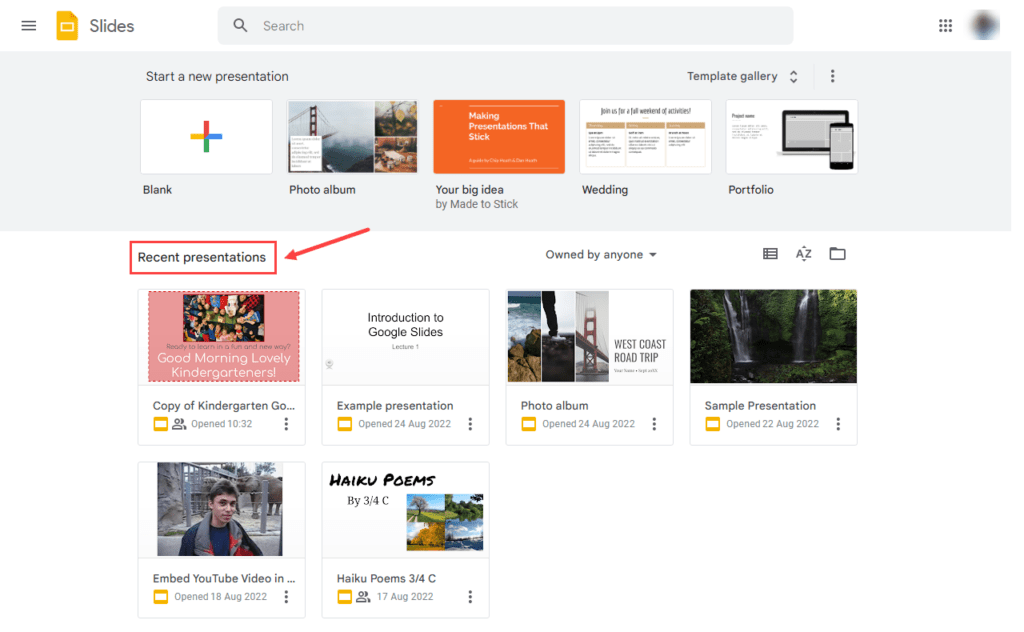
From Google Slides : At the top of the home page, you’ll see a “Start a new presentation” header, with a row of thumbnails underneath. To start a new, blank presentation, click the Blank thumbnail. To start a new presentation in a template, select one of the thumbnails to the right or click Template gallery toward the upper-right corner, then click any thumbnail on the page that appears.

The Google Slides home page. (Click image to enlarge it.)
Below the “Start a new presentation” area you’ll see a list of presentations that are stored in your Google Drive or shared with you. To open a presentation, click it in this list.
The list of your presentations appears in reverse chronological order starting with the presentation you most recently opened. Clicking the “AZ” icon at the upper right of this list changes the sort order to Last modified by me , Last modified , or in alphabetical order by presentation title. You can also browse to a specific folder by clicking the folder icon next to the “AZ” icon.
From Google Drive : Presentations stored in your Google Drive are listed in the main window of the Drive home page. To see a listing of presentations that others are sharing with you, click Shared with me in the left column. From either list, double-click a presentation to open it in Google Slides.
To start a new, blank presentation, click the New button at the upper-left of the screen and then click Google Slides .
If you want to use a template to start a new presentation, click the New button, then move the cursor over the right arrow next to Google Slides and select From a template . The template gallery for Google Slides will open; click a thumbnail to start a new presentation in that template.

Creating a new presentation from Google Drive.
From Google Slides or Drive: You also can use the search box at the top to find presentations in your Google Drive or shared with you. Enter words or numbers that may be in the presentation you’re looking for.
Upload a PowerPoint presentation to Slides
You can edit a Microsoft PowerPoint presentation in Google Slides, but first you must upload it to Google Drive.
From Google Slides: Click the folder icon ( Open file picker ) that’s above and toward the right corner of your presentations list. On the panel that opens, click the Upload tab. Drag-and-drop your PowerPoint file (.ppt or .pptx) onto this panel, or browse your PC’s drive to select it.
From Google Drive: Click the New button, then File upload , and select the PowerPoint file from your PC’s drive and click Open .
Traditionally, when you uploaded PowerPoint files to Google Drive, they were automatically converted to Slides format. That’s still the case when you upload PowerPoint files via the Google Slides home page .
However, Google now supports the ability to edit Microsoft Office files in their native format. By default, any .pptx files that you upload via Google Drive will remain formatted as PowerPoint documents. You can edit and collaborate on a PowerPoint file right in Slides, with all changes made by you or your collaborators saved directly to the PowerPoint file.
On the Google Slides and Drive home pages, native PowerPoint files will be denoted with an orange “P” icon, and when you open a native PowerPoint file in Sheets, you’ll see a “.PPTX” flag to the right of the document title.

Native PowerPoint files show the PowerPoint icon (top) instead of the Google Slides icon (bottom).
If you’d rather have Google convert PowerPoint files to Slides format automatically when you upload them via Google Drive, click the gear icon in the upper-right corner of the Drive home screen and select Settings from the drop-down menu. In the Settings box next to “Convert uploads,” check the checkbox marked Convert uploaded files to Google Docs editor format .
Work in a presentation
When you open a new or existing presentation, its first slide appears in the main window of Google Slides. Here’s a breakdown of the toolbars, menus, panes, and sidebars that appear around your presentation.
The left pane shows thumbnails of all the slides in your presentation. Click a thumbnail, and the slide it represents will appear in the main window, where you can edit it.

The Google Slides editing interface. (Click image to enlarge it.)
Your presentation’s title appears along the top of the screen. To change it, click anywhere inside the title and start typing.
The menu bar below your presentation’s title has a complete set of tools for working with presentations. These are the main submenus to know:
- File has commands for taking action on the whole presentation, including Print, Rename, and Share.
- Edit lists the standard editing commands such as copy, cut, paste, delete, duplicate, and find and replace.
- View lists several ways that you can view your slides as you design and edit them. This includes arranging them into a grid, previewing them as a slideshow, or zooming in on them. You can also watch the transition effect that takes place between slides when they’re played in a slideshow.
- Insert lets you add several objects to your slides, including charts, diagrams, pictures, tables, and text. You can also add links to YouTube videos or sound or video files that are stored in your Google Drive.
- Format lets you change the look of your slides. Certain functions on this submenu become clickable depending on whether you’ve selected an image or text on a slide, or selected the slide itself.
- Slide is where you can add, delete, or duplicate a slide that you’ve selected. You can also add a preset layout to a slide, change its background or theme color, or add and edit a transition effect that takes place between slides when your presentation is played as a slideshow.
- Arrange lists tools that let you group or reorder objects on a slide in relation to another. For example, you can place an image behind another image or group an image and a block of text together to make them easier to move at once.
- Tools leads to several miscellaneous functions. These include letting you record a voice clip to go with a slide, running a spell checker, and showing you a list of objects in your presentation that are linked to other files.
The toolbar directly above your presentation puts commonly used commands in easy reach. From this toolbar, you can click buttons to add to a slide or change its background, comments, layout, objects (images, lines, shapes, text), text style, theme colors for the whole presentation, transition effects during a slideshow, and more. The buttons on the toolbar change depending on whether you’ve selected image or text on a slide or the slide itself.
Notice that there’s no Save button in the toolbar — or anywhere in Google Slides. That’s because Slides automatically saves any changes you make to your presentation.
Speaker notes: Along the bottom of each slide you’ll see an area marked Click to add speaker notes . Here you can type in brief notes to remind yourself what to do or say when the slide is being shown. Only you will see these notes when you show your presentation to an audience.
Themes sidebar: When you start a new blank presentation, the Themes sidebar opens on the right side of the screen. (You can also open this sidebar at any time by clicking Theme on the toolbar above your presentation.) Themes apply the same fonts, colors, and other design elements to all the slides in a presentation, giving it a consistent look and feel. Click a thumbnail in this sidebar to change your presentation to that theme.
Create and manage slides
Here are the basic things to know about working with slides in a presentation.
Add a new, blank slide to your presentation: Click the + button at the left end of the toolbar above your presentation. Alternatively, if you click the down arrow next to the +, you can choose a layout to use as the basis for a new slide.

Click the down arrow next to the + button in the toolbar to choose a layout for a new slide.
Apply or change a slide’s background: Select the slide’s thumbnail in the left sidebar and click Background on the toolbar above your presentation. On the panel that opens, you can change the slide’s background color or use an image file from your Google Drive, Google Photos account, or PC as the background.
Apply or change a slide’s layout: Select the slide’s thumbnail in the left pane, then click Layout on the toolbar above your presentation. On the panel that opens, select the layout you want to apply to this slide.
Apply or change a slide’s transition: Select the slide’s thumbnail in the left sidebar and click Transition on the toolbar above your presentation. In the Motion sidebar that opens along the right side of the screen, you can apply or change the animated transition effect that is played before this slide.

Choosing a transition style in the Motion pane.
Move a slide to a different spot in the slideshow sequence: Click and hold its thumbnail in the left sidebar, drag it up or down to another place in the sequence, and release it.
Delete a slide: Right-click its thumbnail in the left sidebar and select Delete from the pop-up menu. Alternatively, select its thumbnail and select Edit > Delete from the menu bar or just press the Delete key.
Share and collaborate on a presentation
Presentations are often a group effort, with several team members contributing to and polishing a presentation. In Slides, it’s easy for multiple collaborators to work on a presentation together.
First, you need to share the presentation. When you’re viewing your presentation in Google Slides, click the Share button at the upper-right. Or, from your Google Drive homepage, click to highlight the presentation that you want to share. Then, in the toolbar toward the upper right, click the Share icon (a head-and-shoulders silhouette with a +).
Either way, the “Share” panel will open.

Setting permissions for a file being shared privately.
Share a presentation privately
In the entry box, enter the email addresses (or names of your Google Contacts) of the people with whom you want to share. By default, the people you invite to your presentation can edit it and reshare it with others.
To change access permissions for invitees: Click Editor to the right of the entry box and choose another option from the drop-down menu. Commenter means they can view your spreadsheet and add comments but can’t change it. Viewer means they can view your presentation but can’t edit it or add comments.
To prevent your presentation from being reshared, downloaded, or printed: Click the gear icon at the upper-right of this panel. On the smaller panel that opens, uncheck the boxes by Editors can change permissions and share and Viewers and commenters can see the option to download, print, and copy .
When you’re done setting permissions (and, optionally, typing in a message to your invitees), click Send , and everyone you’ve added will receive an email with a link they can click to access the document.
The shared presentation icon.
A presentation you’ve shared (or that others have shared with you) will have an icon of two silhouetted heads next to it in the presentations list on your Google Sheets and Google Drive home pages.
To limit or change a person’s access to your presentation: With the presentation open in Google Slides, click the Share button at the upper-right. Or, from Google Drive, highlight the presentation and click the Share icon.
The Share panel reopens showing a list of all the people you’ve invited, along with their permission status. Click the down arrow to the right of a person’s name, change their permission level or remove their access entirely, and click Save .

You can change permissions for people you’ve shared a presentation with on an individual basis.
If you have a Google Workspace subscription, another option is to select Give temporary access and, next to Access expires , select a date within one year of the current date. If you set an expiration date for a person that you’ve assigned as Editor, their access will be downgraded to Commenter on the expiration date.
Share a presentation publicly
Most business users will want to share presentations privately with select colleagues or clients, but you do have the option to share a presentation publicly. At the bottom of the Share panel is a “General access” area where you can copy a link to the document. By default, this link is restricted to those you invite to the document. To change it to a public link, click Restricted and select Anyone with the link from the menu that appears.
Click Copy link and the link to your presentation will be copied to your PC’s clipboard. You can share this link by pasting it into a chat message, document, email, forum post, or most other means of online written communication. Anyone who clicks this link will be able to view your presentation online. (Be aware that anyone can copy and reshare this link.)
To allow anyone in the public to comment on or edit your presentation: At the bottom right of the Share panel, click Viewer and select Commenter or Editor from the drop-down menu. Then click the Done button. Now the web link to your presentation will let anyone who clicks it add a comment or edit it.

Sharing a spreadsheet publicly.
To turn off public sharing for your presentation: Bring up the Share panel again. Near the bottom, click Anyone with the link and select Restricted from the menu, then click the Done button.
Note: You can apply both public and private sharing methods to your presentation. For example, you could allow the public to only view your presentation, but allow specific people that you’ve invited to comment on or edit it.
Collaborate on a presentation
The people you’ve shared a spreadsheet with can view or work on it at the same time as you or at other times. Remember that people who have Editor privileges to your presentation can change all aspects of it. Having multiple people making changes to a presentation can get confusing. In most cases, setting everyone to Commenter is the best way to collaborate in Slides: People can attach comments to a slide or to objects in a slide, but their comments won’t alter your presentation’s information or design.
To add a comment to a slide: Right-click its thumbnail in the left sidebar and select Comment from the menu that opens. Alternatively, you can select its thumbnail and select Insert > Comment from the menu bar or click the Add comment button (a speech balloon with a + sign).
A blank comment card with your name on it opens to the right of the slide in the main window. On this card’s entry line, type a brief comment, and when you’re finished, click the Comment button.

Typing in a new comment.
To add a comment to an object on a slide: Right-click the object (a block of text, chart, image, picture, etc.) and select Comment from the menu that opens. Alternatively, you can select the object and select Insert > Comment from the menu bar.
To draw someone’s attention to a comment: As you’re composing the comment, type the @ symbol and begin typing their name, then select the person from the list of suggested Google contacts that appears. They’ll receive an email notifying them of the comment and linking to it.
To read, reply to, or remove a comment: A slide that contains a comment is denoted in the left sidebar with a speech balloon by its thumbnail. Click the slide’s thumbnail to make the slide appear in the main window, and you’ll see all its comment cards on the right.
To reply to a comment, click its card. The card will expand to reveal an entry line where you can add a comment in response.

Replying to a comment.
Clicking the checkmark at the upper right marks the comment card as “resolved” and removes the card from the presentation. Clicking the card’s three-dot icon opens a menu that lets you edit or delete your comment.
To see a list of all comments: Click the Open comment history icon (the speech balloon) to the left of the Slideshow button. A sidebar will open along the right side of the screen; it lists all the comment cards in your presentation. When you click a comment on this list, the view of your presentation in the main window will jump to the cell where the comment is located and open its comment card.

The Comments pane lets you quickly review all comments and jump to specific ones.
For more details about collaborating on your presentation, including what it’s like to collaborate in real time, see “ How to collaborate on a document ” in our Google Drive guide. You can also collaborate on a presentation in Google Chat; that’s covered later in this story.
Recover older versions of a presentation
It’s easy to go too far when making tweaks to a presentation. Fortunately, it’s also easy to roll back to an earlier version of the presentation. Click File > Version history > See version history . This opens a panel on the right that shows a list of older versions of your presentation.

Using Version history to view an earlier version of a presentation. (Click image to enlarge it.)
To view an earlier version of your presentation: Click the date for it in the list. That version of the presentation will then appear in the main window.
To restore an earlier version so it replaces your current presentation: With the version you want to restore showing in the main window, click the yellow Restore this version button at the top of the screen. The restored version will then appear at the top of the version history list.
To give an older version a unique name: Click on its date. You’ll be prompted to type in words to replace the date. (The date and time will then appear in smaller size underneath the new name.)
Give a presentation
When it’s time to play your presentation to an audience, Google Slides has two modes: Slideshow and Presenter view. Slideshow mode essentially shows what your audience will see. Presenter view mode provides additional tools for your eyes only that run alongside Slideshow mode.
Slideshow mode: Click the Slideshow button at the upper-right corner of the screen. Google Slides will expand to full-screen view and show the slide that’s currently in the main window. (If you want to start the slideshow from the first slide in your presentation, click the down arrow to the right of the Slideshow button and select Start from beginning .)

The control bar in Slideshow mode lets you click through the slides, turn on auto-play, use a laser pointer effect, and more. (Click image to enlarge it.)
When you move the on-screen pointer to the lower-left corner of your presentation, a control bar appears. You use this to click forward and back through the slides. Clicking the three-dot icon on the control bar opens a menu with other controls, such as starting auto-play and adjusting how quickly it moves from slide to slide.
On this menu, Turn on the laser pointer turns the mouse pointer into a simulated red laser dot. Captions preferences — available only if you’re using a Chrome browser or Chromebook — lets you turn on real-time, automatic transcribing of your words as you say them (English only) and shows them to your audience as on-screen captions. Open speaker notes takes your presentation out of full screen and opens a separate “Presenter view” window, as described below.
Presenter view mode: Click the down arrow to the right of the Slideshow button and select Presenter view . This shows the presentation in your browser window and launches a separate window that assists you while you’re giving your presentation.

Presenter view lets you (but not your audience) see your speaker notes while presenting. (Click image to enlarge it.)
From the Presenter view window, you can jump to any slide in your presentation, read the speaker notes you wrote for a slide, and control the Q&A feature. There’s also a timer that you can set to remind yourself how much time you’re spending showing a slide — or the entire presentation — to your audience.
Click the AUDIENCE TOOLS tab to use the Q&A feature, which lets you take questions from your audience. To open questions for a slideshow, click the Start new button. A web link appears at the top of your presentation. An audience member watching your presentation on their computer, phone, or tablet can click/tap that link, which will take them to a page where they can type a question for you. You’ll see the question in your Presenter view window, and you can choose whether to show their question to the rest of your audience during the presentation. To close questions for a presentation, turn the switch from ON to OFF .

Audience members can submit questions from their devices, and the presenter can decide whether to display them as part of the slideshow. (Click image to enlarge it.)
Present in Google Meet
Need to give a presentation during a Google Meet video meeting? As long as you’re using a Chromium-based browser (Chrome, Microsoft Edge, Opera, etc.), it’s easy: Toward the upper right of the Google Slides page, click the Google Meet icon. From the panel that opens, select a meeting that’s scheduled on your Google calendar today, start a new meeting, or type/paste in the web link or code that you have for another meeting.

Click the Meet icon to get started presenting to a video meeting.
If you start a new meeting, a sidebar for the meeting will open on the right. At the bottom of the sidebar, click the Present now icon (a box with an up arrow). On the panel that appears, select your presentation and click the Share button, and you’ll be presenting to the meeting.

Choose which tab or window you want to share and click the Share button. (Click image to enlarge it.)
If you join a scheduled meeting, you have two choices: “Join the call” and “Just present this tab.” If you click Join the call , a sidebar for the meeting will open on the right. Follow the same steps as above to present to the meeting. If you click Just present this tab , you’ll go directly to the panel where you select your presentation and click Share , but you won’t have a sidebar where you can follow the main meeting.
To stop sharing your presentation to the meeting, click the Stop sharing button at the top left of your browser window.
For more details about using Google Meet, see our Google Meet cheat sheet .
Download and export a presentation
Google Slides lets you download presentations for use offline. On the top menu, select File > Download and choose a file format. You can save your presentation to your PC as a PowerPoint (.pptx) file or in other formats such as PDF, or as JPG or PNG for an individual slide.
5 tips for working with Google Slides
Now that you’re comfortable working in Google Slides, try these intermediate tips.
Use the Google Slides mobile app
With the exception of the “Version history” tool, the Google Slides app for Android , iPhone , and iPad has many of the same features described in this guide.
When you have a slideshow open, the toolbar at the top of the screen lets you take a variety of actions:
- To present your slides on your phone or tablet, on a Chromecast device, or in a Google Meet meeting, tap the triangle icon.
- To share your presentation with other people, the headshot silhouette. (See “How to share from the Google Drive, Docs, Sheets, and Slides mobile apps” in our Google Drive cheat sheet .)
- To view all the comments in the presentation, tap the Comments icon (a chat balloon) if you see it in the toolbar, or tap the three-dot icon and select View comments from the menu that appears.
- The three-dot menu also lets you see the presentation’s Q&A history, export it, make it available offline, and more.

The Google Slides Android app.
To edit or comment on a slide: Tap the slide, and a menu will appear that lets you add or view comments for that slide or edit it. Tap an element on a slide, such as text or an image, and tools to edit that element will appear.
Any changes you make to your presentation in the mobile app are automatically saved and will appear the next time you open it in the Google Slides web app.
Get suggested slide layouts and content
Click the Explore icon at the lower-right corner of the screen. The Explore sidebar will open along the right side. In most cases, you’ll be presented with thumbnails of suggested layouts that Google Slides has automatically customized for the slide that’s open in the main window. Click the one you want, and it will be applied to the slide.

Use the Explore tool to get suggested layouts (left) and search for images (right).
At the top of the Explore sidebar is a search box. You can type in a word or phrase to find related content on the web or in your Google Drive. Search results appear on separate Web, Images, and Drive tabs in the sidebar. Click a web or Drive result to open it in a new browser tab. On the Images tab, click the + icon on the upper-right corner of an image to insert it onto your slide.
Create custom slide layouts to use as templates
You can design your own slide layouts to use as templates in any future presentation. First, open a new, blank presentation as described above. Then:
- On the menu bar over the blank presentation, select View > Theme builder .
- The main window switches to a layout editor. Toward the left you’ll see a column with the heading THEME on top and LAYOUTS just below that. Click the thumbnail of any layout in the LAYOUTS list. It will appear in the main window.
- You can remove objects that are already in any layout. For example, click on a block of text. A frame appears around the text. Without selecting the text itself, move the pointer to ward an edge of the frame, right-click, and select Delete from the menu that opens.

Creating a custom slide layout. (Click image to enlarge it.)
- Using the formatting toolbar above the slide, you can add new objects to the slide, including images, image placeholders, shapes, lines, and blocks for text. (Tip: enter placeholder words inside the text blocks.) When you click on any object, a frame appears around it. Drag and drop the frame to relocate it on the slide, or drag its edges to change its shape or size. You can also add or change the border and background colors for any object on the slide and/or change the background color for the whole slide.
- When you’re finished designing your layout, click the Rename button above the slide and give the layout a unique name.
- If you want to create another custom layout, click on the thumbnail of another layout under the column LAYOUTS and repeat the above steps starting from #3.
- When you are finished custom-designing all your layouts, click the X toward the upper-right of the slide layout in the main window.
- Along the top of the screen, click anywhere inside Untitled presentation and start typing. Tip: Use a name that indicates this is a template (e.g., “Annual Budget Presentation – Template”).
In the future, you can make new presentations starting from this template, and your custom slide layouts will be available.
- Open the template presentation you created in the steps above. On the menu bar, click File > Make a copy > Entire presentation . On the panel that opens, type in a name for the new presentation you want to create and click the Make a copy button. Google Slides will open this new presentation in a new browser tab.
- On the toolbar above the first slide of your new presentation, click Layout . From the panel of thumbnails that opens, select one of the layouts that you created. It will then be applied to the slide in the main window.
Collaborate on a presentation in Google Chat
An alternative way to collaborate on a presentation is to share it in Google Chat. Other people in your chat can add comments and help make changes to your presentation.
Start in Google Chat . To the left of the box where you type in your chat messages, click the + icon and select Drive file from the menu that opens. A panel will open over the screen listing the files in your Google Drive. Find and click your presentation to highlight it, then click INSERT on the lower-right corner.
You’ll be taken back to the chat message box. Click the blue right-pointing arrow to the right of the box, and a panel will open over the screen designating permissions for the shared presentation. By default, permissions are set to Comment. To change this, click Comment and select View or Edit . You can also allow the people in the chat to share a web link to your presentation with others outside of the chat by selecting Turn link sharing on .

You can share a presentation to individual or group chats in Google Chats. (Click image to enlarge it.)
After you’ve set the permissions, click SEND , and your message will appear in the chat stream with a large thumbnail of your presentation. To open a presentation in the chat, click the thumbnail. The presentation will open inside a large window that’s laid out alongside the right of the chat stream.
This is actually Google Slides running inside the chat window with your presentation loaded in it. Thus, most of the Slides commenting and editing tools are available for you and others in the chat to use on your presentation (if you granted them permission to comment or edit). The user interface is the same, except there’s no menu bar.

Collaborating on a presentation from within a Google Chat. (Click image to enlarge it.)
Use keyboard shortcuts
Save time in Slides by using keyboard shortcuts for common tasks. Below are some of the most useful to know. For more, select Help > Keyboard shortcuts from the top menu when you have a spreadsheet open or press Ctrl + / (Windows, Chrome OS) or ⌘ + / (macOS).
Handy Google Slides keyboard shortcuts
This story was originally published in September 2019 and updated in August 2022.
Related content
How dhl harnessed genai to unify 200 career sites into a single platform, how many jobs are available in technology in the us, apple's find my system is coming to android, how to use a smartphone as a mobile hotspot, from our editors straight to your inbox.
Howard Wen ( www.howardwen.com ) is a longtime contributor to Computerworld . He specializes in explainer guides, how-tos, and reviews of office applications and productivity tools.
More from this author
Google docs cheat sheet: how to get started, 8 highly useful slack bots for teams, microsoft onedrive cheat sheet, 9 chrome extensions that supercharge google drive, most popular authors.

- Howard Wen Contributing Writer
Show me more
Android 14 upgrade report card: predictable unpredictability.

A phish by any other name should still not be clicked

India is about to become Apple's third-biggest market
The link between smartphones and social media addiction

Sam Bankman-Fried gets 25 years in prison

How to combat social media addiction

April 4, 2024
11 Best Websites for Making a Presentation (And How to Choose One For Your Needs)
Here are 11 of the best websites and programs to create free presentations online
Co-founder, CEO
The best websites for making presentations equip you with all the tools needed to build a professional, attractive, and informative slide deck quickly and efficiently. But with dozens of slide makers claiming to be the best, it’s hard to choose an app that suits your needs best.
We’ve done the legwork for you and scoured the web for the best presentation websites. We based our evaluation on factors such as functionality, ease of use, AI sophistication, collaboration tools, and value for money. Below is the result — a comprehensive overview of the 11 best web-based slide creation apps based on our findings.
Short on time? Summary of the best sites for making a presentation
1. plus ai — best all-round presentation maker.

Key Features
- Adds easy-to-use AI to Google Slides
- Affords customization options for slide templates, colors, and logos
- Allows slide deck generation via different methods
- Facilitates collaboration within teams on Google Workspace
- Features a setting-rich but straightforward user interface
- $10/month for Basic and $20 for Pro versions when billed annually ($15 and $30, respectively, with monthly billing)
Plus AI is a powerful and user-friendly presentation maker that’s suitable for any purpose, whether you’re a professional, student, or amateur user.
Plus AI gives you a robust selection of AI slide creation methods. You can generate presentations straight from text, work on them slide-by-slide, design them from scratch, or use existing templates. Regardless of the method, the tool’s AI technology does all the heavy lifting design-wise and the interface is a breeze to navigate, so you can sit back and focus on the content.
Meanwhile, the customization options allow you to tailor the slides to your desired aesthetic, content type, and audience, and you can create your presentation in 80 languages. The resulting slide decks are elegant, professional, and appropriate for any use case.
Plus AI is an affordable presentation maker, with pricing that starts at $10 per month with annual billing, or $15 when billed monthly. Each of the plans includes an AI extension for Google Docs; this feature helps you compose and edit text. If you’d rather not spend money without taking the tool for a test drive, Plus AI offers you a 7-day free trial.
Here are the key pros and cons of Plus AI — they should help you decide if this presentation maker is right for you:
- Generates professional and visually appealing presentations in minutes — no design skills needed
- AI function allows you to edit and format slides without manual effort
- Lots of ways to customize the presentation
- Vast selection of templates and example presentations
- Text-to-slide and from-scratch creation
- Allows team collaboration in Google Workspace
- Integrates with Google Slides and Microsoft PowerPoint
- Budget-friendly plans and a 7-day free trial
- Plus creates presentations in Google Slides or PowerPoint format, which may be harder for newer users to edit
2. Canva — Best free presentation site

- Offers mobile presentation templates
- Web- or mobile-based Canva app supports collaboration
- Remote Control feature lets you run the presentation from your smartphone
- Canva live feature allows viewers to join QA sessions during a presentation
- Presenter mode lets you see your speaking notes and upcoming slides while you present
- AI assists in slide creation and can present on your behalf
- Individual Free Plan: $0 per month
- Individual Pro Plan: $14.99 per month
- Teams Plan: $29.99 per month
Canva is a web-based template editor with graphics creation tools and a powerful presentation builder in its free plan. Canva offers you an array of slide templates designed for virtually any purpose, along with a suite of customization tools to tailor the presentation to your topic and setting.
Canva has made a noticeable effort to optimize presentations for the smartphone. The app’s most striking feature is its selection of mobile presentation templates, which don’t lag their desktop-based peers in either aesthetics or utility. But whether or not your presentation is designed for a mobile screen, Canva lets you run it right from your smartphone, with a presenter view that shows your notes and upcoming slides. The audience can likewise engage with your presentation from their mobile devices during Q&A sessions.
Depending on your use case, you may be able to get away with Canva’s comprehensive free plan. The free Canva has presentation creation and editing tools and gives you access to a huge selection of professional templates. However, it’s the $14/month Pro plan that lets you unlock all the premium tools and graphic assets. And if you need Canva to collaborate with teams, you’re looking at $29.99 per month for the first 5 users.
To help you decide whether Canva is worth trying out, we’ve made this quick summary of the app’s pros and cons:
- Solid free plan with basic features and a large selection of graphic assets
- Optimized for mobile presentations
- Elegant templates for any use case
- Intermediate design skills required
- No direct integration with Google Workspace or Microsoft 365 (possible through third-party apps)
3. Prezi — Best slide tool for creative users

- Web-based tool for creating presentations, videos, and infographics
- Asset library includes templates, ready-to-use story blocks, and stock images from Unsplash and GIFs from
- Integrates with Webex, Zoom, Microsoft Teams, and other video conferencing apps to show presentations and the presenter on the same screen
- Lets you convert PowerPoint presentations to Prezi
Pricing (all plans are billed annually)
- For students/educators: $3-8 per month
- For individuals: $7-19 per month
- For businesses: $15-29 per month
Prezi is a web-based tool for creating presentations, videos, and infographics that are suitable for business and educational settings. The tool offers a wealth of image and icon assets, as well as templates to get you started on your slide deck. The templates do not constrain your creativity with linear slides the way PowerPoint does — you can create your presentations on an open canvas. Prezi even lets you import and customize PowerPoint presentations in its app. And, with the help of Prezi’s new AI tool, you can create and edit entire presentations quickly.
One of Prezi’s most defining features is its integration with popular video conferencing apps, such as Webex, Zoom, Teams, and Meet. Crucially, Prezi lets your slides appear on the same screen as your own video feed while you’re presenting.
Prezi offers three pricing tiers. Students and educators get the least expensive options, with plans that range between $3 and $8 per month. For individual users, plans cost $7-19 per month, while business users pay between $15 and $29 per month. All of Prezi’s plans are billed annually, but you can try the tool for 14 days without committing to a subscription.
If you’re not sure whether this presentation tool is right for you, consider Prezi’s pros and cons below:
- Design freedom and for creating unique and attractive slides
- Graphic assets are readily available
- Integrates with video conferencing apps
- AI assistant generates and edits presentations
- Inexpensive plans for students and educators
- Video and infographic creation part of each plan
- 14-day free trial
- Design skills required to create quality presentations
- Lack of integration with Google Slides and Microsoft PowerPoint
- No monthly billing options
4. Visme — Best for graphics and special effects

- Tools for creating special effects and animating graphics
- Ability to import and edit Microsoft PowerPoint presentations
- AI designer helps create a presentation draft
- Integration with Google Drive, DropBox, Mailchimp, Slack, and other apps
- Presentation analytics tools
- Basic package: $0/month
- Starter package (individual): $12.25/month
- Pro package (individual or team): $24.75-$79+/month
Visme is a web-based app for producing various types of visual content, including presentations. The app’s most distinct feature is its suite of special effects you can use to make the slides’ content and graphics more engaging. The app also lets you animate the images and insert video and audio features into the slides.
Visme integrates with a whole host of other platforms and apps. These integration options are largely designed to let you import content seamlessly into Visme. For example, you have the option of importing your PowerPoint files into Visme, enhancing them there, and exporting them back in the .ppt format if you like. That said, Visme does not work as an extension in popular slide makers, like Google Slides or PowerPoint.
You have three main pricing options with Visme. The Basic plan is free, but you’re limited in access to collaboration tools, assets, interactive, and AI features. The more comprehensive Starter plan costs $12.25 per month (billed annually), and equips you with Visme’s more premium tools. Finally, the Pro team plan sets you back $79/month for a team of 5 and lets you use Visme’s entire suite of interactivity and collaboration functions.
Here are a few vital pros and cons if you need help deciding whether Visme is right for you:
- Vast selection of special effects
- Ability to animate graphics on the slides
- Simple file movement between different web-based apps
- Free plan available
- Free plans extremely limiting
- No direct integration with Google or Microsoft slide tools
5. Powtoon — Best for slides with animation

- Templates with configurable graphics and animation
- Customizable fonts, colors, and logos
- Access to stock images, videos, and soundtracks
- Lite plan: $50/month ($15/month when billed annually)
- Professional plan: $190/month ($40/month when billed annually)
- Agency: $117/month (annual billing only)
Powtoon is a visual web-based content creation platform with tools for making videos, animations, and presentations. The app’s presentation function lets you build slides using professional templates, in which you’re free to customize the fonts, colors, logos, and graphics. You can even animate the graphics and build custom avatars to present on your behalf — it’s one of Powtoon’s unique selling features.
Powtoon’s suite of slide tools includes a database of royalty-free stock images, video footage, and music. You can use all of these assets in your slides, or upload your own as you see fit. However, how much of these shiny tools you can use in your slide decks depends on the chosen plan.
There are three pricing plans available, and the discrepancy between monthly and annual payments is striking. Most presentation sites charge a few dollars more if you opt for monthly instead of annual billing, but Powtoon’s monthly prices easily triple and quadruple. For example, the Lite plan costs $15/month with annual billing, but $50 if you wish to pay every month instead. You get very basic features with this plan, especially as far as animation and interactivity are concerned. Likewise, the Professional plan jumps from $40 to $190 if you choose monthly payments. You get a bit more for your buck, but some rudimentary features are still absent (like font uploads). Meanwhile, the Agency plan costs a whopping $1400 annually (no monthly option), and this plan gets you all of the app’s bells and whistles.
Not sure if investing in a product like Powtoon is worth it? Consider its pros and cons below:
- Comprehensive animation and video creation features
- Graphic and audio assets available with subscription
- Fonts and logos can be uploaded
- Most customization, animation, and AI features only come with the expensive Agency package
- Monthly payment options are not reasonable
6. Haiku Deck — Best site for image editing options

- Minimalistic interface
- Graphic design tools for improving slide aesthetics
- Pre-loaded templates and image assets
- Cloud-based file sharing for team collaboration
- AI presentation builder (Haiku Deck Zuru)
- Pro plan: $9.99 per month billed annually, or $19.99 monthly
- Premium plan: $29.99 per month, billed annually
Haiku Deck is a web, desktop, and mobile-based presentation builder with a significant focus on design aesthetics. The app’s design tools allow you to refine the graphics in the preloaded templates and images you’re using in the slides. You can source the images right from Haiku’s repository, which boasts over 40 million assets.
To help you create your slide decks, Haiku offers its AI assistant. The AI feature can create new presentations from your outline, or enhance your existing drafts. Since the AI learns from other Haiku users, its algorithms are now trained to outfit slides with contextually relevant imagery and graphics.
Haiku Deck’s pricing has two tiers: Pro and Premium. The Pro plan costs $9.99/month when billed annually and affords full access to the slide creation tools. Meanwhile, the Premium plan will set you back $29.99/month (again, billed annually), and equips you with features such as analytics, live web tracking, and priority support.
Here’s a summary of Haiku Deck’s most prominent pros and cons:
- Visually appealing slides
- Large database of graphic assets
- Advanced tools for editing images
- Capable AI-powered slide builder
- No free plan
- No integration with Google Slides or Microsoft PowerPoint
7. Zoho Show — Best presentation site for budget-minded users

- Clean interface with tools changing depending on the task
- Library for templates, slides, and fonts to facilitate team collaboration
- Over 100 templates
- Imports/exports PowerPoint files
- Presentations can be controlled from smartphone or smart watch
- For individuals: Free
- Professional Plan: $2.50/month and up (billed annually)
- With Zoho Workplace Standard: $3.00/month (billed annually)
Zoho is a web-based suite of business tools, and Zoho Show is its slide creation app. Zoho Show is a straightforward, inexpensive, yet fully functional slide maker that offers most of the same features you’ll get from pricier presentation sites. You can build your decks using over 100 preloaded templates, work on PowerPoint presentations before exporting them to their original file format, and run your slideshow from a smart device. Show’s most unique feature is its clean, contextual interface that only displays tools that are relevant to your current task (whether that’s handy or limiting depends on your preferences).
Zoho Show’s pricing has three tiers. First, there’s the Free plan. This package lets you build basic presentations, but you miss out on key collaboration features and have limited access to graphic assets. Next, you get the more comprehensive Professional Plan, which costs $2.50; you must sign up for Zoho WorkDrive and have a team of 3 people to get this plan. Finally, you can get the entire Zoho Workplace suite for $3/month — this option unlocks the full functionality of the Show app and lets you use other Zoho tools, such as their Office Suite, Mail, and Workdrive.
Have a look at Zoho Show’s pros and cons below to see if this presentation website is right for you:
- Interface automatically shows tools relevant to the task
- Ability to add custom fonts and embed files into slides
- Templates, graphic assets, and collaboration tools included
- Supports PowerPoint file formats
- Subscription to Zoho Workdrive or Workplace required to access paid plan — unnecessary if all you need is a presentation tool
- Some plans require a minimum of 3 users
- Free individual plan limits use of graphic assets, templates, and collaboration tools
- No direct integration with Google Slides
8. Pitch — Best presentation site for use in business and sales

- Lets you build presentations with AI, from a template, or from scratch
- Supports custom fonts and colors
- Provides team collaboration tools
- Allows you to embed presentations on the web
- Offers engagement analytics tools
- Pro plan: $25/month
- Business: $100/month
Pitch is a web-based presentation maker designed primarily for business use. The app helps streamline slide deck creation with its AI tool, which generates a first draft based on your prompts and leaves your team with the task of refining the slides to your liking. The slides have shareable links, so your entire team can collaborate on the slide deck. You can even invite consultants from outside your workplace to edit the presentations.
Once your slide deck is complete, Pitch allows you to embed it on the web in your CMS — much like you’d do with a YouTube video. And to give you a feel for how audiences engage with your presentation, Pitch equips you with engagement and analytics performance tools.
There are three pricing options with Pitch. The free plan comes with all the presentation creation functions, but you get no tracking and limited collaboration tools. The Pro plan costs $25/month (or $22 per month when billed annually), and gives you more freedom to use Pitch in a team environment. Finally, the Business plan costs $100/month (or $85/month with yearly billing) and gives you access to the full suite of features.
Can’t decide if Pitch is the best presentation website for your team? Have a look at its most vital pros and cons:
- AI slide creation feature
- Performance analytics tools
- Integration with various productivity and collaboration apps
- Media asset library
- Engagement tracking only available in paid plans
- No integration with Google Slides or Microsoft 365
9. Beautiful.ai — Best site for no-frills AI-generated presentations

- AI-powered presentation maker
- Slide creation from user’s prompts
- Automated slide formatting
- File sharing within the team (requires Team Plan)
- Graphic assets database
- Pro: $144 per year
- Team: $40/month per user with annual billing ($50 with monthly billing)
- Enterprise: Pricing available on request
Beautiful.ai is an AI-powered presentation builder that leverages full automation to make slide creation quick and easy. All you need to do is enter a prompt for your slide deck, and beautiful.ai will generate your first draft. These AI-generated drafts are quite simplistic in terms of both content and graphics, but they serve as a good starting point. Moreover, beautiful.ai’s presentations are formatted consistently, which should save you time as you edit each slide.
You get three pricing options with beautiful.ai — Pro, Team, and Enterprise. The Pro package is meant for individual use, and costs $144 per year (there’s no way to pay monthly). The plan equips you with the AI slide maker but limits your use of assets and team collaboration features. The Pro plan costs $50/month for each user, or $480 annual for each license you purchase. This plan affords access to more customization and teamwork functions and lets you use graphic assets. Finally, the Enterprise plan includes all the features of the Pro plan, but with more dedicated training and support for your team. You’d have to reach out to beautiful.ai’s sales team to get a quote for the Enterprise plan.
Beautiful.ai helps create slides quickly and with little skill. However, if you’re not sure this app is right for you, consider its most vital pros and cons below.
- Quick way to create and format slides
- Inexpensive plan for personal use
- Elegant slide templates
- No integration with Google Slides or Microsoft 365
- Slide content is very basic
- Limited customization and branding options
10. Google Slides — Best for Google Workspace Users With Basic Presentation Needs

- Basic presentation creation tool
- Limited selection of templates, fonts, and colors
- Supports import/export of PowerPoint files
- Allows collaboration within the Google Workspace
- Free with a Google account
Slides is the web-based presentation tool you get with your Google account. This rudimentary app features a limited library of templates, fonts, and colors, along with a basic suite of tools for formatting the text and graphics in your slides. You can insert your own image, video, and audio files into the slides, but there is no access to a library of royalty-free assets.
Despite its functional constraints, Google Slides is a useful app because it lets teams using Google Workspace collaborate easily on presentations. To get the most of Slides, though, you need to boost its functionality with a suitable extension. Google Gemini now works as an extension within the app, but for the $30 it costs you, the output is disappointing. All Gemini knows does is generate simple, low-quality images; it won’t help you produce, format, or edit presentations.
In contrast, an app like Plus AI leverages artificial intelligence algorithms to give Google Slides powers it lacks on its own. By using the Plus AI extension, you can create entire Slides presentations from a single prompt, automate slide editing and formatting, and access a rich library of templates and ready-made slide decks. Meanwhile, Plus AI’s customization features help you brand your presentations with custom fonts, colors, and your company logo.
Not sure if Google’s slide creation tool is right for you? Have a look at its pros and cons below.
- Allows collaboration in the Google Workspace
- Compatible with PowerPoint files
- Supports AI-powered slide-creation extensions, such as Plus AI
- Free to use with a Google account
- Limited capabilities without third-party apps
- No library with image, video, or audio assets
11. Microsoft PowerPoint — Best For Highly Skilled Presentation Designers

- Vast library of slide themes, variants, and layouts
- Database of stock images and videos
- Massive array of slide editing, formatting, and customization tools
- Supports collaboration in the Microsoft 365 ecosystem
- As a standalone product: $159.99 (one-time fee)
- With Microsoft 365 apps, for home use: $6.99-$9.99/month
- With Microsoft 365 apps, for business use: $6.00-22.00/user/month
PowerPoint is one of the world’s oldest presentation builders that’s been part of Microsoft’s arsenal since the early 1990s. To this day, PowerPoint has been the most commonly used presentation app. But there’s a reason we’ve ranked it last on our list. Buoyed by its popularity, PowerPoint hasn’t evolved much over time; you won’t get anything beyond the most basic and uninspired presentations out of it unless you’re an advanced user with lots of time on your hands.
The app’s user interface immediately overwhelms you with options and settings. Some of these seem similar in how they function, and you won’t know which tool to use until you’ve experimented with them all. Apart from the cluttered interface, PowerPoint disappoints with its simplistic selection of templates and designs.
You can use Microsoft’s Copilot to forgo the tedious task of creating your own PowerPoint presentation, but beware: like Gemini, Copilot is still limited in its slide-making abilities. You can get it to create a slide deck from a single prompt, but the output will feature basic and repetitive along with lifeless images.
PowerPoint’s pricing is a bit convoluted at a glance — you get different options whether you want the standalone product ($159.99) or the entire Microsoft 365 suite. If you choose the latter, the Home options range in price between $6.99 and $9.99 per month, while the Business plans cost between $6.00 and $22.00 per month per user.
We don’t believe that PowerPoint is worth your time considering the vast selection of more powerful and user-friendly presentation apps on the market. However, you can review the app’s pros and cons below and decide for yourself.
- Massive selection of design and customization tools
- Integrates with Microsoft Copilot
- Lets team members using Microsoft 365 work on the same presentation simultaneously
- Overwhelming user interface
- Very basic templates and designs
- Creating professional presentations is a challenge for novice users
- AI assistant cannot produce elegant, content-rich slide decks
How we ranked the best presentation sites
To make your selection process simple and effective, we ranked the best presentation websites based on these vital criteria:
- Functionality
- Level of AI sophistication
- Ease of use
- Collaboration options
Integration with popular slide creation tools
Value for money, functionality .
The best presentation sites are loaded with handy functions that enable you to make visually appealing, info-rich, and engaging presentations with little effort and minimal editing. These include customization tools, templates, image assets, and graphics refinement features.
Level of AI sophistication
AI technology is at the forefront of slide makers’ drive to create the best product for their clients. AI-powered presentation sites save you from spending long hours on writing content, digging up graphics, and then formatting every slide — AI handles these tasks for you. But not all AI slide creators are made equal. Some leave you with rudimentary decks that feature repetitive content and unrelated imagery. Others give you a solid starting point for an informative and captivating presentation.
Ease of use
The best presentation sites greet you with an intuitive and uncluttered interface that takes you minutes (if not seconds) to master. But usability goes beyond navigating the UI. That’s why we also assess the simplicity with which you can actually produce presentations. Simply put, how easy is it to create and edit slides? Do you need advanced design skills to manipulate the graphics and give the slide deck your desired aesthetic ? The best slide makers take these questions into account, so that their product makes presentations a breeze. You worry about the content, and let the app do the rest.
Collaboration options
High-quality presentation apps allow team members to create, edit, and give feedback on presentations remotely. That’s because today’s business needs, along with hybrid work arrangements, mean that more and more teams are forced to collaborate electronically. Features such as cloud-based file sharing and integration with communication platforms help different members of your team work on the presentation from wherever they are.
Google Slides and Microsoft PowerPoint are the most commonly used presentation programs in the world. These two giants are the natural, go-to option for slide creation in the corporate, educational, and institutional world. Any presentation app that’s worth its salt should integrate with at least one of these tools. At the very least, a quality independent slide app should be able to import and export files that can be used in Google Slides or PowerPoint.
The best presentation apps are usually not free, but the money you pay for them should be worth the features and benefits you get in return. That’s why we’ve evaluated each of the slide makers above based on the balance between their price point and their offerings.
How to choose the best presentation website for your needs?
You can’t really go wrong by opting for any of the 10 presentation sites above; however, to get a tool that’s tailored to your use-case, you’ll have to do a bit more research and analysis. The four steps below should help you zero in on the optimal presentation maker for your needs.
- Consider the purpose of the presentation. Some slide tools cater to sales teams (think Pitch), others to graphic-minded users (Haiku Deck comes to mind), while others, like Plus AI, are excellent all-rounders.
- Decide on the level of customization you need. How concerned are you with personalizing and branding your slide decks? If a generic, templated presentation is all you need for a school project, investing in a feature-rich, customizable tool may be overkill. But if you need your slide decks to feature custom colors, fonts, and convey your brand identity, opt for a tool (and pricing package) that has this functionality.
- Decide if you want AI help. Unless you’re a skilled designer with a passion for creating and formatting slides, AI can be incredibly useful. Consider this: would you rather spend hours on refining your slides and ensuring consistency, or have the AI tool produce a uniformly formatted first draft? Check out the best AI presentation makers here.
- Factor in your budget. Most presentation sites have similar pricing, with monthly plans ranging between $0 and $40. However, some charge more — much more. Of course, the higher price points generally translate into richer offerings that may include other apps for visual content creation. Consider whether you need these extras or if a capable slide creation tool will suffice.

Latest posts
Latest post.

How do AI content detectors work — and can you trust them?
We investigate 10 of the most popular AI content detector tools, their accuracy, whether they can be trusted — and how to bypass detection.
How to use ChatGPT to create PowerPoint presentations
Step-by-step guide to using AI tools to create presentations. Looking for ChatGPT for PowerPoint? Here's a guide to using AI in PowerPoint and Google Slides
.webp)
A guide to all of Google’s AI products
A comprehensive guide to Google's AI ecosystem, categorizing all of Google's AI products and analyzing the ways that Google AI products have evolved over time.

Tome vs. Gamma: In-depth comparison, pricing, and recommendations
In-depth comparison of Tome and Gamma with recommendations for which tool is right for you
More resources
235+ ideas for persuasive speech topics.
How to choose a great persuasive speech topic, inspiration and ideas, and example presentations for you to get started
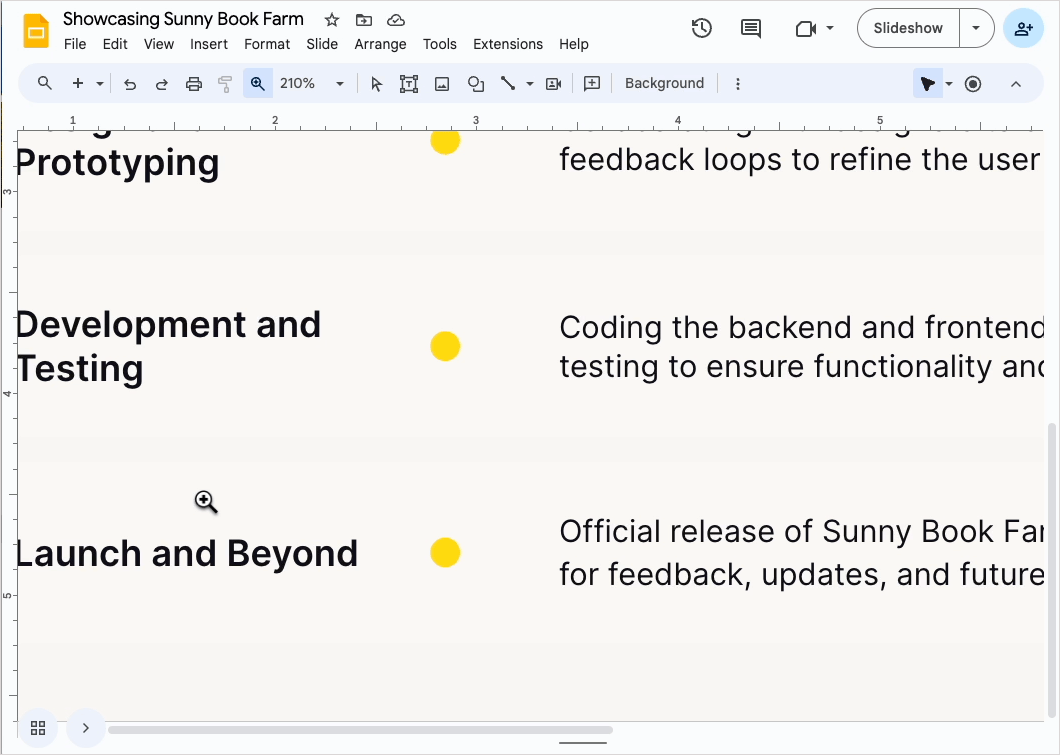
How to zoom in on Google Slides
When you zoom in on Google Slides, you get a close-up view of your text, image, or other slide element which makes it simpler to fine-tune those elements.
Ideas for your next PowerPoint Night
The best, funniest, and most thought-provoking prompts for your next PowerPoint night
IMAGES
VIDEO
COMMENTS
Go to slides.google.com on your computer. Open an existing presentation or create a new one. Step 2: Select the Desired Slide: Choose the slide where you want to embed the timer. Step 3: Insert the Video: Navigate to the top toolbar, click on "Insert," then select "Video.". Step 4: Search for the Timer Video:
You can also right-click on it and click on " Copy ". Step-3: Click on the Option to Insert a Video. Now, go back to your Google Slides presentation. Open the slide where you want to insert the timer. Then, click on the "Insert" tab in the menu bar and select the "Video" option from the "Insert" menu.
2. Choose a Timing Between Slides. The Auto-advance slides drop-down menu on the Publish to the web screen functions like a Google Slides timer. Let's go to the File menu and click on the Share menu. Next click the Publish to the web option.
To add a timer to google slides, go to 'Insert' tab > press "Video" > search "5 minutes timer" > choose a video and "Select". Alternatively, you can install a timer extension. Adding timers in your slides can help you manage your time effectively during presentations. They can also be a valuable visual aid for your audience ...
Go to slides.google.com on your PC or Mac computer and create or open a presentation. 2. Select the slide you want to add a timer to in the left sidebar. 3. In the top toolbar, select "Insert" and ...
Go to the Video Selection Page. Follow these steps to navigate to your video selection page in Google Slides: In your Google Slides presentation, click on the "Toolbar.". Select "Insert ...
To do this, go to Insert -> Video. Add a timer video on YouTube or upload it via Google Drive. You can search for it via YouTube if you don't have a video available. The countdown timer can include a specific duration (e.g., 5 minutes or 10 seconds). Select the required video and click Insert to add it to your slide.
Step 1: Search for a timer video on Youtube. You can do this without leaving Google Slides. To start, go to Insert in the toolbar and then select Video. A pop-up will appear that allows you to search YouTube. Type the length of timer you want into the search bar and click the blue Search button. A range of options will pop up.
In this tutorial, we cover how to use a timer and clock extension into your Google Slides presentations.📒 Notes & Links 📒1️⃣ Get the Slides Timer Extension...
STEP 1: ADD SLIDES TIMER CHROME EXTENSTION. Start by searching for the Slides Timer extension on the Chrome Web Store. You can do a simple Google search for "Google Slides Timer" in your Google search bar and the first result will be the Slides Timer in the chrome store. Once you find the slides timer extension, you will need to select ...
Visit the Slides Timer extension page in the Chrome Web Store. Click Add to Chrome to install the extension. Restart your browser to ensure the extension is active. After installing the extension ...
In this vide we walk you through how to embed an automatic countdown timer to you Google Slides. This is super easy to do and something that you can get done...
In the navigation pane on the left, click the slide to which you want to add the timer. Click the Text box command on the Google Slides toolbar. Click inside the slide to insert a textbox. Type in the textbox your preferred time in the format << time->>. For example, for a 5-minute countdown type in <<5:00->>.
A countdown timer in Google Slides is a great way of keeping students ontrack when working on a task.
Follow these steps below to add a timer to Google Slides using AutoPlay button: Open your Google Slides presentation and switch to Present Mode on the desired deck by pressing "Ctrl+F5". Hover your cursor over the three dots in the lower left corner to reveal a box that says "Open the options" menu. Click on the three dots.
The video timer appears on the slide, so both you and the viewers of the presentation can see the timer counting down. You can move the timer around on the page next to text and images or make the timer the only object on the slide. Related: 6 Types of Workplace Presentations (With Tips) How to add a timer to a Google Slides presentation
Right-click your mouse to bring up the context menu and select "Copy" or Select the URL by clicking on it and press "Ctrl+C" keys on your keyboard to copy the selected URL. Step 3: Now, insert a timer into a Google Slides presentation. Click on the slide where you want to place or insert a timer. In the menu bar, click on "Insert ...
Open Google Chrome, click the Google Apps icon, and select " Google Slides ." Then, click the specific slide in your presentation where you want to add a timer. Go to the Insert tab and click "Video" from the drop-down menu. Select the "YouTube" option and type "countdown timer" (no quotes) in the search bar. Then, press Enter.
Here's what you'll do. Visit the Chrome Web Store and search for Slides Timer . Click Get to install the extension on your browser. Select Add Extension . Move to Google Slides and select a slide ...
Method 2: Adding a Digital Clock Using "Slides Timer". As I mentioned before, Google Slides doesn't give us the option to add a clock from its menu, but you can use the Chrome extension "Slides Timer.". First, go to "Slides Timer" in the Chrome web Store or type it on the search bar. Click " Add to Chrome " to add the ...
Adding a countdown timer to your Google Slides presentations can be extremely useful to help pace your presentation and keep your audience engaged. With a.
How to add a timer to Google Slides. 1. Go to slides.google.com on your PC or Mac computer and create or open a presentation. 2. Select the slide you want to add a timer to in the left sidebar. 3 ...
Use Google Slides to create online slideshows. Make beautiful presentations together with secure sharing in real-time and from any device.
Open the template presentation you created in the steps above. On the menu bar, click File > Make a copy > Entire presentation. On the panel that opens, type in a name for the new presentation you ...
Unlock the secrets of time for your students with our Time Mastery Slideshow Template, perfect for educators aiming to instill time-telling skills. With its vivid yellow and green illustrative design, this presentation template captivates and educates, making it an ideal tool for classroom use or online learning sessions. Dive into teaching ...
For individuals: $7-19 per month. For businesses: $15-29 per month. Prezi is a web-based tool for creating presentations, videos, and infographics that are suitable for business and educational settings. The tool offers a wealth of image and icon assets, as well as templates to get you started on your slide deck.