We use essential cookies to make Venngage work. By clicking “Accept All Cookies”, you agree to the storing of cookies on your device to enhance site navigation, analyze site usage, and assist in our marketing efforts.
Manage Cookies
Cookies and similar technologies collect certain information about how you’re using our website. Some of them are essential, and without them you wouldn’t be able to use Venngage. But others are optional, and you get to choose whether we use them or not.
Strictly Necessary Cookies
These cookies are always on, as they’re essential for making Venngage work, and making it safe. Without these cookies, services you’ve asked for can’t be provided.
Show cookie providers
- Google Login
Functionality Cookies
These cookies help us provide enhanced functionality and personalisation, and remember your settings. They may be set by us or by third party providers.
Performance Cookies
These cookies help us analyze how many people are using Venngage, where they come from and how they're using it. If you opt out of these cookies, we can’t get feedback to make Venngage better for you and all our users.
- Google Analytics
Targeting Cookies
These cookies are set by our advertising partners to track your activity and show you relevant Venngage ads on other sites as you browse the internet.
- Google Tag Manager
- Infographics
- Daily Infographics
- Popular Templates
- Accessibility
- Graphic Design
- Graphs and Charts
- Data Visualization
- Human Resources
- Beginner Guides
Blog Beginner Guides How To Make a Good Presentation [A Complete Guide]

How To Make a Good Presentation [A Complete Guide]
Written by: Krystle Wong Jul 20, 2023

A top-notch presentation possesses the power to drive action. From winning stakeholders over and conveying a powerful message to securing funding — your secret weapon lies within the realm of creating an effective presentation .
Being an excellent presenter isn’t confined to the boardroom. Whether you’re delivering a presentation at work, pursuing an academic career, involved in a non-profit organization or even a student, nailing the presentation game is a game-changer.
In this article, I’ll cover the top qualities of compelling presentations and walk you through a step-by-step guide on how to give a good presentation. Here’s a little tip to kick things off: for a headstart, check out Venngage’s collection of free presentation templates . They are fully customizable, and the best part is you don’t need professional design skills to make them shine!
These valuable presentation tips cater to individuals from diverse professional backgrounds, encompassing business professionals, sales and marketing teams, educators, trainers, students, researchers, non-profit organizations, public speakers and presenters.
No matter your field or role, these tips for presenting will equip you with the skills to deliver effective presentations that leave a lasting impression on any audience.
Click to jump ahead:
What are the 10 qualities of a good presentation?
Step-by-step guide on how to prepare an effective presentation, 9 effective techniques to deliver a memorable presentation, faqs on making a good presentation, how to create a presentation with venngage in 5 steps.
When it comes to giving an engaging presentation that leaves a lasting impression, it’s not just about the content — it’s also about how you deliver it. Wondering what makes a good presentation? Well, the best presentations I’ve seen consistently exhibit these 10 qualities:
1. Clear structure
No one likes to get lost in a maze of information. Organize your thoughts into a logical flow, complete with an introduction, main points and a solid conclusion. A structured presentation helps your audience follow along effortlessly, leaving them with a sense of satisfaction at the end.
Regardless of your presentation style , a quality presentation starts with a clear roadmap. Browse through Venngage’s template library and select a presentation template that aligns with your content and presentation goals. Here’s a good presentation example template with a logical layout that includes sections for the introduction, main points, supporting information and a conclusion:

2. Engaging opening
Hook your audience right from the start with an attention-grabbing statement, a fascinating question or maybe even a captivating anecdote. Set the stage for a killer presentation!
The opening moments of your presentation hold immense power – check out these 15 ways to start a presentation to set the stage and captivate your audience.
3. Relevant content
Make sure your content aligns with their interests and needs. Your audience is there for a reason, and that’s to get valuable insights. Avoid fluff and get straight to the point, your audience will be genuinely excited.
4. Effective visual aids
Picture this: a slide with walls of text and tiny charts, yawn! Visual aids should be just that—aiding your presentation. Opt for clear and visually appealing slides, engaging images and informative charts that add value and help reinforce your message.
With Venngage, visualizing data takes no effort at all. You can import data from CSV or Google Sheets seamlessly and create stunning charts, graphs and icon stories effortlessly to showcase your data in a captivating and impactful way.

5. Clear and concise communication
Keep your language simple, and avoid jargon or complicated terms. Communicate your ideas clearly, so your audience can easily grasp and retain the information being conveyed. This can prevent confusion and enhance the overall effectiveness of the message.
6. Engaging delivery
Spice up your presentation with a sprinkle of enthusiasm! Maintain eye contact, use expressive gestures and vary your tone of voice to keep your audience glued to the edge of their seats. A touch of charisma goes a long way!
7. Interaction and audience engagement
Turn your presentation into an interactive experience — encourage questions, foster discussions and maybe even throw in a fun activity. Engaged audiences are more likely to remember and embrace your message.
Transform your slides into an interactive presentation with Venngage’s dynamic features like pop-ups, clickable icons and animated elements. Engage your audience with interactive content that lets them explore and interact with your presentation for a truly immersive experience.

8. Effective storytelling
Who doesn’t love a good story? Weaving relevant anecdotes, case studies or even a personal story into your presentation can captivate your audience and create a lasting impact. Stories build connections and make your message memorable.
A great presentation background is also essential as it sets the tone, creates visual interest and reinforces your message. Enhance the overall aesthetics of your presentation with these 15 presentation background examples and captivate your audience’s attention.
9. Well-timed pacing
Pace your presentation thoughtfully with well-designed presentation slides, neither rushing through nor dragging it out. Respect your audience’s time and ensure you cover all the essential points without losing their interest.
10. Strong conclusion
Last impressions linger! Summarize your main points and leave your audience with a clear takeaway. End your presentation with a bang , a call to action or an inspiring thought that resonates long after the conclusion.
In-person presentations aside, acing a virtual presentation is of paramount importance in today’s digital world. Check out this guide to learn how you can adapt your in-person presentations into virtual presentations .

Preparing an effective presentation starts with laying a strong foundation that goes beyond just creating slides and notes. One of the quickest and best ways to make a presentation would be with the help of a good presentation software .
Otherwise, let me walk you to how to prepare for a presentation step by step and unlock the secrets of crafting a professional presentation that sets you apart.
1. Understand the audience and their needs
Before you dive into preparing your masterpiece, take a moment to get to know your target audience. Tailor your presentation to meet their needs and expectations , and you’ll have them hooked from the start!
2. Conduct thorough research on the topic
Time to hit the books (or the internet)! Don’t skimp on the research with your presentation materials — dive deep into the subject matter and gather valuable insights . The more you know, the more confident you’ll feel in delivering your presentation.
3. Organize the content with a clear structure
No one wants to stumble through a chaotic mess of information. Outline your presentation with a clear and logical flow. Start with a captivating introduction, follow up with main points that build on each other and wrap it up with a powerful conclusion that leaves a lasting impression.
Delivering an effective business presentation hinges on captivating your audience, and Venngage’s professionally designed business presentation templates are tailor-made for this purpose. With thoughtfully structured layouts, these templates enhance your message’s clarity and coherence, ensuring a memorable and engaging experience for your audience members.
Don’t want to build your presentation layout from scratch? pick from these 5 foolproof presentation layout ideas that won’t go wrong.

4. Develop visually appealing and supportive visual aids
Spice up your presentation with eye-catching visuals! Create slides that complement your message, not overshadow it. Remember, a picture is worth a thousand words, but that doesn’t mean you need to overload your slides with text.
Well-chosen designs create a cohesive and professional look, capturing your audience’s attention and enhancing the overall effectiveness of your message. Here’s a list of carefully curated PowerPoint presentation templates and great background graphics that will significantly influence the visual appeal and engagement of your presentation.
5. Practice, practice and practice
Practice makes perfect — rehearse your presentation and arrive early to your presentation to help overcome stage fright. Familiarity with your material will boost your presentation skills and help you handle curveballs with ease.
6. Seek feedback and make necessary adjustments
Don’t be afraid to ask for help and seek feedback from friends and colleagues. Constructive criticism can help you identify blind spots and fine-tune your presentation to perfection.
With Venngage’s real-time collaboration feature , receiving feedback and editing your presentation is a seamless process. Group members can access and work on the presentation simultaneously and edit content side by side in real-time. Changes will be reflected immediately to the entire team, promoting seamless teamwork.

7. Prepare for potential technical or logistical issues
Prepare for the unexpected by checking your equipment, internet connection and any other potential hiccups. If you’re worried that you’ll miss out on any important points, you could always have note cards prepared. Remember to remain focused and rehearse potential answers to anticipated questions.
8. Fine-tune and polish your presentation
As the big day approaches, give your presentation one last shine. Review your talking points, practice how to present a presentation and make any final tweaks. Deep breaths — you’re on the brink of delivering a successful presentation!
In competitive environments, persuasive presentations set individuals and organizations apart. To brush up on your presentation skills, read these guides on how to make a persuasive presentation and tips to presenting effectively .

Whether you’re an experienced presenter or a novice, the right techniques will let your presentation skills soar to new heights!
From public speaking hacks to interactive elements and storytelling prowess, these 9 effective presentation techniques will empower you to leave a lasting impression on your audience and make your presentations unforgettable.
1. Confidence and positive body language
Positive body language instantly captivates your audience, making them believe in your message as much as you do. Strengthen your stage presence and own that stage like it’s your second home! Stand tall, shoulders back and exude confidence.
2. Eye contact with the audience
Break down that invisible barrier and connect with your audience through their eyes. Maintaining eye contact when giving a presentation builds trust and shows that you’re present and engaged with them.
3. Effective use of hand gestures and movement
A little movement goes a long way! Emphasize key points with purposeful gestures and don’t be afraid to walk around the stage. Your energy will be contagious!
4. Utilize storytelling techniques
Weave the magic of storytelling into your presentation. Share relatable anecdotes, inspiring success stories or even personal experiences that tug at the heartstrings of your audience. Adjust your pitch, pace and volume to match the emotions and intensity of the story. Varying your speaking voice adds depth and enhances your stage presence.

5. Incorporate multimedia elements
Spice up your presentation with a dash of visual pizzazz! Use slides, images and video clips to add depth and clarity to your message. Just remember, less is more—don’t overwhelm them with information overload.
Turn your presentations into an interactive party! Involve your audience with questions, polls or group activities. When they actively participate, they become invested in your presentation’s success. Bring your design to life with animated elements. Venngage allows you to apply animations to icons, images and text to create dynamic and engaging visual content.
6. Utilize humor strategically
Laughter is the best medicine—and a fantastic presentation enhancer! A well-placed joke or lighthearted moment can break the ice and create a warm atmosphere , making your audience more receptive to your message.
7. Practice active listening and respond to feedback
Be attentive to your audience’s reactions and feedback. If they have questions or concerns, address them with genuine interest and respect. Your responsiveness builds rapport and shows that you genuinely care about their experience.

8. Apply the 10-20-30 rule
Apply the 10-20-30 presentation rule and keep it short, sweet and impactful! Stick to ten slides, deliver your presentation within 20 minutes and use a 30-point font to ensure clarity and focus. Less is more, and your audience will thank you for it!
9. Implement the 5-5-5 rule
Simplicity is key. Limit each slide to five bullet points, with only five words per bullet point and allow each slide to remain visible for about five seconds. This rule keeps your presentation concise and prevents information overload.
Simple presentations are more engaging because they are easier to follow. Summarize your presentations and keep them simple with Venngage’s gallery of simple presentation templates and ensure that your message is delivered effectively across your audience.

1. How to start a presentation?
To kick off your presentation effectively, begin with an attention-grabbing statement or a powerful quote. Introduce yourself, establish credibility and clearly state the purpose and relevance of your presentation.
2. How to end a presentation?
For a strong conclusion, summarize your talking points and key takeaways. End with a compelling call to action or a thought-provoking question and remember to thank your audience and invite any final questions or interactions.
3. How to make a presentation interactive?
To make your presentation interactive, encourage questions and discussion throughout your talk. Utilize multimedia elements like videos or images and consider including polls, quizzes or group activities to actively involve your audience.
In need of inspiration for your next presentation? I’ve got your back! Pick from these 120+ presentation ideas, topics and examples to get started.
Creating a stunning presentation with Venngage is a breeze with our user-friendly drag-and-drop editor and professionally designed templates for all your communication needs.
Here’s how to make a presentation in just 5 simple steps with the help of Venngage:
Step 1: Sign up for Venngage for free using your email, Gmail or Facebook account or simply log in to access your account.
Step 2: Pick a design from our selection of free presentation templates (they’re all created by our expert in-house designers).
Step 3: Make the template your own by customizing it to fit your content and branding. With Venngage’s intuitive drag-and-drop editor, you can easily modify text, change colors and adjust the layout to create a unique and eye-catching design.
Step 4: Elevate your presentation by incorporating captivating visuals. You can upload your images or choose from Venngage’s vast library of high-quality photos, icons and illustrations.
Step 5: Upgrade to a premium or business account to export your presentation in PDF and print it for in-person presentations or share it digitally for free!
By following these five simple steps, you’ll have a professionally designed and visually engaging presentation ready in no time. With Venngage’s user-friendly platform, your presentation is sure to make a lasting impression. So, let your creativity flow and get ready to shine in your next presentation!
Discover popular designs

Infographic maker

Brochure maker

White paper online

Newsletter creator

Flyer maker

Timeline maker

Letterhead maker

Mind map maker

Ebook maker

How it works
For Business
Join Mind Tools
Article • 10 min read
How to Structure a Presentation
Choosing the best format for your audience.
By the Mind Tools Content Team

Have you ever sat through a rambling, disorganized presentation? If so, you probably found it hard to follow what the speaker was saying.
When presentations don't flow well, it's easy for audiences to get lost. This is why it's important to think carefully about the structure and organization of your presentation.
In this article, we'll explore some common structures that you can use next time you speak in front of other people.
The Importance of Structure
Without a defined structure, your audience may not be able to follow your presentation. When this happens, your opportunity is lost, the communication fails, and your reputation takes a hit. For example, if your aim is to persuade people, you'll want to use a different approach from the one you'd use if you wanted to demonstrate how a product works.
Many factors can influence your choice of structure, but the most important consideration is your presentation's purpose or goal. You need to identify what you want to achieve – do you want to inspire, motivate, inform, persuade, or entertain people?
Your audience's needs also affect the structure you choose. For example, those who are new to your topic need more background information than people with more expertise and experience. So, in this case, you'd want to choose an approach that gives you ample time to explain the context of your subject, as well as to reinforce your main points.
Structures to Consider
Below, we outline several structures that you can use to organize your presentation.
1. Open – Body – Conclusion
The Open – Body – Conclusion approach is one of the most practical structures you can use for presentations. (Click here to download a worksheet that helps you use it.)
People often call it the "tell 'em" approach, because you:
- Tell audience members what you're going to tell them (introduction).
- Tell them (body).
- Tell them what you told them (conclusion).
This structure is simple, effective and easy to remember. Its repetitive nature allows you to reinforce your points, which helps others remember them. It is also flexible: you can adjust the introduction and body to persuade, motivate, educate, or entertain them.
One downside, however, is that repetition can quickly bore people. The approach is also "old hat" to many, which can cause them to lose interest. If you choose to use it, balance repetition with plenty of interesting facts, images, anecdotes, or stories to hold your audience's interest.
Let's look at each stage of the Open – Body – Conclusion structure in detail and discuss the elements that you need to include in each. We'll start with the body, rather than the introduction, because the rest of your presentation will be based on that.
The body of your presentation needs to contain your key points. You should present these in a logical order, so that your audience can follow them easily.
Keep in mind that the body should comprise a limited number of ideas: the more you try to include, the fewer people will remember. A good guide is to cover three to five main points, but no more.
When organizing your ideas, use the chunking principle to put the information into specific units. This will make the concepts easier to grasp, and help people remember what you have told them.
Make sure that you back up your main points with facts. Use good information-gathering strategies in your research, and consider citing the sources that you use. To add credibility to your presentation, consider using the following information to support your ideas:
- Data, facts or statistics.
- Images or diagrams.
- Stories and examples.
- Quotes or testimonials from experts or industry leaders.
Reliable sources will strengthen your credibility , and build trust with your audience.
Your opening, or introduction, has two main purposes: to grab your audience's attention, and to cover the key points that you intend to talk about.
Instead of telling people what you plan to say, you can use a different approach and explain why they are there. What will they learn from your presentation, and how will the content benefit them?
It's also important to get their attention right from the beginning. You can do this in several ways:
- Tell a story.
- Ask a rhetorical question.
- Play a short video.
- Make a strong or unexpected statement.
- Challenge your audience.
- Use a quotation or example.
- Appeal to people's self-interest.
- Request a specific action.
- Use suspense.
If you plan to answer questions at the end of your presentation, it's a good idea to mention this in the introduction, so people don't interrupt you mid-flow.
Many presenters overlook the importance of a conclusion – but the statements you finish with are what many audience members will remember best.
With the "tell 'em" approach, your conclusion summarizes the main points in the body of your presentation. If you want people to take action, be specific about what you want them to do.
Think carefully about how you want them to feel once you've finished; your conclusion is a great opportunity to reinforce this. Why not inspire them with a great story, a quote or a compelling call to action?
2. The Sandwich Approach
The Sandwich Approach is a variation of the Open – Body – Conclusion structure. This three-part structure covers:
- Advantages and/or benefits of your message or idea.
- Risks and concerns.
- How the benefits manage or eliminate those risks.
This approach is effective when you want to persuade audience members, or change their minds.
Having evidence to support your position is critical. However, factual data and reams of spreadsheets and charts are not highly persuasive. What people respond to is "vivid" evidence that brings your concept or argument to life.
To brush up on your persuasion skills, look at The Rhetorical Triangle . This tool asks you to consider your communication from three perspectives: those of the writer, the audience and the context. It's a method that builds credibility, and helps you ensure that your arguments are logical.
3. Monroe's Motivated Sequence
Monroe's Motivated Sequence is another good structure to use when you need to motivate or persuade. This sequence consists of five key steps:
- Getting your audience's attention – Use an interesting "hook" or opening point, such as a shocking statistic. Be provocative and stimulating, not boring and unemotional.
- Creating a need – Convince the audience there's a problem, explain how it affects them. Persuade them that things need to change.
- Defining your solution – Explain what you think needs to be done.
- Describing a detailed picture of success (or failure) – Give people a vision; something they can see, hear, taste, and touch.
- Asking the audience to do something straight away – Get them involved right from the start. If you do this, it's then much easier to keep them engaged and active in your cause.
4. Demonstration Structure
Use a simple demonstration structure when you are unveiling a new product or service.
Start by explaining why the product or service is so good. What makes it special? What problem will it solve for people?
Next, demonstrate what it does. How you do this will depend on your product but, whatever you do, make sure it works! Bring any important points to the audience's attention and provide helpful tips, where appropriate. Show them the results, and finish by giving them useful information, a good understanding of your topic, and something to remember.
Don't get too wrapped up in the detail; remember to keep it simple. Your presentation will be more powerful and your audience will remember more if you highlight just a few of the most important features. This will whet their appetite, and leave them wanting to know more.
5. Opportunity, Benefits, Numbers Structure
The Opportunity, Benefits, Number (OBN) structure is useful when you face busy people who want to hear what you have to say in the shortest time possible.
To use this structure, give audience members a quick summary of the opportunity that they need to consider, and outline the benefits that they can expect. Then, show them the numbers that back up your claims. [1]
For example, imagine you are explaining why your company should implement a new performance management system. First, you might give some background on the proposal – for example, you want to drive a high-performance culture. Then, you could explain the benefits, such as improving organizational performance and profits. Finally, you could compare the cost of bringing the system in with the predicted return on investment, based on a similar system at another organization.
Presentations that lack a clear flow are confusing and ineffective. This is why it's important to pay careful attention when choosing the most appropriate structure.
Different structures fulfill different purposes. Before you begin, think about why you are giving your presentation. Do you want to inform, persuade, inspire, or entertain your audience?
The most common structure for presentations is Open – Body – Conclusion. This is often effective because it gives you the opportunity to repeat your key points a number of times. However, other structures can be more appropriate, depending on the circumstances, such as when you're trying to persuade an audience, demonstrate a product, or provide information in the most time-efficient way.
Download Worksheet
[1] Martinuzzi, B. (2013). '11 Ways to Structure a Knockout Presentation,' from American Express OPEN Forum [online]. Available here . [Accessed 7 August 2014.]
You've accessed 1 of your 2 free resources.
Get unlimited access
Discover more content
Linking Attitude and Behavior
Assessing the Need for Change
Drivers of Organizational Change and Techniques to Address Them
Add comment
Comments (0)
Be the first to comment!

Gain essential management and leadership skills
Busy schedule? No problem. Learn anytime, anywhere.
Subscribe to unlimited access to meticulously researched, evidence-based resources.
Join today and save on an annual membership!
Sign-up to our newsletter
Subscribing to the Mind Tools newsletter will keep you up-to-date with our latest updates and newest resources.
Subscribe now
Business Skills
Personal Development
Leadership and Management
Member Extras
Most Popular
Latest Updates

Better Public Speaking

How to Build Confidence in Others
Mind Tools Store
About Mind Tools Content
Discover something new today
How to create psychological safety at work.
Speaking up without fear
How to Guides
Pain Points Podcast - Presentations Pt 1
How do you get better at presenting?
How Emotionally Intelligent Are You?
Boosting Your People Skills
Self-Assessment
What's Your Leadership Style?
Learn About the Strengths and Weaknesses of the Way You Like to Lead
Recommended for you
Rise: 3 practical steps for advancing your career, standing out as a leader, and liking your life.
Patty Azzarello
Book Insights
Business Operations and Process Management
Strategy Tools
Customer Service
Business Ethics and Values
Handling Information and Data
Project Management
Knowledge Management
Self-Development and Goal Setting
Time Management
Presentation Skills
Learning Skills
Career Skills
Communication Skills
Negotiation, Persuasion and Influence
Working With Others
Difficult Conversations
Creativity Tools
Self-Management
Work-Life Balance
Stress Management and Wellbeing
Coaching and Mentoring
Change Management
Team Management
Managing Conflict
Delegation and Empowerment
Performance Management
Leadership Skills
Developing Your Team
Talent Management
Problem Solving
Decision Making
Member Podcast
- SUGGESTED TOPICS
- The Magazine
- Newsletters
- Managing Yourself
- Managing Teams
- Work-life Balance
- The Big Idea
- Data & Visuals
- Reading Lists
- Case Selections
- HBR Learning
- Topic Feeds
- Account Settings
- Email Preferences
What It Takes to Give a Great Presentation
- Carmine Gallo

Five tips to set yourself apart.
Never underestimate the power of great communication. It can help you land the job of your dreams, attract investors to back your idea, or elevate your stature within your organization. But while there are plenty of good speakers in the world, you can set yourself apart out by being the person who can deliver something great over and over. Here are a few tips for business professionals who want to move from being good speakers to great ones: be concise (the fewer words, the better); never use bullet points (photos and images paired together are more memorable); don’t underestimate the power of your voice (raise and lower it for emphasis); give your audience something extra (unexpected moments will grab their attention); rehearse (the best speakers are the best because they practice — a lot).
I was sitting across the table from a Silicon Valley CEO who had pioneered a technology that touches many of our lives — the flash memory that stores data on smartphones, digital cameras, and computers. He was a frequent guest on CNBC and had been delivering business presentations for at least 20 years before we met. And yet, the CEO wanted to sharpen his public speaking skills.
- Carmine Gallo is a Harvard University instructor, keynote speaker, and author of 10 books translated into 40 languages. Gallo is the author of The Bezos Blueprint: Communication Secrets of the World’s Greatest Salesman (St. Martin’s Press).
Partner Center
Module 8: Developing and Delivering Business Presentations
Parts of a good presentation, learning outcomes.
- Identify key features of a good presentation
Like reverse engineering a product, we can distill the key features of a good presentation by looking at presentation evaluation scorecards. Refer to Table 1 for a sample class presentation grading rubric.
At the macro level, the key elements of a good presentation are content, organization, and delivery. There are both substance and style aspects of content. Substance elements include the originality and significance of your idea, the quality of your research and analysis, clarity and potential impact of your recommendations. Style aspects of content include confidence and credibility, both of which have a significant impact on how you—and your message—are received.
Good organization starts with a strong opening and continues in a logical and well-supported manner throughout the presentation, leading to a close that serves as a resolution of the problem or a summary of the situation you’ve presented. The audience experiences good organization as a sense of flow—an inevitable forward movement to a satisfying close. This forward momentum also requires audiences to have a certain level of technical and information-management competency. To the latter point, good presentation requires a presenter to put thought into information design, from the structure and content of slides to the transitions between individual points, slides and topics.
Delivery entails a range of factors from body language and word choice to vocal variety. In this category, your audience is responding to your personality and professionalism. For perspective, one of the three evaluation categories on the official Toastmasters speaker evaluation form is “As I Saw You;” in parentheses: “approach, position, personal appearance, facial expression, gestures and detracting mannerisms.” A good presenter has a passion for the subject and an ability to convey and perhaps elicit that emotion in the audience. Audience engagement—through eye contact, facial expression, perhaps the use of gestures or movement—also contributes to an effective presentation. However, to the point in the Toastmasters evaluation, gestures, movement other mannerisms can be distracting (see Module 7: Public Speaking for more on this). What works: natural (not staged) movement that reinforces communication of your idea.

Figure 1. The WIIFM Principle.
With those key features and presentation-evaluation criteria in mind, let’s add a disclaimer. The reality is that your features won’t matter if you don’t deliver one essential benefit: relevance.
Whether you think in Toastmasters terminology—”What’s in it for me? (WIIFM)” from the audience perspective—or put yourself in the audience’s position and ask “So what?,” it’s a question that you need to answer early. We’ll get into this more in the next section as we discuss presentation planning.
Practice Question
- Parts of a Good Presentation. Authored by : Nina Burokas. Provided by : Lumen Learning. License : CC BY: Attribution
- Modification of WIIFM. Authored by : Nathan Stephens. Located at : https://flic.kr/p/dEFKQS . License : CC BY-SA: Attribution-ShareAlike

- Legacy Site
- AS / A2 Home
- AS ICT Topics
- A2 ICT Topics
2. Linear presentations
Most presentations start at the beginning then each slide is presented one after another in numerical order.
This is called a 'Linear presentation'. Slide 1 is followed by Slide 2 then Slide 3 and so on.
In a linear presentation there is no facility to jump to out-of-order slides.
A linear presentation is very good for imparting facts and figures such as presenting the annual results of the company or summarising a finished project. These kinds of presentation have a minimal amount of audience participation.
The features of linear presentations are:
- Slides are shown in a pre-determined order.
- Slides that jump out of this sequence are not allowed.
- Slides follow an ordered line from the beginning to the end of the presentation.
challenge see if you can find out one extra fact on this topic that we haven't already told you
Click on this link: Linear Presentations
- Privacy Policy
- Terms of Use
Scholar Speak
How to design & improve presentation slides.
Written by Arslan Ahmed

When it comes to presentation, the first two questions which come to mind are “What content to present” and “how to present.” Students are learning to become experts in their own domain of knowledge, but the big questions are “how” to convey that knowledge to others. Students certainly do not want their well-crafted and well-rehearsed script to be presented poorly. The slides should speak for themselves.
It is not how much a presenter gives, but how they give it that matters the most. The presenter can either make the audience go to sleep with boring slides or keep them engaged throughout the presentation.
Here are 8 key points to keep in mind when designing your slides which can also be used as a checklist:
- Template : Choosing the right template is the first key to success of your presentation. A template contains layouts, theme colors, fonts, effects, background styles and many more stylistic options. A template should be consistent throughout the presentation. A company might have a dedicated template to be used. Another source for templates is the UNT PowerPoint templates webpage, which can be used for your class presentations. Using these templates, 50% of the presenter’s work is done which allows the presenter to focus on the content for their slides. It is important to know the location of the presentation, taking into consideration a few factors such as lighting, equipment available, and if the presentation is physical or virtual, with each having a potential impact on necessary preparation.
- Style guide: The style guide outlines the most significant specifications for making PowerPoint presentations. If one is available, employees given the same template need to follow the same set of rules. As a result, the corporate design is consistent. This allows employees to save time while also improving the quality of your presentations. Let the style of the slides speak to the audience it is aimed at. If creating a PowerPoint independent rather than based on a template, keep consistency in the styling of the theme, font, font size, font color (which may differ for headings and subheadings), picture size, and size of any logos throughout the PowerPoint or simply follow the predefined recommended style guide for that template if available.
- Layout: The presentation will look much better and even more professional if the creator uses the proper layout for each slide. Ensure that the design components and content are arranged in a uniform fashion throughout the presentation. The layout of the material and visuals should be balanced and coherent.
- Consistency: Consistency is key to a good presentation. The movement from one slide to the next should feel seamless. For a beautiful presentation, the typeface, colors, layout, and style should all be consistent.
- Visuals: Images speak more than words coming from the mouth of a presenter. Use relevant and meaningful images where required. Visuals are an excellent method to communicate effectively but do not find just any image from a Google search, as it may be distracting; instead, look for the right one and do not violate the copyrights of the image. Another way to understand if the image is suitable for the topic is to try justifying how this image connects with the content of the slide, and if it conveys the message to the audience without any audio associated with it.
- Colors: Have you noticed that anything related to UNT, like the UNT website, is always printed in green? This is because most organizations use a dedicated color palette as part of their identity. Always be consistent in choosing the colors for your presentations. Colors not only enhance your slides but also help to communicate the message between the presenter and the audience more effectively. As such, if you are making an independent presentation for a classroom, add some color to the slides or use a predefined template with colors that match your purpose. Consider a dark background for the slide with a light color for the text if you are giving a presentation in a dark room. Avoid using light text on light background or clashing colors, which will distract the audience.
- Alignment: Practice proper alignment of all content in the slides. Some examples of what to look for include the margins, spacing from all sides, and images on the left, right, or middle. If the slide contains a lot of information, proper alignment will make it presentable and will keep the audience from becoming distracted. Proper alignment makes a slide look clean, well-formatted and professional.
- Typeface: Choose a good typeface or font family which are easy to read and are also suitable for printing. Keep the font consistent from the first slide to the last. There are several fonts you can use for your presentation. However, you are better off choosing standard fonts, such as Calibri, Tahoma, Gill Sans, and Garamond, or even Times New Roman and Constantia. Stay away from all-caps fonts and Avoid Scripts, Italics and Decorative Fonts.
Those are the 8 essential characteristics of well-designed PowerPoint slides, along with all the best tips for a great presentation. Please feel free to leave a comment letting us know if this helped you, and as always, contact Ask Us with your research and library questions.
References (APA format):
Mount, K. (2017). Presentation skills: Designing effective visual aids .
Reynolds, G. (2010). Presentation zen design: Simple design principles and techniques to enhance your presentations . Berkeley, Calif: New Riders
Mount, K. (2017). Presentation skills: Design, structure and content .
Leave a Reply Cancel reply
Your email address will not be published. Required fields are marked *
Written by graduate student employees, Scholar Speak hopes to bridge the gap between the library and its students through instruction on the use of library services and resources.
Recent Posts
- Zines: Symposium, Library, and Interview May 24, 2024
- Discover Services Offered at Willis Library May 7, 2024
- Database Deep Dives: Part 2 May 2, 2024
Additional Links
Apply now Schedule a tour Get more info
Disclaimer | AA/EOE/ADA | Privacy | Electronic Accessibility | Required Links | UNT Home
This site uses cookies, including third-party cookies, to improve your experience and deliver personalized content.
By continuing to use this website, you agree to our use of all cookies. For more information visit IMA's Cookie Policy .

Change username?
Create a new account, forgot password, sign in to myima.
Multiple Categories
Four Design Choices for Slide Presentations
May 01, 2020
By: Charles E. Davis , Ph.D., CMA, CPA, CGMA

As a management accountant or member of your organization’s finance team in the era of Big Data, you’re likely to be called on to create presentations—either internally to your colleagues and upper management or externally to suppliers, shareholders, auditors, or other interested parties. You’ll need to communicate information in a proficient manner that tells the story you want to tell, whether it involves data, financial results, or even a business case or strategy proposal.
The key is to use your slides to tell the story effectively without detracting from your message. Piece of cake, right?
Hardly. In many cases, just getting started on a slide deck presents the greatest challenge. For instance, have you ever found yourself staring at a blank screen, wondering where to begin? I have, and it always seems like that blank slide just stares back at me, almost daring me to place the first word or graphic on the empty background.
One obvious starting point is to select a template provided in your presentation software, but certain templates may seem overly familiar to you from other presentations you’ve sat in on and, thus, as stale as month-old bread. If you want your next slide deck to look fresh and grab your audience’s attention, consider moving away from canned templates and creating your own look. It isn’t as difficult as you may think.
With a little thought about backgrounds, colors, fonts, and contrast, you can be well on your way to designing your custom slide deck. Or, if you aren’t comfortable creating a customized template or your organization has its own standard template, you can still apply these design elements to give your presentation a solid visual approach that will help convey your message effectively.
CHOOSE A BACKGROUND
One of the first decisions in designing effective slides, especially those that present intricate concepts or data visualizations, is selecting the background color. While you may be tempted to think it’s as simple as choosing white or black or a standard Microsoft PowerPoint template, there are four basic considerations when making that choice: room lighting, graphics, slide size, and template background.
First, if possible, check out the room where you’ll be presenting. Is there a lot of ambient light? Will the lights be on, off, or dimmed? The amount of light should influence your choice of backgrounds. In a dark or dimly lit room, a white or light-colored background will be too bright for the audience. In this case, a black or dark-colored background will be a better choice. If you’ll be in a brightly lit room, however, using a white or light-colored background will work just fine.
Next, consider the type of graphical elements you’ll be using in your slides. If your graphics have a white background, think about using a white background for your slides. As you can see in Figure 1, this allows the graphic’s background to blend in with the slide background, letting the image “float” and giving your slides a more professional look. Using the black background in this case causes the eye to focus on the graphic’s background rather than the graphic itself.

If your graphics have a white background and you want to use a black background, there are a couple of ways around this. First, you can remove the white background from the graphics by using the “remove background” feature in PowerPoint or using photo-editing software such as Adobe Photoshop. Be aware that photo-editing software will do a much better job of removing the background than PowerPoint alone.
Another option is to use transparent graphics (often identified by a PNG extension), which have the white background from the image removed. As shown in Figure 2, these graphics will often show up with a gray-and-white checkerboard pattern when you preview them in a graphics selection program.
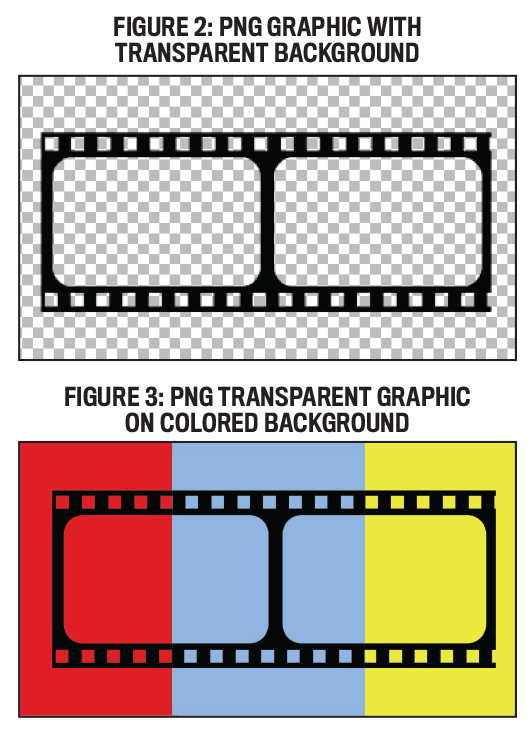
If you’re using Google to find graphics, you can filter your search to include only images with transparent backgrounds by selecting “Images,” clicking on the “Tools” button below the search area, and using the “Color” tool to specify “Transparent” as the color. As shown in Figure 3, transparent graphics work well on any color slide background.
A third consideration affecting background color choice is the slide size. Figure 4 shows the same standard size slide (4:3 aspect ratio) with a white background and with a black background. As you can see with the slide on the left, using a white background creates vertical black bars on either side of the projection screen. If you use a black background, however, these areas appear to merge into the background, in effect creating a larger slide footprint. Of course, you can avoid this issue by using a widescreen format (16:9 aspect ratio) for your slides, in which case a white background on a widescreen slide will fill the projection screen.

Finally, whether you choose to use a stock template provided in your presentation software or design your own template, the background graphics shouldn’t distract from your message graphics. And since you don’t want any of your slide elements to overlap the background graphics, a template with large graphical elements will reduce the area available for slide content.
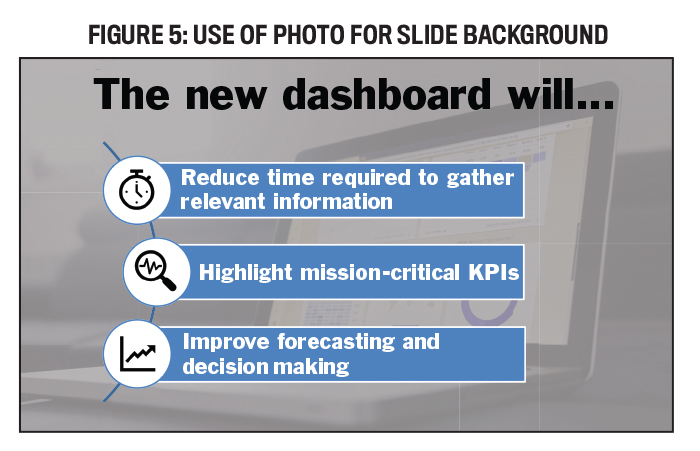
One way to add interest to your slide deck is to use a photograph for your background, as shown in Figure 5. If you choose this design route, you may use the same image for all of your slides or use different photos for each slide. Either way, choose high-quality photographs that complement your presentation content and won’t distract your audience’s attention from the slide’s main message. If you choose multiple photographs, select ones that have a similar look and feel to provide consistency within your presentation. You may find that you need to recolor the pictures to match your overall color scheme or to provide adequate contrast with the text.
A final word on photos: Beware of copyright issues! Websites that offer free images include pexels.com, pixabay.com, and unsplash.com. There are plenty of eye-catching images to choose from on any of these sites without the hassle of asking permission or paying a fee.
DEFINE A COLOR PALETTE
Choosing a color palette at the beginning of the design process will help ensure your slides have a consistent look and feel throughout the deck. Many times, part or all of this color scheme may be dictated by your employer, so talk with your manager or human resources department before you get started. If you have some freedom of choice, Adobe Color is a handy tool to help with the color selection process.
While most of us use words to define colors, my idea of “navy blue” might be different from yours. To eliminate this ambiguity, using one of the three primary systems for defining colors—Pantone PMS, RGB, and CMYK—will help you define a color palette for your slides, particularly if you’re trying to match an organization’s “official” colors. In the absence of official color definitions, you can get close by pasting a logo in a blank PowerPoint slide and using the eyedropper tool to capture the desired color definitions.
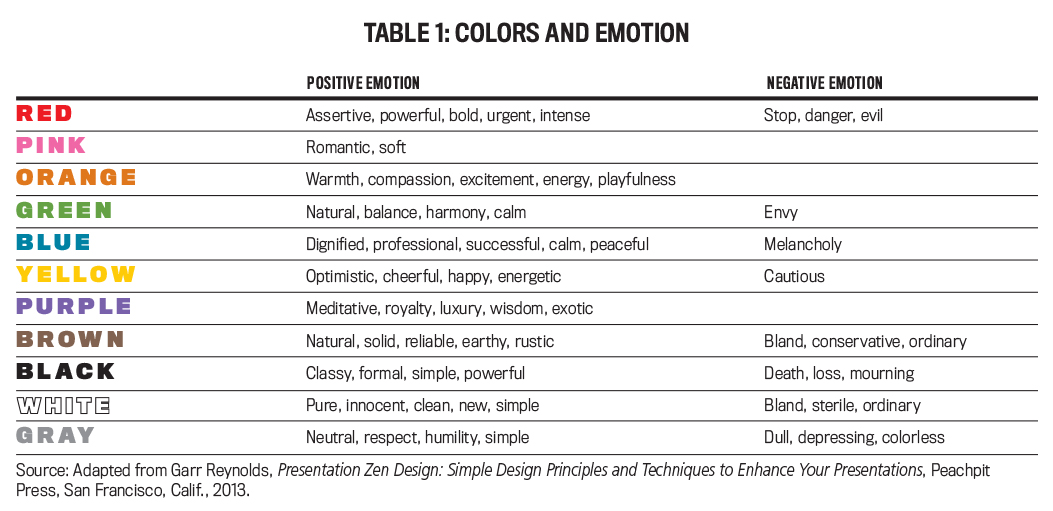
When selecting colors to include in your color palette, you need to think about the emotions attached to certain colors. In his book, Presentation Zen Design: Simple Design Principles and Techniques to Enhance Your Presentations , communications expert Garr Reynolds offers insights into colors and the emotions they evoke. For instance, red can suggest feelings of assertiveness, boldness, danger, and urgency, while blue is seen as dignified, professional, calming, and melancholy. Green can be viewed as calm and balanced but also evokes feelings of envy. Table 1 presents 11 colors and the emotions Reynolds links to them.
Since you’ll likely use more than one color in your slides, a color wheel can help you select combinations that work well together. Figure 6 illustrates six basic color schemes to consider for your color palette.
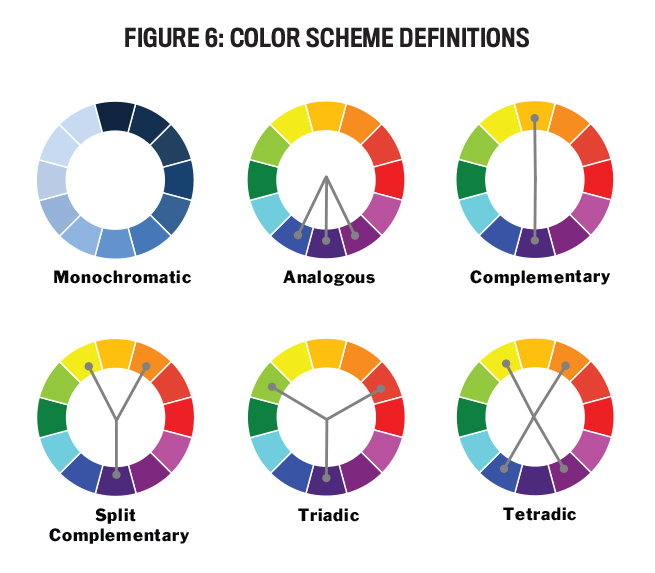
When selecting a color scheme for your slides, you shouldn’t use more than four different colors. Choose one as the dominant color, one as a support color, and the remaining colors as accents. While each of the color wheels in Figure 6 shows only 12 colors, online tools such as Adobe Color provide a full spectrum of colors, shades, and tints to choose from.
Monochromatic color schemes are based on a single color and use tints (lighter colors created by adding white), shades (darker colors created by adding black), and tones (colors created by adding gray) of that color for accents. A closely related scheme not illustrated in the figure is an achromatic scheme, which uses black, white, and gray combined with one brighter accent color.
An analogous color scheme uses three colors that are side by side on the color wheel. These schemes are generally thought to be serene and comforting, but you should avoid having both warm and cool colors in a single analogous color scheme. Black, white, and gray can provide additional accent colors.
Complementary color schemes use two colors that are opposite each other on the color wheel. This scheme is vibrant, but a complementary color combination for background and text doesn’t work well. Instead of choosing a color directly across the color wheel, a split complementary scheme chooses the two colors on either side of that complementary color. This scheme provides much of the same vibrancy and contrast as the complementary scheme, but it lacks some of the harshness found in some complementary selections. Other options include a triadic scheme, which employs three colors that are evenly spaced on the color wheel, and a tetradic scheme, which uses four colors (two sets of complementary colors).
Once you’ve selected your color palette, choose the text color carefully so that it provides enough contrast against your background color. For instance, black text on a dark blue background or light gray text on a white background won’t provide enough contrast to make the slide text easy to read.
SELECT A FONT
If your computer is like mine, there are so many fonts installed that choosing one can be overwhelming. While fancy fonts have their place in good design, a business slide deck usually isn’t one of those places. When choosing your font, remember that the person sitting in the last row has to be able to read what’s on your slide, and fancy fonts will be harder to read.
Limit yourself to one or two fonts (three at the most) for your slides. While this may seem restrictive, you can use a combination of two or three different sizes, weights (regular, bold, condensed), and italics of the same font to establish variety while still ensuring a consistent feel to your slides. If you do choose to use multiple font families, be sure that they’re different enough—Arial vs. Times New Roman, for instance—so it doesn’t look like a mistake.
When choosing a font, consider the computer that will be running your presentation. If the font you use to create your slides isn’t loaded on the computer used to present the slides, you can run into trouble. While the program will substitute a font that it believes is “close” to the specified font, this can sometimes result in misplaced or unreadable text. To avoid these font issues, it’s best to stick with a few standard fonts that are most likely installed on any computer. Table 2 lists some standard fonts that are commonly installed on most computers.
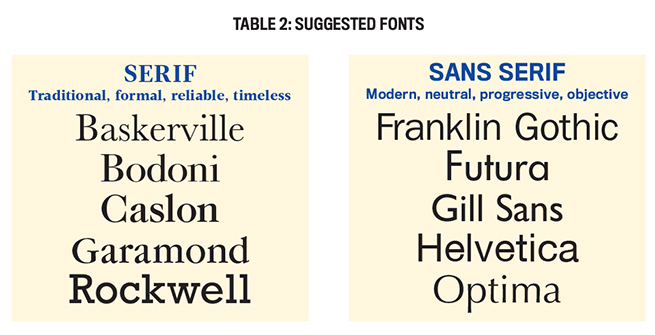
Notice that they’re grouped into serif and sans serif fonts. Serifs are the small “tails” at the ends of letters (for example, compare the “i” of Baskerville and Helvetica). Serif fonts work best on a slide when the font is large; otherwise, the serifs can run together, making the text more difficult to read. Sans serif fonts work well at all sizes. Note, too, that some fonts appear larger than others even if the same point size is used.
USE CONTRAST EFFECTIVELY
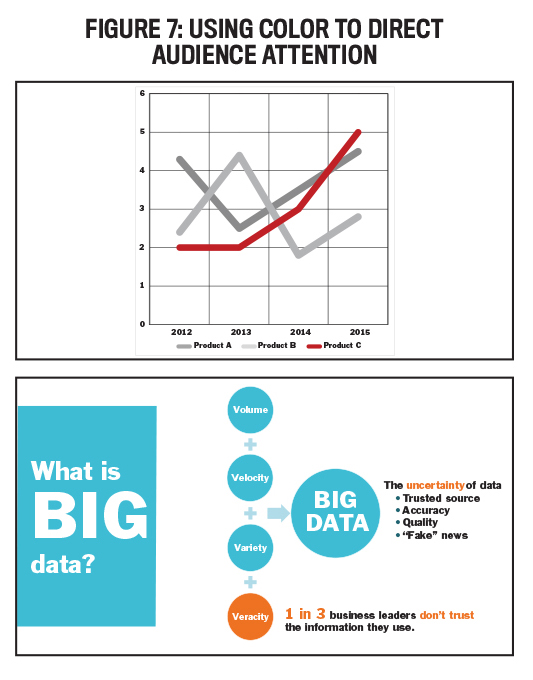
When creating a presentation slide, you want to control how the audience views the information. A simple way to direct the viewing is by using contrast to draw the audience’s eyes to the desired part of the slide. For instance, you may want everyone to focus on the content that you happen to be speaking about at a particular time, or you may want them to focus on the most important part of the content on a single slide. Three ways to direct the audience’s attention are color, size, and movement.
Color is an easy way to direct attention to a specific area of a slide. Notice in Figure 7 that this technique can effectively call attention to a specific component of a graph; bring focus to newly added components on a “building” slide, where elements appear one at a time; or connect important parts of the slide.
Because size is often associated with importance—the larger the item, the more important it’s assumed to be—it can be used to direct the audience’s attention to specific items. As shown in Figure 8, size can be used effectively for both text and graphics. It can also be combined effectively with color and contrast to draw attention.

While programs such as PowerPoint give you multiple options for movement, overuse of movement will actually reduce its effectiveness. In Figure 9, for example, it’s best to use simple movements, such as using a “wipe” to display the arrows in the first slide and a “fade” to bring in the four parts of the graphic in the second slide. Avoid the fancy spins and boomerangs that may leave your audience feeling a bit dizzy.
If you’re thinking that all of this sounds like a lot to consider when designing slides, you’re correct. Besides the mechanics of slide design, just like good writing, good slide design requires multiple drafts, proofreading, and editing. In her book slide:ology: The Art and Science of Creating Great Presentations , communications expert Nancy Duarte estimates it takes roughly 20 to 60 hours to build 30 slides to support a one-hour presentation, with the total development time for a presentation ranging between 36 and 90 hours.
While templates can help reduce this development time, many of them feel overly familiar—death by PowerPoint, if you will. If you choose to use a standard template, change the colors and fonts to freshen it up. But designing your own slides—possibly with the help of a local graphic artist, college art student, or someone in your company’s marketing department—will make your presentation really stand out from the crowd.
A good way to start developing your own design skills is to look critically at other people’s slides and jot down what you find interesting and effective about them; then use these elements to begin building your own bag of tricks. And do some additional reading (see “Slide Design Resources” below) to learn more about slide design from experts on the subject.
You now have some good tips and tools to improve your slide decks. As a creative exercise, call up an old deck and apply what you’ve learned about backgrounds, colors, fonts, and contrast. See if you can add some interest and impact to those slides. And when you’re done, ask a colleague to compare the old and new decks and give you some honest feedback. I think you’ll be surprised with the results, which you can use to make your next presentation really shine.
SLIDE DESIGN RESOURCES
Over the years, I’ve found plenty of helpful guides to creating more interesting presentations, both online and in book form. Here are some that are particularly valuable.
- Presentation Zen, presentationzen.com
- SlideShare, slideshare.net
- Note & Point, noteandpoint.com
- Improve Presentation: The 22 Best PowerPoint Templates for 2020, improvepresentation.com/blog/best-powerpoint-templates
- Slidedocs, duarte.com/slidedocs
- Presentation Process, presentation-process.com
- Nancy Duarte, slide:ology: The Art and Science of Creating Great Presentations , O’Reilly Media, Sebastopol, Calif., 2008.
- Nancy Duarte, HBR Guide to Persuasive Presentations , Harvard Business Review Press, Boston, Mass., 2012.
- Garr Reynolds, Presentation Zen: Simple Ideas on Presentation Design and Delivery , Peachpit Press, San Francisco, Calif., 2019.
- Garr Reynolds, Presentation Zen Design: Simple Design Principles and Techniques to Enhance Your Presentations , Peachpit Press, San Francisco, Calif., 2013.
- Robin Williams, The Non-Designer’s Design Book: Design and Typographic Principles for the Visual Novice , Peachpit Press, San Francisco, Calif., 2014.
About the Authors

- Technology & Analytics
- Data Visualization
- Communication Skills
- presentation software
- career development
Publication Highlights
IMA Life: Beyond the Traditional Role
Explore more.
Copyright Footer Message
Lorem ipsum dolor sit amet
6 Most Effective Presentation Styles
Hrideep barot.
- Presentation , Public Speaking

Have you ever been an audience member who was not wholly involved in a speech or a speaker who discovered their audience dozing off? Both scenarios have the potential to be disheartening and fruitless.
What can you then do to improve the effectiveness of your presentation?
There are various styles in which you can present your content. Out of a plethora of choices, some of the most effective ones include – the Visual, Storytelling, freeform and instructor style of presentation. Each of them has their own set of methods and guidelines, however, they are known to be extremely beneficial and are used by speakers all over the world.
What is a Presentation Style?
Let us first take a brief look at what a presentation style is before moving on to the most effective techniques that you can use.
A Presentation style is a way of giving a presentation orally. In other words, a particular presenting type is an approach you adopt or employ to deliver your content. There are numerous presenting styles or methods you can use when giving public speeches or presentations such as –
- Visual Presentation Style
- Coach Presentation Style
- Instructor Presentation Style
- Lessig Presentation Style
Out of hundreds of methods and ways, there are a few that are more effective and yield better much better results when used appropriately. They include –
1. Visual Style
The visual presentation style uses visual components to support the verbal subject. In other words, this approach uses charts, photos, graphs, and other visual aids in addition to speaking to assist the audience in visualizing and comprehending the material.
Advantages of Using a Visual Presentation Style
The relevance and effectiveness of visual and verbal communication are well known, making the visual style of presentation one of the finest to adopt. This is also a remarkably effective strategy as it aids the audience in more easily understanding complicated or in-depth talking points. When used in conjunction, visual and verbal communication aid in better understanding and retention.

How Can You Use a Visual Presentation Style?
If you plan to use this style in your upcoming presentation, then these are some steps you can follow-
1] Be thorough with your content – it is essential to know your content well to prepare visuals related to it.
2] Pick up only the key points and add them on slides – key pointers can be one sentence that conveys the primary information you want to share.
3] Use graphs or charts to convey numbers or statistics – Simply saying numbers can confuse consumers. Therefore, charts and graphs make it easier to comprehend when you speak about them.
4] Include relevant pictures or videos in each slide or alternative ones – Using images and videos can be beneficial because they give your audience something to look at while you speak, which helps them understand and retain what you are saying.
Things To Avoid When Using a Visual Presentation Style
Now that you know how to use a visual style, it is equally imperative to be mindful of a few common mistakes so that you do not make them.
1] Slides only complement your speech – do not put-up paragraphs and read from them. It will only bore the audience and disengage them from it. Instead, only add critical words or phrases on which you can verbally elaborate.
2] Don’t use a fancy unreadable font – a visually presenting slide does help but using a fancy font will only make it not understandable. Thus, it is crucial to stick to standard readable fonts and sizes.
3] Don’t rush through – just because you have a slide that allows people to read and understand some of the content does not mean you can speed up. Allocate sufficient time to each topic so that the audience has time to grasp and understand.
Example of a Speech That Uses a Visual Presentation Style
Wondering what a visual presentation style looks like? Check out this video where Steve Jobs introduces Mac Air to the world. This is an apt video showcasing what a visual presentation should be like!
2. Storytelling Style
The storytelling style of presentation is a method where the speaker uses anecdotes and examples to connect with the audience. This technique is among the greatest and most effective because it enables the audience to relate to another lay person’s experiences, thereby allowing them to understand the practicality and reality of the topic.
Advantages Of Using a Storytelling Style
Using a storytelling style allows you to –
1] Share real-life experiences on the topic , letting people know its practicality. For instance, if your topic is “optimism and positivity in life,” you can offer examples of how being positive has benefited you in various circumstances and examples of how things have gone when you haven’t been hopeful.
2] It allows the audience to provide their input , which helps you understand if the audience is grasping the message you want to convey. This is a subtle yet constructive way of engaging the audience and gaining feedback.
3] It also permits for an informal and naturally flowing talk . Most of the speeches are very structured and formal. Even though this has a construct, you can adapt it to the conversations and knowledge of the audience.

How To Use the Storytelling Presentation Style?
Using the storytelling method also requires backend work. If you wish to adopt this style for your upcoming presentation, here are steps that you can follow –
1] Develop the structure of your speech – first, it is helpful to write down the topic and each subtopic you will cover.
2] Include relevant stories, anecdotes, and experiences – once you have the overall flow of your speech, then you can fill the relevant gaps with your own stories and experiences.
3] Keep some time for an audience input – allocate 1-2 minutes wherein you take the backend and allow the members from the audience to comment or share their experiences that are relevant to the topic.
Things to avoid when using the storytelling method
Every method has specific pointers to be careful of, and storytelling is no exception. Here make sure to –
1] Not make it like a formal delivery – Try not to overly formalize and grandiloquent it since this will take away from the storytelling element.
2] Only share the positives – Sharing real experiences is one benefit of the storytelling technique. Thus, use this approach to communicate the topic’s applicability by outlining its advantages and disadvantages.
Here is a video of Andrea Gibbs, who talks about “The Power of Storytelling” by sharing anecdotes and experiences from her personal life.
The storytelling format is much popular among motivational speakers who use personal experiences to motivate people for the better.
3. Connector Style
The connector style of presenting, as its name suggests, includes the speaker establishing a connection with the audience. This indicates that the speaker actively engages the audience by asking frequent follow-up questions and seeking meaningful feedback. Speakers widely use this strategy to strengthen connections with audiences by demonstrating how they all are similar.
Advantages Of Using a Connector Style of Presentation
The connector style of presentation, much like the storyteller, has a lot of benefits. Among the many, the most important ones include –
1] It allows you to establish a deeper connection with the audience , which helps you understand them and if they can comprehend the message you want to convey.
2] The audience is able to participate actively . Usually, the audience only listens passively, but this format allows them to respond and express their opinions, keeping them actively engaged the entire time.
3] You can receive immediate feedback . In most other presentation methods, this perk is not present. It’s beneficial to get insightful feedback because it enables you to comprehend your audience’s viewpoint and adapt your information for contextual understanding. Furthermore, it enlightens you as to which areas require more effort.

Guidelines While Using the Connector Presentation Style
1] Start with a personal story or connecting activity that grabs the audience – this method helps keep the audience engaged from the very start.
2] Practice nonverbal gestures – keeping eye contact with the audience, smile, and use your hand gestures to convey your presence and complete attention to the audience.
3] Cater to the audience throughout – this form of presentation means that you and the audience are entirely involved. Thus, keeping a check on them is of utmost importance. Keep checking if they are interested and if not, include relevant activities to gain their attention back.
Things to Avoid When Using the Connector Style
When using the connector style, do not take up most of the time telling self-stories or doing self-talking. It is vital to keep your content brief but meaningful while allowing the audience to give their inputs and viewpoints on it.
1] Don’t read from scripts or recite the information . Keep the content naturally flowing like a back-and-forth conversation that can be moulded as per the answers and feedback of the audience.
2] Don’t use visuals to complement your talks. The connector style relies primarily on you and your stories, so don’t use graphics to convey any messages unless they are some pictures to show on a relevant topic.
Many speakers use the connector style because it helps them connect deeply with the audience, when used correctly, it does allow the speaker to develop meaningful relations with the audience and convey relevant and helpful messages.
4. Instructor Style
Many presenters adopt the instructor style of presenting when educating their audience on a challenging or complicated subject. To simplify a complex issue so that the audience may more readily grasp, this method entails the use of well-known phrases, figurative language, metaphors, and pictures.

Advantages of the Instructor Style of Presentation
The instructor presentation style is more formal, like a teacher or professor delivering a lecture. But this format, for reasons of its own, is beneficial because –
1] It allows you to logically explain the subject with the help of relevant visuals, examples, and supplements. For example, if you take up the topic of “Investing in your 20’s”, you can start by explaining what an investment is, the types of investments available, pros and cons of each etc. while supporting it with relevant videos, stats, and graphics.
2] When used correctly, the method can be highly persuasive as it builds decks in a logical order and uses impactful visuals as evidence to support the ideas. Continuing the same example, if you logically go on explaining and supporting, most of the audience will have been convinced to make some sort of investments.
3] Lastly, this method allows you to educate and aware the audience appropriately . You can use your knowledge and skills on the subject matter to convey the message effectively. If you have personally had some experiences, this method allows you to share them to help the audience become aware.
Things to Avoid When Using the Instructor Style of Presentation
When employed improperly, this formal presentation can prevent a speech from succeeding. As a result, it’s crucial to use the procedure correctly by avoiding the following:
1] Skipping the basics on the assumption that the audience will already know – it is essential to start and cover the basics and then make your way up to the complex topics.
2] Don’t only go on speaking from one topic to the other – even though there isn’t a lot of audience participation, including small segments with quizzes and discussions to know if the audience understands the content.
3] Don’t use jargon or complex language to communicate – the topic might be challenging to comprehend. Hence, you should avoid using difficult words or jargon that people are largely unaware of. Instead, using straightforward and basic terms will be beneficial.
The instructor style is much used by a famous speaker Al Gore who advocated and educated people on climate change. This is one video where you can see the effective use of instructor presentation style.
5. Takahashi Style
Named after its creator, Masayoshi Takahashi, Text is the main component of a Takahashi presentation. It is a technique that employs simple visuals, mainly large block fonts. A Takahashi presentation doesn’t include charts, photos, or pictures, just a few essential big font words.
Advantages of using a Takahashi Presentation Style
There are several benefits that make it desirable to adopt this highly distinctive style. Some of them include –
1] The speaker can easily elaborate on a topic because the slides, which have a few essential key phrases, provide the audience with brief information beforehand.
2] The slides include simple and unambiguous phrases concerning the speaker’s topic, preventing any distraction or deviance from the subject.
3] It combines the two essential components of a presentation—clear, concise text and eye-catching visuals—making it ultimately beneficial for everyone’s use.
Guidelines when using a Takahashi Presentation Style
If you want an actual Takahashi presentation, there are some key pointers to keep in mind –
1] Do not include text more than needed – make sure to add a few words or a maximum of 2 sentences. Anything beyond that will make it crowded and messy, and unappealing to the audience.
2] Keep the slides simple – an authentic Takahashi presentation is black and white to avoid distraction. Therefore, it is best to avoid any colours and stick to this standard format.
3] Keep the font as large as possible – once you have put the content on the slide, make sure to increase the font as much as it can fit best on the slide. The reason is that large fonts attract attention and can embed the core messages in the reader’s mind.
If you found this method interesting and want to learn more about it, tap on this video where Luminita Florea tells you all about the Takahashi style of presentation.
6. The Lessig Style
Much similar to the Takahashi Method, The Lessig Presentation Style has been inspired by the work of Stanford law professor, Lawrence Lessig. This style employs the use of a single word, short quote, or photos that are in sync with the speaker’s speech.
Advantages of using The Lessig Presentation Style
1] Each slide in a Lessig presentation concentrates on one concept or topic. This makes it simple for the audience to understand and absorb each idea separately.
2] This presentation method functions like a movie, with each slide presenting succinct information for only 10 to 15 seconds. Because of its conciseness and pace, this style works well in keeping the audience hooked to the content.
3] This method allows for much better retention and memory because of dual coding, i.e., via the visual and verbal mode of communication. More often than not, the word or quote put up is read aloud by the speaker, allowing the audience to hear and see it, thus etching a strong memory for the same.
Guidelines to remember when using the Lessig Presentation Style
This minimalistic presentation has much to be careful of. Some of the important guidelines include –
1] Not more than a word or quote – it is important to keep the slides less with only a key word or quote or picture in rare cases. Adding more than that will take away the essence and quality of the Lessig Style.
2] Use contrast – since the slide contains just one word, quote or picture it is important to highlight and enlarge it so that it doesn’t skip the eye of the audience in any way. Although this kind of presentation allows you to use colour, using a standard black and white is recommended.
The Lessig style of presentation is one of the most effective and captivating approaches, and many presenters use it in their speeches. Tap below to see an example of such a presentation and its effect!
Regardless of the style you choose, there are several styles that you should absolutely avoid using because they could make your presentation go awry. Tap on this video where we tell you exactly what to styles you have to say a BIG NO to.
Presentations are an integral part of the professional life. Whether you are a professional speaker or a corporate employee, or a teacher, every role will at some point require you to present, persuade or educate an audience. It is thus helpful to know about some of the most effective styles so that you can make the most of them in your next presentation!
We hope that this article has helped you learn the most effective presentation styles, ways to adopt it and pitfalls to avoid!
Happy Presenting!

Enroll in our transformative 1:1 Coaching Program
Schedule a call with our expert communication coach to know if this program would be the right fit for you

Lost Voice? Here’s How to Recover Sore Throat and Speak Again

7 Keys to Emcee Like a Pro: Unlock Your Hosting Potential

8 Ways to Rise Above the Noise to Communicate Better
- [email protected]
- +91 98203 57888
Get our latest tips and tricks in your inbox always
Copyright © 2023 Frantically Speaking All rights reserved
Kindly drop your contact details so that we can arrange call back
Select Country Afghanistan Albania Algeria AmericanSamoa Andorra Angola Anguilla Antigua and Barbuda Argentina Armenia Aruba Australia Austria Azerbaijan Bahamas Bahrain Bangladesh Barbados Belarus Belgium Belize Benin Bermuda Bhutan Bosnia and Herzegovina Botswana Brazil British Indian Ocean Territory Bulgaria Burkina Faso Burundi Cambodia Cameroon Canada Cape Verde Cayman Islands Central African Republic Chad Chile China Christmas Island Colombia Comoros Congo Cook Islands Costa Rica Croatia Cuba Cyprus Czech Republic Denmark Djibouti Dominica Dominican Republic Ecuador Egypt El Salvador Equatorial Guinea Eritrea Estonia Ethiopia Faroe Islands Fiji Finland France French Guiana French Polynesia Gabon Gambia Georgia Germany Ghana Gibraltar Greece Greenland Grenada Guadeloupe Guam Guatemala Guinea Guinea-Bissau Guyana Haiti Honduras Hungary Iceland India Indonesia Iraq Ireland Israel Italy Jamaica Japan Jordan Kazakhstan Kenya Kiribati Kuwait Kyrgyzstan Latvia Lebanon Lesotho Liberia Liechtenstein Lithuania Luxembourg Madagascar Malawi Malaysia Maldives Mali Malta Marshall Islands Martinique Mauritania Mauritius Mayotte Mexico Monaco Mongolia Montenegro Montserrat Morocco Myanmar Namibia Nauru Nepal Netherlands Netherlands Antilles New Caledonia New Zealand Nicaragua Niger Nigeria Niue Norfolk Island Northern Mariana Islands Norway Oman Pakistan Palau Panama Papua New Guinea Paraguay Peru Philippines Poland Portugal Puerto Rico Qatar Romania Rwanda Samoa San Marino Saudi Arabia Senegal Serbia Seychelles Sierra Leone Singapore Slovakia Slovenia Solomon Islands South Africa South Georgia and the South Sandwich Islands Spain Sri Lanka Sudan Suriname Swaziland Sweden Switzerland Tajikistan Thailand Togo Tokelau Tonga Trinidad and Tobago Tunisia Turkey Turkmenistan Turks and Caicos Islands Tuvalu Uganda Ukraine United Arab Emirates United Kingdom United States Uruguay Uzbekistan Vanuatu Wallis and Futuna Yemen Zambia Zimbabwe land Islands Antarctica Bolivia, Plurinational State of Brunei Darussalam Cocos (Keeling) Islands Congo, The Democratic Republic of the Cote d'Ivoire Falkland Islands (Malvinas) Guernsey Holy See (Vatican City State) Hong Kong Iran, Islamic Republic of Isle of Man Jersey Korea, Democratic People's Republic of Korea, Republic of Lao People's Democratic Republic Libyan Arab Jamahiriya Macao Macedonia, The Former Yugoslav Republic of Micronesia, Federated States of Moldova, Republic of Mozambique Palestinian Territory, Occupied Pitcairn Réunion Russia Saint Barthélemy Saint Helena, Ascension and Tristan Da Cunha Saint Kitts and Nevis Saint Lucia Saint Martin Saint Pierre and Miquelon Saint Vincent and the Grenadines Sao Tome and Principe Somalia Svalbard and Jan Mayen Syrian Arab Republic Taiwan, Province of China Tanzania, United Republic of Timor-Leste Venezuela, Bolivarian Republic of Viet Nam Virgin Islands, British Virgin Islands, U.S.

Home Blog PowerPoint Tutorials The Essential Guide to Making Timelines in PowerPoint and Google Slides
The Essential Guide to Making Timelines in PowerPoint and Google Slides

Timelines are used for a variety of purposes by people across different professions. You might be a project manager looking to create a timeline to understand the outputs and outcomes of your project or a teacher looking to teach your students about all major happenings leading up to a historical event. Timelines are a good way to visualize past, present and future events, to forecast outcomes and to learn from the past.
What is a Timeline?
History of timelines, why timelines are important in presentations, different timeline styles, ingredients of a successful timeline, how to create a timeline in powerpoint, how to create a timeline in google slides, other creative timeline designs (infographics & examples), examples of best timeline templates for presentations, what makes the perfect timeline.
A timeline can be your snapshot into the past and a window into the expected future by analyzing the what, why, where, when and how, leading up to the things that are most important to you. In this guide we shall tell you all that you need to know about timelines and how to create them.
A timeline is essentially a visual representation marking all major events over a period of time. A timeline marks specific milestones, achievements, or expected results tied to a specific topic. What a timeline is used for depends on a number of factors. For example, your timeline can be a graphical representation of past events, a forecast of future results or expected outcomes, or even a mix of past, present and future activities, events and outcomes.
Most timelines use time as a scale. The majority of timelines are linear in scale, while some timelines use a logarithmic scale. Timelines can be created in a number of ways such as with text based labels, numbers, graphs, photos and in the form of animations.
Timelines are most commonly used for educational purposes, in research and project management. However, this is not an exhaustive list. Other than use for business and academic purposes, timelines have been applied to learn about the spread of pandemics, chronology of the universe, and to understand scientific processes.
Timelines have been used for centuries to chronicle events. Timelines have been an effective tool in recording history and learning from the past to determine the effect of past events on the present and the future. Man has chronicled events and written memoirs to record history since time immemorial. These were perhaps methods similar to create a timeline of important aspects of history. However, not all such records contained specific dates. Moreover, recording history was not necessarily done in the form of short timeline visualizations as we often see in the form of modern timelines.
Perhaps the earliest examples of timelines are historical records that were maintained by scribes and historians on the instructions of kings. In fact, scribes performed many tasks that modern timelines serve including; recording the amount of crops harvested, forecasting demand and supply, as well as keeping accounts for ordering supplies. This is somewhat similar to what most project managers do. They plan, anticipate and ensure the implementation of project goals and outcomes in line with set timelines. For this purpose, they use historical and present data, as well as forecasting models. They align their teams in line with the set timeline and offer course correction, as needed. For this purpose, a visually appealing historical timeline template can be a time-saver for educators and historians who need to prepare their presentations.
Modern timelines that we see today can be assumed to have origins as old as recorded history. In fact, this recorded era which roughly spans to 3500 BC has some form of timeline related aspect, as one can trace back events chronologically across multiple civilizations; be it Mesopotamia & Sumerians, or the Roman, Greek, Arab, Chinese, South Asian and other civilizations.

Timelines serve as an essential way of simplifying content within presentations and making it easier to grasp for an audience. Instead of explaining about a concept, project or expected outcome by going back and forth; it can be much easier to simply use a timeline to show the entire layout in chronological order. This ties all aspects of the topic with a thread like symbolism which makes it easier to explain, plan, brainstorm and visualize ideas.
Business presentations, for instance, often require explaining lengthy and cumbersome concepts and ideas in a small time span. Whether you’re pitching your idea before a potential investor, need to explain the forecasts for a project, wish to reveal details about current progress or need to elaborate upon past events; a timeline can make your job so much easier. They can essentially help answer the why, what, when, how and where in the form of a simple visualization.

There are a number of timelines styles that can be applied when making a timeline. The way you construct a timeline is actually quite subjective. It can be hard to put all timeline styles in a box considering the various tools that have now made it possible to construct timelines in so many different ways. Below is a breakdown of some of the timeline styles that you can apply when making timelines.
Horizontal Timelines
A horizontal timeline can be useful for showing progress. Such a timeline can be good for representing events chronologically. Horizontal timelines are one of the most common type of timelines and are great for project management, depicting historical events and forecasting.

Vertical Timelines
A vertical timeline template can be useful for constructing graphs and representing research data. Such a timeline can also be created using an axis to discuss variables affecting an outcome. Needless to say, vertical timelines can also be used for project management, forecasting and representing events chronologically.
Non-Linear Timelines
These can come in radial, spiral or arbitrary forms. These are often represented in the form of chains and interconnected shapes (e.g. arrows) or snake like lines. These timelines might not have a set horizontal or vertical sequence, as they represent interconnected pieces. Such timelines can be useful for depicting processes and discussing multiple variables and for longer event sequences.
Animated or Interactive Timelines: Such a timeline can be made in a number of ways. You can bring together aspects of horizontal, vertical, and non-linear timelines. This is because the ability to create a timeline by bringing together different variables affecting it can result in endless possibilities. Zooming UIs like the one used in Prezis and HTML5 based web apps, and powerful platforms like Microsoft SandDance running with Power BI can help you affect the timeline by selecting multiple variables. Such timelines can remain in flux as you apply data to visualize your content.
The new Morph transition and 3D features in recent versions of PowerPoint open a range of new possibilities to develop animated and really impressive timelines in PowerPoint.

From Tables to Graphical Timelines in PowerPoint
The tabular data were user for years. You can present your data using tables by labeling different bits of the information by date. Tables can be however more complicated and lengthy. From an audience viewpoint, tables could not help to visualize the timeline milestones easily vs. a visually appealing timeline design. If you intend to present your information before an audience, a graphical timeline can be usually easier to present than a table.

Your timeline needs to be fashioned in a manner that makes it easy enough for your audience to understand the various interconnected sections. Here are a few tips for making a timeline that can help you get your message across to an audience.
- Avoid Messy Timelines: Your timeline should be easy to understand and the various parts of your timeline should not be so intertwined that it becomes impossible to make head or tail out of it.
- Ensure Accuracy: There is no use making a visually appealing timeline if your data is wrong. Make sure that the information given in your timeline is accurate and not misrepresented. Even a single mistake in a timeline can disrupt the entire sequence.
- Account for Scalability: You must account for scalability in your timeline. Be it the design of the timeline or the process or forecast shown within it; you must ensure that the timeline can be edited to accommodate changes. This is because there might be a number of ideas, issues or instructions that might be discussed during your presentation or meeting, which might significantly alter the timeline once its presented.
- Goals & Outcomes: Most timelines come with goals and outcomes. If your timeline requires these, make sure that the goals and outcomes are defined properly. You will require emphasizing upon key milestones, and accounting for their expected outputs and outcomes.
- Descriptive Text & Labels: It is always important to ensure your timelines are properly labeled. If necessary, also add descriptive text, especially for milestones, goals and outcomes. This will help you neatly conclude your timeline.
Now that we learned the basics of a timeline, you may be wondering: how to make a timeline? There are a number of ways you can create timeline for your presentations or documents. One of the most common ways of making a timeline slide is in PowerPoint or Google Slides. Other online tools and specific timeline web apps can also be used. Let’s take a look at how you can quickly create professional looking timelines.
Creating a Timeline in Microsoft PowerPoint
How to make a timeline in PowerPoint? Below are 3 easy steps for making a timeline in PowerPoint using SmartArt Graphics. This is probably the easiest method for making a timeline in PowerPoint.
3 Easy Steps for Making a Timeline in PowerPoint using SmartArt
Step 1. Insert a SmartArt Graphic: Go to Insert -> SmartArt and pick a SmartArt Graphic. For making timelines, you might want to use Process based graphics. These can be easier to use for depicting a timeline like sequence. Some of the graphics in this section are specifically meant for timelines, such as the Basic Timeline graphic which depicts an arrow.
However, you can pick and choose a graphic according to need. For example, some of the graphics might not give you enough margin to add a lot of text or doing so might make the graphic confusing. Hence, pick a SmartArt Graphic that you think will be best to accommodate your content, like the Basic Timeline option. This way, you can add a timeline to your PowerPoint slide.
Step 2. Add text to your SmartArt: In the next step, add text to label your timeline and if necessary, to add a description describing each step of the timeline. For some timelines, a simple label might be enough, as you might need to keep the graphical elements minimum to describe each step during your presentation verbally.
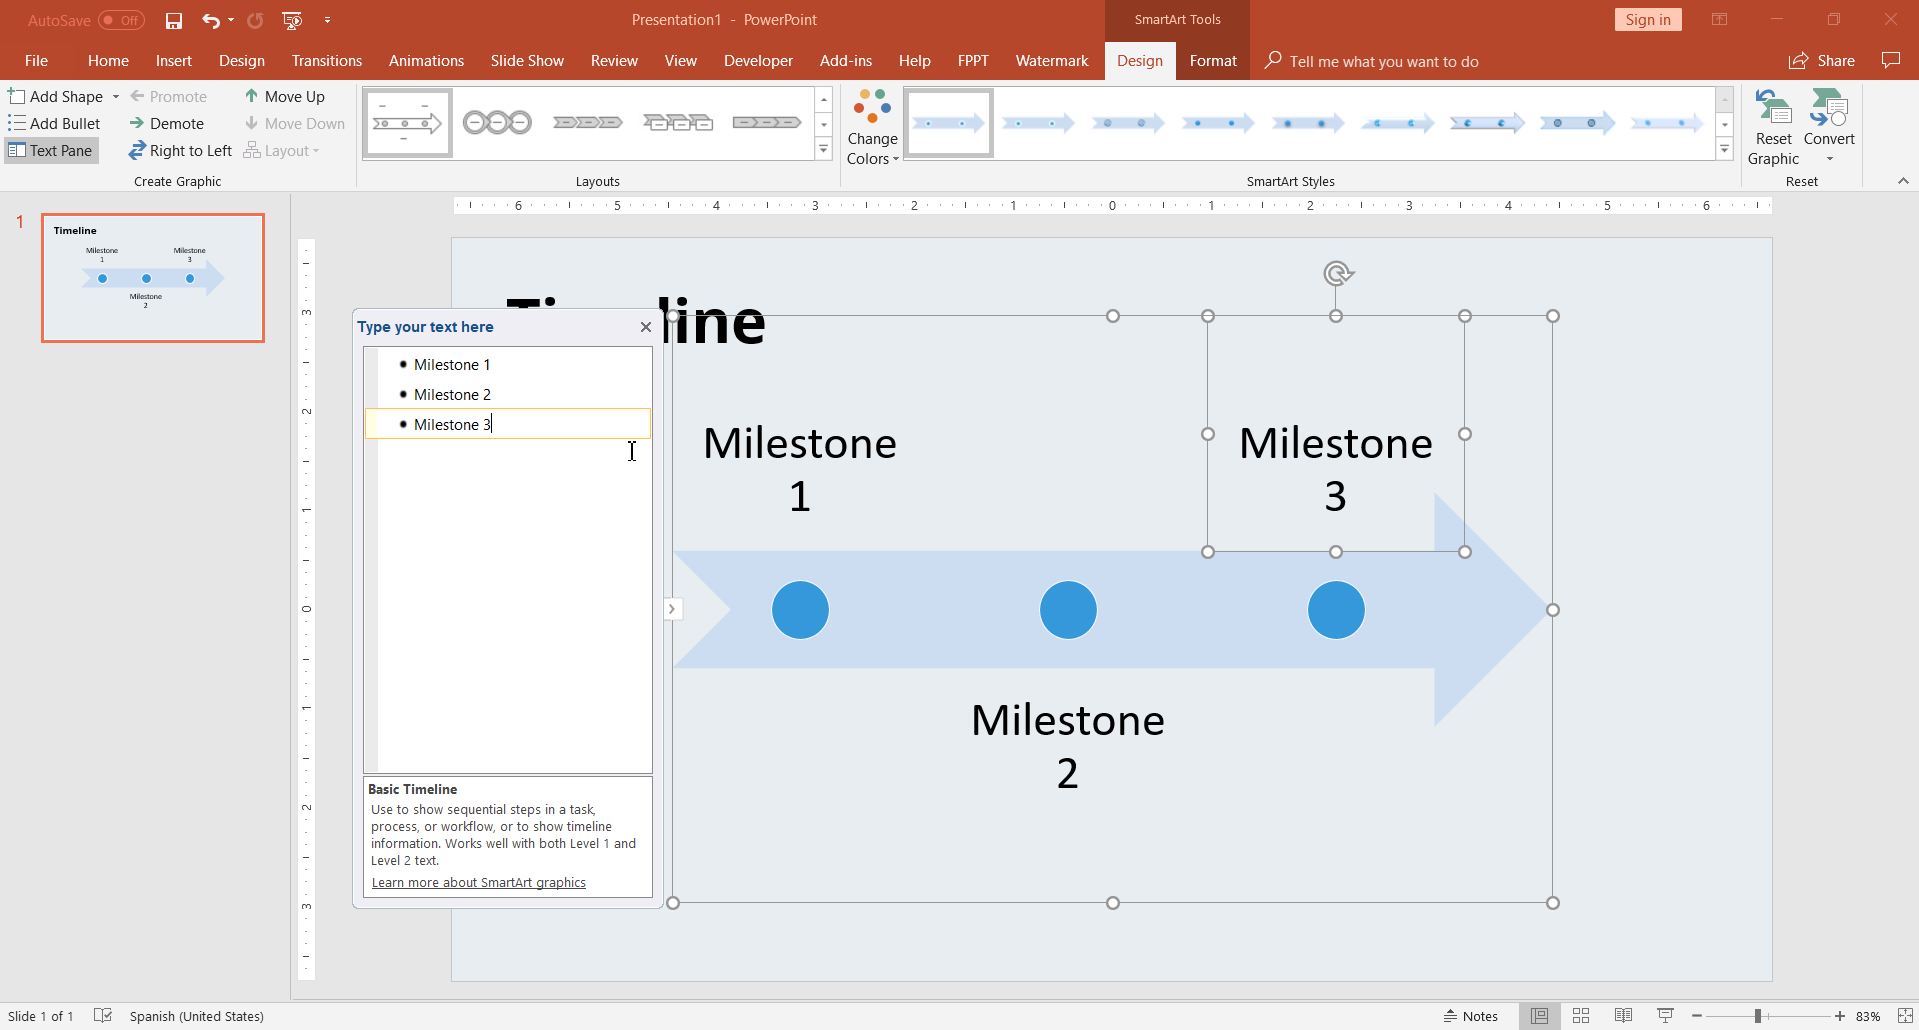
Step 3. Design your timeline: You can design your timeline by using SmartArt Tools, and picking the various color schemes given within PowerPoint or changing the shape colors. You can always switch the SmartArt Graphic using SmartArt Tools and try your hands at different graphic types to make interesting timelines. In the following example we have adjusted the fill options to a custom gradient color.

3 Easy Steps for Making a Timeline in PowerPoint using Shapes
Another easy method for making timelines in PowerPoint is by using the built-in PowerPoint shapes. You can use various shapes for designing your timeline, however, a very common shape is the Arrow shape.
- Step 1. Insert shapes: In the first step, insert a shape via Insert -> Shapes. For the purpose of this tutorial, we will use the Right Arrow shape. This is because an arrow can be quite useful for pointing towards a specific direction on the slide; making it ideal for linear timelines. You can insert multiple shapes to construct your timeline, such as a few arrows pointing towards the right.
- Step 2. Add text-boxes: You can insert text-boxes to explain each step of the shape. These text-boxes can be added both within shapes and next to them. The former can help label the shapes with dates and other relevant information, whereas, the latter can be handy for adding a description for what each shape implies.
- Step 3. Design your shapes: You can recolor, resize and reorder the shapes according to your specific timeline requirements in order to make it stand out and to highlight different parts of it by color coding it.

This method can be used either to create a basic timeline or an advanced timeline.
Google Slides has had an impressive growth in recent years and positioned itself as one of the preferred tools when creating business slide decks and presentations for education. As in PowerPoint, Google Slides offers a wide range of tools to create timeline slides are one of the diagrams that can be created in Google Slides presentations.
How to build a timeline in Google Slides? You can create timeline templates in Google Slides by either using shapes, by using the same procedure as PowerPoint (by inserting shapes via Insert -> Shapes in Google Slides), or opt for a much easier method that can help you cut down the time needed for making timelines in Google Slides.

- Step 1. Insert a timeline diagram: You can insert timeline diagrams in Google Slides via Insert -> Diagrams. There are a number of diagram types listed in this section, make sure you pick Timeline diagrams from the right pane.
- Step 2. Pick a timeline diagram template: You can choose from the various timeline diagrams given in this section. Pick the one that you think might be best suited for your timeline requirements.
- Step 3. Customize timeline diagram: Once you have picked a timeline diagram, you can customize it. You can right-click on the diagram to add animations or choose Format Options to edit the various parameters of the diagram.
The Format Options menu takes you to a pane where you can edit the size, position, shadow and reflection of the diagram, as well as to rotate it.
For more information, check our tutorial on how to make a timeline on Google Slides .
An infographic is a visual image used to represent information or data. A well-designed infographic can help to simplify a complicated data structure or message into a captivating experience. Used correctly, timeline infographics can be one of the most effective strategies in digital marketing to convey a message to an audience. Infographic timelines can also be used in social media or other mediums. An effective infographic should be visually engaging and be prepared to target a specific audience.
As many other visual elements used in infographics, timelines are part of infographic design. They can help to portray history, achievements or describe how a business have evolved over the years. There are many creative timeline infographic designs and layouts. Here is just an example of a simple but creative infographic design:

This great timeline created by Anna Vital (Adioma Founder and Information Designer) is a clear example of timeline design that helps to describe how Yahoo started. It’s simple, clear and descriptive.
A timeline template for PowerPoint or Google Slides can help to save a lot of valuable hours. Here is a list of some of the timeline templates for PowerPoint and Google Slides that you can find in our catalog. All timelines are 100% editable and ready to be used in your presentations.
1. Circular Timeline Infographic Template for PowerPoint
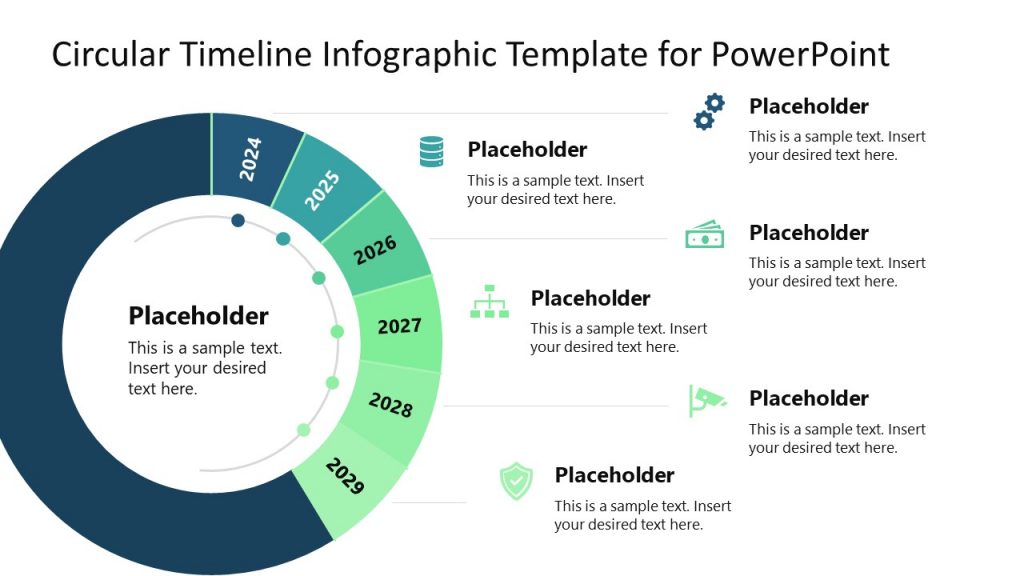
The Circular Timeline Infographic Template for PowerPoint is an interactive way to create a circular timeline infographic design. It seeks to represent different important milestones through a circular design, accompanied by graphic assets and icons that will allow you to communicate in a better way to your audience.
Use This Template
2. Segmented Plan Timeline Template Design for PowerPoint
The Segmented Plan Timeline Template Design for PowerPoint is a presentation template widely used for planning and launching a new product to the market. Thanks to its graphic resources, it is straightforward to understand. In this slide, you will be able to show each of the plans of expectation, launch, and maintenance of the product, and at the same time, you can communicate to your audience how long will be the duration of each stage.
3. Curved Year Timeline PowerPoint Template
The Curved Year Timeline PowerPoint Template is a one-pager that helps toward planning and setting goals for the following years simply and concisely. This curved year timeline design helps managers, executives and project planners to communicate where you are today and where you want to be in 5 years.
4. Mountain Timeline Concept Template for PowerPoint

The Mountain Timeline Concept Template for PowerPoint is a presentation that seeks to represent the path of growth in a company or project. It includes 6 slides that will allow you to explain and add information in each of the stages in this roadmap. This PowerPoint timleine template is widely used to communicate the desired roadmap for the next 4 or 5 years.
5. One Pager Vertical Timeline Slide Template
The One Pager Vertical Timeline Slide Template is a clear and concise way to represent a Timeline. Thanks to its minimalist design, it is possible to add relevant information for each of the following stages. This presentation is useful for the education field since it allows to represent events and their respective descriptions to generate a better understanding.
6. Multi-Stage Timeline PowerPoint Template
The Multi-Stage Timeline PowerPoint Template is another One Pager that seeks to represent a timeline accompanied by different Stages. Thanks to its attractive design and its two versions, white and blue, you will be able to present a project roadmap accompanied by different relevant stages and explanatory comments.
7. Free Timeline Template for PowerPoint
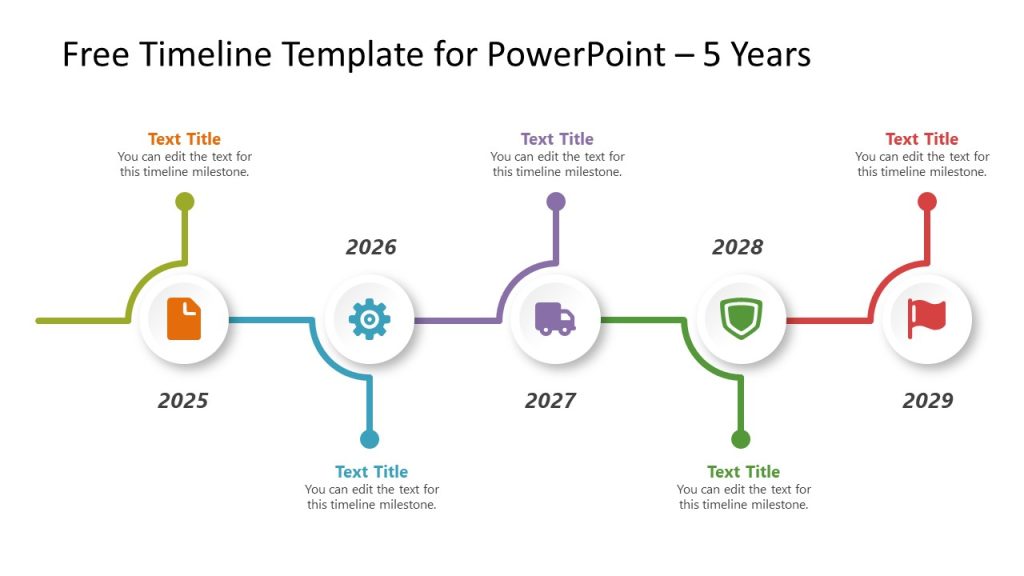
8. Swimlane Timeline Templates

9. Table Timeline Template for PowerPoint
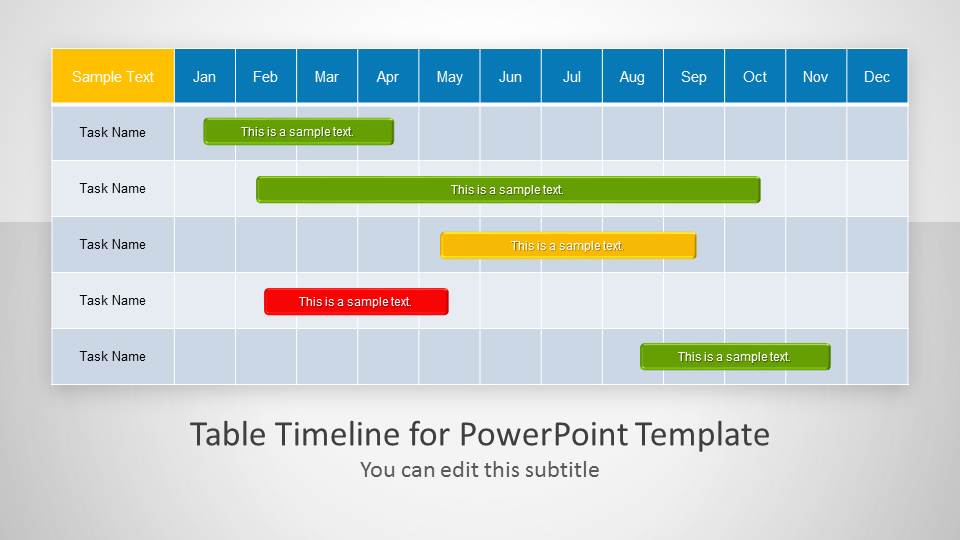
10. Curved Roadmap with Poles Milestones PowerPoint Timeline
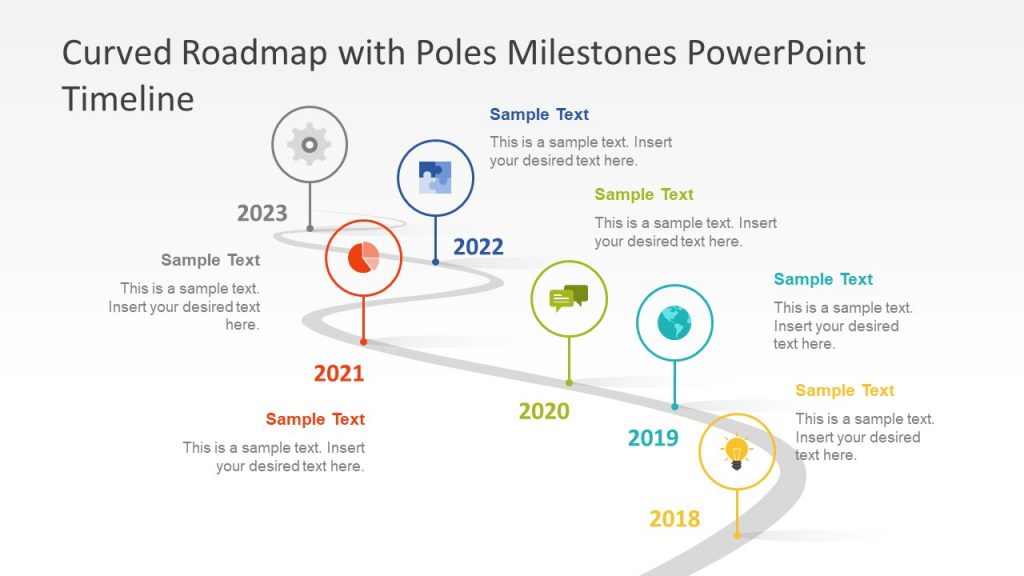
11. 30 60 90 Days Plan Timeline Template
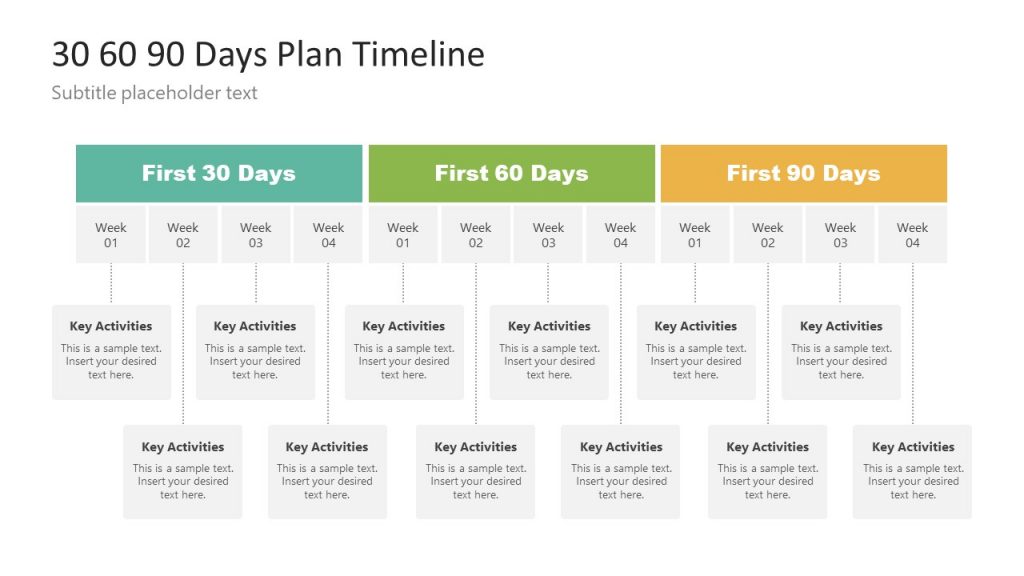
12. 4-Column Overlapped Sections Roadmap PowerPoint Timeline
There are a number of methods for generating timelines using PowerPoint, Google Slides, Web applications and a range of other tools. However, you should opt for the method that seems most suitable. For example, you might like a web application that can make a good timeline, however, if the venue at which you are to present the timeline has no stable internet connection, you might run into trouble. Similarly, you might want to animate your shapes in a PowerPoint timeline, however, it must be duly noted that this might make your slides heavy and if you are using legacy hardware, your presentation might lag. It is always a good idea to play your timeline before the presentation day and make sure everything is in place.
There are a number of flexible presentation templates that can make your life easier. These can be freely used with multiple platforms such as PowerPoint and Google Slides, providing you with both online and offline functionality to offer you more flexibility as a presenter. You can check out some of these templates from the list given below.

Like this article? Please share
Chronological, Deadline, Evolution, Future, History, Infographic, Life, Project Planning, Schedule, Timeline, Timescale, Timetable Filed under PowerPoint Tutorials
Related Articles

Filed under Google Slides Tutorials • May 21st, 2024
How to Make a Timeline on Google Slides
Follow our step-by-step instructions to make a timeline on Google Slides, either with templates or starting from scratch. Check it out!

Filed under Business • April 24th, 2024
How to Create and Present a Project Timeline
Building a project timeline is an essential aspect of project management. Stay tuned to our detailed guide with examples and templates.

Filed under PowerPoint Tutorials • November 8th, 2023
How To Present an Action Plan
An Action Plan is a sequence of steps that must be performed for a strategy to succeed. Learn how to present your Action plan to an Executive Audience.
Leave a Reply
4.1 Linear Functions
Learning objectives.
In this section, you will:
- Represent a linear function.
- Determine whether a linear function is increasing, decreasing, or constant.
- Interpret slope as a rate of change.
- Write and interpret an equation for a linear function.
- Graph linear functions.
- Determine whether lines are parallel or perpendicular.
- Write the equation of a line parallel or perpendicular to a given line.
Just as with the growth of a bamboo plant, there are many situations that involve constant change over time. Consider, for example, the first commercial maglev train in the world, the Shanghai MagLev Train ( Figure 1 ). It carries passengers comfortably for a 30-kilometer trip from the airport to the subway station in only eight minutes 2 .
Suppose a maglev train travels a long distance, and maintains a constant speed of 83 meters per second for a period of time once it is 250 meters from the station. How can we analyze the train’s distance from the station as a function of time? In this section, we will investigate a kind of function that is useful for this purpose, and use it to investigate real-world situations such as the train’s distance from the station at a given point in time.
Representing Linear Functions
The function describing the train’s motion is a linear function , which is defined as a function with a constant rate of change. This is a polynomial of degree 1. There are several ways to represent a linear function, including word form, function notation, tabular form, and graphical form. We will describe the train’s motion as a function using each method.
Representing a Linear Function in Word Form
Let’s begin by describing the linear function in words. For the train problem we just considered, the following word sentence may be used to describe the function relationship.
- The train’s distance from the station is a function of the time during which the train moves at a constant speed plus its original distance from the station when it began moving at constant speed.
The speed is the rate of change. Recall that a rate of change is a measure of how quickly the dependent variable changes with respect to the independent variable. The rate of change for this example is constant, which means that it is the same for each input value. As the time (input) increases by 1 second, the corresponding distance (output) increases by 83 meters. The train began moving at this constant speed at a distance of 250 meters from the station.
Representing a Linear Function in Function Notation
Another approach to representing linear functions is by using function notation. One example of function notation is an equation written in the slope-intercept form of a line, where x x is the input value, m m is the rate of change, and b b is the initial value of the dependent variable.
In the example of the train, we might use the notation D ( t ) D ( t ) where the total distance D D is a function of the time t . t . The rate, m , m , is 83 meters per second. The initial value of the dependent variable b b is the original distance from the station, 250 meters. We can write a generalized equation to represent the motion of the train.
Representing a Linear Function in Tabular Form
A third method of representing a linear function is through the use of a table. The relationship between the distance from the station and the time is represented in Figure 2 . From the table, we can see that the distance changes by 83 meters for every 1 second increase in time.
Can the input in the previous example be any real number?
No. The input represents time so while nonnegative rational and irrational numbers are possible, negative real numbers are not possible for this example. The input consists of non-negative real numbers.
Representing a Linear Function in Graphical Form
Another way to represent linear functions is visually, using a graph. We can use the function relationship from above, D ( t ) = 83 t + 250 , D ( t ) = 83 t + 250 , to draw a graph as represented in Figure 3 . Notice the graph is a line . When we plot a linear function, the graph is always a line.
The rate of change, which is constant, determines the slant, or slope of the line. The point at which the input value is zero is the vertical intercept, or y -intercept , of the line. We can see from the graph that the y -intercept in the train example we just saw is ( 0 , 250 ) ( 0 , 250 ) and represents the distance of the train from the station when it began moving at a constant speed.
Notice that the graph of the train example is restricted, but this is not always the case. Consider the graph of the line f ( x ) = 2 x + 1. f ( x ) = 2 x + 1. Ask yourself what numbers can be input to the function. In other words, what is the domain of the function? The domain is comprised of all real numbers because any number may be doubled, and then have one added to the product.
Linear Function
A linear function is a function whose graph is a line. Linear functions can be written in the slope-intercept form of a line
where b b is the initial or starting value of the function (when input, x = 0 x = 0 ), and m m is the constant rate of change, or slope of the function. The y -intercept is at ( 0 , b ) . ( 0 , b ) .
Using a Linear Function to Find the Pressure on a Diver
The pressure, P , P , in pounds per square inch (PSI) on the diver in Figure 4 depends upon her depth below the water surface, d , d , in feet. This relationship may be modeled by the equation, P ( d ) = 0.434 d + 14.696. P ( d ) = 0.434 d + 14.696. Restate this function in words.
To restate the function in words, we need to describe each part of the equation. The pressure as a function of depth equals four hundred thirty-four thousandths times depth plus fourteen and six hundred ninety-six thousandths.
The initial value, 14.696, is the pressure in PSI on the diver at a depth of 0 feet, which is the surface of the water. The rate of change, or slope, is 0.434 PSI per foot. This tells us that the pressure on the diver increases 0.434 PSI for each foot her depth increases.
Determining Whether a Linear Function Is Increasing, Decreasing, or Constant
The linear functions we used in the two previous examples increased over time, but not every linear function does. A linear function may be increasing, decreasing, or constant. For an increasing function , as with the train example, the output values increase as the input values increase. The graph of an increasing function has a positive slope. A line with a positive slope slants upward from left to right as in Figure 5 (a) . For a decreasing function , the slope is negative. The output values decrease as the input values increase. A line with a negative slope slants downward from left to right as in Figure 5 (b) . If the function is constant, the output values are the same for all input values so the slope is zero. A line with a slope of zero is horizontal as in Figure 5 (c) .
Increasing and Decreasing Functions
The slope determines if the function is an increasing linear function , a decreasing linear function , or a constant function.
- f ( x ) = m x + b f ( x ) = m x + b is an increasing function if m > 0. m > 0.
- f ( x ) = m x + b f ( x ) = m x + b is a decreasing function if m < 0. m < 0.
- f ( x ) = m x + b f ( x ) = m x + b is a constant function if m = 0. m = 0.
Deciding Whether a Function Is Increasing, Decreasing, or Constant
Studies from the early 2010s indicated that teens sent about 60 texts a day, while more recent data indicates much higher messaging rates among all users, particularly considering the various apps with which people can communicate. 3 . For each of the following scenarios, find the linear function that describes the relationship between the input value and the output value. Then, determine whether the graph of the function is increasing, decreasing, or constant.
- ⓐ The total number of texts a teen sends is considered a function of time in days. The input is the number of days, and output is the total number of texts sent.
- ⓑ A person has a limit of 500 texts per month in their data plan. The input is the number of days, and output is the total number of texts remaining for the month.
- ⓒ A person has an unlimited number of texts in their data plan for a cost of $50 per month. The input is the number of days, and output is the total cost of texting each month.
Analyze each function.
- ⓐ The function can be represented as f ( x ) = 60 x f ( x ) = 60 x where x x is the number of days. The slope, 60, is positive so the function is increasing. This makes sense because the total number of texts increases with each day.
- ⓑ The function can be represented as f ( x ) = 500 − 60 x f ( x ) = 500 − 60 x where x x is the number of days. In this case, the slope is negative so the function is decreasing. This makes sense because the number of texts remaining decreases each day and this function represents the number of texts remaining in the data plan after x x days.
- ⓒ The cost function can be represented as f ( x ) = 50 f ( x ) = 50 because the number of days does not affect the total cost. The slope is 0 so the function is constant.
Interpreting Slope as a Rate of Change
In the examples we have seen so far, the slope was provided to us. However, we often need to calculate the slope given input and output values. Recall that given two values for the input, x 1 x 1 and x 2 , x 2 , and two corresponding values for the output, y 1 y 1 and y 2 y 2 —which can be represented by a set of points, ( x 1 , y 1 ) ( x 1 , y 1 ) and ( x 2 , y 2 ) ( x 2 , y 2 ) —we can calculate the slope m . m .
Note that in function notation we can obtain two corresponding values for the output y 1 y 1 and y 2 y 2 for the function f , f , y 1 = f ( x 1 ) y 1 = f ( x 1 ) and y 2 = f ( x 2 ) , y 2 = f ( x 2 ) , so we could equivalently write
Figure 6 indicates how the slope of the line between the points, ( x 1 , y 1 ) ( x 1 , y 1 ) and ( x 2 , y 2 ) , ( x 2 , y 2 ) , is calculated. Recall that the slope measures steepness, or slant. The greater the absolute value of the slope, the steeper the slant is.
Are the units for slope always units for the output units for the input ? units for the output units for the input ?
Yes. Think of the units as the change of output value for each unit of change in input value. An example of slope could be miles per hour or dollars per day. Notice the units appear as a ratio of units for the output per units for the input.
Calculate Slope
The slope, or rate of change, of a function m m can be calculated according to the following:
where x 1 x 1 and x 2 x 2 are input values, y 1 y 1 and y 2 y 2 are output values.
Given two points from a linear function, calculate and interpret the slope.
- Determine the units for output and input values.
- Calculate the change of output values and change of input values.
- Interpret the slope as the change in output values per unit of the input value.
Finding the Slope of a Linear Function
If f ( x ) f ( x ) is a linear function, and ( 3 , −2 ) ( 3 , −2 ) and ( 8 , 1 ) ( 8 , 1 ) are points on the line, find the slope. Is this function increasing or decreasing?
The coordinate pairs are ( 3 , −2 ) ( 3 , −2 ) and ( 8 , 1 ) . ( 8 , 1 ) . To find the rate of change, we divide the change in output by the change in input.
We could also write the slope as m = 0.6. m = 0.6. The function is increasing because m > 0. m > 0.
As noted earlier, the order in which we write the points does not matter when we compute the slope of the line as long as the first output value, or y -coordinate, used corresponds with the first input value, or x -coordinate, used. Note that if we had reversed them, we would have obtained the same slope.
If f ( x ) f ( x ) is a linear function, and ( 2 , 3 ) ( 2 , 3 ) and ( 0 , 4 ) ( 0 , 4 ) are points on the line, find the slope. Is this function increasing or decreasing?
Finding the Population Change from a Linear Function
The population of a city increased from 23,400 to 27,800 between 2008 and 2012. Find the change of population per year if we assume the change was constant from 2008 to 2012.
The rate of change relates the change in population to the change in time. The population increased by 27 , 800 − 23 , 400 = 4400 27 , 800 − 23 , 400 = 4400 people over the four-year time interval. To find the rate of change, divide the change in the number of people by the number of years.
So the population increased by 1,100 people per year.
Because we are told that the population increased, we would expect the slope to be positive. This positive slope we calculated is therefore reasonable.
The population of a small town increased from 1,442 to 1,868 between 2009 and 2012. Find the change of population per year if we assume the change was constant from 2009 to 2012.
Writing and Interpreting an Equation for a Linear Function
Recall from Equations and Inequalities that we wrote equations in both the slope-intercept form and the point-slope form . Now we can choose which method to use to write equations for linear functions based on the information we are given. That information may be provided in the form of a graph, a point and a slope, two points, and so on. Look at the graph of the function f f in Figure 7 .
We are not given the slope of the line, but we can choose any two points on the line to find the slope. Let’s choose ( 0 , 7 ) ( 0 , 7 ) and ( 4 , 4 ) . ( 4 , 4 ) .
Now we can substitute the slope and the coordinates of one of the points into the point-slope form.
If we want to rewrite the equation in the slope-intercept form, we would find
If we want to find the slope-intercept form without first writing the point-slope form, we could have recognized that the line crosses the y -axis when the output value is 7. Therefore, b = 7. b = 7. We now have the initial value b b and the slope m m so we can substitute m m and b b into the slope-intercept form of a line.
So the function is f ( x ) = − 3 4 x + 7 , f ( x ) = − 3 4 x + 7 , and the linear equation would be y = − 3 4 x + 7. y = − 3 4 x + 7.
Given the graph of a linear function, write an equation to represent the function.
- Identify two points on the line.
- Use the two points to calculate the slope.
- Determine where the line crosses the y -axis to identify the y -intercept by visual inspection.
- Substitute the slope and y -intercept into the slope-intercept form of a line equation.
Writing an Equation for a Linear Function
Write an equation for a linear function given a graph of f f shown in Figure 8 .
Identify two points on the line, such as ( 0 , 2 ) ( 0 , 2 ) and ( −2 , −4 ) . ( −2 , −4 ) . Use the points to calculate the slope.
Substitute the slope and the coordinates of one of the points into the point-slope form.
We can use algebra to rewrite the equation in the slope-intercept form.
This makes sense because we can see from Figure 9 that the line crosses the y -axis at the point ( 0 , 2 ) , ( 0 , 2 ) , which is the y -intercept, so b = 2. b = 2.
Writing an Equation for a Linear Cost Function
Suppose Ben starts a company in which he incurs a fixed cost of $1,250 per month for the overhead, which includes his office rent. His production costs are $37.50 per item. Write a linear function C C where C ( x ) C ( x ) is the cost for x x items produced in a given month.
The fixed cost is present every month, $1,250. The costs that can vary include the cost to produce each item, which is $37.50. The variable cost, called the marginal cost, is represented by 37.5. 37.5. The cost Ben incurs is the sum of these two costs, represented by C ( x ) = 1250 + 37.5 x . C ( x ) = 1250 + 37.5 x .
If Ben produces 100 items in a month, his monthly cost is found by substituting 100 for x . x .
So his monthly cost would be $5,000.
Writing an Equation for a Linear Function Given Two Points
If f f is a linear function, with f ( 3 ) = −2 , f ( 3 ) = −2 , and f ( 8 ) = 1 , f ( 8 ) = 1 , find an equation for the function in slope-intercept form.
We can write the given points using coordinates.
We can then use the points to calculate the slope.
If f ( x ) f ( x ) is a linear function, with f ( 2 ) = –11 , f ( 2 ) = –11 , and f ( 4 ) = −25 , f ( 4 ) = −25 , write an equation for the function in slope-intercept form.
Modeling Real-World Problems with Linear Functions
In the real world, problems are not always explicitly stated in terms of a function or represented with a graph. Fortunately, we can analyze the problem by first representing it as a linear function and then interpreting the components of the function. As long as we know, or can figure out, the initial value and the rate of change of a linear function, we can solve many different kinds of real-world problems.
Given a linear function f f and the initial value and rate of change, evaluate f ( c ) . f ( c ) .
- Determine the initial value and the rate of change (slope).
- Substitute the values into f ( x ) = m x + b . f ( x ) = m x + b .
- Evaluate the function at x = c . x = c .
Using a Linear Function to Determine the Number of Songs in a Music Collection
Marcus currently has 200 songs in his music collection. Every month, he adds 15 new songs. Write a formula for the number of songs, N , N , in his collection as a function of time, t , t , the number of months. How many songs will he own at the end of one year?
The initial value for this function is 200 because he currently owns 200 songs, so N ( 0 ) = 200 , N ( 0 ) = 200 , which means that b = 200. b = 200.
The number of songs increases by 15 songs per month, so the rate of change is 15 songs per month. Therefore we know that m = 15. m = 15. We can substitute the initial value and the rate of change into the slope-intercept form of a line.
We can write the formula N ( t ) = 15 t + 200. N ( t ) = 15 t + 200.
With this formula, we can then predict how many songs Marcus will have at the end of one year (12 months). In other words, we can evaluate the function at t = 12. t = 12.
Marcus will have 380 songs in 12 months.
Notice that N is an increasing linear function. As the input (the number of months) increases, the output (number of songs) increases as well.
Using a Linear Function to Calculate Salary Based on Commission
Working as an insurance salesperson, Ilya earns a base salary plus a commission on each new policy. Therefore, Ilya’s weekly income I , I , depends on the number of new policies, n , n , he sells during the week. Last week he sold 3 new policies, and earned $760 for the week. The week before, he sold 5 new policies and earned $920. Find an equation for I ( n ) , I ( n ) , and interpret the meaning of the components of the equation.
The given information gives us two input-output pairs: ( 3 , 760 ) ( 3 , 760 ) and ( 5 , 92 0 ) . ( 5 , 92 0 ) . We start by finding the rate of change.
Keeping track of units can help us interpret this quantity. Income increased by $160 when the number of policies increased by 2, so the rate of change is $80 per policy. Therefore, Ilya earns a commission of $80 for each policy sold during the week.
We can then solve for the initial value.
The value of b b is the starting value for the function and represents Ilya’s income when n = 0 , n = 0 , or when no new policies are sold. We can interpret this as Ilya’s base salary for the week, which does not depend upon the number of policies sold.
We can now write the final equation.
Our final interpretation is that Ilya’s base salary is $520 per week and he earns an additional $80 commission for each policy sold.
Using Tabular Form to Write an Equation for a Linear Function
Table 1 relates the number of rats in a population to time, in weeks. Use the table to write a linear equation.
We can see from the table that the initial value for the number of rats is 1000, so b = 1000. b = 1000.
Rather than solving for m , m , we can tell from looking at the table that the population increases by 80 for every 2 weeks that pass. This means that the rate of change is 80 rats per 2 weeks, which can be simplified to 40 rats per week.
If we did not notice the rate of change from the table we could still solve for the slope using any two points from the table. For example, using ( 2 , 1080 ) ( 2 , 1080 ) and ( 6 , 1240 ) ( 6 , 1240 )
Is the initial value always provided in a table of values like Table 1 ?
No. Sometimes the initial value is provided in a table of values, but sometimes it is not. If you see an input of 0, then the initial value would be the corresponding output. If the initial value is not provided because there is no value of input on the table equal to 0, find the slope, substitute one coordinate pair and the slope into f ( x ) = m x + b , f ( x ) = m x + b , and solve for b . b .
A new plant food was introduced to a young tree to test its effect on the height of the tree. Table 2 shows the height of the tree, in feet, x x months since the measurements began. Write a linear function, H ( x ) , H ( x ) , where x x is the number of months since the start of the experiment.
Graphing Linear Functions
Now that we’ve seen and interpreted graphs of linear functions, let’s take a look at how to create the graphs. There are three basic methods of graphing linear functions. The first is by plotting points and then drawing a line through the points. The second is by using the y- intercept and slope. And the third method is by using transformations of the identity function f ( x ) = x . f ( x ) = x .
Graphing a Function by Plotting Points
To find points of a function, we can choose input values, evaluate the function at these input values, and calculate output values. The input values and corresponding output values form coordinate pairs. We then plot the coordinate pairs on a grid. In general, we should evaluate the function at a minimum of two inputs in order to find at least two points on the graph. For example, given the function, f ( x ) = 2 x , f ( x ) = 2 x , we might use the input values 1 and 2. Evaluating the function for an input value of 1 yields an output value of 2, which is represented by the point ( 1 , 2 ) . ( 1 , 2 ) . Evaluating the function for an input value of 2 yields an output value of 4, which is represented by the point ( 2 , 4 ) . ( 2 , 4 ) . Choosing three points is often advisable because if all three points do not fall on the same line, we know we made an error.
Given a linear function, graph by plotting points.
- Choose a minimum of two input values.
- Evaluate the function at each input value.
- Use the resulting output values to identify coordinate pairs.
- Plot the coordinate pairs on a grid.
- Draw a line through the points.
Graphing by Plotting Points
Graph f ( x ) = − 2 3 x + 5 f ( x ) = − 2 3 x + 5 by plotting points.
Begin by choosing input values. This function includes a fraction with a denominator of 3, so let’s choose multiples of 3 as input values. We will choose 0, 3, and 6.
Evaluate the function at each input value, and use the output value to identify coordinate pairs.
Plot the coordinate pairs and draw a line through the points. Figure 11 represents the graph of the function f ( x ) = − 2 3 x + 5. f ( x ) = − 2 3 x + 5.
The graph of the function is a line as expected for a linear function. In addition, the graph has a downward slant, which indicates a negative slope. This is also expected from the negative, constant rate of change in the equation for the function.
Graph f ( x ) = − 3 4 x + 6 f ( x ) = − 3 4 x + 6 by plotting points.
Graphing a Function Using y- intercept and Slope
Another way to graph linear functions is by using specific characteristics of the function rather than plotting points. The first characteristic is its y- intercept, which is the point at which the input value is zero. To find the y- intercept, we can set x = 0 x = 0 in the equation.
The other characteristic of the linear function is its slope .
Let’s consider the following function.
The slope is 1 2 . 1 2 . Because the slope is positive, we know the graph will slant upward from left to right. The y- intercept is the point on the graph when x = 0. x = 0. The graph crosses the y -axis at ( 0 , 1 ) . ( 0 , 1 ) . Now we know the slope and the y -intercept. We can begin graphing by plotting the point ( 0 , 1 ) . ( 0 , 1 ) . We know that the slope is the change in the y -coordinate over the change in the x -coordinate. This is commonly referred to as rise over run, m = rise run . m = rise run . From our example, we have m = 1 2 , m = 1 2 , which means that the rise is 1 and the run is 2. So starting from our y -intercept ( 0 , 1 ) , ( 0 , 1 ) , we can rise 1 and then run 2, or run 2 and then rise 1. We repeat until we have a few points, and then we draw a line through the points as shown in Figure 12 .
Graphical Interpretation of a Linear Function
In the equation f ( x ) = m x + b f ( x ) = m x + b
- b b is the y -intercept of the graph and indicates the point ( 0 , b ) ( 0 , b ) at which the graph crosses the y -axis.
- m m is the slope of the line and indicates the vertical displacement (rise) and horizontal displacement (run) between each successive pair of points. Recall the formula for the slope:
Do all linear functions have y -intercepts?
Yes. All linear functions cross the y-axis and therefore have y-intercepts. (Note: A vertical line is parallel to the y-axis does not have a y-intercept, but it is not a function .)
Given the equation for a linear function, graph the function using the y -intercept and slope.
- Evaluate the function at an input value of zero to find the y- intercept.
- Identify the slope as the rate of change of the input value.
- Plot the point represented by the y- intercept.
- Use rise run rise run to determine at least two more points on the line.
- Sketch the line that passes through the points.
Graphing by Using the y- intercept and Slope
Graph f ( x ) = − 2 3 x + 5 f ( x ) = − 2 3 x + 5 using the y- intercept and slope.
Evaluate the function at x = 0 x = 0 to find the y- intercept. The output value when x = 0 x = 0 is 5, so the graph will cross the y -axis at ( 0 , 5 ) . ( 0 , 5 ) .
According to the equation for the function, the slope of the line is − 2 3 . − 2 3 . This tells us that for each vertical decrease in the “rise” of – 2 – 2 units, the “run” increases by 3 units in the horizontal direction. We can now graph the function by first plotting the y -intercept on the graph in Figure 13 . From the initial value ( 0 , 5 ) ( 0 , 5 ) we move down 2 units and to the right 3 units. We can extend the line to the left and right by repeating, and then drawing a line through the points.
The graph slants downward from left to right, which means it has a negative slope as expected.
Find a point on the graph we drew in Example 12 that has a negative x -value.
Graphing a Function Using Transformations
Another option for graphing is to use a transformation of the identity function f ( x ) = x . f ( x ) = x . A function may be transformed by a shift up, down, left, or right. A function may also be transformed using a reflection, stretch, or compression.
Vertical Stretch or Compression
In the equation f ( x ) = m x , f ( x ) = m x , the m m is acting as the vertical stretch or compression of the identity function. When m m is negative, there is also a vertical reflection of the graph. Notice in Figure 14 that multiplying the equation of f ( x ) = x f ( x ) = x by m m stretches the graph of f f by a factor of m m units if m > 1 m > 1 and compresses the graph of f f by a factor of m m units if 0 < m < 1. 0 < m < 1. This means the larger the absolute value of m , m , the steeper the slope.
Vertical Shift
In f ( x ) = m x + b , f ( x ) = m x + b , the b b acts as the vertical shift , moving the graph up and down without affecting the slope of the line. Notice in Figure 15 that adding a value of b b to the equation of f ( x ) = x f ( x ) = x shifts the graph of f f a total of b b units up if b b is positive and | b | | b | units down if b b is negative.
Using vertical stretches or compressions along with vertical shifts is another way to look at identifying different types of linear functions. Although this may not be the easiest way to graph this type of function, it is still important to practice each method.
Given the equation of a linear function, use transformations to graph the linear function in the form f ( x ) = m x + b . f ( x ) = m x + b .
- Graph f ( x ) = x . f ( x ) = x .
- Vertically stretch or compress the graph by a factor m . m .
- Shift the graph up or down b b units.
Graphing by Using Transformations
Graph f ( x ) = 1 2 x − 3 f ( x ) = 1 2 x − 3 using transformations.
The equation for the function shows that m = 1 2 m = 1 2 so the identity function is vertically compressed by 1 2 . 1 2 . The equation for the function also shows that b = − 3 b = − 3 so the identity function is vertically shifted down 3 units. First, graph the identity function, and show the vertical compression as in Figure 16 .
Then show the vertical shift as in Figure 17 .
Graph f ( x ) = 4 + 2 x f ( x ) = 4 + 2 x using transformations.
In Example 15 , could we have sketched the graph by reversing the order of the transformations?
No. The order of the transformations follows the order of operations. When the function is evaluated at a given input, the corresponding output is calculated by following the order of operations. This is why we performed the compression first. For example, following the order: Let the input be 2.
Writing the Equation for a Function from the Graph of a Line
Earlier, we wrote the equation for a linear function from a graph. Now we can extend what we know about graphing linear functions to analyze graphs a little more closely. Begin by taking a look at Figure 18 . We can see right away that the graph crosses the y -axis at the point ( 0 , 4 ) ( 0 , 4 ) so this is the y -intercept.
Then we can calculate the slope by finding the rise and run. We can choose any two points, but let’s look at the point ( – 2 , 0 ) . ( – 2 , 0 ) . To get from this point to the y- intercept, we must move up 4 units (rise) and to the right 2 units (run). So the slope must be
Substituting the slope and y- intercept into the slope-intercept form of a line gives
Given a graph of linear function, find the equation to describe the function.
- Identify the y- intercept of an equation.
- Choose two points to determine the slope.
- Substitute the y- intercept and slope into the slope-intercept form of a line.
Matching Linear Functions to Their Graphs
Match each equation of the linear functions with one of the lines in Figure 19 .
- ⓐ f ( x ) = 2 x + 3 f ( x ) = 2 x + 3
- ⓑ g ( x ) = 2 x − 3 g ( x ) = 2 x − 3
- ⓒ h ( x ) = − 2 x + 3 h ( x ) = − 2 x + 3
- ⓓ j ( x ) = 1 2 x + 3 j ( x ) = 1 2 x + 3
Analyze the information for each function.
- ⓐ This function has a slope of 2 and a y -intercept of 3. It must pass through the point (0, 3) and slant upward from left to right. We can use two points to find the slope, or we can compare it with the other functions listed. Function g g has the same slope, but a different y- intercept. Lines I and III have the same slant because they have the same slope. Line III does not pass through ( 0 , 3 ) ( 0 , 3 ) so f f must be represented by line I.
- ⓑ This function also has a slope of 2, but a y -intercept of −3. −3. It must pass through the point ( 0 , −3 ) ( 0 , −3 ) and slant upward from left to right. It must be represented by line III.
- ⓒ This function has a slope of –2 and a y- intercept of 3. This is the only function listed with a negative slope, so it must be represented by line IV because it slants downward from left to right.
- ⓓ This function has a slope of 1 2 1 2 and a y- intercept of 3. It must pass through the point (0, 3) and slant upward from left to right. Lines I and II pass through ( 0 , 3 ) , ( 0 , 3 ) , but the slope of j j is less than the slope of f f so the line for j j must be flatter. This function is represented by Line II.
Now we can re-label the lines as in Figure 20 .
Finding the x -intercept of a Line
So far we have been finding the y- intercepts of a function: the point at which the graph of the function crosses the y -axis. Recall that a function may also have an x -intercept , which is the x -coordinate of the point where the graph of the function crosses the x -axis. In other words, it is the input value when the output value is zero.
To find the x -intercept, set a function f ( x ) f ( x ) equal to zero and solve for the value of x . x . For example, consider the function shown.
Set the function equal to 0 and solve for x . x .
The graph of the function crosses the x -axis at the point ( 2 , 0 ) . ( 2 , 0 ) .
Do all linear functions have x -intercepts?
No. However, linear functions of the form y = c , y = c , where c c is a nonzero real number are the only examples of linear functions with no x-intercept. For example, y = 5 y = 5 is a horizontal line 5 units above the x-axis. This function has no x-intercepts, as shown in Figure 21 .
x -intercept
The x -intercept of the function is value of x x when f ( x ) = 0. f ( x ) = 0. It can be solved by the equation 0 = m x + b . 0 = m x + b .
Finding an x -intercept
Find the x -intercept of f ( x ) = 1 2 x − 3. f ( x ) = 1 2 x − 3.
Set the function equal to zero to solve for x . x .
The graph crosses the x -axis at the point ( 6 , 0 ) . ( 6 , 0 ) .
A graph of the function is shown in Figure 22 . We can see that the x -intercept is ( 6 , 0 ) ( 6 , 0 ) as we expected.
Find the x -intercept of f ( x ) = 1 4 x − 4. f ( x ) = 1 4 x − 4.
Describing Horizontal and Vertical Lines
There are two special cases of lines on a graph—horizontal and vertical lines. A horizontal line indicates a constant output, or y -value. In Figure 23 , we see that the output has a value of 2 for every input value. The change in outputs between any two points, therefore, is 0. In the slope formula, the numerator is 0, so the slope is 0. If we use m = 0 m = 0 in the equation f ( x ) = m x + b , f ( x ) = m x + b , the equation simplifies to f ( x ) = b . f ( x ) = b . In other words, the value of the function is a constant. This graph represents the function f ( x ) = 2. f ( x ) = 2.
A vertical line indicates a constant input, or x -value. We can see that the input value for every point on the line is 2, but the output value varies. Because this input value is mapped to more than one output value, a vertical line does not represent a function. Notice that between any two points, the change in the input values is zero. In the slope formula, the denominator will be zero, so the slope of a vertical line is undefined.
A vertical line, such as the one in Figure 25 , has an x -intercept, but no y- intercept unless it’s the line x = 0. x = 0. This graph represents the line x = 2. x = 2.
Horizontal and Vertical Lines
Lines can be horizontal or vertical.
A horizontal line is a line defined by an equation in the form f ( x ) = b . f ( x ) = b .
A vertical line is a line defined by an equation in the form x = a . x = a .
Writing the Equation of a Horizontal Line
Write the equation of the line graphed in Figure 26 .
For any x -value, the y -value is − 4 , − 4 , so the equation is y = − 4. y = − 4.
Writing the Equation of a Vertical Line
Write the equation of the line graphed in Figure 27 .
The constant x -value is 7 , 7 , so the equation is x = 7. x = 7.
Determining Whether Lines are Parallel or Perpendicular
The two lines in Figure 28 are parallel lines : they will never intersect. They have exactly the same steepness, which means their slopes are identical. The only difference between the two lines is the y -intercept. If we shifted one line vertically toward the other, they would become coincident.
We can determine from their equations whether two lines are parallel by comparing their slopes. If the slopes are the same and the y -intercepts are different, the lines are parallel. If the slopes are different, the lines are not parallel.
Unlike parallel lines, perpendicular lines do intersect. Their intersection forms a right, or 90-degree, angle. The two lines in Figure 29 are perpendicular.
Perpendicular lines do not have the same slope. The slopes of perpendicular lines are different from one another in a specific way. The slope of one line is the negative reciprocal of the slope of the other line. The product of a number and its reciprocal is 1. 1. So, if m 1 and m 2 m 1 and m 2 are negative reciprocals of one another, they can be multiplied together to yield –1. –1.
To find the reciprocal of a number, divide 1 by the number. So the reciprocal of 8 is 1 8 , 1 8 , and the reciprocal of 1 8 1 8 is 8. To find the negative reciprocal, first find the reciprocal and then change the sign.
As with parallel lines, we can determine whether two lines are perpendicular by comparing their slopes, assuming that the lines are neither horizontal nor vertical. The slope of each line below is the negative reciprocal of the other so the lines are perpendicular.
The product of the slopes is –1.
Parallel and Perpendicular Lines
Two lines are parallel lines if they do not intersect. The slopes of the lines are the same.
If and only if b 1 = b 2 b 1 = b 2 and m 1 = m 2 , m 1 = m 2 , we say the lines coincide. Coincident lines are the same line.
Two lines are perpendicular lines if they intersect to form a right angle.
Identifying Parallel and Perpendicular Lines
Given the functions below, identify the functions whose graphs are a pair of parallel lines and a pair of perpendicular lines.
Parallel lines have the same slope. Because the functions f ( x ) = 2 x + 3 f ( x ) = 2 x + 3 and j ( x ) = 2 x − 6 j ( x ) = 2 x − 6 each have a slope of 2, they represent parallel lines. Perpendicular lines have negative reciprocal slopes. Because −2 and 1 2 1 2 are negative reciprocals, the functions g ( x ) = 1 2 x − 4 g ( x ) = 1 2 x − 4 and h ( x ) = −2 x + 2 h ( x ) = −2 x + 2 represent perpendicular lines.
A graph of the lines is shown in Figure 30 .
The graph shows that the lines f ( x ) = 2 x + 3 f ( x ) = 2 x + 3 and j ( x ) = 2 x – 6 j ( x ) = 2 x – 6 are parallel, and the lines g ( x ) = 1 2 x – 4 g ( x ) = 1 2 x – 4 and h ( x ) = − 2 x + 2 h ( x ) = − 2 x + 2 are perpendicular.
Writing the Equation of a Line Parallel or Perpendicular to a Given Line
If we know the equation of a line, we can use what we know about slope to write the equation of a line that is either parallel or perpendicular to the given line.
Writing Equations of Parallel Lines
Suppose for example, we are given the equation shown.
We know that the slope of the line formed by the function is 3. We also know that the y- intercept is ( 0 , 1 ) . ( 0 , 1 ) . Any other line with a slope of 3 will be parallel to f ( x ) . f ( x ) . So the lines formed by all of the following functions will be parallel to f ( x ) . f ( x ) .
Suppose then we want to write the equation of a line that is parallel to f f and passes through the point ( 1 , 7 ) . ( 1 , 7 ) . This type of problem is often described as a point-slope problem because we have a point and a slope. In our example, we know that the slope is 3. We need to determine which value of b b will give the correct line. We can begin with the point-slope form of an equation for a line, and then rewrite it in the slope-intercept form.
So g ( x ) = 3 x + 4 g ( x ) = 3 x + 4 is parallel to f ( x ) = 3 x + 1 f ( x ) = 3 x + 1 and passes through the point ( 1 , 7 ) . ( 1 , 7 ) .
Given the equation of a function and a point through which its graph passes, write the equation of a line parallel to the given line that passes through the given point.
- Find the slope of the function.
- Substitute the given values into either the general point-slope equation or the slope-intercept equation for a line.
Finding a Line Parallel to a Given Line
Find a line parallel to the graph of f ( x ) = 3 x + 6 f ( x ) = 3 x + 6 that passes through the point ( 3 , 0 ) . ( 3 , 0 ) .
The slope of the given line is 3. If we choose the slope-intercept form, we can substitute m = 3 , x = 3 , m = 3 , x = 3 , and f ( x ) = 0 f ( x ) = 0 into the slope-intercept form to find the y- intercept.
The line parallel to f ( x ) f ( x ) that passes through ( 3 , 0 ) ( 3 , 0 ) is g ( x ) = 3 x − 9. g ( x ) = 3 x − 9.
We can confirm that the two lines are parallel by graphing them. Figure 31 shows that the two lines will never intersect.
Writing Equations of Perpendicular Lines
We can use a very similar process to write the equation for a line perpendicular to a given line. Instead of using the same slope, however, we use the negative reciprocal of the given slope. Suppose we are given the function shown.
The slope of the line is 2, and its negative reciprocal is − 1 2 . − 1 2 . Any function with a slope of − 1 2 − 1 2 will be perpendicular to f ( x ) . f ( x ) . So the lines formed by all of the following functions will be perpendicular to f ( x ) . f ( x ) .
As before, we can narrow down our choices for a particular perpendicular line if we know that it passes through a given point. Suppose then we want to write the equation of a line that is perpendicular to f ( x ) f ( x ) and passes through the point ( 4 , 0 ) . ( 4 , 0 ) . We already know that the slope is − 1 2 . − 1 2 . Now we can use the point to find the y -intercept by substituting the given values into the slope-intercept form of a line and solving for b . b .
The equation for the function with a slope of − 1 2 − 1 2 and a y- intercept of 2 is
So g ( x ) = − 1 2 x + 2 g ( x ) = − 1 2 x + 2 is perpendicular to f ( x ) = 2 x + 4 f ( x ) = 2 x + 4 and passes through the point ( 4 , 0 ) . ( 4 , 0 ) . Be aware that perpendicular lines may not look obviously perpendicular on a graphing calculator unless we use the square zoom feature.
A horizontal line has a slope of zero and a vertical line has an undefined slope. These two lines are perpendicular, but the product of their slopes is not –1. Doesn’t this fact contradict the definition of perpendicular lines?
No. For two perpendicular linear functions, the product of their slopes is –1. However, a vertical line is not a function so the definition is not contradicted.
Given the equation of a function and a point through which its graph passes, write the equation of a line perpendicular to the given line.
- Determine the negative reciprocal of the slope.
- Substitute the new slope and the values for x x and y y from the coordinate pair provided into g ( x ) = m x + b . g ( x ) = m x + b .
- Solve for b . b .
- Write the equation of the line.
Finding the Equation of a Perpendicular Line
Find the equation of a line perpendicular to f ( x ) = 3 x + 3 f ( x ) = 3 x + 3 that passes through the point ( 3 , 0 ) . ( 3 , 0 ) .
The original line has slope m = 3 , m = 3 , so the slope of the perpendicular line will be its negative reciprocal, or − 1 3 . − 1 3 . Using this slope and the given point, we can find the equation of the line.
The line perpendicular to f ( x ) f ( x ) that passes through ( 3 , 0 ) ( 3 , 0 ) is g ( x ) = − 1 3 x + 1. g ( x ) = − 1 3 x + 1.
A graph of the two lines is shown in Figure 32 .
Note that that if we graph perpendicular lines on a graphing calculator using standard zoom, the lines may not appear to be perpendicular. Adjusting the window will make it possible to zoom in further to see the intersection more closely.
Given the function h ( x ) = 2 x − 4 , h ( x ) = 2 x − 4 , write an equation for the line passing through ( 0 , 0 ) ( 0 , 0 ) that is
- ⓐ parallel to h ( x ) h ( x )
- ⓑ perpendicular to h ( x ) h ( x )
Given two points on a line and a third point, write the equation of the perpendicular line that passes through the point.
- Determine the slope of the line passing through the points.
Find the negative reciprocal of the slope.
- Use the slope-intercept form or point-slope form to write the equation by substituting the known values.
Finding the Equation of a Line Perpendicular to a Given Line Passing through a Point
A line passes through the points ( −2 , 6 ) ( −2 , 6 ) and ( 4 , 5 ) . ( 4 , 5 ) . Find the equation of a perpendicular line that passes through the point ( 4 , 5 ) . ( 4 , 5 ) .
From the two points of the given line, we can calculate the slope of that line.
We can then solve for the y- intercept of the line passing through the point ( 4 , 5 ) . ( 4 , 5 ) .
The equation for the line that is perpendicular to the line passing through the two given points and also passes through point ( 4 , 5 ) ( 4 , 5 ) is
A line passes through the points, ( −2 , −15 ) ( −2 , −15 ) and ( 2 , −3 ) . ( 2 , −3 ) . Find the equation of a perpendicular line that passes through the point, ( 6 , 4 ) . ( 6 , 4 ) .
Access this online resource for additional instruction and practice with linear functions.
- Linear Functions
- Finding Input of Function from the Output and Graph
- Graphing Functions using Tables
4.1 Section Exercises
Terry is skiing down a steep hill. Terry's elevation, E ( t ) , E ( t ) , in feet after t t seconds is given by E ( t ) = 3000 − 70 t . E ( t ) = 3000 − 70 t . Write a complete sentence describing Terry’s starting elevation and how it is changing over time.
Jessica is walking home from a friend’s house. After 2 minutes she is 1.4 miles from home. Twelve minutes after leaving, she is 0.9 miles from home. What is her rate in miles per hour?
A boat is 100 miles away from the marina, sailing directly toward it at 10 miles per hour. Write an equation for the distance of the boat from the marina after t hours.
If the graphs of two linear functions are perpendicular, describe the relationship between the slopes and the y -intercepts.
If a horizontal line has the equation f ( x ) = a f ( x ) = a and a vertical line has the equation x = a , x = a , what is the point of intersection? Explain why what you found is the point of intersection.
For the following exercises, determine whether the equation of the curve can be written as a linear function.
y = 1 4 x + 6 y = 1 4 x + 6
y = 3 x − 5 y = 3 x − 5
y = 3 x 2 − 2 y = 3 x 2 − 2
3 x + 5 y = 15 3 x + 5 y = 15
3 x 2 + 5 y = 15 3 x 2 + 5 y = 15
3 x + 5 y 2 = 15 3 x + 5 y 2 = 15
− 2 x 2 + 3 y 2 = 6 − 2 x 2 + 3 y 2 = 6
− x − 3 5 = 2 y − x − 3 5 = 2 y
For the following exercises, determine whether each function is increasing or decreasing.
f ( x ) = 4 x + 3 f ( x ) = 4 x + 3
g ( x ) = 5 x + 6 g ( x ) = 5 x + 6
a ( x ) = 5 − 2 x a ( x ) = 5 − 2 x
b ( x ) = 8 − 3 x b ( x ) = 8 − 3 x
h ( x ) = −2 x + 4 h ( x ) = −2 x + 4
k ( x ) = −4 x + 1 k ( x ) = −4 x + 1
j ( x ) = 1 2 x − 3 j ( x ) = 1 2 x − 3
p ( x ) = 1 4 x − 5 p ( x ) = 1 4 x − 5
n ( x ) = − 1 3 x − 2 n ( x ) = − 1 3 x − 2
m ( x ) = − 3 8 x + 3 m ( x ) = − 3 8 x + 3
For the following exercises, find the slope of the line that passes through the two given points.
( 2 , 4 ) ( 2 , 4 ) and ( 4 , 10 ) ( 4 , 10 )
( 1 , 5 ) ( 1 , 5 ) and ( 4 , 11 ) ( 4 , 11 )
( –1 , 4 ) ( –1 , 4 ) and ( 5 , 2 ) ( 5 , 2 )
( 8 , –2 ) ( 8 , –2 ) and ( 4 , 6 ) ( 4 , 6 )
( 6 , 11 ) ( 6 , 11 ) and ( –4 , 3 ) ( –4 , 3 )
For the following exercises, given each set of information, find a linear equation satisfying the conditions, if possible.
f ( − 5 ) = −4 , f ( − 5 ) = −4 , and f ( 5 ) = 2 f ( 5 ) = 2
f ( −1 ) = 4 , f ( −1 ) = 4 , and f ( 5 ) = 1 f ( 5 ) = 1
Passes through ( 2 , 4 ) ( 2 , 4 ) and ( 4 , 10 ) ( 4 , 10 )
Passes through ( 1 , 5 ) ( 1 , 5 ) and ( 4 , 11 ) ( 4 , 11 )
Passes through ( −1 , 4 ) ( −1 , 4 ) and ( 5 , 2 ) ( 5 , 2 )
Passes through ( −2 , 8 ) ( −2 , 8 ) and ( 4 , 6 ) ( 4 , 6 )
x intercept at ( −2 , 0 ) ( −2 , 0 ) and y intercept at ( 0 , −3 ) ( 0 , −3 )
x intercept at ( −5 , 0 ) ( −5 , 0 ) and y intercept at ( 0 , 4 ) ( 0 , 4 )
For the following exercises, determine whether the lines given by the equations below are parallel, perpendicular, or neither.
4 x − 7 y = 10 7 x + 4 y = 1 4 x − 7 y = 10 7 x + 4 y = 1
3 y + x = 12 − y = 8 x + 1 3 y + x = 12 − y = 8 x + 1
3 y + 4 x = 12 − 6 y = 8 x + 1 3 y + 4 x = 12 − 6 y = 8 x + 1
6 x − 9 y = 10 3 x + 2 y = 1 6 x − 9 y = 10 3 x + 2 y = 1
For the following exercises, find the x - and y- intercepts of each equation.
f ( x ) = − x + 2 f ( x ) = − x + 2
g ( x ) = 2 x + 4 g ( x ) = 2 x + 4
h ( x ) = 3 x − 5 h ( x ) = 3 x − 5
k ( x ) = −5 x + 1 k ( x ) = −5 x + 1
− 2 x + 5 y = 20 − 2 x + 5 y = 20
7 x + 2 y = 56 7 x + 2 y = 56
For the following exercises, use the descriptions of each pair of lines given below to find the slopes of Line 1 and Line 2. Is each pair of lines parallel, perpendicular, or neither?
Line 1: Passes through ( 0 , 6 ) ( 0 , 6 ) and ( 3 , −24 ) ( 3 , −24 )
Line 2: Passes through ( −1 , 19 ) ( −1 , 19 ) and ( 8 , −71 ) ( 8 , −71 )
Line 1: Passes through ( −8 , −55 ) ( −8 , −55 ) and ( 10 , 89 ) ( 10 , 89 )
Line 2: Passes through ( 9 , − 44 ) ( 9 , − 44 ) and ( 4 , − 14 ) ( 4 , − 14 )
Line 1: Passes through ( 2 , 3 ) ( 2 , 3 ) and ( 4 , −1 ) ( 4 , −1 )
Line 2: Passes through ( 6 , 3 ) ( 6 , 3 ) and ( 8 , 5 ) ( 8 , 5 )
Line 1: Passes through ( 1 , 7 ) ( 1 , 7 ) and ( 5 , 5 ) ( 5 , 5 )
Line 2: Passes through ( −1 , −3 ) ( −1 , −3 ) and ( 1 , 1 ) ( 1 , 1 )
Line 1: Passes through ( 2 , 5 ) ( 2 , 5 ) and ( 5 , − 1 ) ( 5 , − 1 )
Line 2: Passes through ( −3 , 7 ) ( −3 , 7 ) and ( 3 , −5 ) ( 3 , −5 )
For the following exercises, write an equation for the line described.
Write an equation for a line parallel to f ( x ) = − 5 x − 3 f ( x ) = − 5 x − 3 and passing through the point ( 2 , – 12 ) . ( 2 , – 12 ) .
Write an equation for a line parallel to g ( x ) = 3 x − 1 g ( x ) = 3 x − 1 and passing through the point ( 4 , 9 ) . ( 4 , 9 ) .
Write an equation for a line perpendicular to h ( t ) = −2 t + 4 h ( t ) = −2 t + 4 and passing through the point ( −4 , –1 ) . ( −4 , –1 ) .
Write an equation for a line perpendicular to p ( t ) = 3 t + 4 p ( t ) = 3 t + 4 and passing through the point ( 3 , 1 ) . ( 3 , 1 ) .
For the following exercises, find the slope of the line graphed.
For the following exercises, write an equation for the line graphed.
For the following exercises, match the given linear equation with its graph in Figure 33 .
f ( x ) = − x − 1 f ( x ) = − x − 1
f ( x ) = −3 x − 1 f ( x ) = −3 x − 1
f ( x ) = − 1 2 x − 1 f ( x ) = − 1 2 x − 1
f ( x ) = 2 f ( x ) = 2
f ( x ) = 2 + x f ( x ) = 2 + x
f ( x ) = 3 x + 2 f ( x ) = 3 x + 2
For the following exercises, sketch a line with the given features.
An x -intercept of ( –4 , 0 ) ( –4 , 0 ) and y -intercept of ( 0 , –2 ) ( 0 , –2 )
An x -intercept ( –2 , 0 ) ( –2 , 0 ) and y -intercept of ( 0 , 4 ) ( 0 , 4 )
A y -intercept of ( 0 , 7 ) ( 0 , 7 ) and slope − 3 2 − 3 2
A y -intercept of ( 0 , 3 ) ( 0 , 3 ) and slope 2 5 2 5
Passing through the points ( –6 , –2 ) ( –6 , –2 ) and ( 6 , –6 ) ( 6 , –6 )
Passing through the points ( –3 , –4 ) ( –3 , –4 ) and ( 3 , 0 ) ( 3 , 0 )
For the following exercises, sketch the graph of each equation.
f ( x ) = −2 x − 1 f ( x ) = −2 x − 1
f ( x ) = −3 x + 2 f ( x ) = −3 x + 2
f ( x ) = 1 3 x + 2 f ( x ) = 1 3 x + 2
f ( x ) = 2 3 x − 3 f ( x ) = 2 3 x − 3
f ( t ) = 3 + 2 t f ( t ) = 3 + 2 t
p ( t ) = −2 + 3 t p ( t ) = −2 + 3 t
x = 3 x = 3
x = −2 x = −2
r ( x ) = 4 r ( x ) = 4
For the following exercises, write the equation of the line shown in the graph.
For the following exercises, which of the tables could represent a linear function? For each that could be linear, find a linear equation that models the data.
For the following exercises, use a calculator or graphing technology to complete the task.
If f f is a linear function, f ( 0.1 ) = 11.5 f ( 0.1 ) = 11.5 , and f ( 0.4 ) = –5.9 f ( 0.4 ) = –5.9 , find an equation for the function.
Graph the function f f on a domain of [ –10 , 10 ] : f ( x ) = 0.02 x − 0.01. [ –10 , 10 ] : f ( x ) = 0.02 x − 0.01. Enter the function in a graphing utility. For the viewing window, set the minimum value of x x to be −10 −10 and the maximum value of x x to be 10 10 .
Graph the function f f on a domain of [ –10 , 10 ] : f x ) = 2 , 500 x + 4 , 000 [ –10 , 10 ] : f x ) = 2 , 500 x + 4 , 000
Table 3 shows the input, w , w , and output, k , k , for a linear function k . k .
- ⓐ Fill in the missing values of the table.
- ⓑ Write the linear function
k , k , round to 3 decimal places.
Table 4 shows the input, p , p , and output, q , q , for a linear function q . q .
Graph the linear function f f on a domain of [ − 10 , 10 ] [ − 10 , 10 ] for the function whose slope is 1 8 1 8 and y -intercept is 31 16 . 31 16 . Label the points for the input values of −10 −10 and 10. 10.
Graph the linear function f f on a domain of [ − 0.1 , 0.1 ] [ − 0.1 , 0.1 ] for the function whose slope is 75 and y -intercept is −22.5. −22.5. Label the points for the input values of −0.1 −0.1 and 0.1. 0.1.
Graph the linear function f f where f ( x ) = a x + b f ( x ) = a x + b on the same set of axes on a domain of [ − 4 , 4 ] [ − 4 , 4 ] for the following values of a a and b . b .
- ⓐ a = 2 ; b = 3 a = 2 ; b = 3
- ⓑ a = 2 ; b = 4 a = 2 ; b = 4
- ⓒ a = 2 ; b = –4 a = 2 ; b = –4
- ⓓ a = 2 ; b = –5 a = 2 ; b = –5
Find the value of x x if a linear function goes through the following points and has the following slope: ( x , 2 ) , ( −4 , 6 ) , m = 3 ( x , 2 ) , ( −4 , 6 ) , m = 3
Find the value of y if a linear function goes through the following points and has the following slope: ( 10 , y ) , ( 25 , 100 ) , m = −5 ( 10 , y ) , ( 25 , 100 ) , m = −5
Find the equation of the line that passes through the following points:
( a , b ) ( a , b ) and ( a , b + 1 ) ( a , b + 1 )
( 2 a , b ) ( 2 a , b ) and ( a , b + 1 ) ( a , b + 1 )
( a , 0 ) ( a , 0 ) and ( c , d ) ( c , d )
Find the equation of the line parallel to the line g ( x ) = −0. 01 x +2 .01 g ( x ) = −0. 01 x +2 .01 through the point ( 1 , 2 ) . ( 1 , 2 ) .
Find the equation of the line perpendicular to the line g ( x ) = −0. 01 x +2 .01 g ( x ) = −0. 01 x +2 .01 through the point ( 1 , 2 ) . ( 1 , 2 ) .
For the following exercises, use the functions f ( x ) = −0. 1 x +200 and g ( x ) = 20 x + 0.1. f ( x ) = −0. 1 x +200 and g ( x ) = 20 x + 0.1.
Find the point of intersection of the lines f f and g . g .
Where is f ( x ) f ( x ) greater than g ( x ) ? g ( x ) ? Where is g ( x ) g ( x ) greater than f ( x ) ? f ( x ) ?
Real-World Applications
At noon, a barista notices that they have $20 in their tip jar. If the barista makes an average of $0.50 from each customer, how much will they have in the tip jar if they serve n n more customers during the shift?
A gym membership with two personal training sessions costs $125, while gym membership with five personal training sessions costs $260. What is cost per session?
A clothing business finds there is a linear relationship between the number of shirts, n , n , it can sell and the price, p , p , it can charge per shirt. In particular, historical data shows that 1,000 shirts can be sold at a price of $ 30 , $ 30 , while 3,000 shirts can be sold at a price of $22. Find a linear equation in the form p ( n ) = m n + b p ( n ) = m n + b that gives the price p p they can charge for n n shirts.
A phone company charges for service according to the formula: C ( n ) = 24 + 0.1 n , C ( n ) = 24 + 0.1 n , where n n is the number of minutes talked, and C ( n ) C ( n ) is the monthly charge, in dollars. Find and interpret the rate of change and initial value.
A farmer finds there is a linear relationship between the number of bean stalks, n , n , she plants and the yield, y , y , each plant produces. When she plants 30 stalks, each plant yields 30 oz of beans. When she plants 34 stalks, each plant produces 28 oz of beans. Find a linear relationships in the form y = m n + b y = m n + b that gives the yield when n n stalks are planted.
A city’s population in the year 1960 was 287,500. In 1989 the population was 275,900. Compute the rate of growth of the population and make a statement about the population rate of change in people per year.
A town’s population has been growing linearly. In 2003, the population was 45,000, and the population has been growing by 1,700 people each year. Write an equation, P ( t ) , P ( t ) , for the population t t years after 2003.
Suppose that average annual income (in dollars) for the years 1990 through 1999 is given by the linear function: I ( x ) = 1054 x + 23,286 I ( x ) = 1054 x + 23,286 , where x x is the number of years after 1990. Which of the following interprets the slope in the context of the problem?
- ⓐ As of 1990, average annual income was $23,286.
- ⓑ In the ten-year period from 1990–1999, average annual income increased by a total of $1,054.
- ⓒ Each year in the decade of the 1990s, average annual income increased by $1,054.
- ⓓ Average annual income rose to a level of $23,286 by the end of 1999.
When temperature is 0 degrees Celsius, the Fahrenheit temperature is 32. When the Celsius temperature is 100, the corresponding Fahrenheit temperature is 212. Express the Fahrenheit temperature as a linear function of C , C , the Celsius temperature, F ( C ) . F ( C ) .
- ⓐ Find the rate of change of Fahrenheit temperature for each unit change temperature of Celsius.
- ⓑ Find and interpret F ( 28 ) . F ( 28 ) .
- ⓒ Find and interpret F ( –40 ) . F ( –40 ) .
- 2 http://www.chinahighlights.com/shanghai/transportation/maglev-train.htm
- 3 http://www.cbsnews.com/8301-501465_162-57400228-501465/teens-are-sending-60-texts-a-day-study-says/
As an Amazon Associate we earn from qualifying purchases.
This book may not be used in the training of large language models or otherwise be ingested into large language models or generative AI offerings without OpenStax's permission.
Want to cite, share, or modify this book? This book uses the Creative Commons Attribution License and you must attribute OpenStax.
Access for free at https://openstax.org/books/college-algebra-2e/pages/1-introduction-to-prerequisites
- Authors: Jay Abramson
- Publisher/website: OpenStax
- Book title: College Algebra 2e
- Publication date: Dec 21, 2021
- Location: Houston, Texas
- Book URL: https://openstax.org/books/college-algebra-2e/pages/1-introduction-to-prerequisites
- Section URL: https://openstax.org/books/college-algebra-2e/pages/4-1-linear-functions
© Jan 9, 2024 OpenStax. Textbook content produced by OpenStax is licensed under a Creative Commons Attribution License . The OpenStax name, OpenStax logo, OpenStax book covers, OpenStax CNX name, and OpenStax CNX logo are not subject to the Creative Commons license and may not be reproduced without the prior and express written consent of Rice University.

AI + Machine Learning , Announcements , Azure AI Content Safety , Azure AI Studio , Azure OpenAI Service , Partners
Introducing GPT-4o: OpenAI’s new flagship multimodal model now in preview on Azure
By Eric Boyd Corporate Vice President, Azure AI Platform, Microsoft
Posted on May 13, 2024 2 min read
- Tag: Copilot
- Tag: Generative AI
Microsoft is thrilled to announce the launch of GPT-4o, OpenAI’s new flagship model on Azure AI. This groundbreaking multimodal model integrates text, vision, and audio capabilities, setting a new standard for generative and conversational AI experiences. GPT-4o is available now in Azure OpenAI Service, to try in preview , with support for text and image.
Azure OpenAI Service

A step forward in generative AI for Azure OpenAI Service
GPT-4o offers a shift in how AI models interact with multimodal inputs. By seamlessly combining text, images, and audio, GPT-4o provides a richer, more engaging user experience.
Launch highlights: Immediate access and what you can expect
Azure OpenAI Service customers can explore GPT-4o’s extensive capabilities through a preview playground in Azure OpenAI Studio starting today in two regions in the US. This initial release focuses on text and vision inputs to provide a glimpse into the model’s potential, paving the way for further capabilities like audio and video.
Efficiency and cost-effectiveness
GPT-4o is engineered for speed and efficiency. Its advanced ability to handle complex queries with minimal resources can translate into cost savings and performance.
Potential use cases to explore with GPT-4o
The introduction of GPT-4o opens numerous possibilities for businesses in various sectors:
- Enhanced customer service : By integrating diverse data inputs, GPT-4o enables more dynamic and comprehensive customer support interactions.
- Advanced analytics : Leverage GPT-4o’s capability to process and analyze different types of data to enhance decision-making and uncover deeper insights.
- Content innovation : Use GPT-4o’s generative capabilities to create engaging and diverse content formats, catering to a broad range of consumer preferences.
Exciting future developments: GPT-4o at Microsoft Build 2024
We are eager to share more about GPT-4o and other Azure AI updates at Microsoft Build 2024 , to help developers further unlock the power of generative AI.
Get started with Azure OpenAI Service
Begin your journey with GPT-4o and Azure OpenAI Service by taking the following steps:
- Try out GPT-4o in Azure OpenAI Service Chat Playground (in preview).
- If you are not a current Azure OpenAI Service customer, apply for access by completing this form .
- Learn more about Azure OpenAI Service and the latest enhancements.
- Understand responsible AI tooling available in Azure with Azure AI Content Safety .
- Review the OpenAI blog on GPT-4o.
Let us know what you think of Azure and what you would like to see in the future.
Provide feedback
Build your cloud computing and Azure skills with free courses by Microsoft Learn.
Explore Azure learning
Related posts
AI + Machine Learning , Announcements , Azure AI , Azure AI Studio , Azure OpenAI Service , Events
New models added to the Phi-3 family, available on Microsoft Azure chevron_right
AI + Machine Learning , Announcements , Azure AI , Azure AI Content Safety , Azure AI Services , Azure AI Studio , Azure Cosmos DB , Azure Database for PostgreSQL , Azure Kubernetes Service (AKS) , Azure OpenAI Service , Azure SQL Database , Events
From code to production: New ways Azure helps you build transformational AI experiences chevron_right
AI + Machine Learning , Azure AI Studio , Customer stories
3 ways Microsoft Azure AI Studio helps accelerate the AI development journey chevron_right
AI + Machine Learning , Analyst Reports , Azure AI , Azure AI Content Safety , Azure AI Search , Azure AI Services , Azure AI Studio , Azure OpenAI Service , Partners
Microsoft is a Leader in the 2024 Gartner® Magic Quadrant™ for Cloud AI Developer Services chevron_right
Join the conversation, leave a reply cancel reply.
Your email address will not be published. Required fields are marked *
I understand by submitting this form Microsoft is collecting my name, email and comment as a means to track comments on this website. This information will also be processed by an outside service for Spam protection. For more information, please review our Privacy Policy and Terms of Use .
I agree to the above
IMAGES
VIDEO
COMMENTS
Which of the following best describes a linear presentation? Linear presentations build the message point by point and end with a conclusion following logical steps. To ensure your presentation will hold the audience's attention and fit within the time frame allotted, which of the following should be considered?
Which of the following best describes a linear presentation? The systematic arrangement of data in columns and rows. Interviews. Adds interest for the reader. Linear presentations build the message point by point and end with a conclusion following logical steps. 15 of 20. Term.
Apply the 10-20-30 rule. Apply the 10-20-30 presentation rule and keep it short, sweet and impactful! Stick to ten slides, deliver your presentation within 20 minutes and use a 30-point font to ensure clarity and focus. Less is more, and your audience will thank you for it! 9. Implement the 5-5-5 rule. Simplicity is key.
Break out of linear presentations with Prezi - Prezi Tutorial From the course: Prezi Essential Training. Start my 1-month free trial Buy this course ($39.99*) ...
Each of these has exactly 20 seconds, and they should transition automatically. This way, the speaker won't have the temptation of staying in one for too long. Because of all this, Pecha Kucha is a highly visual, concise presentation style. As you can probably imagine, It is a really hard presentation style to use.
Describing a detailed picture of success (or failure) - Give people a vision; something they can see, hear, taste, and touch. Asking the audience to do something straight away - Get them involved right from the start. If you do this, it's then much easier to keep them engaged and active in your cause. 4.
Here are a few tips for business professionals who want to move from being good speakers to great ones: be concise (the fewer words, the better); never use bullet points (photos and images paired ...
Vertex (or Node): A fundamental unit of a graph, representing a point or an entity. Edge: A connection between two vertices in a graph, representing a relationship or interaction. Directed graph (or Digraph): A graph in which edges have a direction, indicating a one-way connection from one vertex to another.
Slides reflect an understanding of and ability to apply design best practices (i.e., 10-20-30 rule; "bullet points kill") 20 pts (Full Marks) 0 pts (No Marks) 20 pts: Presentation meets stated requirements. Presentation meets subject matter, research, length & formatting (including citation) requirements. 10 pts (Full Marks) 0 pts (No Marks ...
2. Linear presentations. Most presentations start at the beginning then each slide is presented one after another in numerical order. This is called a 'Linear presentation'. Slide 1 is followed by Slide 2 then Slide 3 and so on. In a linear presentation there is no facility to jump to out-of-order slides.
The layout of the material and visuals should be balanced and coherent. Consistency: Consistency is key to a good presentation. The movement from one slide to the next should feel seamless. For a beautiful presentation, the typeface, colors, layout, and style should all be consistent. Visuals: Images speak more than words coming from the mouth ...
Which of the following best represents information found in a table? The systematic arrangement of data in columns and rows. Which of the following best describes a linear presentation? Linear presentations build the message point by point and end with a conclusion following logical steps. About us. About Quizlet; How Quizlet works;
In her book slide:ology: The Art and Science of Creating Great Presentations, communications expert Nancy Duarte estimates it takes roughly 20 to 60 hours to build 30 slides to support a one-hour presentation, with the total development time for a presentation ranging between 36 and 90 hours.
Linear Presentation Linear presentation is the conventional way of presenting research results in predefined and systematic format. In the linear presentation, information needs to be presented ...
Dec 16, 2020. Last Updated: 12/16/2020. The main difference between Prezi and PowerPoint is that Prezi is a cloud-based tool for creating non-linear presentations while PowerPoint is an offline tool for creating standard presentations. In this comparison guide, you'll learn what tool is best for your presentations in 2022.
involves the use of phrases, metaphors, and pictures to ease a complex subject. 5. Takahashi. involves using only text on slides to convey important messages to the audience. 6. Lessig. involves the use of a single word, quote or picture that is read by the speaker. 1.
Examples of Best Timeline Templates for Presentations. A timeline template for PowerPoint or Google Slides can help to save a lot of valuable hours. Here is a list of some of the timeline templates for PowerPoint and Google Slides that you can find in our catalog. All timelines are 100% editable and ready to be used in your presentations.
However, the visual nature of slides makes it easier to follow topics and digest information. That's when Linear switched to Pitch for meetings. Karri explains, "I think a presentation can be ...
The three components essential to the linear perspective system are orthogonals (parallel lines), the horizon line, and a vanishing point. So as to appear farther from the viewer, objects in the compositions are rendered increasingly smaller as they near the vanishing point. Early examples of Brunelleschi's system can be seen in Donatello's relief St. George Killing the Dragon (c. 1416 ...
Which of the following best describes a linear presentation? Linear presentations build the message point by point and end with a conclusion following logical steps. To keep the audience's attention and convince them your message is relevant, what should be incorporated through the planning process?
Linear presentations use a backchannel such as Twitter. 2. Linear presentations build the message point by point and end with a conclusion following logical steps. 3. Linear presentations are best developed with interactive slide software such as Prezi. 4. Linear presentations are given before a live audience with a question and answer ...
Linear Function. A linear function is a function whose graph is a line. Linear functions can be written in the slope-intercept form of a line. f(x) = mx + b. where b is the initial or starting value of the function (when input, x = 0 ), and m is the constant rate of change, or slope of the function. The y -intercept is at (0, b).
Get the best value at every stage of your cloud journey. Free Azure services. See which services offer free monthly amounts. Pay as you go. Only pay for what you use, plus get free services. Flexible purchase options. Find the options that work best for you. Azure benefits and incentives. Explore special offers, benefits, and incentives
5.0 (1 review) Which best describes desktop publishing? -the process of designing and laying out printed material. -the positioning of text, graphics, and white space on a page. -the style of letters and how they are arranged. -the use of images and colors. Click the card to flip 👆.