Home Blog Google Slides Tutorials How to do a Voiceover on Google Slides

How to do a Voiceover on Google Slides
Google Slides is often used to share presentations online. Sometimes, these presentations can be confusing for the recipient unless there is additional information that can help elaborate each slide. While Google Slides, unlike PowerPoint, does not allow recording a voiceover to narrate your slides, you can insert separately recorded audio files to your slides to generate a narration.

Google Slides Voice-Over Recording
You can record your voice-over recordings and save them to a folder in Google Drive to insert in slides via New > File Upload. Google Slides does not support many audio formats, so make sure your narration is in MP3 or WAV format. Otherwise, the file will not show up when you try to insert it in Google Slides.

We recommend that you keep a naming convention for your files that makes them easy to identify so that you can conveniently incorporate them for relevant slides later on.
It is necessary to ensure that your audio files are not restricted. Select one or more files and select Share via right-click context menu.

Ensure all files are accessible via the link for recipients with at least View Only privileges. This will ensure that your audience is able to play the audio from within the Google Slides file. Otherwise, the audio icon will show a message asking the viewer to request access to the audio file.

How to Narrate Google Slides
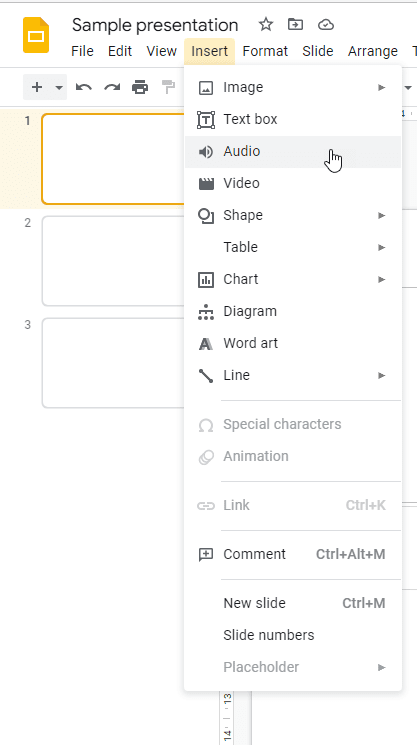
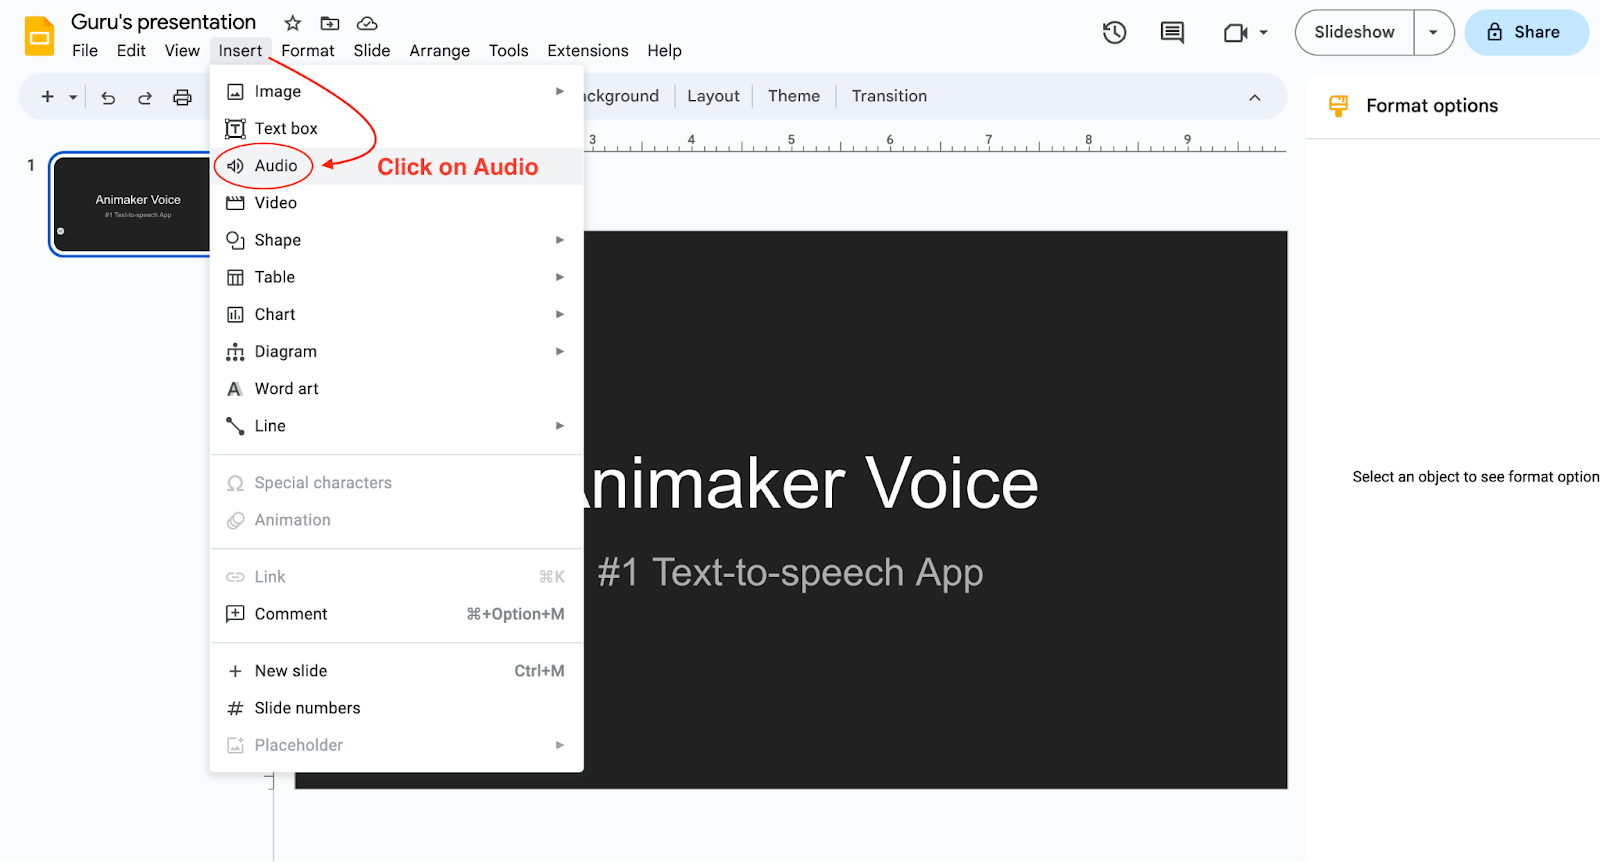
Once your audio files have been uploaded to Google Slides, and you have unrestricted the sharing of those files, go to your Google Slides Theme and add audio for each slide via Insert > Audio .

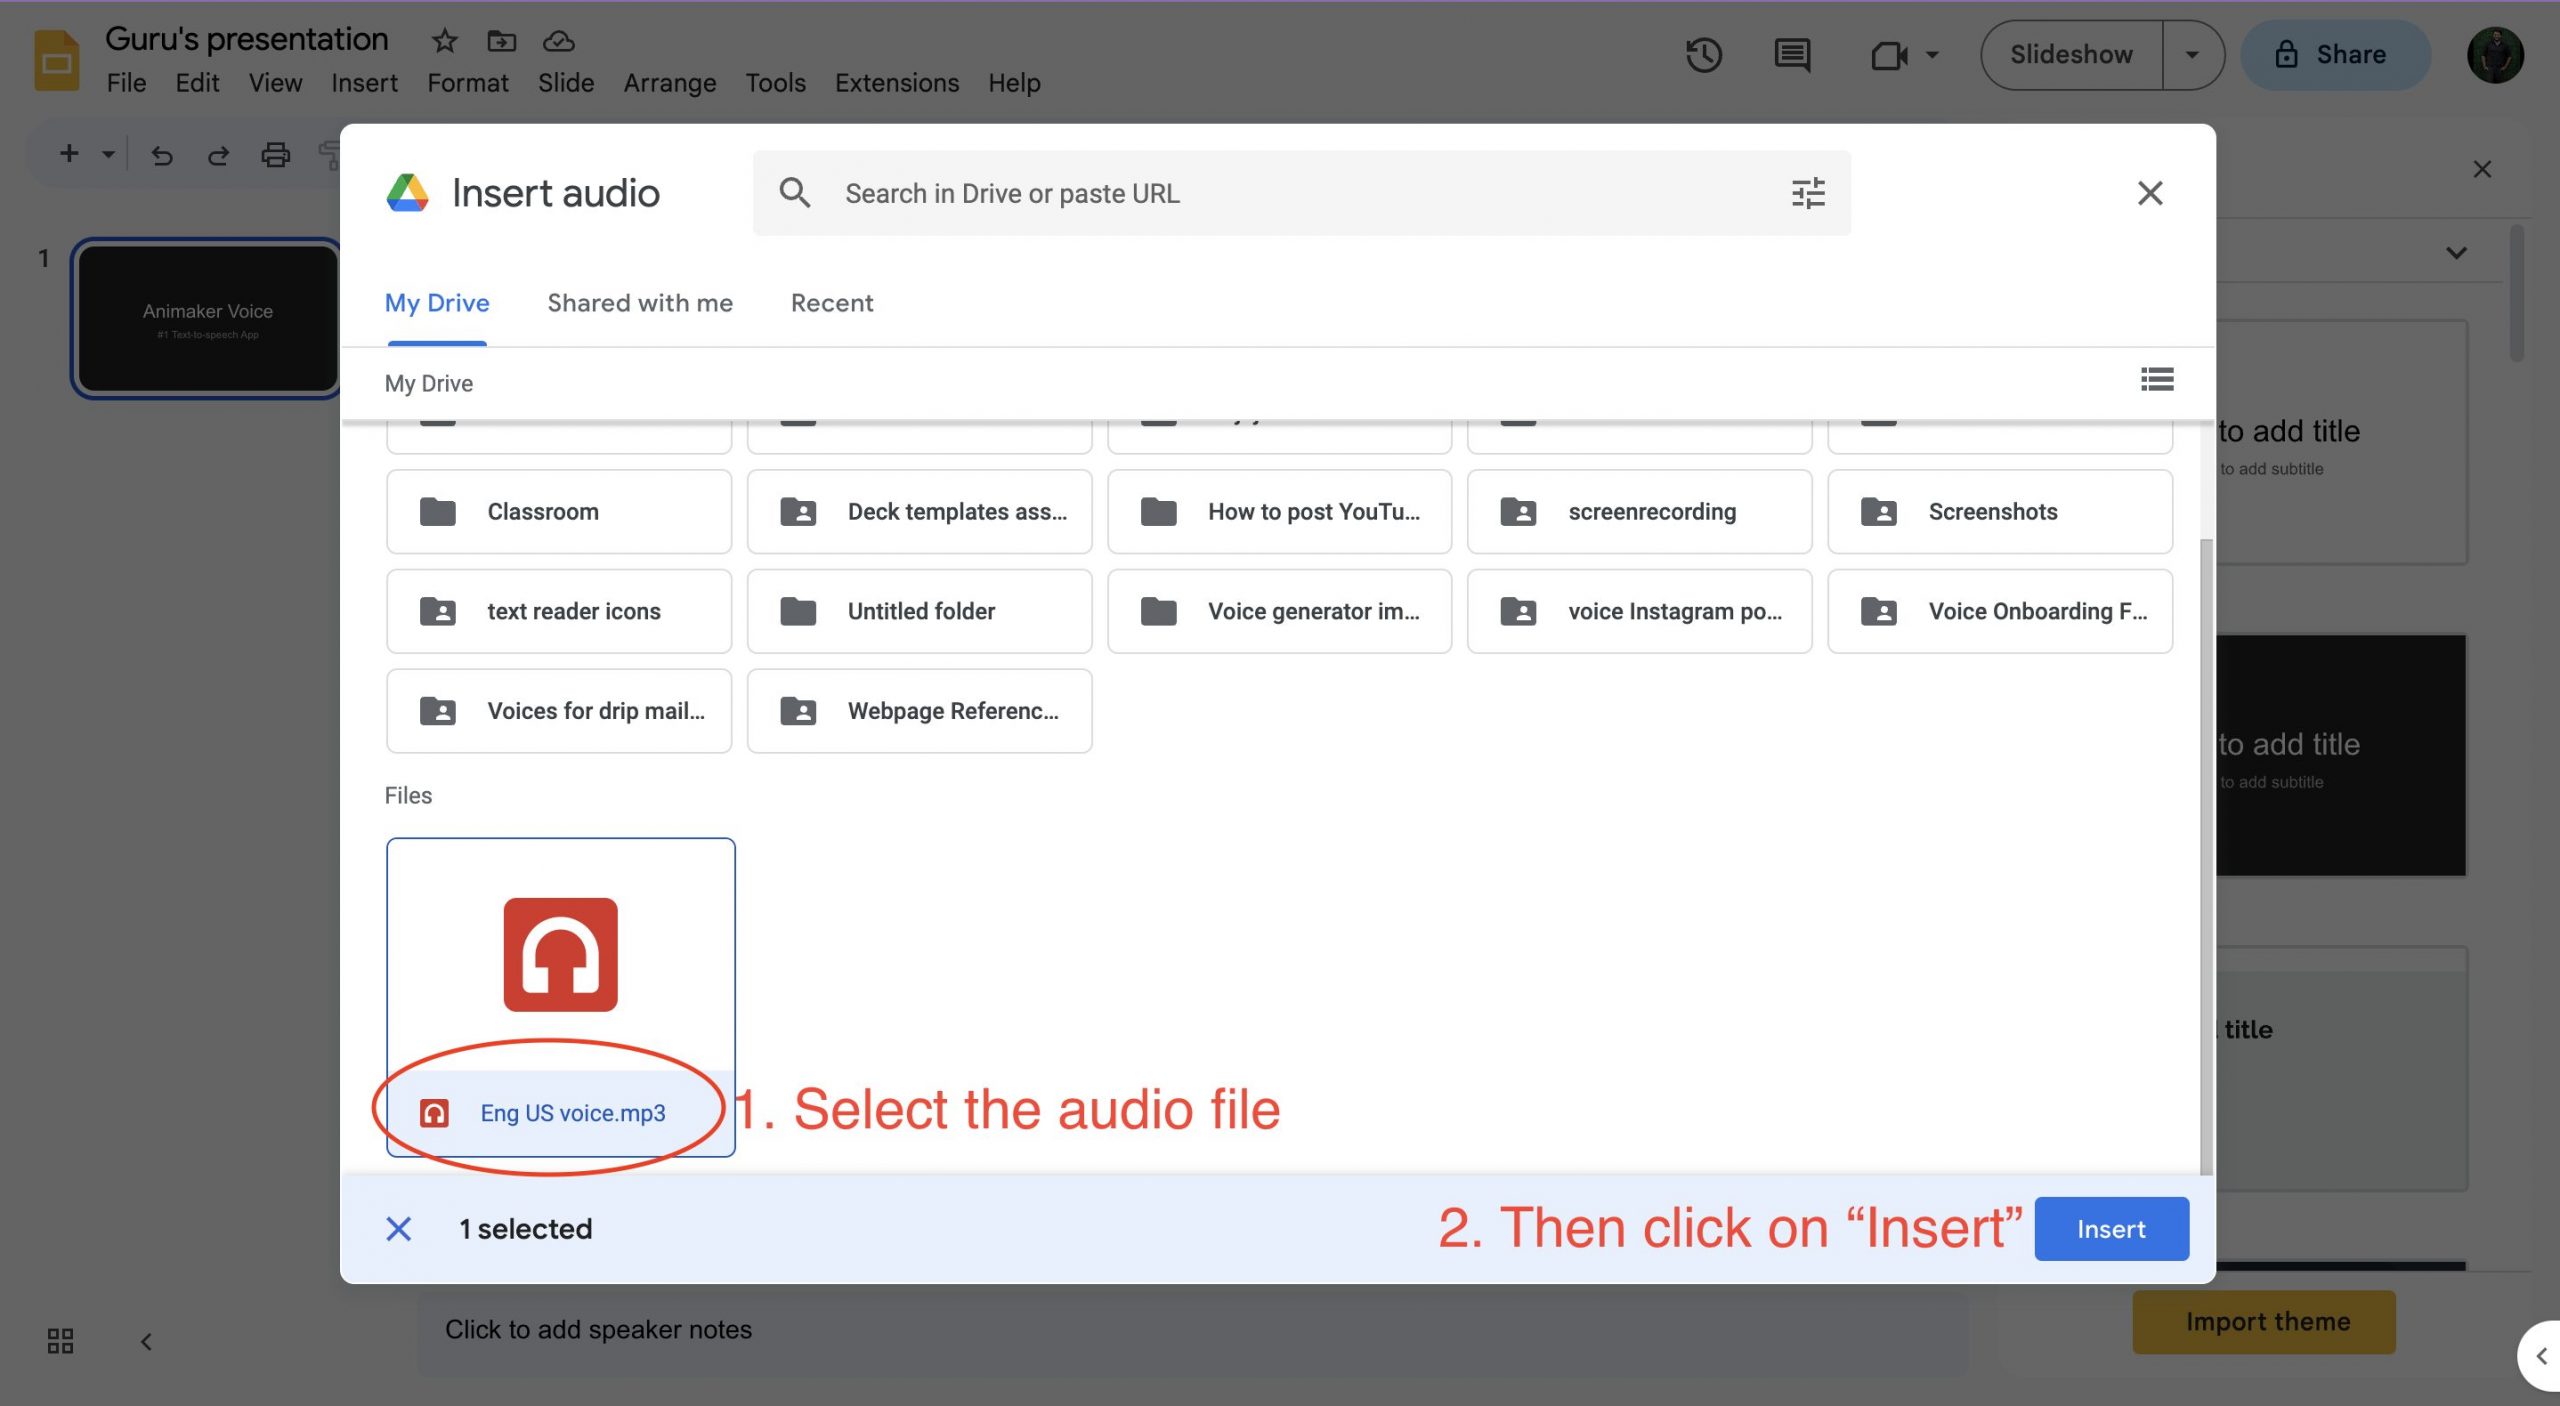
Select the audio file with the narration to insert into the current slide and drag it to place it in the desired location on the slide.

After the audio file has been added, you can click to preview the sound. Furthermore, you can customize audio playback options to play the audio automatically or manually, in a loop, and to stop the audio when the slide changes.

To customize the look of the way your audio icon appears on the slide, see the menus below the Audio playback menu on the right sidebar. Using these options, you can adjust the audio icon’s size, position, and color and add a drop shadow and reflection.
Once your narrations are added to respective slides, you can share your presentation and enable the recipients to listen to the narration on each slide automatically or manually (based on your playback settings).

Audio narrations can only be helpful if they are clear and concise, with good voice quality. If you are struggling with context, you can write a script for each slide and read from it to make your narrative more focused.
Make sure you record your narrations in a place where there isn’t any background noise, or you have a noise cancellation headset to cancel out unwanted sounds in the background. It’s always a good idea to playback and check the voice narrations for sound and contextual clarity.
Since Google Slides supports only MP3 or WAV audio formats, you might need to convert your audio narrations to another format before uploading them to Google Drive. You can also use CloudConvert or other Google Drive-supported apps to make conversions from the cloud.

Like this article? Please share
Google Slides, Presentation Approaches, Presentation Ideas, Presentation Skills Filed under Google Slides Tutorials
Related Articles

Filed under Google Slides Tutorials • April 26th, 2024
How to Print Multiple Slides on One Page in Google Slides
Discover how to print multiple slides on one page in Google Slides to optimize your presentation handouts.

Filed under Design • April 23rd, 2024
How to Create the Perfect Handouts for a Presentation
Learn how to create effective handouts for presentations and the recommended structure for handouts with this guide.

Filed under Google Slides Tutorials • April 23rd, 2024
How to Align Objects in Google Slides
Optimize your layouts by learning how to align objects in Google Slides presentations. Step-by-step guide with screenshots.
Leave a Reply
How to Do a Voice Over on Google Slides: Tools & Tips
Eager to add a personal touch to your Google Slides presentation? Integrating a voice-over can significantly elevate your delivery, making it more engaging and accessible. But how does one navigate this process? It may seem complex, but with the right guidance, it’s actually a walk in the park.
Whether you’re new to Google Slides or have been using it for a while, this guide will serve as your roadmap. With comprehensive step-by-step instructions, we’ll unveil the process of adding a voice-over to your slides, helping you bring your presentations to life.
So, are you ready to lend your voice to your ideas? Let’s set sail on this journey and explore the dynamic world of voice-overs in Google Slides together! By the end, you’ll have a powerful new tool in your presentation toolkit.
2 Million+ Google Slides Themes, Presentation Templates + More With Unlimited Downloads
Download thousands of Google Slides themes, and many other design elements, with a monthly Envato Elements membership. It starts at $16 per month, and gives you unlimited access to a growing library of over 2,000,000 presentation templates, fonts, photos, graphics, and more.

Company Profile Template
Google slides.

Delica Google Slides
133+ unique slides.

Creative Template

Ciri Slides Template
Clean & minimal.

Kloe Minimal Template
Clean & simple design.

Alloyz Business Template
Explore Google Slides Themes
Understanding Voice Overs
Voice overs in presentations are essentially audio narrations that accompany and explain the visual content on your slides. They are an effective way to connect with your audience, explain complex concepts, and add a personal touch to your presentation.
Using Google Slides’ Built-In Audio Insertion Feature
While Google Slides doesn’t have a direct voice over feature, it does allow you to insert audio files. This means you can record your voice over separately and then add the audio file to your slides. Here’s how:
- Record your voice over for each slide using a voice recording tool. You can use built-in tools on your device, like Voice Recorder on Windows or Voice Memos on macOS and iOS, or use online tools like Vocaroo.
- Save each audio file individually. It’s recommended to use an organized naming system, like ‘Slide1’, ‘Slide2’, and so on.
- Upload the audio files to your Google Drive.
- Open your Google Slides presentation. Select the slide you want to add the voice over to.
- Click on ‘Insert’ > ‘Audio’. This will open a window showing your Google Drive files.
- Select the relevant audio file for the slide. Once inserted, an audio icon will appear on your slide. You can click on this icon and adjust the settings, choosing whether the audio plays automatically, on click, or loops.
Repeat these steps for each slide you want to add a voice over to.
Using Screen Recording Tools
Another approach to adding voice overs to your Google Slides presentation is by using a screen recording tool. This method allows you to narrate your presentation in real time, creating a more dynamic and interactive experience for your audience. Here are some popular screen recording tools you can use:
Loom is a user-friendly tool that allows you to record your screen, voice, and face simultaneously. You can use it to navigate through your Google Slides presentation while providing real-time narration. Here’s a simple guide:
- Download and install Loom on your computer.
- Open Loom and select ‘Screen + Cam’ to record both your screen and voice.
- Open your Google Slides presentation in Present mode.
- Start recording in Loom and navigate through your presentation as you provide your voice over.
- Once finished, you can edit the video in Loom, trimming any unwanted sections and adding callouts or captions as needed.
- Save the video and share it directly with your audience, or upload it to a video sharing platform like YouTube and embed the video into your Google Slides presentation.

2. ScreenPal
ScreenPal is another great tool for recording voice overs. It offers a range of editing tools, including options to add captions, animations, and even a green screen effect. Follow these steps to use ScreenPal:
- Download and install ScreenPal on your computer.
- Open ScreenPal and select ‘Start Recording’.
- Choose the screen capture area and ensure the microphone is turned on for voice recording.
- Start the recording and go through your Google Slides presentation, narrating as you progress.
- After finishing the recording, you can use the video editor to add effects, trim parts of the video, or adjust the audio.
- Save your video and upload it to a platform like YouTube. Then, you can share the link or embed the video into your Google Slides presentation.

Using Professional Voice Over Software
If you’re looking for a more professional sound or need advanced editing options, consider using professional voice over software like Audacity . Audacity is a free, open-source software that offers a wide range of audio recording and editing features. Here’s how to use Audacity for your voice overs:
- Download and install Audacity on your computer.
- Open Audacity and select the microphone for recording.
- Start recording your voice over. You can record the narration for each slide individually or record a continuous narration and split it later.
- Use Audacity’s editing features to clean up the audio, remove noise, adjust volume levels, and add effects as needed.
- Export the audio files and upload them to Google Drive.
- Open your Google Slides presentation and insert the audio files as explained in section 2.

Tips for Effective Voice Overs
Creating a compelling voice over involves more than just reading your slides. Here are some tips to help you create engaging narrations:
- Write a script: Don’t improvise your narration. Write a script for your voice over and practice it. This will help you deliver a clear, concise, and engaging narration.
- Speak clearly: Speak at a steady pace, articulate your words clearly, and use pauses effectively. Ensure your voice is loud enough to be heard clearly but not so loud that it’s jarring.
- Be conversational: Try to make your voice over sound natural and conversational, as if you were speaking to the audience face-to-face. This can make your presentation more engaging and relatable.
- Use an appropriate tone: Match the tone of your voice to the content of your presentation. If your presentation is about a serious topic, your voice should reflect that seriousness. Conversely, if your presentation is light-hearted or humorous, let that show in your voice.
Adding a voice over to your Google Slides presentation can elevate it from a basic slide show to an immersive, engaging experience for your audience. With the tools and techniques we’ve discussed in this article, you’ll be well-equipped to create effective voice overs for your presentations.
Remember, the key to a successful voice over is clear, engaging narration that complements and enhances your visual content. Happy recording!
Create Your Course
How to do a voiceover on google slides or powerpoint, share this article.
Voice-over presentations offer a better learning experience because they are a more engaging way to learn.
Some students learn better through visual cues, while others learn by listening. However, adding voice-over narration to your presentations enables students to benefit from the best of both worlds. It allows adding important information and context to explain what’s on the slides – as if your students were attending a live lecture!
Now, you may assume adding voice-over to your presentations is complicated. However, it isn’t as tricky as you probably think! Once you have your slides ready, there are just a few extra steps you’ll need to take to add narration.
In this blog, we share four ways to do a voiceover presentation – voice-over Google Slides, PowerPoint, screen recording, and the Presentation lesson feature on Thinkific.
Before we get into the options, let’s quickly cover the only ground rule regarding recording voice-overs: Don’t sacrifice sound quality. Viewers are willing to put up with rough visuals but don’t forgive poor sound. Most computers have built-in microphones that sort of get the job done, but we recommend headphones or a USB Microphone to improve the quality of your voiceover.
Related: How To Set Up A DIY Home Video Recording Studio For Cheap
Now, let’s get into your voice-over options. Toward the end of the article, you will also find five tips for adding a good voice-over. If you’d like to sit back and learn, check out this video we created on how to easily add voiceover to your slides:
4 ways to do voice-over presentations
There are two main routes you can take to record a voiceover for your presentations :
You may want to use PowerPoint or Google Slides to add voiceover to each slide that plays as students make their way through the presentation. PowerPoint has recording functionality built-in, but with Google Slides, some extra steps are involved with recording your audio, then uploading it to Google Drive before you can embed it on each slide.
Alternatively, you may want to ditch the slides and create a screen recording of the presentation. To do this, you can use any screen recording software as you talk through the slides and turn your presentation into a video lesson. And if you’re a Thinkific user, you can create voiceover slides with the Presentation lesson feature.
Use this list to skip to your preferred voice-over narration method:
- How to do a voice-over on Google Slides
- How to do a voice-over on PowerPoint (Microsoft Office)
- How to do a voice-over screen recording
- How to do voice-over slides with Thinkific
Option 1: How to do a voice-over on Google Slides
Google Slides doesn’t have built-in functionality to record your slides, but you can still accomplish the same with it with an extra step. You can add voiceover to Google Slides by uploading an audio file saved in Google Drive to each slide.
For this option, all you need is Google Slides and a computer with a microphone.
Let’s go through the steps-
Step 1: Create your audio files for each slide and upload them to Google Drive.

Tip: Organize your files with a naming convention. You’ll need to locate these files in the next step. To keep them organized , following a naming convention for your audio files, including Course, Lesson, and Slide numbers, helps.
Step 2: Insert audio to your slide, and configure play settings
Next, you can insert audio from your drive into each slide individually.

The files you uploaded should be in the Recent tab, but you can also search for the file manually.

Step 3: Configure your audio settings
Google Slides gives you the option to specify how the voiceover should act. To open the Format options menu, you can click on the speaker icon, then go to Format options under the Format menu.

Voice-over formatting options for Google Slides:
- Autoplay- You can choose if you want the audio to play automatically or manually when a student clicks the slide.
- Loop- You can define if you want the recording to stop or repeat once it gets to the end.

- Button size and colour – You can resize the button by dragging the corner and changing the colour using the “Recolor” option.

An online course or membership site can be a wildly successful way to monetize content.
Need help figuring out where to start? Get free training and start building for free !
Option 2: how to do a voice-over on PowerPoint
Microsoft Powerpoint has a feature that many average users don’t know about, which allows you to add voice-over narration to your PowerPoint. For this option, all you’ll need is Microsoft PowerPoint and a computer with a microphone.
On Windows computers:
Step 1 – in the top menu, go to slideshow >> record slideshow..
You have the option to record from the beginning of the presentation or from the current slide you’re on.

Step 2- Start recording
Once you select which recording you’d like to go ahead with, you’ll be in full-screen mode with options to record, stop, and replay. Once you click record, there will be a countdown timer from 3.

Anything you type in the notes section of the PowerPoint can be viewed by clicking on the notes button at the top.

The recording will stop automatically once you make it to the final slide. You can also pause, stop, or replay a recording at any time by pressing the pause button in the top left of your screen.

You can also record a video of yourself in the corner by selecting the video option in the bottom right corner.

Step 3 – Testing your narration
Once you’re finished, a speaker icon will appear at the bottom right corner of all the slides with recorded narration.

Just hover over the speaker icon to play, skip to time, or adjust the volume to play the narration.

On Mac Computers
Step 1 – click on slide show..

In the top menu, click Slide Show and choose the slide you want to start working on. Unlike on Windows, you will have to select the slide you want to work on manually. If it is the first slide you wish to choose, do so.
Step 2 – Click on Record Slide Show

Step 3 – Choose the input method

On the top of the screen, you can turn off the camera, if you wish to, or turn it on.
The next button helps you choose the voice input, whether your Mac’s in-built mic or an external device.
Step 4 – Add a voice-over to slides

As with the Windows version, add voice-over to the slides one by one, and add notes if you wish.
Step 5 – Complete recording

Once done, click on the large red button to start recording. Once your voice-over is complete, click the same button to stop recording. Again, add notes if you wish to. Then, move to the next slide.
Step 6 – Click on tips for more controls

Click on Tips for several functions and shortcuts you can use on your Macbook to control your voice-over recordings. The Mac version of the PowerPoint tool is much easier to use.
Step 7 – Verify your voice-over for accuracy

After your voice-over is complete, return to your presentation, and make sure that your voice-over is accurate by clicking on the white “Play” icon at the bottom of each slide.
Option 3: how to do a voice-over with screen recording
The last option involves recording your screen and audio as you discuss the presentation.
Check out our guide: How To Record Your Screen On Any Device .
We’ll show you free options and two paid options with advanced editing features:
Hit the record button on the video conferencing software
The easiest and cheapest option for screen recording without additional software is to join a Google Meet or a Zoom call by yourself, share your screen, and press the recording button.
This may be easy for a simple presentation but may prove frustrating for a longer presentation – the inability to edit means you’ve got one shot to make it through your presentation without any mistakes.
Use your computer’s built-in screen recorder
On Windows 10 , just click Windows + G at the same time to open the Game Bar, and press “Start Recording”.
If you’re on a Mac , you can make a video recording of the entire screen or just a portion of it. Shift-Command(⌘)-5 will display on-screen controls for recording the entire screen.
Two paid screen recording options
If you want the ability to edit and customize your video and access more editing options, you’ll need to invest in some software like Screenflow or Camtasia .
Here are our two favorite options , depending on whether you’re on a Mac or Windows System:
Screenflow is a software program for video editing and screencasting for Apple users and is one of the best options for screen capture. This software functions well as a video editor for novice editors, but it lacks the deep customization and functions of a more advanced editor like Adobe Premiere Pro.
Download free trial of Screenflow
Camtasia is an all-in-one screen recorder and video editor that works on both Windows and Mac. It is one of the most widely used systems for screen recording and video editing. It is popular for its user-friendly interface and simple video editing.
Try Camtasia for free
Option 4: how to do voice-over presentations with Thinkific
If you have created a presentation on an external platform like Keynote , PowerPoint or Google Slides, you can use a Presentation lesson to display it within your Thinkific course!
This function enables you to record audio while speaking to specific slides. You also have the option to upload a recording for each slide.
This is a great way to create a customized experience for your students right within Thinkific .
To create a Presentation lesson, you will need to upload a PDF file. Each page in your PDF will be converted to images that will be displayed as slides within your Presentation lesson for students to navigate through.
If you have created a presentation in an external platform like PowerPoint you can simply export it from that platform as a PDF to later upload to Thinkific!
Here are the steps to create a Presentation lesson with voice-over on Thinkific .
With that, let’s explore what it takes to ensure a good voiceover.
Follow these five tips for adding a good voiceover
- Invest in a good microphone – Most cell phones and computers come with built-in microphones. These may not provide the professional-grade audio quality necessary to create compelling online lessons. Therefore, you must invest in a professional microphone that eliminates noise and disturbances. As we mentioned earlier, the most important rule is to ensure that your audio quality is high.
- Use a teleprompter – Although you may speak out your presentation and elaborate on the impromptu bullet points, you could make mistakes. These mistakes may make you seem like a novice. A teleprompter can help you read out your sentences in front of the webcam or the mic without making any errors. The result is – top-notch quality presentations with voiceovers.
- Clear your throat – Most people do not realize the importance of a good quality voice. In fact, voice-over artists are hired simply because of their excellent voices! While you do not need to hire professional voice-over artists, you can ensure that you sound your best by gargling your throat and clearing it before you begin to record. In other words, avoid recording your voiceover if you have a sore throat or when your voice sounds hoarse. Keep a jug of water ready next to you to keep sounding fresh.
- Sound confident – Confidence doesn’t come with good quality microphones and teleprompters alone. Practice talking in front of a mirror, which will help ensure that you sound and look great. In fact, dressing professionally just before you record your voice-over may also have psychological benefits – you could feel more professional and thus sound more professional and confident.
- Edit audio if necessary – Despite all the care taken, you may make mistakes during voice-over recording. Listen to your slides repeatedly and make changes until you are completely satisfied with how you sound. Although there are audio editing tools out there, they may not be necessary for simple presentations such as the ones required for online lessons.
Whichever method you choose, turning a regular presentation into an engaging voice-over is sure to improve the quality of your presentation.
But here’s a thought: Why not monetize your presentations with an online course?
Sign up with us for free and try it out (we dare you) .
Not ready to take the leap, but still interested in improving the quality of your production? Check out one of these related guides:
- How to Create Video For Your Online Coaching Course
- How to Improve the Video Production Quality for Your Online Course
- Best Equipment & Software For Creating Online Courses
- 4 Elements of Effective Video Content for Online Courses
This guide on voiceovers was published in August 2020 and was updated in October 2022.
Colin is a Content Marketer at Thinkific, writing about everything from online entrepreneurship & course creation to digital marketing strategy.
- How To Craft Magnetic & Compelling Learning Outcomes
- Essential Questions To Ask In Your Training Evaluation Survey
- Best Equipment & Software For Creating Online Courses
- How to Create a Compelling Sales Page for Your Online Course
- What Is Universal Design For Learning? (Examples & Best Practices)
Related Articles
25 ways to increase customer retention in a membership site.
Want to increase retention in your membership site? Check out these tips from successful membership site owners on increasing retention & reducing churn.
Screen Recording to Create Video Lessons
When I created my first online course I spent months researching and testing dozens of tools and methods for content…
How to Plan an Online Course (Templates & Tips)
Learn the top things to do when planning your course, and download the free templates in each section to put these concepts into action.
Try Thinkific for yourself!
Accomplish your course creation and student success goals faster with thinkific..
Download this guide and start building your online program!
It is on its way to your inbox
Let’s get you the best deal
- Commercial business
- Educational institution
- 1001 - 5000
- Discuss bulk purchase discounts
- Arrange a meeting with sales representative
- Provide support with new purchase process
- Provide assistance with renewals or upgrades
- Provide assistance with any other enquiry
Thank you! Our sales team will reach out to you soon

1. How to do a voiceover on Google Slides using a voice recorder
2. how to do a voiceover on google slides using a screen recorder, 3. how to do a voiceover on google slides using text-to-speech translation software, bonus: tips to help you get started , how to do a voiceover on google slides: (3 easy ways).

Rithu V - March 7, 2022 Leave your thoughts. -->
How to Add Voiceover on Google Slides , How to Do A Voiceover on Google Slides , How to Make a Voiceover on Google Slides , How to Record a Voiceover on Google Slides , How to Record Narration in Google Slides , How to Voiceover Google Slides
Once you learn how to add voiceovers to your Google Slides presentations, you'll find it to be a valuable skill.
In today's post, we'll guide you through three different methods for incorporating voiceovers into your Google Slides.
- How to add a voiceover on Google Slides using a voice recorder.
- How to add a voiceover on Google Slides using a screen recorder .
- How to add a voiceover to Google Slides using text-to-speech translation software.

In this method, you can record the audio narration separately and add it to your Google Slides presentation.
As Google Slides doesn't come with a built-in audio recorder, you'd need the help of an external audio/video recording software to record your voiceovers.
There are many voice recorders available online, such as Rev, Audacity, 123Apps, GarageBand, and Vocaroo . You can choose any of these voice recording tools to get started.
Step 1: Record your voiceovers
Once you've selected your voice recording tool, practice with a script and record a few demo sessions to perfect your narration. When ready, record your voiceover and download it in either MP3 or WAV format. Since Google Slides supports only these two formats, ensure your audio files are saved accordingly.
Step 2: Upload it to Google Drive
Now, upload the recorded audio file to your Google Drive.
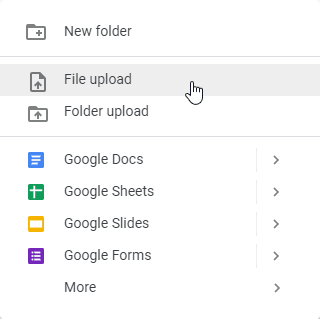
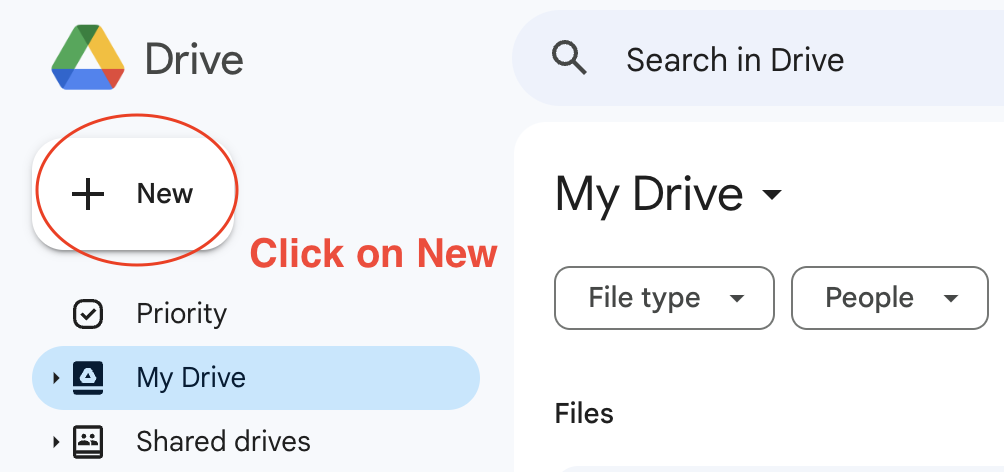
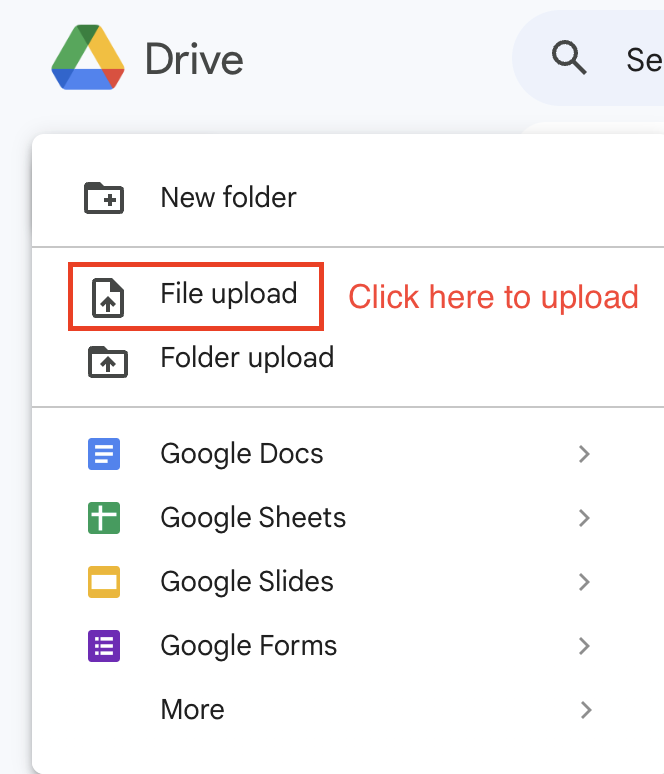
Log in to your Google Drive account, click 'New,' and choose 'File Upload.

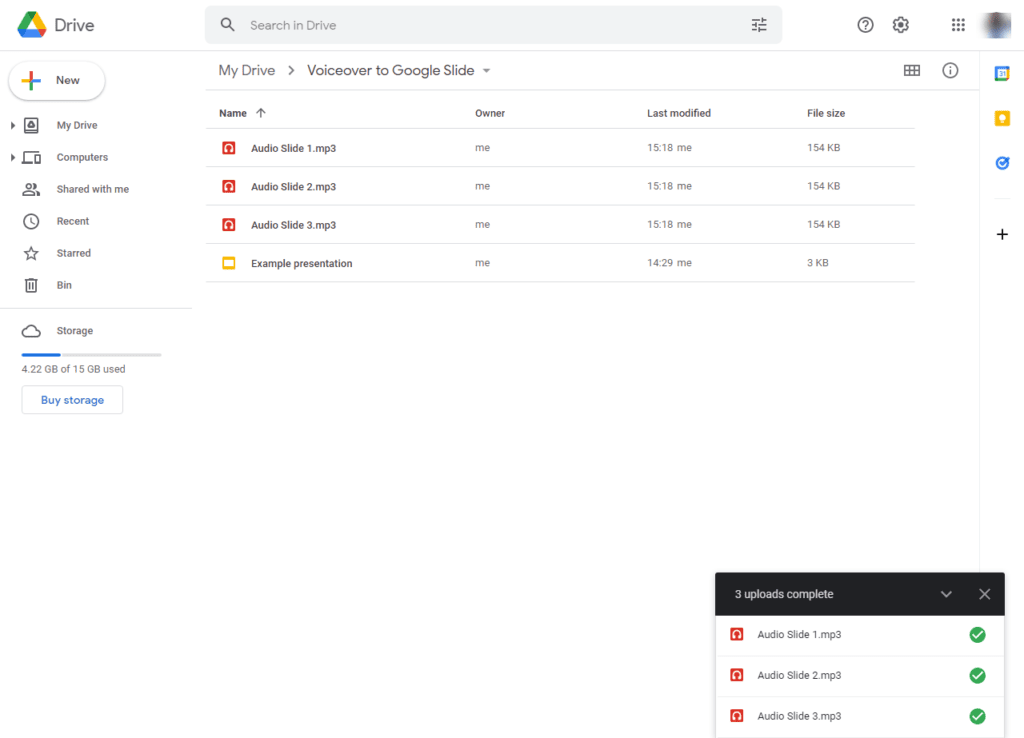
The file has now been uploaded to your Google Drive.
Step 3: Make the audio file accessible to everyone
Before attaching the audio file to your Google Slides presentation, you need to ensure it is accessible to everyone.
To do this, right-click on your audio file, select 'Share,' and click 'Change to anyone with the link' so that anyone on the internet can access the file.

Once you've finished, click on 'Done.'
Step 4: Attach the audio file to Google Slides
You can now easily attach the audio file to your Google Slides presentation. Open the Google slide that needs a voiceover.
Click on the 'Insert' option and choose 'Audio'.

Choose the audio file you'd like to add and click on the 'Select' button.
Once you insert your voiceovers into your Google slide presentation, a speaker icon appears on your slide. Clicking on it will play the audio.
You can also drag the speaker icon and place it anywhere else.
Step 5: Configure settings & watch a preview
With Google Slides, you can customize your audio narrations.
Select the speaker icon and click on the 'Format' option from the toolbar's 'Format' menu. A pop-up box will appear, allowing you to customize your preferences.

Here are some important formatting options available on Google Slides:
- Play automatically : Enable the 'start playing automatically' radio button if you want the audio to play automatically when you open the slide.
- Play on-click : Enable the 'start playing on click' radio button if you want the audio to play only when you click on the speaker icon.
- Loop audio : Enable the 'loop audio' checkbox if you want the audio narration to play on a loop.
- Stop on slide change : Enable the 'stop on slide change' checkbox if you want the audio to stop when you navigate to the next slide.
The second method is one of the easiest among the three.
It allows you to add voice narrations to your Google Slides presentations with a webcam overlay. Once you record yourself presenting, you can freely share it with others.
Numerous screen recording software options are available online. Choose one that best fits your requirements.
When you use a screen recorder for your voiceovers, you can enhance your recording with screen annotations . Additionally, as most screen recording software includes a video editor, you can easily edit unnecessary portions of your voiceovers in one go.
Note : We guide you through this process using Vmaker as it's easy to use and comes with many impressive features.
Step 1: Sign up for Vmaker
Visit Vmaker's official page to create an account. The screen recording software is available as a Chrome plugin, Mac, and Windows application.

The chrome extension can be added to your chrome browser from the ' Chrome Web Store ', while the Mac application can be downloaded from Vmaker's homepage.
Note: The Chrome plugin can be pinned to your browser for easy access to the screen recording software.
Step 2: Start recording the voiceover
Before you begin recording your voiceover, it's advisable to conduct a few test runs to ensure optimal performance during the actual recording. To do this, log in to your Vmaker account and click on 'Start Recording'.
When you're ready for the actual recording, open the Google Slides presentation that requires a voiceover and initiate the recording process.
To commence the voiceover recording, click on the Vmaker icon in your browser and select ' Start Recording '.

You can also customize the features according to your preferences.
Step 3: Edit & share
After recording your voiceovers, initiate the editing process by clicking on the 'Edit' button.
You'll be directed to Vmaker's AI video editor , to converts your Raw videos into Wow videos in just minutes and edit out any unnecessary portions of your recording.

As soon as you finish editing, you can export the recorded video file in your desired format and share it with anyone.
Vmaker also allows its users to upload their videos to social media platforms like Facebook, YouTube, and Instagram. Content creators can easily share their videos in a matter of seconds.
This method can be very helpful if you can't create your own voiceovers due to time constraints. It allows you to generate voiceovers using text to speech translation software and attach them to Google Slides.
These voiceover software applications are supported by artificial intelligence and have the ability to produce realistic voiceovers from text. This means you can convert a voiceover script into a professional voiceover in just a matter of seconds. Additionally, you can adjust the tone, pitch, and breath of your voiceovers according to your preferences. This helps people save a lot of time and money.
There are many text-to-speech translation software options available online. Some of the most popular ones include Animaker's Voice, Speechelo, Logic, Studio One, etc. You can choose any of these software options that best fit your requirements.
Note : We will guide you through this example using Animaker's Voice software.
Now, let's learn how to do a voiceover on Google Slides using text-to-speech software.
Step 1: Sign up for Animaker
Head over to Animaker's official page and sign up.
Once signed up, you'll be directed to the Animaker dashboard. To create voiceovers, click on the 'Create' button and select 'Create Voice' under the 'Create Project' section.

Step 2: Type in the text & customize your preferences
Now, you'll be directed to the Animaker voiceover suite. Here is where you can add the text that needs to be converted into voiceovers.
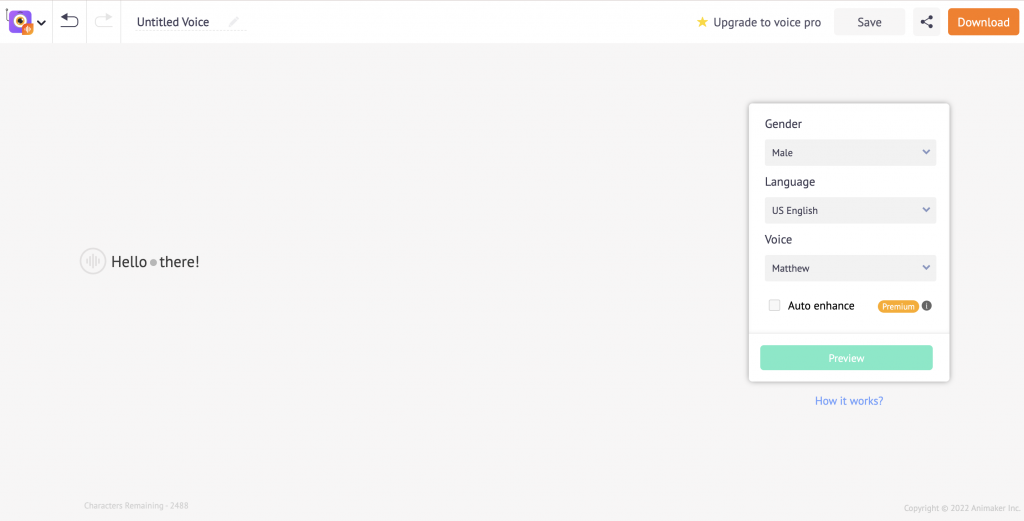
Once you've entered the text, customize your preferences by selecting your gender, language, and voice type.

Additionally, you can change the pitch, speed, and volume of the voiceover by clicking on the button shown below.

To create a break effect or pause between two words, click on the dot between them and adjust the breaks.

There's also a 'Reset' button that allows you to undo recent changes.
Step 3: Preview & make changes if necessary
After entering the text and customizing the preferences, click 'Preview' to check if the audio sounds good. If further adjustments are needed, continue tweaking the break and breath effects until you achieve the desired results.
Step 4: Share/download the recording
Once the voiceover is ready, you can download the audio to your computer or share it with others.
Step 5: Upload to Google Drive & attach the audio file to Google Slides
Easily attach the downloaded audio file to your Google Slides presentation. To do this, follow the steps discussed in the first method. Upload the downloaded file to Google Drive and insert it into your Google Slide presentation from your drive.
Upload your downloaded file to Google Drive and insert it into your Google slide presentation from your drive.
Here are a few tips to help you get started with your recording process.
i) Use a pop-up filter
Many individuals recording voiceovers and other videos use a pop-up filter to block unnecessary background noises and eliminate popping sounds that can occur when speaking quickly.
If you're using a screen recording software like Vmaker for your voiceovers, you can achieve professional results without the need for additional filters. Vmaker comes with a noise control feature that effectively blocks unnecessary background noises, ensuring a smooth recording experience.
However, if you opt for the other two methods to record your voiceovers, investing in a good pop-up filter may enhance your recording quality.
ii) Select a quiet place
It's important to stay focused during the recording, so choose a quiet location with minimal disturbances. Inform your family members in advance and turn off your mobile notifications.
iii) Watch your posture
Good posture provides proper breath support, aiding you in delivering your speech with a clear and strong tone. It's advisable to stand while recording your voiceovers. If you prefer sitting, ensure that you find a comfortable spot where you can sit straight.
iv) Warm up your voice
Conducting a few test runs before the actual recording will help you discover the right combination of pace, projection, and volume for the voiceover. This preparation will reduce the need for multiple retakes.
v) Keep a glass of water close by
It's always advisable to have water or warm tea nearby to keep your vocal cords hydrated. However, stay away from coffee, dairy products, and carbonated beverages.
Now that you've learned how to do a voiceover on Google Slides using three simple methods and know what mistakes to avoid, go ahead and start recording your voiceovers like a pro!
Recommended reads
- How to send a video via Gmail in 3 Different Ways
- How to Make Your Video Presentations Stand Out?
- The Ultimate Guide: What are Video Presentations (Tips and Examples)
- Record Powerpoint Presentations with Audio Easily
- 5 Effective Tips to Make Your Video Presentations Stand Out
Related Posts

Breathe life into courseware videos with educational video creation tools

How to stand out in the era of remote onboarding?

How to do product review videos on youtube?
Get awesome video making tips in your inbox

Gregg Brown
Ars Est Filius Dei
How to Do a Voice Over on Google Slides: A Comprehensive Guide

Google Slides has emerged as a versatile tool for creating engaging presentations, thanks to its user-friendly interface and robust set of features. But have you ever considered adding a voice over to your Google Slides presentation? A voice over can enhance your presentation by providing additional context, making it more engaging, and helping to deliver your message more effectively. Whether you’re an educator creating lessons, a professional delivering a webinar, or a student preparing a report, this comprehensive guide will show you how to do a voice over on Google Slides.
Why Add a Voice Over to Your Google Slides Presentation?
Before we delve into the step-by-step guide, let’s explore why adding a voice over to your Google Slides presentation can be a game-changer.
- Enhanced Understanding: A voice over can provide additional explanations or insights, supplementing the visual content on the slides. This can help to ensure that complex information is understood more thoroughly.
- Increased Engagement: Voice overs can make your presentation more interactive and engaging. A well-delivered voice over can help to hold your audience’s attention and keep them engaged with your content.
- Greater Accessibility: Adding voice overs to your slides can make your content more accessible. For viewers who are visually impaired or prefer audio over reading, a voice over is an essential addition.
- Better Retention: Combining audio with visuals can result in better retention of information. It engages more senses, thereby improving learning and recall.
Now that we understand the benefits, let’s walk through the steps of how to add a voice over to your Google Slides presentation.
Step-by-Step Guide: How to Add Voice Over to Google Slides
While Google Slides does not have a built-in feature to record audio directly, there are workarounds to achieve this. Here, we will use Google Drive and a tool called “Online Voice Recorder”.
Step 1: Record Your Voice Over
First, you’ll need to record the voice over for each slide. A simple, free tool to use is Online Voice Recorder, which allows you to record high-quality audio right from your browser.
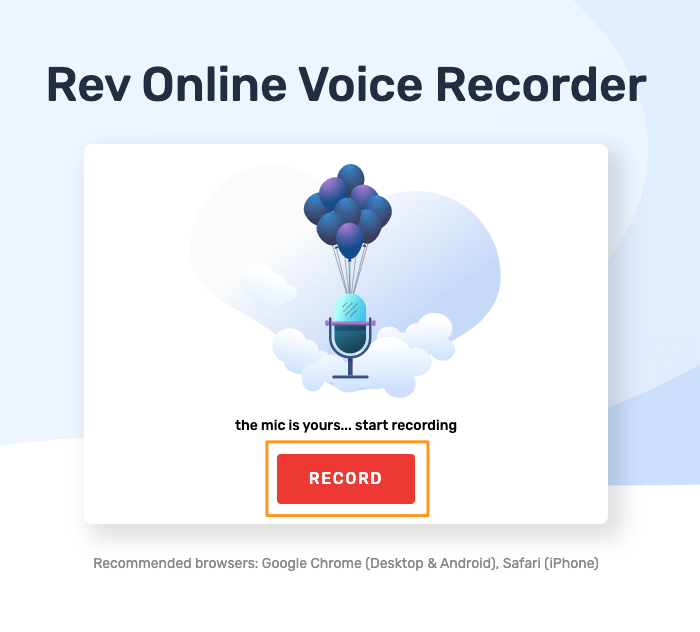
- Go to Online Voice Recorder .
- Click on the red “Record” button to start recording your voice over.
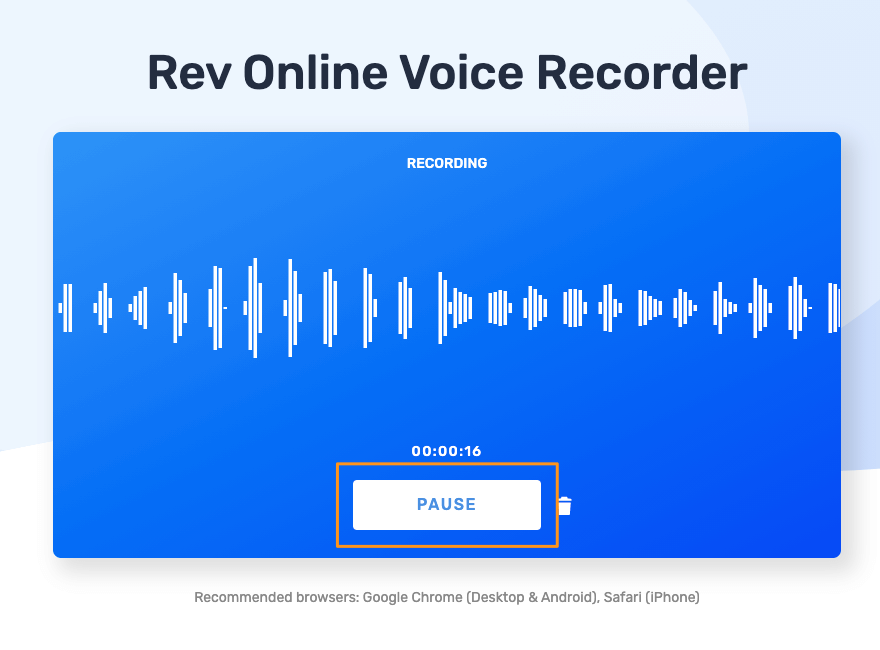
- Once you finish recording, click the same button to stop.
- Click “Save” to download your recording as an .mp3 file.
Step 2: Upload the Audio to Google Drive
Since Google Slides can embed audio from Google Drive, you need to upload your voice over files there.
- Go to Google Drive and click “+ New” button at the top left corner.
- Select “File Upload” and locate your saved .mp3 file.
- After the file is uploaded, right-click on it and select “Share.”
- Click “Change to anyone with the link” and then “Copy link.”
Step 3: Insert Audio into Google Slides
Now it’s time to insert your voice over into the Google Slides presentation.
- Open your Google Slides presentation.
- Click on the slide where you want to insert the voice over.
- Go to “Insert” > “Audio.”
- A sidebar will open with your Google Drive contents. Locate your uploaded .mp3 file and click “Select.”
Your voice over is now inserted into the slide. You can adjust settings like volume, start time, and whether the audio should play automatically when the slide is presented. Repeat these steps for each slide you want to add voice over to.
Adding voice over to your Google Slides presentations can greatly enhance your viewers’ experience and understanding. Although Google Slides doesn’t have a built-in feature to add voice overs, the process is still straightforward. By utilizing external tools such as Online Voice Recorder and Google Drive, you can create a dynamic, engaging presentation that caters to a wide range of audiences.
Looking for an amazing AI voice over tool to go with your presentation? Click here.

Gregg Brown is an actor, visual artist, and photographer with a passion for storytelling. Adept in various mediums, he shares his unique perspectives and experiences through his blog, artwork, and performances. Join him on his creative journey as he explores the world with his dog, Roman.
Similar Posts

Mastering Voice Over Casting Calls: Your Comprehensive, No-Nonsense Guide

How to Do a Voiceover on TikTok: A Step-by-Step Guide

How To Break Into Voice Over Acting in Los Angeles

How to Ace Your Loom Voice Over: Tips and Techniques

Jennifer Aniston: Amazing Voice Over Gigs You Never Knew About

The Best Voice Over Microphone For Acting Work – 2023
Disclosure: MyeLearningWorld is reader-supported. We may receive a commission if you purchase through our links.
How to Add Audio to Google Slides: Record Voice Overs, Narration, & More
Last Updated: 11/06/2023
By Scott Winstead
- Share on Facebook
- Share on LinkedIn
- Share on Reddit
- Share on Pinterest

Google Slides is a versatile tool with more than 800 million monthly users to create presentations, lectures, and more. But as an instructional designer who’s created countless online learning modules, I can tell you that even the best slideshow tool can’t overcome a boring, bland presentation, and a lot of times, that’s exactly what a presentation without audio is.
Audio can be a game-changer for any presentation. It can transform a run-of-the-mill slideshow into a captivating experience. While visuals convey information, audio adds depth, emotion, and impact to your message.
Google Slides does not have audio recording built-in, but the good news is it’s pretty easy to add audio to Google Slides. You don’t even need any technical skills really. To have a narration with your presentation, you have to create the audio file(s) separately and then upload the file(s) to add audio to your Google Slides. Or alternatively, you can use a screen recording plugin like VEED that will let capture your presentation on your desktop screen while you speak over it and record the whole thing to share with others.
Don’t worry — it’s easier than you might think. I’m going to show you exactly how to add voice and audio to Google Slides presentations.
Types of Audio You Can Add to Google Slides
Before I get into the step-by-step process of adding audio to a Google Slides presentation, let’s take a second to go over some ideas for the different kinds of audio you might want to consider using in your slideshow. Each type serves a unique purpose and can elevate your presentation in different ways.
Narration: Adding Voiceovers to Slides
Think of narration as your personal guide through the presentation. It’s your voice providing context, explanations, and insights as your audience navigates each slide. Whether you’re delivering a complex technical concept or sharing a heartfelt story, narration humanizes your content.
If you’re adding narration to a Google slideshow, make sure you focus on the following:
- Scripting: Craft a clear, concise script that complements your visuals.
- Tone: Adjust your tone to match the content—be it informative, enthusiastic, or empathetic.
- Practice: Rehearse your narration to ensure a smooth, engaging delivery.
- Recording Tools: Utilize quality recording tools and consider investing in a good microphone for pristine audio.
Background Music: Enhancing the Atmosphere
Background music provides ambiance and sets the mood. It can make your presentation feel dynamic, cinematic, or simply pleasant. The right music can keep your audience engaged and emotionally connected to your content.
Consider the following when adding background music to Google Slides:
- Genre: Choose music that aligns with your presentation’s theme and message.
- Volume: Ensure the music doesn’t overpower your narration or visuals.
- Transitions: Use music strategically during transitions to maintain flow.
- Royalty-Free Sources: Explore royalty-free music libraries for legal and diverse music options.
Sound Effects: Using Audio Cues for Emphasis
Sound effects can be a great tool for adding emphasis and engagement to your presentation. When used correctly (and sparingly), they grab your audience’s attention, highlight key points, or add humor. From subtle chimes to dramatic crescendos, sound effects can punctuate your presentation.
Consider the following when adding sound effects to Google Slides:
- Relevance: Ensure sound effects and audio clips enhance the content and align with your message.
- Timing: Precisely time sound effects for maximum impact, emphasizing key moments.
- Consistency: Maintain a consistent style, tone, and volume level with sound effects throughout your presentation.
- Moderation: Avoid overusing sound effects in your slide deck, as too much can be distracting.
4 Steps to Add Audio & Voice Over to Google Slides
- How to Use Google Slides →
- Matching Audio Narration with the Slide Presentation →
- Recording Your Voice →
- Adding Audio Files to Google Slides →
1. How to Use Google Slides
Google Slides is a powerful, cloud-based presentation tool that lets you create, edit, and collaborate on stunning presentations effortlessly. With intuitive features, real-time collaboration, and seamless sharing options, it's the go-to platform for crafting engaging and visually appealing slideshows.
Google Slides is a presentation program that is part of the Google Suite of productivity tools. It allows users to create, edit, and share presentations online.
Google Slides is similar to other presentation programs such as Microsoft PowerPoint and Apple Keynote. However, it has some unique features that make it a powerful tool for creating and delivering presentations, like its collaborative features and templates.
If you need a Google account and do not want a Gmail account, just go to Google.com and click the “Sign In” icon in the upper right corner of the browser window and then select “Create account” to set up a new account. You can link your existing email account to your Google account. It does not have to be a Gmail account.

Alternatively, you can get a free Gmail account and never use it except to give you access to Google Drive and Google Tools, including Google Slides, if that is all you want to do.

For the purposes of this tutorial, let’s assume you have a Google Slides presentation already made and you just need to add audio to it.
2. Matching Audio Narration with the Google Slide Presentation

If you want to use narration for a full continuously-playing slideshow, write the script that you will use for all the slides and then watch the slide presentation playback as a slide show to get the timing or your narration to match the progression of the slide as the slideshow plays. This is probably the trickiest part of the whole process.

You will want to edit your script and/or change the playback speed of the slides to match your audio recording of the narration.
Practice reading your script with the slides running in the slideshow mode until you can read the script perfectly .
It is easier to work with the audio file for a slideshow that plays without stopping if you can record the audio narration in one take rather than piecing a bunch of short takes together.
If your video presentation is long or the viewer uses self-pacing to manually click through the slides, you can break up the audio playback into sections or have a separate audio file for each slide. In that case, you need to make sure the audio recordings match, in terms of sound quality.
You want to listen to the audio playback carefully to be certain that the narration playback sounds nice and smooth to the listener. You want to avoid any abrupt volume or tonal changes between slides that may create a distraction or startle the listener.
Problems may arise if the audio recording sessions are in different places under different sounding conditions. To avoid problems, try to record in the same way and the same place if you plan to use separately recorded audio files together in the same presentation. Otherwise, not only will your audio potentially sound disjointed, but it could be an editing nightmare trying to get everything to blend together seamlessly.
3. Recording Your Voice

To record your voice, you can use a free-to-use recording application such as Audacity or a free recorder such as Movavi or another free online recorder. Also, most smartphones have an app to record your voice, which is easy to use.
Another option is to use VEED for more of a live presentation recording.
VEED is an app that has screen recording capabilities, which allows you to record a live voiceover to your Google Slides presentation and then save and share the video file with others. You can screen record on Windows or Mac with this plugin.
Be sure to record your voice in a quiet place with little or no background noises when trying to add audio to Google Slides presentations.
Speak clearly and directly into your voice over microphone in a clear natural voice – a headset microphone is great for this kind of narration work. Do not overdrive the recording by speaking too loudly and also do not speak too softly. Excessively quiet audio requires adding too much gain later (to increase the sound volume), which may introduce unwanted noise or distort your audio, making it difficult for your audience to follow along and even harder to create captions or a transcript with transcription software .

If you want to add background music or sound effects you will want to use a program like Audacity or another audio editing software to bring those things together into one audio file as a balanced audio mix. If you are getting serious about this effort, review our tips on how to create a professional voiceover recording home studio .
4. How to Add Audio to Google Slides
Once you create your audio file(s), then you upload the files to your Google Drive so that they are stored on the Google Cloud and available for Google Slides to access them. Most virtual conference platforms and webinar software will allow you to upload pre-recorded presentations with voiceovers.
Upload the Audio File(s)
To upload audio files to Google Drive, select the triangular Drive icon from the Google Tools menu (to see the tools menu use the grid button in the upper right-hand corner of your browser) and then click on the “New” button and select “File Upload” and then choose the audio file from your device. Wait for the upload to complete before you attempt to use the audio file.

Share the Audio File(s)
Share the audio file by right-clicking on its filename on Google Drive and then click on “Share.” Allow access to anyone with the link to remove restrictions on the use of this file. This gives access to the audio files to your Google Slides viewers. Be careful. This important step is often overlooked. When you share a Google Slides presentation without also sharing the audio files, your viewers can’t hear them.

Insert Audio File(s) to Google Slides
Open the Google Slides file that you want to use or create a new one. Choose the slide where you want to insert audio. Then, from the menu choices select “Insert” and scroll down to select “Audio.” Click the audio file you saved to your Google Drive to select it and then click the “Select” button.

After you insert audio into your Slides presentation, you will see a little speaker-shaped icon appear on your slide. You can play the audio by clicking on the speaker icon. You can change the placement of the speaker icon by dragging it to a different position on the page.
Audio Format Adjustments
Within Google Slides there are some basic sound adjustments available when you add audio files. When the audio object is selected you can click on “Format Options” in the toolbar. There you will see the default settings appear and the adjustments that can be made.
The adjustments include the volume of the audio file playback. You can choose whether the audio file will play automatically or if it requires a click to start it. If you choose “start playing automatically,” then you can also choose to hide the speaker icon since it is no longer necessary as the audio plays on its own.
You can also choose to loop audio if you want it to continuously repeat. You can stop the audio on a slide change if you only want the audio to be available for just one slide. If you uncheck this box not to stop audio on slide change, the audio will continue to play when the slide changes.

Audio Preview
While you are in the editing mode making slides, you can preview the inserted audio by clicking on the speaker icon and then clicking on the play button.

Watch this video by Stephen Kwiecinski. He shows three different ways to add a voiceover to Google Slides using Audacity.
BONUS for Teachers
New EdTech Classroom’s Sam Kay shows how to use free Google Slides Add-Ons to make interactive slide presentations. Add-Ons are made by third-party software developers to add features and make your slide presentations more interesting. He suggests you use Pear Deck to add audio to your slides.
Dos and Don’ts of Adding Audio to a Google Slides Presentation
Now that you understand how to add audio into Google Slides presentations, let’s go over some quick tips and best practices for using it:
These tips will save you from potential audio mishaps and elevate your presentation game.
- Do Script Your Narration: If you’re adding voiceovers, script them thoughtfully. A well-written script keeps your narration concise, on-point, and engaging. Practice your delivery to sound natural and confident.
- Do Balance Audio Levels: Ensure a harmonious blend of audio elements. Your narration should be clear and audible, while background music and sound effects should complement, not overpower.
- Do Time Sound Effects Strategically: Timing is everything with sound effects. Use them to emphasize key points or transitions. When executed right, they can add a dynamic touch to your presentation.
- Do Test Your Audio: Always, always test your audio setup before the actual presentation. Check for volume levels, audio quality, and any potential technical glitches.
- Do Provide Closed Captions: For inclusivity, consider providing closed captions for your narration. It ensures that your content is accessible to all audiences, including those with hearing impairments.
The Don’ts:
- Don’t Go Crazy with Sound Effects: It’s tempting to go wild with sound effects, but resist the urge. Too many can overwhelm your audience and detract from your message.
- Don’t Use Copyrighted Music Without Permission: Unless you have the rights or use royalty-free music, avoid incorporating copyrighted music into your presentation. You don’t want to deal with any nasty legal issues.
- Don’t Neglect Audio Quality: Poor audio quality is a presentation buzzkill. Invest in a decent microphone and record in a quiet space to ensure clear narration.
- Don’t Rush Narration: Speak at a steady, comprehensible pace. Rushed narration can leave your audience struggling to keep up.
- Don’t Distract with Inconsistent Audio: Maintain a consistent style and tone with audio elements throughout your presentation. Sudden changes in volume or style can be jarring.
Can you record audio in Google Slides?
No, Google Slides doesn’t currently have a built-in audio recording feature. However, Google Slides does have the option to insert audio into a presentation, meaning you can record your audio separately outside of Google Slides and add it easily.
Can you do voice overs on Google Slides?
Yes, you can add voiceovers to your Google Slides presentation by recording it separately and inserting it into the presentation. Once you’ve recorded your voiceover, you can insert the output file with just a couple of clicks.
Why can’t I add audio to Google Slides?
If you’re running into issues adding audio in Google Slides, it might be because you’re trying to use a file type that’s not supported or you don’t have the right permissions to add audio to your presentation. Make sure you’re using a supported file type and that you have the correct permissions for inserting audio and making edits before trying again.
What audio files can be added to Google Slides?
Currently, you can insert audio in Google Slides if it’s a .wav or .mp3 file type. Inserting audio files that aren’t .wav or .mp3 will likely result in an error.
Final Notes on Adding Audio to Google Slides
As you can see, it’s actually pretty easy to add audio to your Google Slides presentations. There’s no need to be intimidated, even if you never made any voiceover recordings. After a little bit of practice, you will quickly get the hang of how it all works.
It is fun to add audio and voice to your Google Slides, and it’s an easy way to create instructional videos .
As you become more confident you can learn how to mix in background music as well.
You can even add GIFs to Google Slides presentations .
Not a Google Slides fan? You can also easily add audio to PowerPoint presentations in a similar fashion.
If you have issues with syncing audio and video recorded separately check out 11 ways on how to do it .
Have more questions about recording voice overs? Check out our guide to the best voice over training courses to improve your skills.
Still need help trying to add audio to a Google Slides presentation? Comment below with your concerns so we can help you out.
Udacity Review: Are the Nanodegree Programs Worth the Money?
How to add a gif to google slides presentations: step-by-step guide, leave a comment cancel reply.
Save my name, email, and website in this browser for the next time I comment.

Home » Google Slides » How to Do a Voiceover in Google Slides
How to Do a Voiceover in Google Slides
Voiceover enhances the quality of your Google Slides presentation. It adds context and useful information to explain what is on the slides. This gives your audience a great experience. This tutorial shows you step-by-step how to do a voiceover in Google Slides.
8 Steps to adding a voiceover to a Google Slides presentation
Google Slides doesn’t have a built-in capability to record over slides. You can only add voiceover to google slides by inserting an audio file saved in Google Drive to each slide.
You can add a voiceover to your Google Slides presentation using the following steps:
- Create a Google Slides presentation
- Write a script for audio files
- Record audio files for each slide
- Trim and save the audio files
- Convert the audio files to a format supported by Google Slides
- Upload the audio files to Google Drive
- Insert audio into the slides
- Configure play settings
Let’s get started.
Step #1: Create a Google Slides presentation
Before you can add a voiceover to a Google Slides presentation, you first need to create it.
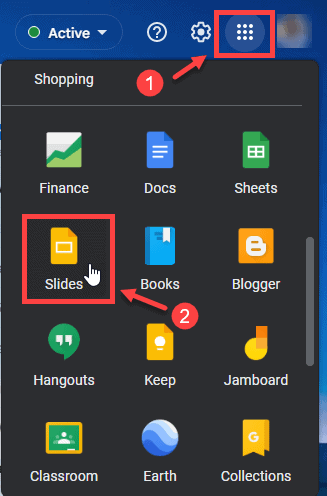
Click the Google apps button in your Google account, which looks like nine dots in a square.
Click the Slides app icon from the apps list to open the Google Slides home screen.
Click the colorful cross in the Google Slides home screen to create a new blank presentation.
Click a template in the Template gallery to start a new presentation based on a template.

Add slides, images and text to build your presentation.
Note: Another way to create a Google Slide presentation:
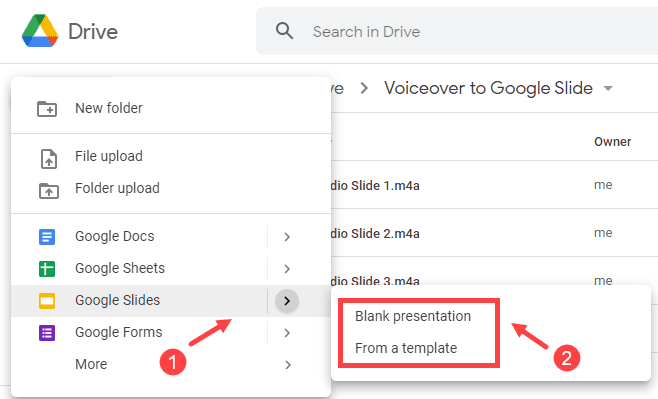
Open Google Drive.
Click + New in the top left of Google Drive.
On the shortcut menu, choose either Blank presentation or From a template .
Build your presentation by adding slides, text and images.
Step #2: Write a script for audio files
You clarify your thoughts and give structure to your content by writing a script.
Write a script as you refer to your presentation slides.
Give clear designations of where each segment of text goes.
For example, you can title the paragraphs, “Slide 1”, “Slide 2”, and so on. This helps you to know when to start and stop speaking while recording your audio.
The following is an example script:

Step #3: Record audio files for each slide
You can use the Windows Voice Recorder app or other preferred software to record audio clips.
Use a voice recorder such as the Windows Voice Recorder to record audio for each slide. Windows Voice recorder is a free app that comes with Windows. It has the necessary capabilities to record, trim, and share audio tracks. It can also flag important moments during recording.
We use Windows Voice Recorder App to explain how to record audio.
Ensure that you first connect a microphone to your computer.
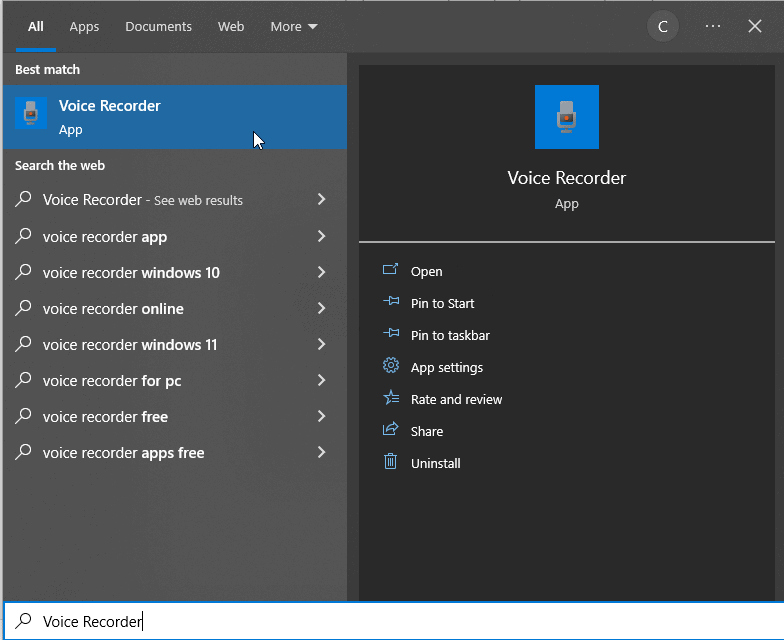
Open Start in MS Windows.
Search for Voice Recorder and click the top result to launch the app.
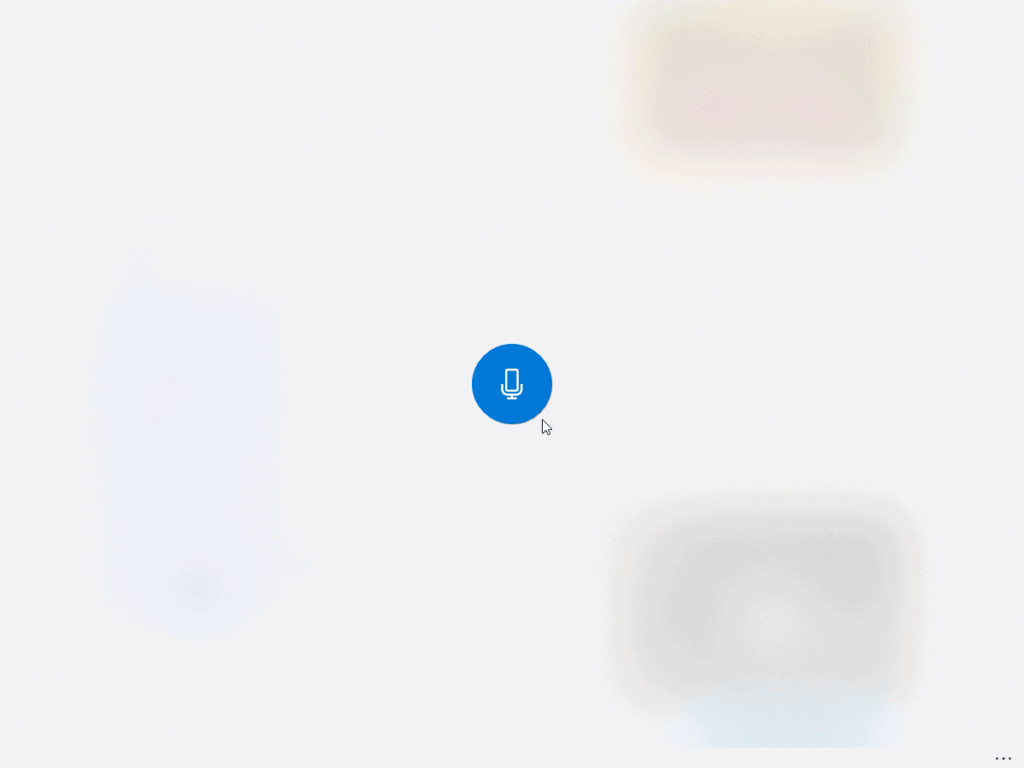
Click the blue button to start recording or press Ctrl + R to start recording.
Once the recording starts, you can click the Flag button to add a marker to the audio file. This option does not interrupt the recording. During editing, this marking feature helps you to move to important parts of the audio file.
Click the Pause button to stop the recording without ending the session. You can click on Pause again to resume recording. This will not split the audio file. It remains a single file.
Click the Stop button to end the voice recording or press the Esc key, Spacebar , or Enter key.
This saves the audio as a .m4a file in the Sound Recordings folder in the Documents folder.

The Voice Recorder app takes you to the editing screen when you press the Stop button. Click the Play button to listen to the recording and note the sections that need trimming.
Step #4: Trim and save the audio file
The Voice Recorder app takes you to the editing screen when you finish each voice recording.
Click on the Trim button to display the trimming handles.
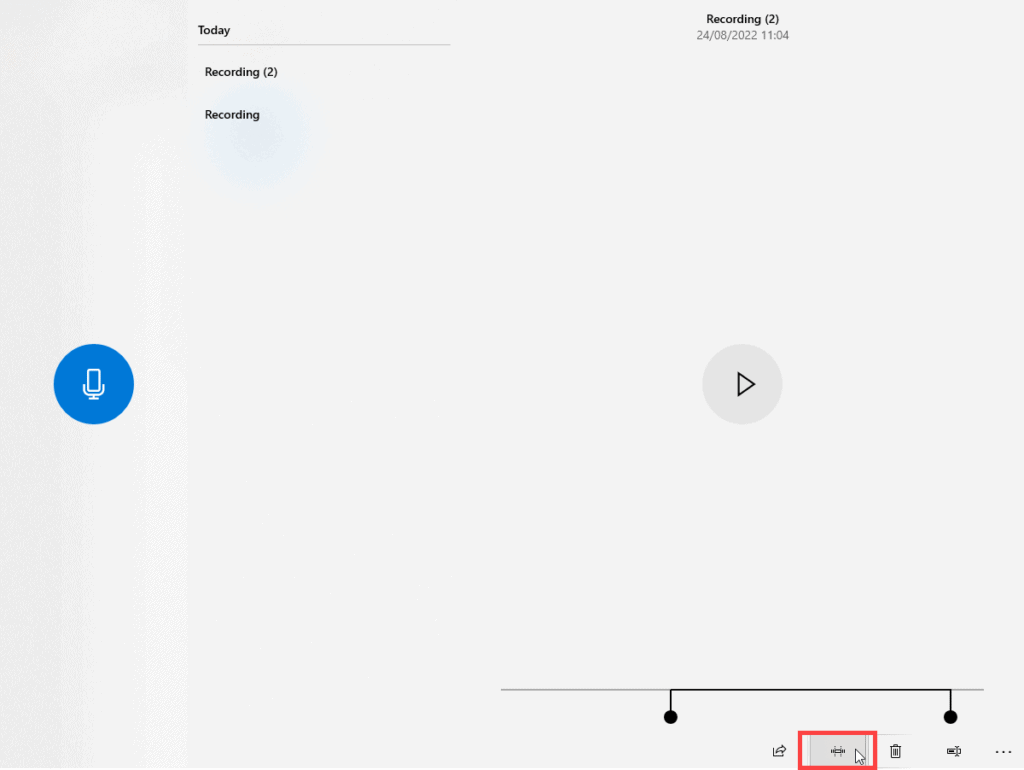
Click the blue handles and drag to trim the audio. We recommend that you trim the audio file to get rid of long pauses between sentences. These pauses are otherwise called “dead air.”
You also need to trim the start and end of your recording. This makes the audio start with the slide and end before you move to the next slide.

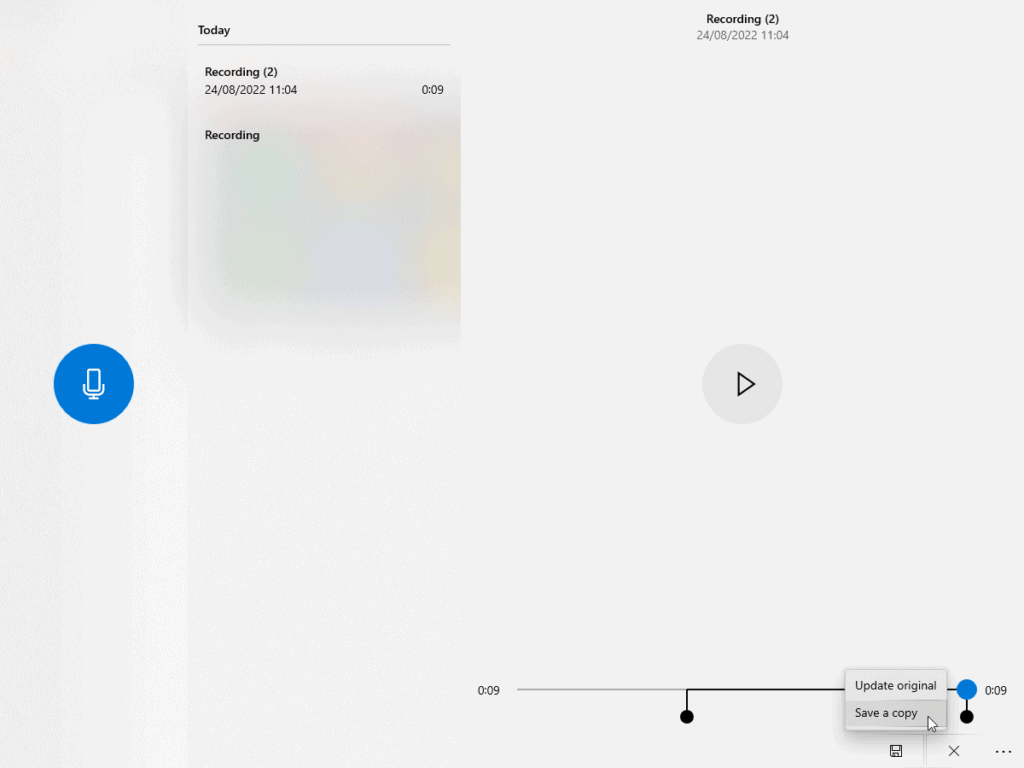
Save the trimmed audio file. We recommend that you Save a copy and keep the original file. You can later go back to it in case you made a mistake in the editing process.
Organize the audio files using a naming convention. This makes it easy to locate the audio file for each slide. For example, use slide numbers, such as “Audio Slide 1”, “Audio Slide 2”, and so on.
Step #5: Convert the audio file to a supported format
Google Slides only supports .wav and .mp3 audio formats. If your audio file is in any other format, convert them into a supported format. In this case, will convert the .m4a files into .mp3 format.
There are many converters out there that you can use to convert your audio from any format to .mp3 or .wav format.
We will use an Online Audio Converter to convert our audio files into .mp3 format.
Click the Open files button to find the audio clips you want to convert on your computer.

In the Open dialog box select all the files you want to convert. Do this by selecting the first audio, then selecting the last audio while holding down the Shift key.
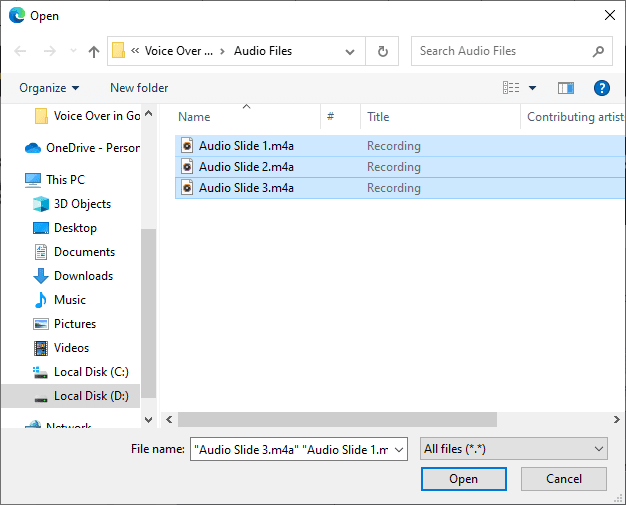
Click the Open button to upload the files.
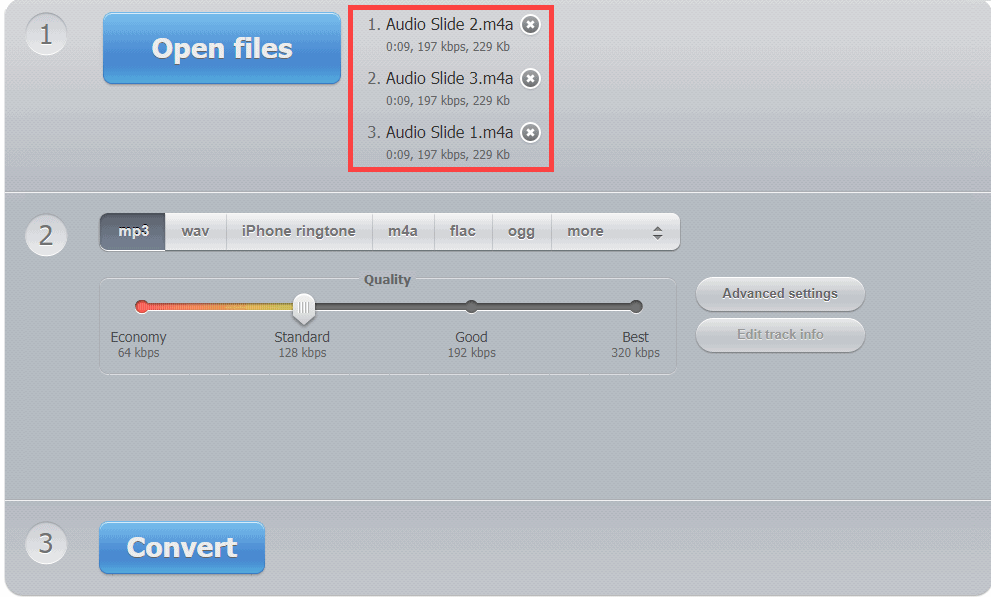
Select the mp3 format option and click the Convert button.
Download the converted files:

Step #6: Upload the audio files to Google Drive
To add an audio file to a Google Slide you must first upload it to Google Drive.
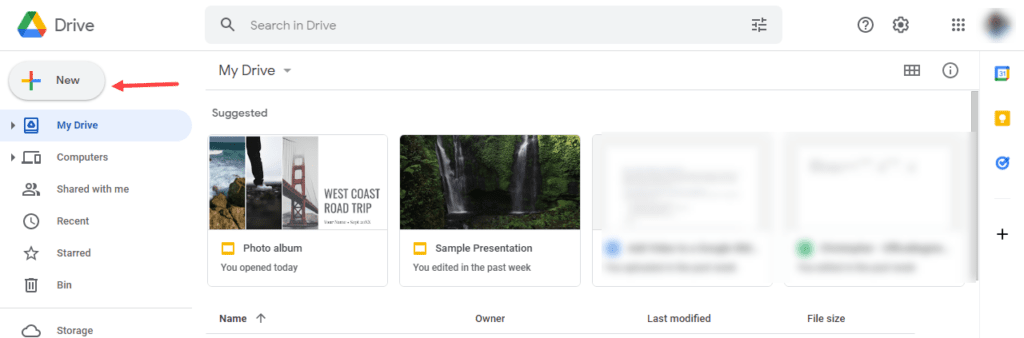
In your Google account click the Google apps button to open the Google apps list.
Then click the Drive app button to open Google Drive.

Click +New to create a new folder on Google Drive for your audio clips.
Click the New folder on the shortcut menu that pops up.

Type the name of the folder in the New folder box and click Create .
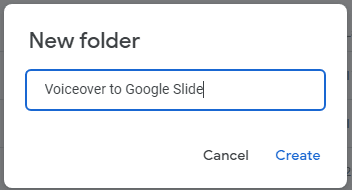
The new folder is created.
Double-click the new folder to open it.
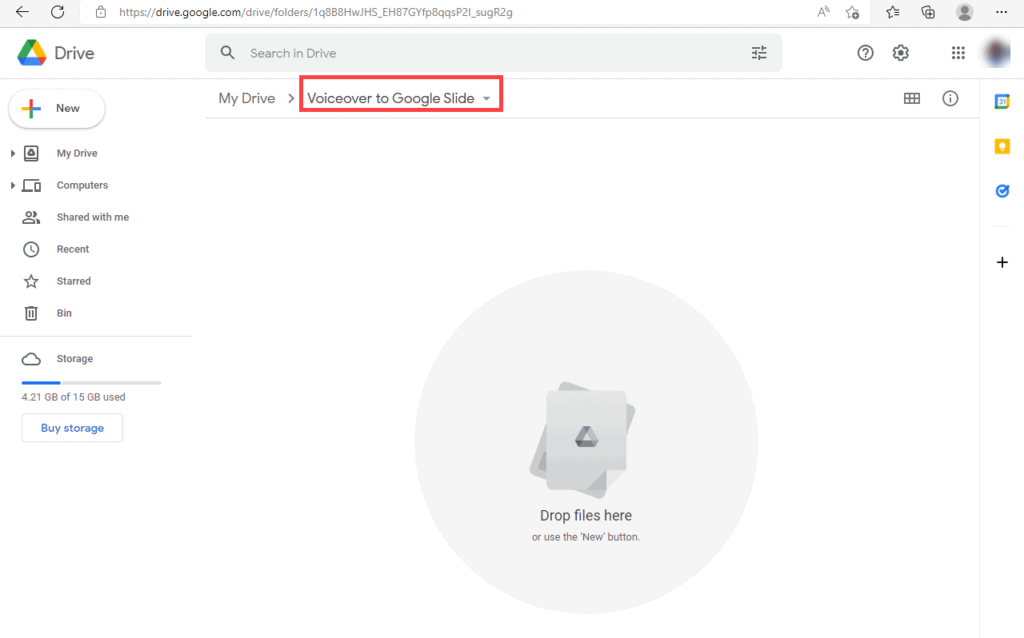
Click +New in the top left of Google Drive and click File upload on the shortcut menu that appears:
In the Open dialog box navigate to the folder where your audio files are stored.
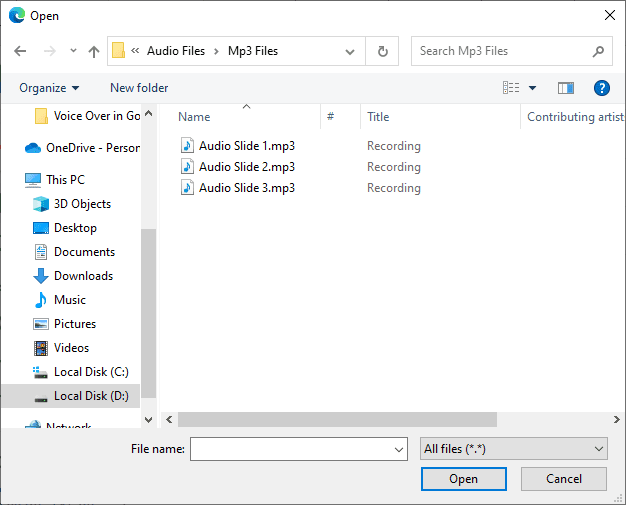
In the Open dialog box select all the files you want to use.
Do this by selecting the first audio, then selecting the last audio while holding down the Shift key.
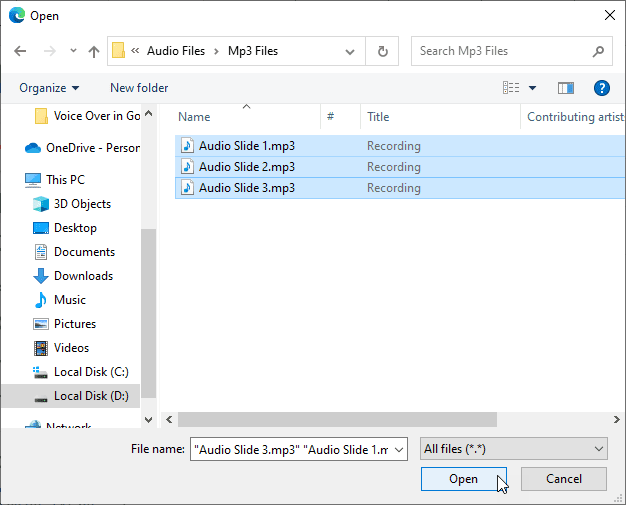
The files are uploaded to Google Drive.
You can also click and drag the audio clips to the folder in Google Drive.
Step #7: Insert audio into the slides
The next step is to insert the uploaded video into Google Slides.
Navigate to the Google Slides home screen and open the presentation you created in Step #1.
In the left navigation pane select the slide to which you want to add an audio clip.
On the main menu, click on the Insert tab.
Click the Audio option.
The files you uploaded should be under the Recent tab.
You can also locate them in the other tabs or use the search functionality.
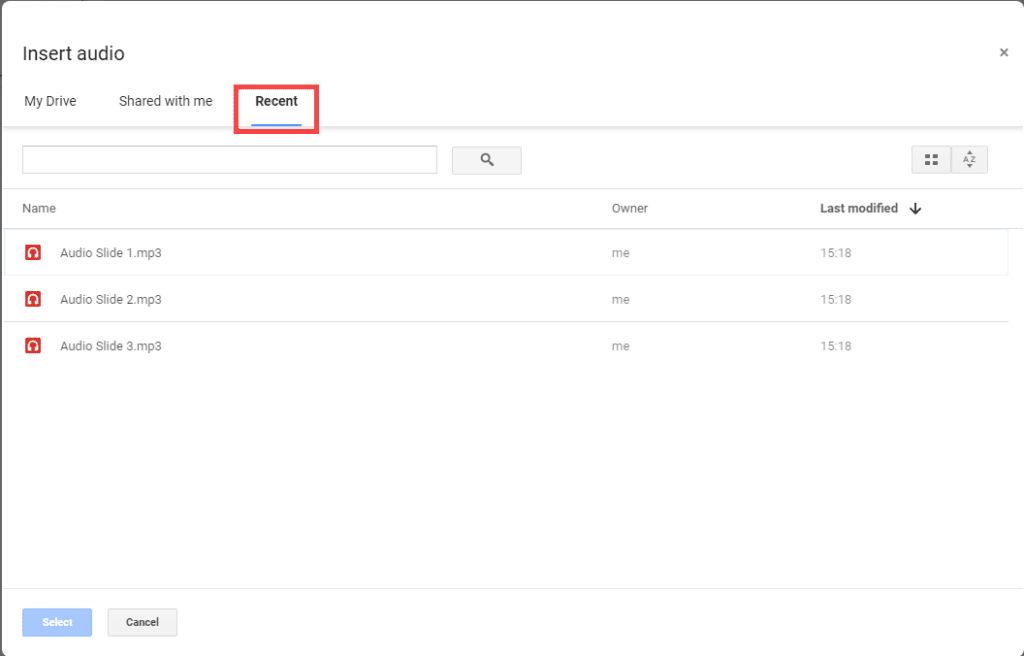
Select each audio file at a time and click the blue Select button to add to the relevant slides.

This adds the speaker icon to the slide.
When you click on the play button, more options appear. This includes the progress bar, volume controller and Format options pane on the right of the slide.

Step #8: Configure the play settings
You now need to set the Format Options.

Expand the Audio playback by clicking on the arrow next to it.
Select On click if you want the audio to play when the slide is advanced by clicking.
Choose Automatically if you want the audio to start playing with the slide.
Set the volume when presenting by sliding the blue dot left or right.
The Hide icon when presenting option hides the speaker icon during presentation mode.
If you check the Loop audio checkbox, the audio clip repeats when it comes to an end.
The Stop on slide change is checked by default. It means the audio clip stops playing when the slide advances to the next slide.
This tutorial explained step-by-step how to add a voiceover in Google Slides.
The quality of your presentation is enhanced by voiceover. This gives your audience a great experience and ensures the wording that accompanies your slides is perfect.
Leave a Comment Cancel reply
Save my name, email, and website in this browser for the next time I comment.
- Video Marketing
- Case Studies
- Create a video

How to Add a Voiceover on Google Slides: A Quick Guide

Guru - July 10, 2023 - Leave your thoughts. 5 min read
add voiceover to presentation , animaker voice , google slides , voiceover
Creating a presentation is like creating a beautiful piece of art. It requires skill and creativity to put together an impressive presentation.
One effective way to make your presentations stand out is by adding voiceovers to your Google Slides!
Voiceovers are like narrations/recordings of a person speaking, and they can make your presentations more engaging and captivating.
Whether you want to explain a concept or share a story, voiceovers can bring life to your slides.
In this blog, we'll show you just how easy it is to add a voiceover on Google Slides.
If you already have a voiceover, you can jump to this section - How to add voiceover to Google Slides with existing audio files.
If you want to create a voiceover from scratch, you can switch to this section - How to create a voiceover and add it to Google Slides.
So, let's get started!
How to add voiceover to Google Slides with existing audio files:
For you to add an audio file to your Google Slides presentations, it must be in MP3 or WAV audio format.
If you already have the voiceover for your slides in the correct format, the steps to use them in google slides are very straightforward.
Here they are:
Step 1 - Upload the voiceover to Google Drive
First, open your Google Drive. To upload an audio file, click on the New button at the top left corner of the window.
Next, select the File Upload option from the dropdown menu.
Alternatively, you can drag and drop the audio file onto the browser window with Google Drive open.
Step 2 - Insert the voiceover
Now open your Google Slide where you want to include a voiceover. Then click on the 'Insert' option in the top menu.
From the dropdown menu, select 'Audio.'
Under My Drive, browse and select the audio file you wish to add and click on ‘Insert.’
Step 3 - Customize/Preview the voiceover
After inserting the audio file into the Google Slides presentation, a speaker icon and a small audio player widget will appear on the slide.
To play the audio when you are presenting your slideshow, simply click on the speaker icon.
You can drag the speaker icon and position it anywhere else on the slide if desired.
You can further customize the voiceover playback using the audio format options on the right side.
In the format options menu, you get options that allow you to alter the volume at which you want the audio to play when you are presenting.
You can also choose when to start playing audio while presenting. You can choose between ‘on click’ and ‘automatically’.
If you choose to play on click, the voiceover in the slide will start playing only when you click after landing on that particular slide. If you choose to play automatically, the voiceover in the slide will start playing automatically when you present that particular slide.
Spend some time on these options and figure out which one works best for your presentation.
And Voila! You have successfully learned how to add voiceovers to Google Slides in simple steps.
Alright. Now that you have learned how to upload your existing voiceover to your Google Slides, let’s quickly jump onto how to create voiceovers for your Google Slides from scratch.
How to Create a Voiceover and Add it to Google Slides
If you don’t have a voiceover already, don’t worry! We will help you create one in just a few steps.
You can record the voiceover using a voice recording tool if you feel comfortable using your own voice.
In such a case, we suggest you try online voice recording tools like Rev and Veed or use offline voice recording software such as Apple’s GarageBand or Audacity , whichever is convenient.
In this article, we’ll cover how you can record a voiceover using Rev’s free online voice recording tool.
Record a Voiceover for Your Google Slides Presentations in 4 Simple Steps using a Free Voice Recorder App:
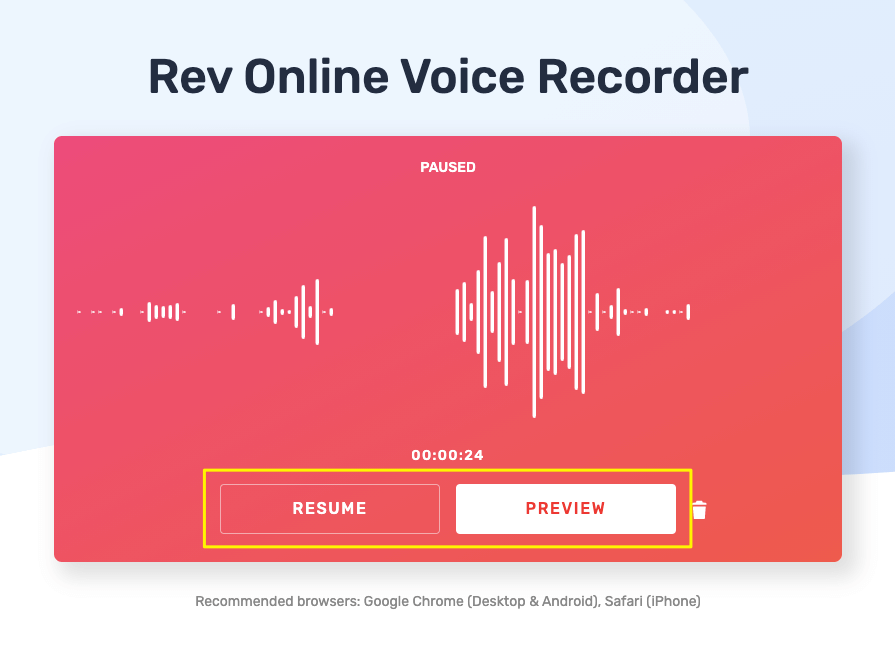
Step 1: recording your voice.
Step 2: Take a pause from recording
As you are recording, you can pause the recording by clicking on the Pause button.
Step 3: Resume and Preview the recording
You can then resume recording by clicking on the Resume button or preview what you’ve recorded by clicking the Preview button.
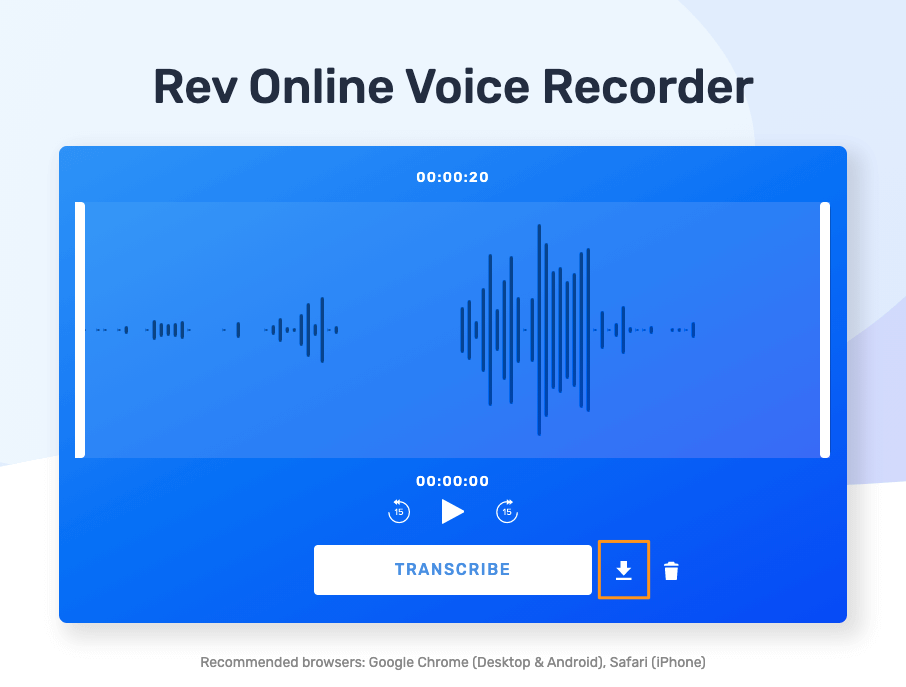
Step 4: Download the recording
Clicking on the preview button will take you to a window where you can preview, transcribe, or download the recording.
Click the download icon next to the transcribe button to download the recording.
In this way, you can easily record your voice, download the voiceover as audio files, and use them in your Google Slides directly.
Once you have successfully created your voiceover, head to this section - How to add voiceover to Google Slides with existing audio files.
This is the easiest way to create and add your own recorded voiceovers to your Google Slides.
However, if you feel it’s better to have a professional voiceover in your Google Slides, jump to the next section, where you can learn more about creating realistic voiceovers using a text-to-speech application.
Create Realistic Voiceovers Using Text-to-Speech App - Animaker Voice
If you are uncomfortable using voice recordings in Google Slides, you can opt to create realistic voiceovers using text-to-speech applications like Animaker Voice .
Animaker Voice uses the AI-powered NTTS (Neural Text To Speech) model to generate ultra-realistic, crystal-clear audio narrations just from your scripts.
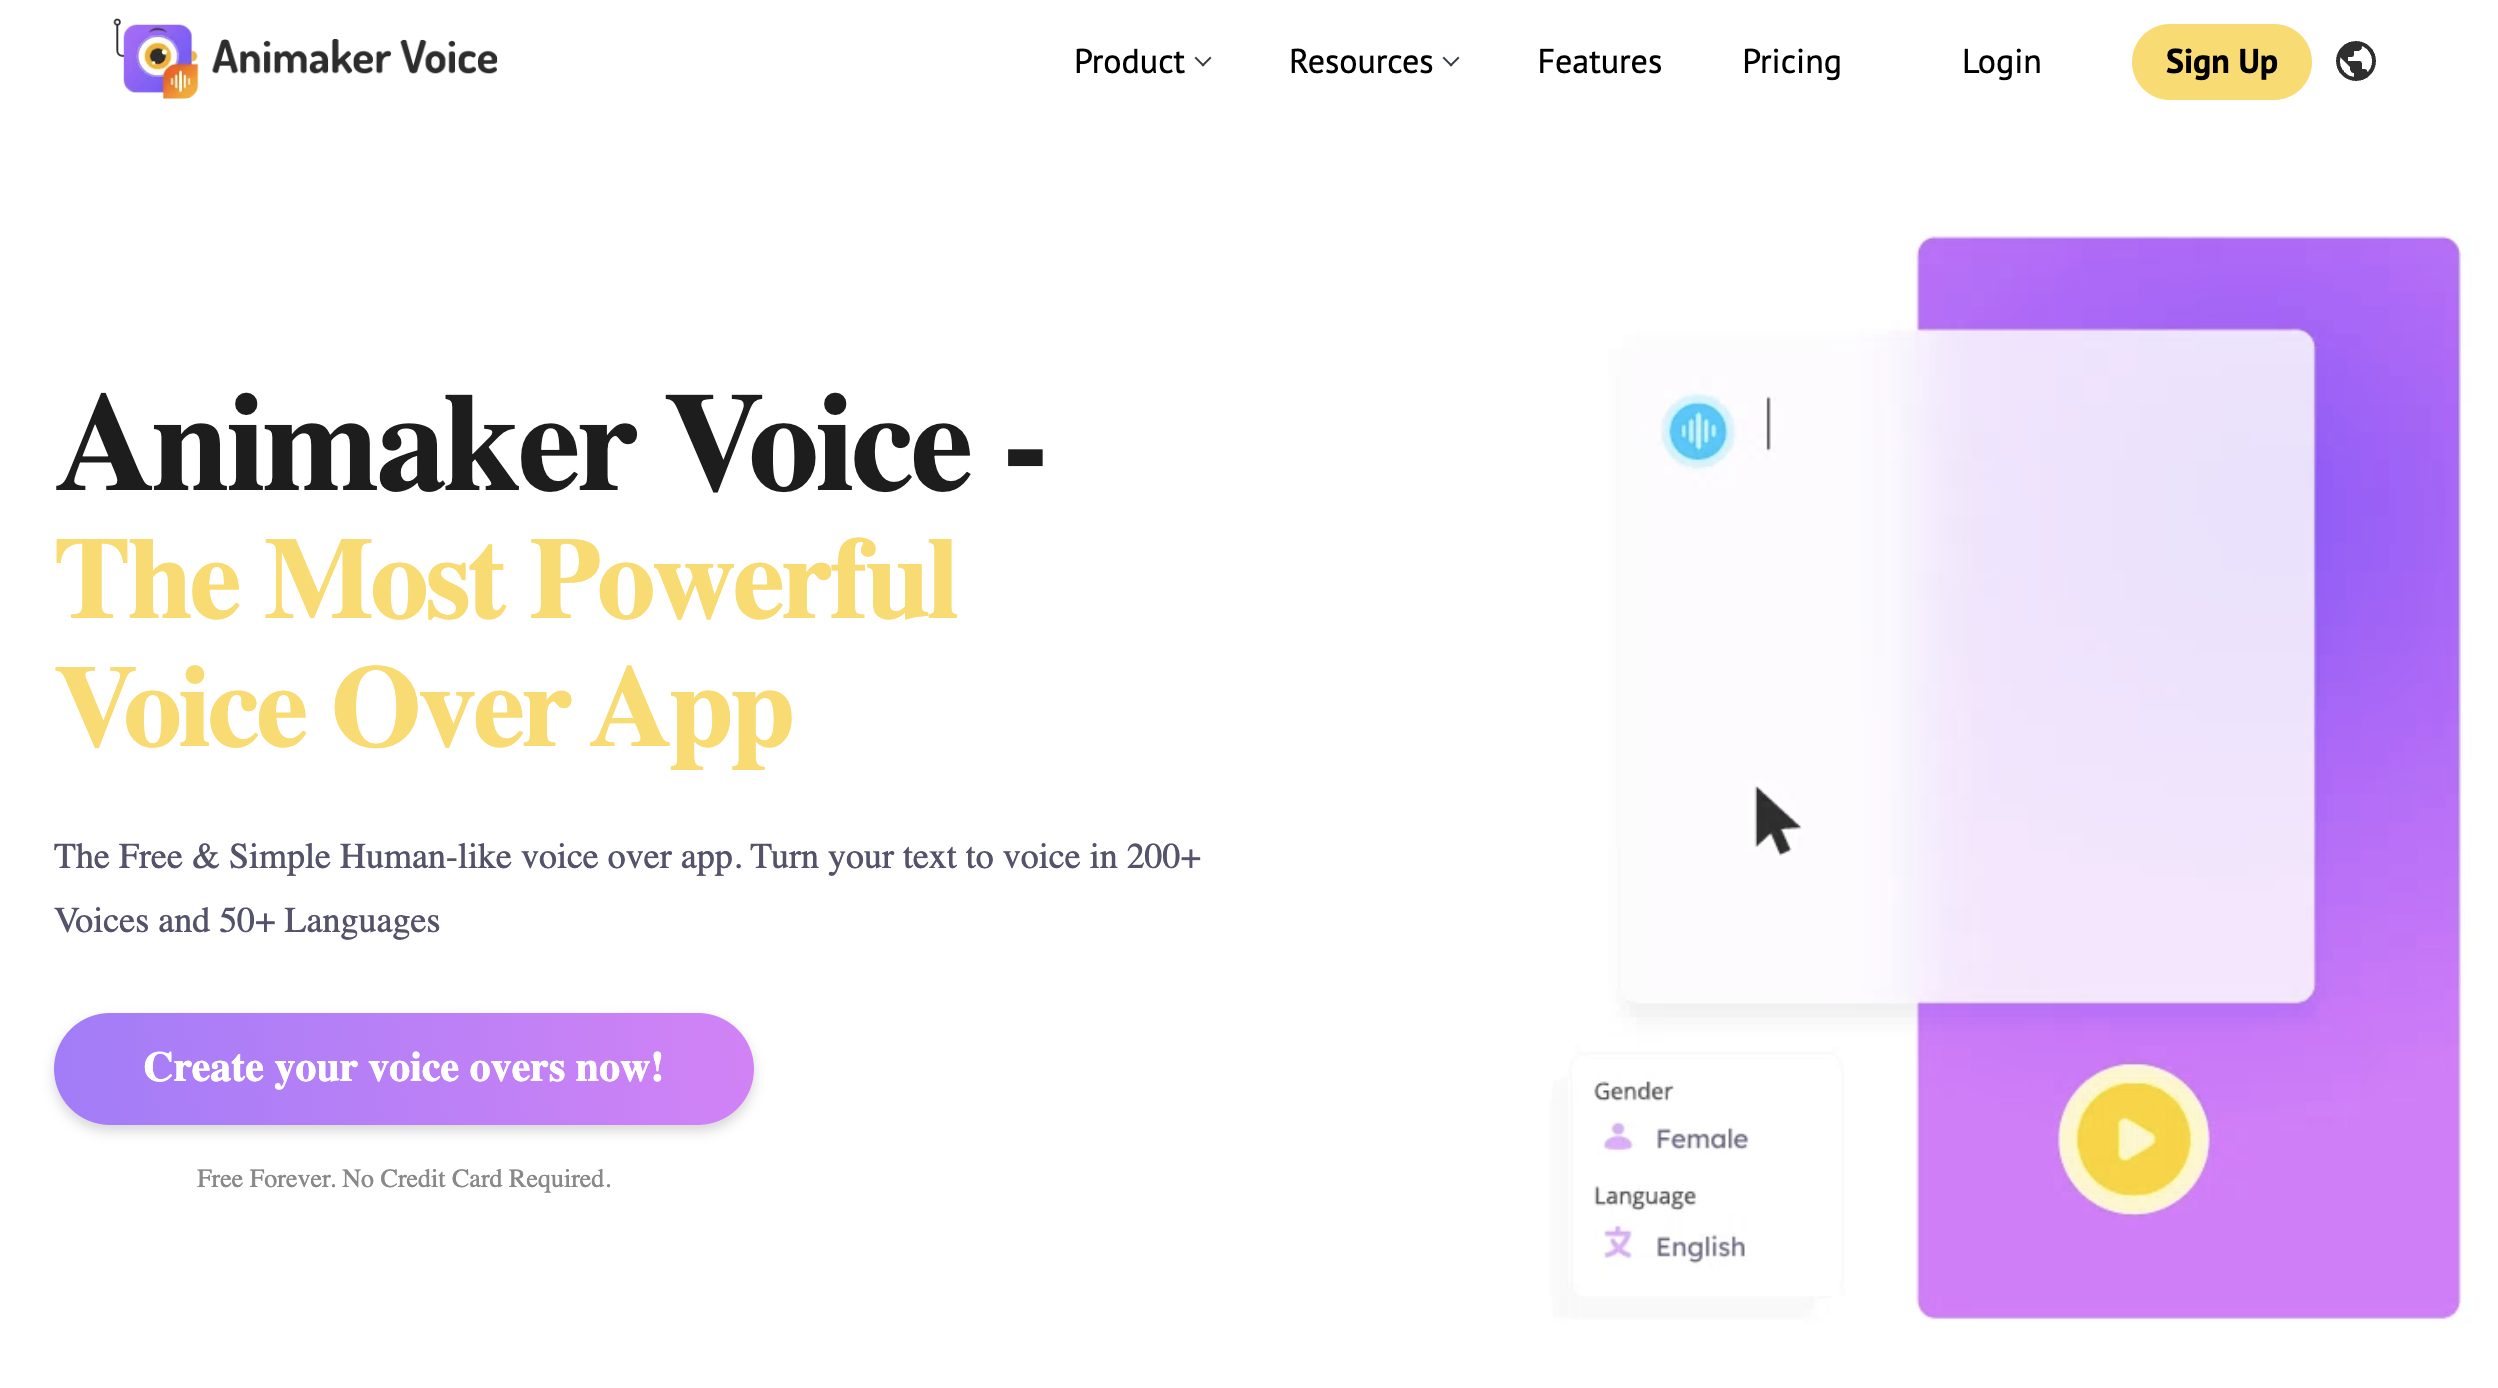
You can create a computer-generated voice just from text instantly once you signup for Animaker’s free account.
Check out this video tutorial to convert your script to speech in the Animaker Voice text-to-speech app .
Without spending a lot of money and time, it’s very straightforward to create a super realistic voiceover just from text and add them to your Google Slides.
Once you have successfully created your TTS voiceover, head to this section - How to add voiceover to Google Slides with existing audio files.
Do you know any other exciting hacks on how to add great voiceovers to your presentations on Google Slides?
Please let us know about them in the comment section below.
Related Posts
How to Make a Perfect YouTube Channel: An Expert Guide
How to Promote Your Videos Using Facebook? [Video]

How to Promote Your Videos on Instagram? [Video]
Subscribe to get awesome DIY tips that could break the boundaries of other DIY tools.
Create Engaging Animated Videos On Your Own
Our drag-and-drop builder makes it easy for anyone to create pro-level animated videos using pre-made templates and ready-to-go assets with zero technical skills.
How to Add Voice Over to Google Slides: A Step-By-Step Guide

Baidhurya Mani
Hey there! I’m Baidhurya, the brains behind SellCoursesOnline. I used to run a digital agency, where I helped course businesses launch their eLearning platforms. I also led the tech and marketing teams at StationX, helping it grow to 500K+ students. In addition, I created the popular supply chain network design course. With 8+ years of experience, I’m here to share my expertise and insights on course creation and platforms with you.
Google Slides has, over time, become a worthy competitor to PowerPoint. It is easy to use, allows for seamless collaboration, and offers a vast selection of templates, add-ons, and extensions.
While Google Slides is a robust application used by all types of people, it is missing one critical thing: a voice recorder .
There will be times when you want to do a recorded presentation rather than doing a live one, and for that, you need the ability to add audio to Google Slides.
Moreover, adding a voice over to your presentation can be a great way to create a video for your online training or workshop.
So, we have created this step-by-step guide to show you how to add voice over to Google Slides. We’ll cover two different approaches here, and you can choose whatever works best for you.
In the end, we’ll also share some pro tips on how you can level up your voice over and make your video presentation more engaging.
Let’s get started.
Option 1: Adding Narrations & Voice Overs To Google Slides
To add audio recording to Google Slides is quite straightforward. It involves recording using an external voice recorder and inserting an audio file from your Google Drive into your slides.
NOTE: This first option will be ideal for those who are looking to create a presentation with voiceovers, but if you want to create a video using Google Slides, you can go directly to Option #2 .
Now, if you have your audio ready, you have already won half the battle. Otherwise, you’ll need to record the voiceovers using a third-party recording app.
Just follow the steps below, and you should be up and running fairly quickly.
Record Your Voice
If you want to add narration to a slideshow, begin by writing a script for each slide in your slide presentation.
It goes without saying that your audio quality could make or break your presentation, so make sure to record in a quiet place and use a quality microphone.
There are numerous audio recording applications that you can use, with sophisticated options such as Audacity , which have a bigger learning curve.
There are simpler tools that fit the purpose, such as Voice Recorder on Windows and Voice Memos on Mac.
Once you find the application and microphone that’s best for you, record your voice over and while exporting, make sure the audio format is either MP3 or WAV to be compatible with Google Slides.
Upload Audio Files To Google Drive
Once you have your audio files ready, open Google Drive, choose New from the Tools menu, locate the File Upload option, and select the audio file(s) you want to upload.

Once it gets uploaded, right click on the filename and select the Share option.
Remove any restriction on its use by allowing access to everyone with a link. This will make sure anyone who receives the presentation can listen to the audio files as well.

Insert Audio into Google Slides
First, open the Google Slides presentation you want to add the voice over to and select the slide in which you wish to insert the audio file.
From the Insert menu, select Audio and pick the audio file from Google Drive.

Once you click on the Select button, a tiny speaker-shaped icon will appear on your slide.
Clicking on this icon will play the audio file, and you can change its placement by dragging it to a different location on the slide.
While working with the slides, you can preview the audio you just inserted from the Drive by clicking on this speaker icon and then clicking the Play button.
Configure Your Audio Settings
After adding the audio file, you can make some basic audio adjustments to control how the audio plays during the presentation.
Click on the Format Options from the toolbar while keeping the audio icon on the slide selected. A window with default settings and adjustment options opens up.

You can adjust the audio playback volume and whether the audio file should play automatically or need a click to start playing.
If you decide to play the audio on clicking, the viewer can choose to listen to the audio during the presentation, and it won’t play automatically.
If you set the audio to start playing automatically, you can hide the mini-player icon as it is no longer needed.
There is a Loop option you can select if you want the audio to repeat continuously. To keep the audio playing for just one slide, select the option to stop on slide change. If you don’t check this option, your audio will keep playing on the next slide as well.
Now, you can repeat these steps for each of your slides and test the presentation to ensure everything works as intended.
Option 2: Record Your Video Presentation with a Screencast Tool
The second option to add voice over to your Google Slides is to use a screen recording solution. With this approach, you record everything on your screen, including your presentation and your microphone feed.
If you want to make a standalone video for any purpose rather than just add an audio file in Google Slides, you should take this approach, and this will work very well for most people because:
- Making a screencast is pretty straightforward.
- You can record your webcam if you want.
- With certain tools, you have the option to edit and enhance your video.
While there are many screencast software in the market, and you can use whatever you prefer, we’ll cover two solutions in this guide: Zoom and Camtasia .
While Zoom is an online meeting app that allows you to record your session, Camtasia is a specialized screen recording and editing software.
Record Using a Free Tool Like Zoom
The cheapest and the easiest way to record your Google Slides is to join a Zoom call, turn your mic on, share your screen, and press the record button.
It also lets you record your webcam, and once the call is over, Zoom will save the recording on your computer.

This method is great for doing a quick screen recording and works very well if you have to record just a few slides and a short narration.
Moreover, Zoom recording is ideal for when your presentation involves conversations with more participants or has multiple people explaining the different aspects of the presentation.
Record Using a Screencast Software Like Camtasia
So that you know, Zoom doesn’t have any video editing or enhancement capabilities, and you need to get the recording right in one shot.
Say you’re recording a video for an online course and want a highly professional final product, Zoom won’t be the best option for you, and in this case, you should use specialized software like Camtasia.
Camtasia is an all-in screen recording software that gives you more flexibility while recording and comes with a powerful video editor.
Using Camtasia is straightforward, and you’ll need to download its Windows/Mac desktop app.
Once you launch the Camtasia recorder, you need to select the screen area you want to capture, select the right microphone, and then hit the Record button.

You can pause and resume during the recording, and you can stop the recording when you’re done.
However, the real power of Camtasia comes into play in the post-production phase. Here are some popular edits people do in Camtasia:
- Remove unnecessary portions or mistakes
- Add background music and insert external recordings
- Remove background noise
- Add audio effects like compression, adjusting clip speed, etc.
- Add annotations and callouts
- Apply animation & zoom effects
- Remove video background using green screen
Overall, this option gives you maximum flexibility while recording your video using Google Slides presentation and is best for professional video creators.
Bonus Tips: Take Your Video Presentation to the Next Level
In this section, I’ll share some pro tips on how you can take your video presentation to the next level. You may or may not need everything that’s included here, so decide accordingly.
Record High-Quality Voice Over
Audio quality can make or break your presentation/video. So when you’re planning to do a voice over, the first consideration should be recording quality audio .
Ensuring that your narration sounds smooth to the listener will enhance the presentation’s appeal and avoid unnecessary distractions.
However, recording clean audio and getting rid of background noise can be a challenge.
So, here are some simple tips you can use to make sure your Google Slides voice over is clear, crisp, and without any background noise.
Optimize Your Recording Environment
The best way to avoid noise in your recording is to keep the recording environment as quiet as possible:
- Pick a quiet room with as little background noise as possible.
- Close all the doors and windows to avoid any external noise.
- Make sure to turn off the fan, air conditioner, etc.
- Cover your walls and other hard surfaces with curtains and blankets.
I like to do a test recording of the natural sound in my room (without speaking) for about 10-20 seconds. Then I listen to the recording and try to identify the source of the noise to eliminate them.
Use A Noise Cancellation App
Another effective way to remove background noise while doing a voice over is to use a noise cancellation app like Krisp.
Krisp is an AI-powered noise cancellation app that adds a virtual filter between the microphone and your recording application to avoid background noise.
It works with all the recording tools, including Zoom, Camtasia, Audacity, etc., and you can use it on both Windows as well as Mac.
Remove Noise Using a Video Editor
When you record your narration and sound with a video editing tool like Camtasia, it is easy to get rid of background noises. It comes with built-in noise removal to help you get clear audio.
Camtasia lets you remove unwanted noise from your audio file by simply adding its Noise Removal effect onto the track containing background noise.
You can either automate noise removal with its Analyze function or adjust the sound quality manually with Amount , Reduction , and Sensitivity settings .
Record Audio and Video Separately
When you add voice to Google Slides presentation, its appeal increases, but you must create a narration that is in sync with the content presented on the screen.
The strategy that has worked very well to achieve this is to record the video and the audio separately.
The first step in this process is to write a script for your entire presentation. Then run the slideshow and practice reading the script until you can speak perfectly.
Once you’re ready, record the audio using the script in a single take as it is easy to work with one audio file vs multiple.
Finally, record your screen while going through the slide presentation and save it separately as a video file.
Now, you can easily sync the audio and the video using Camtasia. Its timeline feature and multi-track editing capability make it easy to work with multiple files like these.
Add Background Music to Google Slides
While a high-quality voice over can make your presentation engaging, adding subtle background music can crank it up a notch. The key is not to overdo it and instead use it carefully.
If you want to add background music with narration to your presentation, you need to work your way around some third-party apps.
The first option is to use an audio editing tool like Audacity to create a mix of narration, music, and sound effects before uploading the audio file to Google Drive and inserting it into your Google Slides.
Another workaround is to embed a video in the slides to not be visible during the presentation.
- To integrate narration with background music, use a free tool like Audacity to convert the audio into a video file.
- You can add your background music and any sound effects to this file before conversion. Then, upload the video to YouTube or Google Drive.
- Next, choose Video from the Insert menu of Google Slides and select the file from the Drive. You can alternatively switch to the By URL option and paste any YouTube video link to use a pre-existing sound.

- Once you embed the video into the slide, right click on the video and select Options. Find the setting for auto-play to adjust it to match the slide presentation. You can also set the video start and end time to synchronize the sound with your narration.
- As you want to play the video in the background, you should hide the player from the slide. To do this, select the video and use the resize handles to make the player too small to get noticed.
Use AI Text-To-Speech Voiceover
In certain scenarios, you may not want to add your voice for recording the narration, and in this case, you may consider using an AI-based Text-to-Speech app for your voice over.
Such tools were once considered tacky, but the technology has improved significantly over time, and they can provide an almost human-like voice for your recordings.
My favorite AI voice over tool is Murf.ai , as it makes it super easy to create a voice narration.
You can either type the script or upload your own voice recording to get a studio-quality recording for your video with this app.
Murf.ai simplifies matching the timing of your voice with the slides. You can add pauses, change the pitch and speed to time the voice over perfectly with the presentation, and eliminate any need for post-processing.
Just keep in mind that you can’t expect a 100% natural AI voice, but if you’re unwilling to use your voice and don’t want to spend more money on a voice over artist, Murf.ai can be of great help.
While it’s not possible to record audio on Google Slides natively, adding a voice over is pretty simple. Based on your use case, you can choose one of the two methods covered in this guide.
If you want to do a regular presentation with some audio content, you should follow the first approach. In this case, you record the audio separately and insert it into your Google Slides presentation.
On the other hand, if you want to record a standalone video using your presentation, you should take the second approach of using a screencast software.
Regardless of the method you use, adding voice over to Google Slides can turn it into an engaging experience for your audience.
And once you get better with the process, you can elevate your content to the next level by following some of the tips shared in the last section.
I hope this guide helped you learn how to add voice over to Google Slides. If you have any questions, please leave a comment below.
About The Author

Related Posts

How to Sell Online Courses From Your Own Website (2024)

How to Make Certificates of Completion for Your Courses for FREE

10 Best Screencasting Software in 2024 (With Free Options)

The 7 Best Video Hosting Platforms You Need to Know (2024 Guide)

Online Course vs Membership Site: Which One Is Right for You?

How to Screencast: The Complete Video Creation Guide
How to Record a Google Slides Presentation with Voice Over
Table of contents, what does recording a google slides presentation with voice over mean.
Adding a voiceover to your Google Slides presentation means recording audio narration that plays in sync with your slides, providing an engaging storytelling element that can explain or enhance the visual content.
The Top 10 Scenarios Where Your Presentation Needs That Extra Oomph
Online courses: Create educational content that students can access anytime, anywhere.
Marketing presentations: Add a persuasive narration to your sales pitch.
Product demos: Explain the features and benefits of your product in detail.
Training sessions: Provide clear instructions for new employees or software users.
Conference talks: Share your knowledge with a broader audience, even if you can’t be there in person.
Portfolio showcases: Let your work speak for itself, literally, by explaining your creative process.
Webinars: Enhance your virtual presentations with clear and concise narration.
Internal meetings: Make your reports and updates more engaging for your team.
Customer testimonials: Add a personal touch to your customer success stories.
Personal projects: Create memorable presentations for weddings, birthdays, or other special occasions.
5 Ways to Make Your Presentation Speak for Itself
Use a screen recording tool.
Embed audio files directly into your slides.
Record voiceovers within Google Slides or PowerPoint.
Use professional voiceover services.
Leverage video editing software for more complex presentations.
Step-by-Step Guide: How to Do a Voiceover on Google Slides Using a Screen Recorder
Prepare your slide deck and script.
Select a screen recording tool that suits your needs.
Open your Google Slides presentation and start the slideshow.
Click the record button on your screen recording tool.
Begin your presentation, by speaking clearly and concisely.
Save your recording and embed it into your Google Slides presentation.
How to Add Voiceover to Google Slides with Existing Audio Files
Prepare your Google Slides presentation and audio files.
Click on “Insert” and select “Audio” from the dropdown menu.
Choose your audio file from Google Drive and click “Select.”
Customize the audio playback settings according to your preferences.
Save your presentation and test the audio to ensure it plays correctly.
How to Add Voice-Over to Google Slides & PowerPoint
Prepare your presentation in Google Slides or PowerPoint.
Record your voiceover using a recording tool or select an existing audio file.
In Google Slides, click on “Insert” and select “Audio.” In PowerPoint, click on “Insert” and select “Audio” from the “Media” group.
Customize your audio settings and save your presentation.
Test your presentation to ensure the voiceover plays correctly.
The 5 Steps to Add Audio & Voice Over to Google Slides
Prepare your presentation and audio files.
Click on “Insert” and select “Audio.”
Customize your audio settings according to your preferences.
How to Insert an Audio into a Slides Presentation
Open your Google Slides presentation and click on the slide where you want to add audio.
Test the audio to ensure it plays correctly.
The Benefits of Adding Voice Over to Your Google Slides Presentation
Adding a voiceover to your Google Slides presentation can enhance your audience’s experience, making the content more engaging and easier to understand. It also allows you to convey your message more effectively and adds a personal touch to your presentation.
How to Record a Presentation on Google Slides in 6 Simple Steps
Prepare your presentation and script.
Choose a screen recording tool that suits your needs.
Begin your presentation, speaking clearly and concisely.
Try Speechify Slides
Pricing: Free to try
Speechify Slides is the best AI slide editor for individuals and teams. Create stunning presentations, add text to speech , voice overs, royalty free background music and free stock images. All your projects are free to use for personal or commercial use.
Top Features : Templates, text to video, real-time editing, resizing, transcription, video marketing tools.
Speechify is clearly the best option for your slides or presentations. It also provides seamless integration with the Speechify Studio suite of AI products for people who need to create stunning videos and voice overs. Perfect for teams of all sizes.
Frequently Asked Questions:
Can you record a google slides presentation with audio.
Yes, you can record a Google Slides presentation with audio using a screen recording tool or by embedding existing audio files directly into your slides.
How do you record a presentation with voice over?
You can record a presentation with voice over by using a screen recording tool or by embedding existing audio files directly into your slides.
- Previous How to Do a Voice Over on Google Slides
- Next How to Put a Voice Over on Google Slides

Cliff Weitzman
Cliff Weitzman is a dyslexia advocate and the CEO and founder of Speechify, the #1 text-to-speech app in the world, totaling over 100,000 5-star reviews and ranking first place in the App Store for the News & Magazines category. In 2017, Weitzman was named to the Forbes 30 under 30 list for his work making the internet more accessible to people with learning disabilities. Cliff Weitzman has been featured in EdSurge, Inc., PC Mag, Entrepreneur, Mashable, among other leading outlets.
Recent Blogs

AI Speech Recognition: Everything You Should Know

AI Speech to Text: Revolutionizing Transcription

Real-Time AI Dubbing with Voice Preservation

How to Add Voice Over to Video: A Step-by-Step Guide

Voice Simulator & Content Creation with AI-Generated Voices

Convert Audio and Video to Text: Transcription Has Never Been Easier.
How to Record Voice Overs Properly Over Gameplay: Everything You Need to Know
Voicemail Greeting Generator: The New Way to Engage Callers

How to Avoid AI Voice Scams
Character AI Voices: Revolutionizing Audio Content with Advanced Technology

Best AI Voices for Video Games
How to Monetize YouTube Channels with AI Voices
Multilingual Voice API: Bridging Communication Gaps in a Diverse World
Resemble.AI vs ElevenLabs: A Comprehensive Comparison
Apps to Read PDFs on Mobile and Desktop
How to Convert a PDF to an Audiobook: A Step-by-Step Guide
AI for Translation: Bridging Language Barriers
IVR Conversion Tool: A Comprehensive Guide for Healthcare Providers
Best AI Speech to Speech Tools
AI Voice Recorder: Everything You Need to Know
The Best Multilingual AI Speech Models

Program that will Read PDF Aloud: Yes it Exists
How to Convert Your Emails to an Audiobook: A Step-by-Step Tutorial
How to Convert iOS Files to an Audiobook
How to Convert Google Docs to an Audiobook
How to Convert Word Docs to an Audiobook

Alternatives to Deepgram Text to Speech API
Is Text to Speech HSA Eligible?
Can You Use an HSA for Speech Therapy?
Surprising HSA-Eligible Items

Speechify text to speech helps you save time
Popular blogs.
The Best Celebrity Voice Generators in 2024
YouTube Text to Speech: Elevating Your Video Content with Speechify
The 7 best alternatives to Synthesia.io
Everything you need to know about text to speech on tiktok.
The 10 best text-to-speech apps for Android
How to convert a pdf to speech.
The top girl voice changers
How to use siri text to speech.
Obama text to speech
Robot Voice Generators: The Futuristic Frontier of Audio Creation
PDF Read Aloud: Free & Paid Options
Alternatives to fakeyou text to speech, all about deepfake voices, tiktok voice generator, text to speech goanimate, the best celebrity text to speech voice generators, pdf audio reader, how to get text to speech indian voices, elevating your anime experience with anime voice generators.
Only available on iPhone and iPad
To access our catalog of 100,000+ audiobooks, you need to use an iOS device.
Coming to Android soon...
Join the waitlist
Enter your email and we will notify you as soon as Speechify Audiobooks is available for you.
You’ve been added to the waitlist. We will notify you as soon as Speechify Audiobooks is available for you.
IMAGES
VIDEO
COMMENTS
Google Slides Voice-Over Recording. You can record your voice-over recordings and save them to a folder in Google Drive to insert in slides via New > File Upload. Google Slides does not support many audio formats, so make sure your narration is in MP3 or WAV format. Otherwise, the file will not show up when you try to insert it in Google Slides.
Upload the audio files to your Google Drive. Open your Google Slides presentation. Select the slide you want to add the voice over to. Click on 'Insert' > 'Audio'. This will open a window showing your Google Drive files. Select the relevant audio file for the slide. Once inserted, an audio icon will appear on your slide.
Try Camtasia for free. Option 4: how to do voice-over presentations with Thinkific. If you have created a presentation on an external platform like Keynote, PowerPoint or Google Slides, you can use a Presentation lesson to display it within your Thinkific course!. This function enables you to record audio while speaking to specific slides.
To add audio to your presentation, find the Insert menu at the top of your Google Slides window. Click on it, and you'll see a dropdown menu appear with a list of options. From here, select the third option from the top: Audio. Go to the Insert > Audio menu to find your uploaded MP3 recorded voiceover.
Learn how to easily add voice over narration to Google Slides with this simple and clear tutorial. Watch the video and follow the steps.
Step 4: Attach the audio file to Google Slides. You can now easily attach the audio file to your Google Slides presentation. Open the Google slide that needs a voiceover. Click on the 'Insert' option and choose 'Audio'. Choose the audio file you'd like to add and click on the 'Select' button. Once you insert your voiceovers into your Google ...
Step 2: Upload the Audio to Google Drive. Since Google Slides can embed audio from Google Drive, you need to upload your voice over files there. Go to Google Drive and click "+ New" button at the top left corner. Select "File Upload" and locate your saved .mp3 file. After the file is uploaded, right-click on it and select "Share.".
In this comprehensive tutorial, learn how to add a professional voiceover to your Google Slides presentation. Voiceovers can significantly enhance your prese...
Click the "new" button in your Google Drive and select "Google Slides." A new window tab will open; click the "Insert" tab. In the drop-down menu of the "Insert" tab, navigate and select "Audio." On your "My Drive" tab, navigate and select the audio file you want to add as a voiceover to your Google Slides presentation, then press "Select."
Go to the main Google Slides screen and select "Blank," which will open an untitled presentation. Then click "File" and "Import Slides.". Next, click "Upload.". You'll see a space underneath where you can drag the PowerPoint file you want to import. You can alternatively click "Select a File From Your Device.".
Open the Google Slides file that you want to use or create a new one. Choose the slide where you want to insert audio. Then, from the menu choices select "Insert" and scroll down to select "Audio.". Click the audio file you saved to your Google Drive to select it and then click the "Select" button.
Step #1: Create a Google Slides presentation. Before you can add a voiceover to a Google Slides presentation, you first need to create it. Click the Google apps button in your Google account, which looks like nine dots in a square. Click the Slides app icon from the apps list to open the Google Slides home screen.
How to Add Voiceover to a Google Slide PresentationThere are several ways to add voiceover to a Google Slide Presentation, and this video show you how, step-...
Step 3: Open your Google Slides presentation. On the slide where you want to insert audio, select "Insert" from the toolbar, then choose "Audio" from the drop-down menu. Step 4: From the pop-up, select the audio file from your Google Drive to insert it. A speaker icon will appear on your slide, representing the audio file.
Step 2 - Insert the voiceover. Now open your Google Slide where you want to include a voiceover. Then click on the 'Insert' option in the top menu. From the dropdown menu, select 'Audio.'. Under My Drive, browse and select the audio file you wish to add and click on 'Insert.'.
Here are the steps to add a voice over to Google Slides using a voice recorder: Record your audio narration using the voice recorder. Save the recording as a .wav or .mp3 file. Upload the audio file to Google Drive. Insert the audio file into your Google Slides presentation. The 5 Different Ways to Do Voice Over Presentations
Use a voice recording tool or software like Audacity or Voice Memos on your Mac or Windows computer to record your voiceover. Save the audio file in the appropriate format, such as wav or mp3. Upload the audio file to Google Drive. Insert the audio file into your Google Slides presentation. Customize the audio settings to fit your needs.
So, you want to take your presentations to the next level. Add a bit of spice to plain old slideshows? We got you covered.As of the recording this video, Goo...
Insert Audio into Google Slides. First, open the Google Slides presentation you want to add the voice over to and select the slide in which you wish to insert the audio file. From the Insert menu, select Audio and pick the audio file from Google Drive. Once you click on the Select button, a tiny speaker-shaped icon will appear on your slide.
A voice-over presentation on Google Slides refers to adding audio narration to accompany the visual content of a slideshow. This feature allows the speaker to provide additional context, explanations, or insights that may not be easily conveyed through text or images alone. Essentially, a voice-over transforms your Google Slides presentation ...
Using Zoom. One of the easiest ways to add voice-overs to slides is through Zoom. Just follow these steps. 1. Present the screen. Start a meeting as the host, share your screen, and hit the record button. 2. Narrate the slides. Narrate each slide and click the Stop Recording button when you're done.
The 5 Steps to Add Audio & Voice Over to Google Slides. Prepare your presentation and audio files. Click on "Insert" and select "Audio.". Choose your audio file from Google Drive and click "Select.". Customize your audio settings according to your preferences. Save your presentation and test the audio to ensure it plays correctly.