We explain and teach technology, solve tech problems and help you make gadget buying decisions.

How to Add Voice-Overs to Canva Presentations

Namrata Gogoi is an author covering Buying Guides and device-related tips and tricks. She loves learning and writing about gadgets and accessories that are functional, innovative, and has a positive impact on one's life. Since 2016, she has covered smartphones, computer accessories, household electric appliances - basically any product that helps bring convenience to one's life -- at Guiding Tech. Previously, she worked as an IT Analyst in TCS but found her calling elsewhere. In her free time, you can find her engrossed in a murder mystery.

- You cannot edit uploaded audio files in Canva.
- Present and Record may be unavailable in every country.
- AI Voice-over apps will have limitations on the number of minutes in the free version.
Method 1: Add Audio Files
Since Canva has limited customization options, you must ensure the audio files are trimmed before uploading. Also, all your files must be appropriately named and uploaded to avoid confusion later.
Step 1: Open the presentation and select the slide where you want to add the voice-over.
Step 2: Click the Uploads section on the left and switch to the Audio tab to reveal all the audio files.
Step 3: Drag and drop the audio at the bottom of the selected slide, and position it appropriately using drag.

Repeat the above steps for all the slides. Once everything is in place, tap the Play button to view and hear your voice-overs. If you have missed uploading an audio file, you can manually do it when editing the presentation.
This method comes in handy when you cannot access the Present and Record option, which we have explained next.
Method 2: Present and Record
Canva has a built-in method—Present and Record—for adding voice-overs to already-made presentations. One of the most significant drawbacks is that you need a quiet room and don’t have the option to trim the recorded audio.
Step 1 : Open the presentation and click on the three-dot menu at the extreme right corner.
Step 2 : Select Present and Record from the list of options > Start Recording.

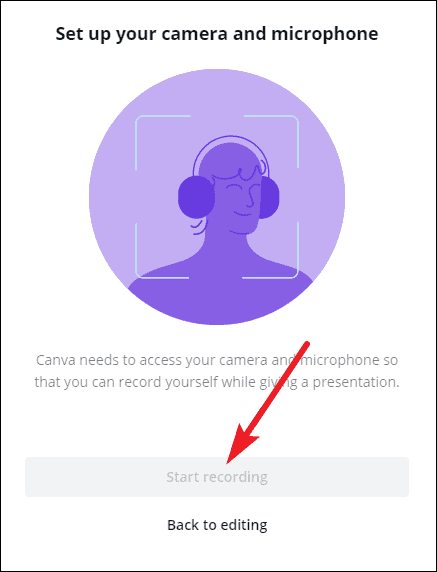
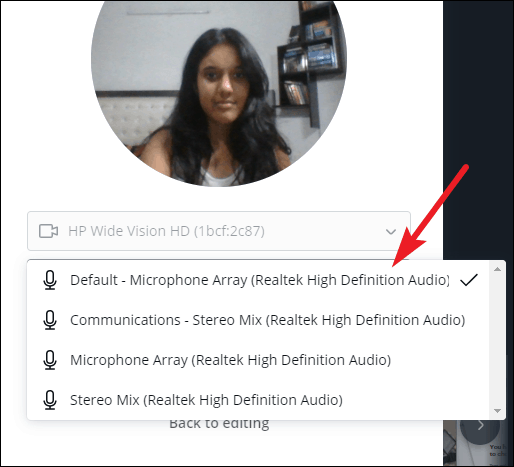
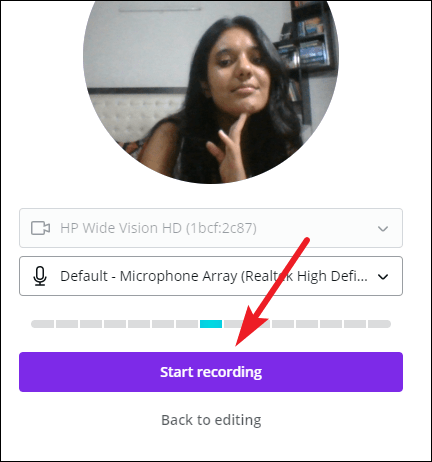
Step 3: It will prompt you to allow access to the camera and microphone. Since you only need to perform a voice-over, skip the camera permission and give access to your microphone. Once done, click on the Start recording button.

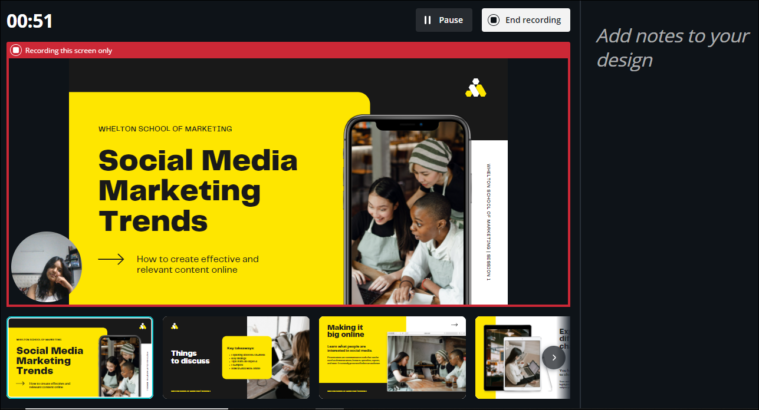
Step 4: Now, record your voice for all the slides. The slides with recorded audio are marked in red. Remember to move along the slides as the presentation asks.

When you need to pause, click on Pause . This way, you can also skip a few slides where you do not want any voice-overs.
Step 5 : Once the recording is complete, click on Done at the top right corner.

Depending on the length of the audio and the presentation’s content, the download might take time.

In addition to the direct download, Canva allows you to copy and share the link to the presentation directly.
Method 3: Using AI
Many voice-over AI apps can connect to Canva and help you convert text to voice using multiple voice profiles. Here, we are using Murf AI.
Step 1: Open Canva, go to Apps , and search for Murf AI .
Step 2: Click on it, sign in using your existing account, or sign up.
Step 3: Once done, it will prompt you to use it in the existing or new design .

Step 4: In the Canva presentation editor, you will have access to Murif AI on the left , where you can select language , a voice profile , and a text box where you can type the text and choose style , speed , and pitch.

Step 5: Select the slide where you want to add the voice-over, click on Generate voiceover , and Add to the design .

It’s easy to add voice-over using AI apps, but there are limitations when using a free account. For example, Murf AI limits voice-over time to 12-15 minutes.
Was this helpful?
Last updated on 23 April, 2024
The above article may contain affiliate links which help support Guiding Tech. However, it does not affect our editorial integrity. The content remains unbiased and authentic.
Leave a Reply Cancel reply
Your email address will not be published. Required fields are marked *

The article above may contain affiliate links which help support Guiding Tech. The content remains unbiased and authentic and will never affect our editorial integrity.
DID YOU KNOW

Namrata Gogoi
More in internet and social.

Top 10 Fixes for Facebook White Screen on iPhone, Android and Web
Join the newsletter.
Get Guiding Tech articles delivered to your inbox.
How to Create a Talking Presentation in Canva using 'Present and Record' Feature
Cannot present in a live session? No worries, pre-record your presentations with Canva's Talking Presentations.

Canva is a great tool for creating presentations, professional as well as personal. With thousands of templates and a rich content library for images, videos, and graphics, the presentations you can create with Canva are sure to stand out.
But that’s not all Canva is great for. Have you ever seen the words ‘Talking Presentation’ on Canva’s Home Page and wondered what they are? It’s Canva’s solution to a very real problem people face all the time.
A lot of people use presentations in webinars these days, or it’s a part of their website. The point being, presentations aren’t confined to just conference rooms these days. They have far greater reach. But presenting on the internet can be daunting. Talking presentations can help with that. They’re also great for when you cannot be present in person or maybe when some other people couldn’t attend.
Now, obviously, it isn’t really a presentation that talks, as in it doesn’t have any talking elements. You’re the one doing all the talking. It is basically a recording of the presentation with your video and voice-over. Canva studio makes the task so easy that you could do it with your eyes shut (metaphorically speaking, of course).
Creating a Talking Presentation
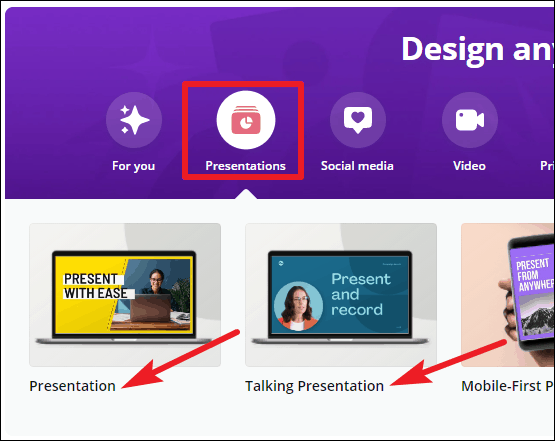
Go to canva.com and click on ‘Presentations’ to get started. It’s better to start with a template instead of a blank slate, but you can do either. Canva has a different category for ‘Talking presentations’. But it doesn’t matter whether you choose ‘Presentations’ or ‘Talking Presentations’, you can record for both types.
Create your presentation as you normally do. You can also go to Canva and open any of your existing presentations to convert them into a talking presentation.
Once your presentation is complete, go to the toolbar at the top of the editor.
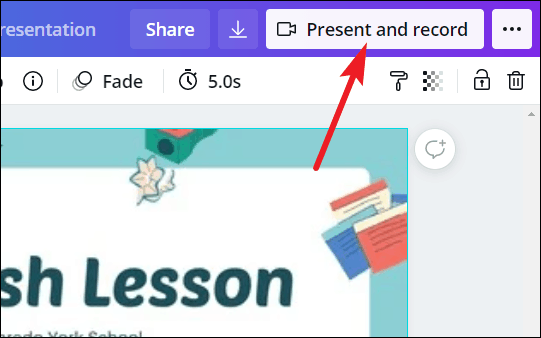
Now, if you chose ‘Talking Presentations’ while creating the presentation, the option for ‘Present and Record’ will appear on the toolbar itself.
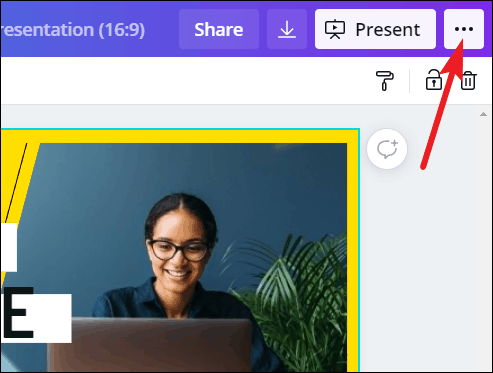
Otherwise, click the ‘three-dot’ icon next to the ‘Present’ button.
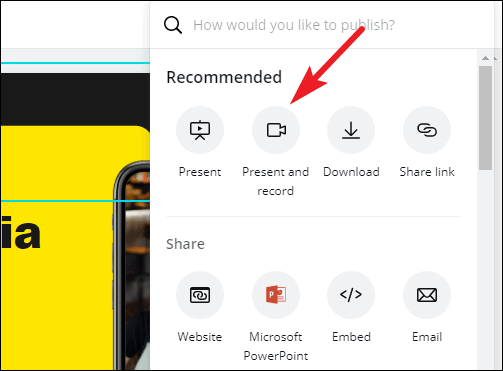
Then, select ‘Present and Record’ from the menu that appears.
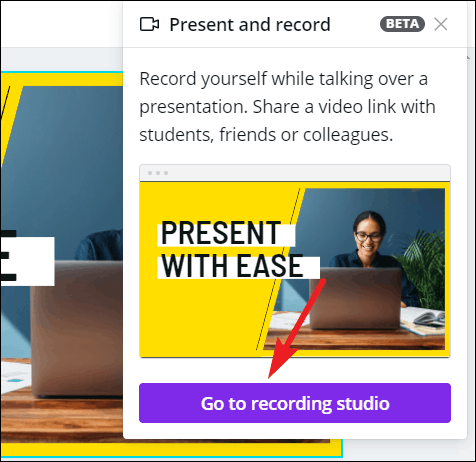
Click the ‘Go to Recording Studio’ button.
Recording the Presentation
Your browser will display a pop-up that Canva wants access to your camera and microphone. Click ‘Allow’.

Once Canva has access to both, the ‘Start Recording’ button will become clickable. Canva needs access to both your camera and microphone for the Present and Record feature. If for some reason, access to either of these being blocked, you won’t be able to use the functionality.
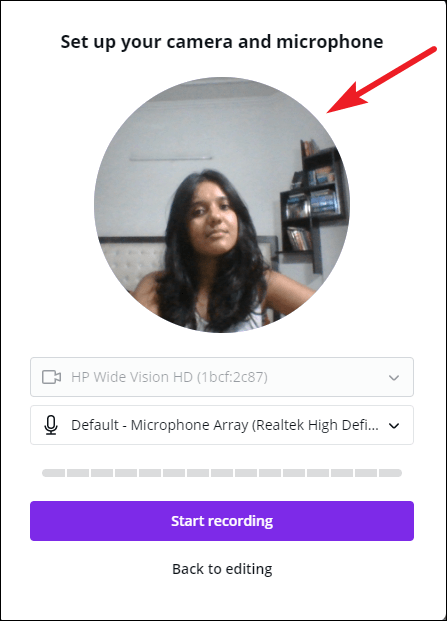
Before proceeding, check that your camera and microphone are working. You can see the preview of your video in the pop-up. You can also adjust your camera based on this preview, as this bubble represents how your video will appear while recording the presentation.
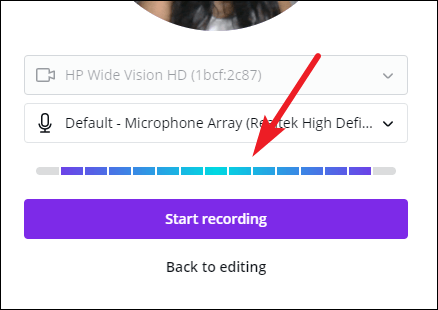
To check your microphone, say something. The bar beneath the microphone option will turn blue from gray if your microphone is working properly and Canva detects sound.
You can also change which camera or microphone to use (in case you have multiple) from the drop-down menus.
Once everything is spick and span, click the ‘Start Recording’ button to begin.
A 3-second timer will display on your screen; ready yourself for the recording during this time.

The recording screen will show all the slides in thumbnails and your notes in the right panel. But in the actual recording, only the presentation part (with your video in the lower-left corner) will be visible, which is highlighted in red during the recording session.
You can pause the recording at any time for a breather. Click the ‘Pause’ button to pause the recording.
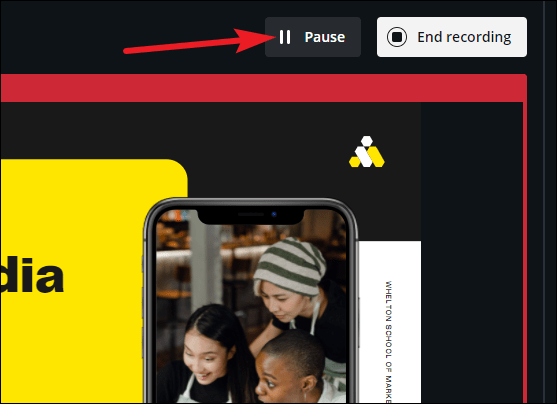
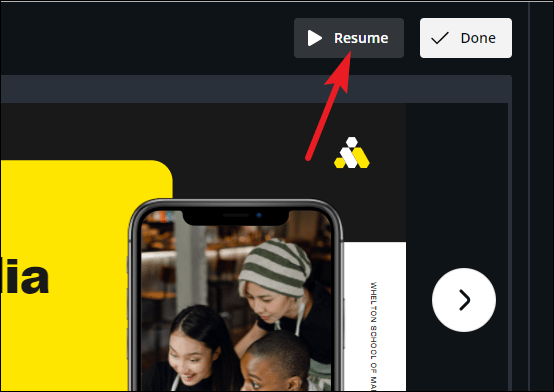
It’ll become the ‘Resume’ button when the recording is paused, click it restart the recording.
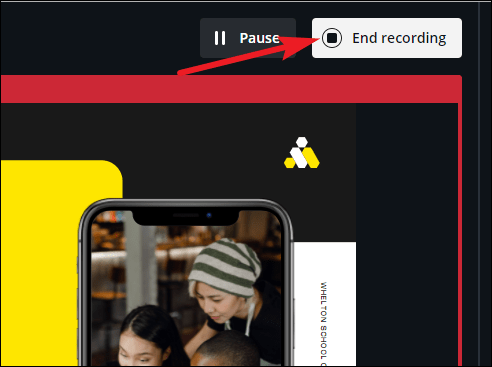
When you’re done, click the ‘End Recording’ button next to pause.
Sharing the Presentation
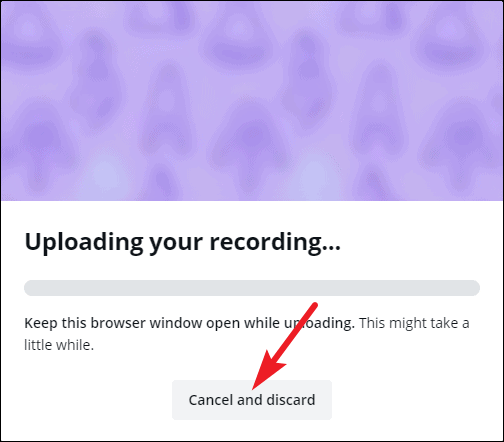
It’ll take a few seconds for your recording to process and upload. You can discard the recording at this stage if you weren’t happy with it and begin again.
Once it uploads, the link for your recording will be ready. You can share it with others directly. Or you can download it on your computer. If you want to watch the recording before sharing it with others, you can either go to the recording link yourself or download it and then watch it.
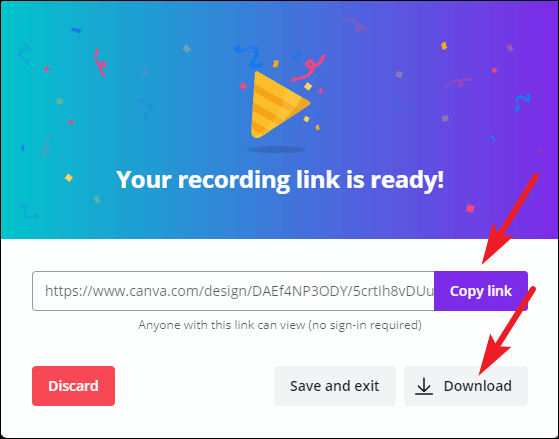
You can also just ‘Save and exit’ instead of choosing from either of the above options. Or click ‘Discard’ if you want to record again.
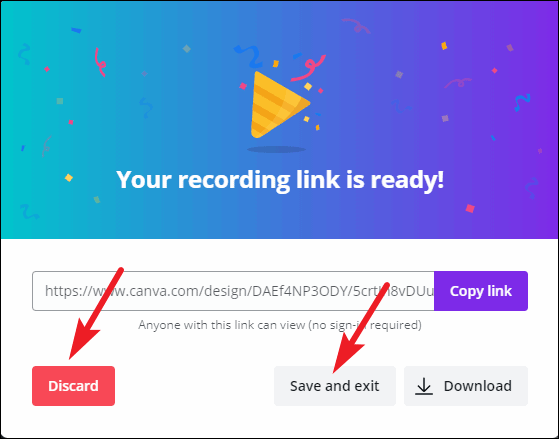
If you click ‘Save and exit’, you can access the recording again at any time. Open the presentation, and click the ‘Present and Record’ button.
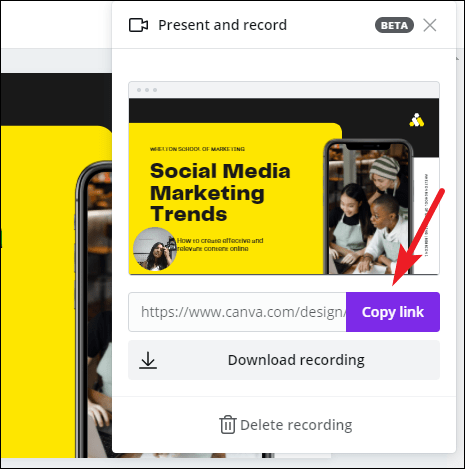
The Present and Record menu will open, and it will have the link to the recording as well the options to download and delete it. If you want to re-record, you’ll first have to delete this recording.
Anyone can go to the link and watch the presentation without any requirement for a sign-in. Or you can download it and upload it to your website, or use it in your webinar. The options are boundless and it’s up to you.
If you want people to no longer be able to watch the presentation recording, simply delete it from the ‘Present and Record’ menu, and the link will no longer show the recording.
Canva is the perfect tool for your presentations. Not only can you create amazing presentations, but it also provides tools for what comes after. Like presenting it in circumstances when you cannot do it live. Recording the presentation adds that personal touch that simply sending it to people cannot capture.

How to Use Gemini Code Assist in VS Code

How to Code Using AI

Microsoft Copilot Pro Review: There is a lot of Unrealized Potential
Get all the latest posts delivered straight to your inbox., member discussion.

How to Debloat and Clean Up Microsoft Edge

How to Use AI Silence Remover in Microsoft Clipchamp

What is Super Drag and Drop in Microsoft Edge and How to Enable It

How to Use Microsoft Edge Drop to Share Files Between Your Devices

How Do Live Folders Work in Arc Browser?
How to Add Your Voiceover to Canva Presentation

Adding a voiceover to your Canva presentations can be a great way to enhance your slides and better connect with your audience. Recorded audio makes your presentation more dynamic and interesting. It also allows you to provide more context and explanation for your content.
In this guide, I’ll walk you through the full process of how to add voiceovers to Canva presentations , from recording your script to embedding the audio into your slides . Follow these steps to take your Canva presentation to the next level with custom voiceovers.
Method 1: Record Voiceovers Directly in Canva

The easiest way to add voiceovers to your presentation is to record directly within Canva using the “Present and record” feature.
Here are the steps:
- Open your Canva presentation and click on “Present” in the top toolbar.
- Select “Present and record” . This will launch Canva’s recording studio. Present and record option
- Give Canva permission to access your computer’s microphone and camera by clicking “Allow” when prompted.
- Click the red “Start recording” button and start narrating your presentation. Your voice will be recorded slide-by-slide as you click through each one.
- When you’re finished, hit “Stop recording” and close the recording studio. The voiceover files will automatically attach to each slide.
That’s all there is to it! Now when you present your slides, your voiceovers will play automatically on each slide.
Method 2: Upload Pre-Recorded Voiceover Files

Alternatively, you can upload pre-recorded voiceover files if you want more control over the recording and editing process:
- Record your voiceover audio in advance using recording software like Audacity or Garageband . Make sure to save files as MP3s.
- In Canva, click on the “Uploads” tab. Drag and drop your voiceover MP3 files into the uploads area.
- Go back to your presentation slides. Click and drag your uploaded MP3 file onto the timeline of the slide where you want that voiceover to play. Drag voiceover to timeline
- Repeat for all other slides and voiceovers. Play back your presentation to test.
Pro Tip : If your original presentation video or animations have audio that conflicts with your voiceover, select it on the timeline and toggle mute on. This will mute the original audio and only play your voiceover.
Consider cleaning up flubs and mistakes with editing software before uploading to Canva. Even minor fixes can polish your voiceovers.
How long can my voiceover recordings be?
There is no length limit for voiceovers added through the upload method. If recording directly in Canva, voiceovers are limited to the length of each slide.
Is there a file size limit for uploaded audio?
Yes, Canva imposes a 100MB file size limit across all your uploaded assets, including images, videos, and audio files.
Can I edit the voiceover timing and audio?
Basic editing such as trimming the start/end points and adjusting volume levels can be done in Canva’s timeline. For more advanced editing features, use external audio editing software before uploading files to Canva.
What audio formats does Canva support?
Canva supports common formats like MP3, WAV, M4A and AIFF. For best compatibility, export voiceovers as MP3s.
What happens if I go over my Canva storage limit?
If you exceed Canva’s overall storage allowance, you will not be able to add new uploads until deleting old files. Consider compressing audio files to smaller sizes.
About The Author
Related posts.

How to Add Background to Canva Presentation

How to Make Canva Presentation Animate on Click

How to Download Canva Presentation as PPT

How to Record on Canva Presentation

The Ultimate Guide: Add an AI Voice Over to Your Canva Video Efficiently
Table of contents.
In the digital age, creating engaging videos for your social media platforms or YouTube channel has become an indispensable part of content creation. While visuals matter, a well-executed voiceover can significantly amplify the impact of your video. Canva, a popular graphic design tool, is an excellent platform for creating stunning videos. But how do you add an AI voice over to a Canva video? This step-by-step tutorial aims to guide beginners on this process.
How to Add AI Voice to Canva Video?
- Generate AI Voiceover : First, create your AI voiceover using a text to speech ( TTS ) tool or AI voice generator. Enter the text you wish to convert into speech, select the desired voice type, and generate your audio file.
- Save Your AI Voiceover : Once the AI-generated voiceover is ready, download and save it as an mp3 or mp4 file.
- Upload AI Voiceover to Canva : Open your Canva design or Canva presentation. Click on the ‘Uploads’ tab in the left pane. Click ‘Upload media’ at the top right corner and select the voiceover audio file you created.
- Add AI Voiceover to Canva Video : Drag and drop the audio file onto your video timeline. Adjust the audio to align with your video content. Press the ‘Play’ button to preview the video with the voiceover.
Can I use Voice Over in Canva?
Yes, Canva supports the addition of voiceovers to videos. You can either record voiceover directly in Canva, use your own voice with an external recording studio, or utilize AI tools to generate a voiceover.
How Do You Add Voice Over to a Video?
To add a voice over to a video in Canva:
- Open your video project in Canva and go to the video editing section.
- Click on the ‘Music’ tab in the left pane, then select ‘Uploads’.
- Click on ‘Upload an audio file’ and choose the desired voiceover file from your device.
- Drag and drop the uploaded audio file onto your video timeline. You can customize the audio placement to match the video perfectly.
- If you want to add multiple audio files to Canva, repeat the process. Canva allows you to layer multiple audio files onto a single video.
- After you’re satisfied with your video, click ‘Download’ at the top right corner. Save it as an mp4 file, ready for sharing on your social media posts, YouTube Shorts, or Instagram story.
Top 9 Software or Apps for AI Voiceover
- Speechify Voice Over : Speechify Voice Over is a powerful voice over app that runs in your browser. with the power of AI, it brings surprising features made simple for anyone to use. Try it free, today!
- WellSaid Labs : It offers lifelike, AI-generated voiceovers. Users can select from various voice types and customize the pacing.
- Google Text-to-Speech (TTS) : This tool provides a straightforward way to convert text into spoken audio. Available on both Android and iPhone.
- Amazon Polly : This service turns text into lifelike speech, allowing you to create voiceover applications that talk.
- iSpeech : This platform converts text into clear, human-like speech. Ideal for content creators and video editors.
- Speakabo : It offers a wide range of AI voices and languages, ideal for global content creators.
- Natural Reader : This tool offers a straightforward TTS solution. It has a range of voice options and is user-friendly.
- Voicepods : This platform offers custom voice solutions. It’s useful for adding personalized voiceovers to your videos.
- Animaker Voice : This app offers both TTS and voice-recording options. It’s ideal for YouTube videos, tutorials, and Canva presentations.
With Canva, adding a voiceover to your video is a simple task. This tutorial should guide beginners through the process, ensuring professional-quality content. Whether it’s for a TikTok clip, YouTube video, or an engaging Instagram story, mastering this technique will enhance your content creation skill set.
Now that you understand how to add AI voiceover to your Canva videos, it’s time to explore and start recording. Make your mark in the digital world with stunning, professional-quality videos!
- Previous How to Add an AI Voice Over to VideoLeap: An Easy Guide for Beginners
- Next How to add an AI voice over to Vita – Video Editor & Maker

Cliff Weitzman
Cliff Weitzman is a dyslexia advocate and the CEO and founder of Speechify, the #1 text-to-speech app in the world, totaling over 100,000 5-star reviews and ranking first place in the App Store for the News & Magazines category. In 2017, Weitzman was named to the Forbes 30 under 30 list for his work making the internet more accessible to people with learning disabilities. Cliff Weitzman has been featured in EdSurge, Inc., PC Mag, Entrepreneur, Mashable, among other leading outlets.
Recent Blogs

AI Speech Recognition: Everything You Should Know
AI Speech to Text: Revolutionizing Transcription
Real-Time AI Dubbing with Voice Preservation

How to Add Voice Over to Video: A Step-by-Step Guide

Voice Simulator & Content Creation with AI-Generated Voices

Convert Audio and Video to Text: Transcription Has Never Been Easier.

How to Record Voice Overs Properly Over Gameplay: Everything You Need to Know
Voicemail Greeting Generator: The New Way to Engage Callers
How to Avoid AI Voice Scams

Character AI Voices: Revolutionizing Audio Content with Advanced Technology
Best AI Voices for Video Games
How to Monetize YouTube Channels with AI Voices
Multilingual Voice API: Bridging Communication Gaps in a Diverse World
Resemble.AI vs ElevenLabs: A Comprehensive Comparison
Apps to Read PDFs on Mobile and Desktop
How to Convert a PDF to an Audiobook: A Step-by-Step Guide
AI for Translation: Bridging Language Barriers
IVR Conversion Tool: A Comprehensive Guide for Healthcare Providers
Best AI Speech to Speech Tools
AI Voice Recorder: Everything You Need to Know
The Best Multilingual AI Speech Models
Program that will Read PDF Aloud: Yes it Exists
How to Convert Your Emails to an Audiobook: A Step-by-Step Tutorial
How to Convert iOS Files to an Audiobook
How to Convert Google Docs to an Audiobook

How to Convert Word Docs to an Audiobook
Alternatives to Deepgram Text to Speech API

Is Text to Speech HSA Eligible?
Can You Use an HSA for Speech Therapy?
Surprising HSA-Eligible Items

Speechify text to speech helps you save time
Popular blogs.
The Best Celebrity Voice Generators in 2024
YouTube Text to Speech: Elevating Your Video Content with Speechify
The 7 best alternatives to Synthesia.io
Everything you need to know about text to speech on tiktok.
The 10 best text-to-speech apps for Android
How to convert a PDF to speech

The top girl voice changers
How to use siri text to speech.
Obama text to speech
Robot voice generators: the futuristic frontier of audio creation, pdf read aloud: free & paid options, alternatives to fakeyou text to speech, all about deepfake voices, tiktok voice generator, text to speech goanimate, the best celebrity text to speech voice generators, pdf audio reader.

Only available on iPhone and iPad
To access our catalog of 100,000+ audiobooks, you need to use an iOS device.
Coming to Android soon...
Join the waitlist
Enter your email and we will notify you as soon as Speechify Audiobooks is available for you.
You’ve been added to the waitlist. We will notify you as soon as Speechify Audiobooks is available for you.
Home Blog Design How to Use Canva and PowerPoint for Presentations
How to Use Canva and PowerPoint for Presentations

Creating the perfect presentation design is a challenge that speakers often aim to achieve, only to find themselves lacking graphic design knowledge. Although high-tier options like Adobe Photoshop and Adobe Illustrator help users worldwide to put their ideas into pixels, the reality is they are not user-friendly interfaces for people outside the graphic design industry, namely business professionals, marketers, and educators. Hence, the need to find an alternative for making powerful graphics to use in our presentations – and here’s where Canva comes into the picture.
This web-based graphic design tool has quickly become the preferred choice of teachers, social media influencers, and small business owners due to its free-tier plans and pro plans at a convenient subscription-based fee.
In this article, we will see how to use Canva presentation in PowerPoint and how to export Canva to PPT, to create visually appealing presentations.
Table of Contents
Canva vs. Microsoft PowerPoint: Pros and Cons for Presenters
Designing with canva, how to export a canva presentation to powerpoint, how to use canva-made graphics in powerpoint, final words.
Although presenters often see Canva as an alternative to PowerPoint, the reality is that they differ in one single aspect: Canva is a graphic design tool, whereas PowerPoint is a presentation design software. Some of the tools available in PowerPoint are not there in Canva, and vice versa.

Going into more technical aspects, here are the Pros and Cons of working with either software as a presenter.
Pros of Canva as a Presentation Tool
User-friendly interface.
Canva’s drag-and-drop feature makes it easy for non-designers to create presentations by using its library of shapes, graphics, text styles, and other resources.
Wide Range of Templates
It offers a vast library of Canva templates, which can be easily customized in their online editor, saving time on design. There’s a con associated with this point, which we shall discuss later.
Magic Studio for Canva was released mid-Q3 this year with the idea of powering designs with AI tools. This tool is available in Canva search features and in the editor at the bottom right corner, which features the list options:
- AI text generation
- Suggested graphics to match your design
- Suggested photos to match your design
Collaboration Feature
Allows multiple users to simultaneously work on the same presentation, which is great for small team projects. Compared with PowerPoint, it does not require all users to be Premium to collaborate online.
Web-Based Platform
Being an online platform, it allows users to work from any device with Internet access without needing software installation. This particularly helps users with legacy computers who cannot install current versions of Microsoft Office.
Integrated Stock Library
Provides access to a broad selection of stock photos, illustrations, and icons within the platform. Just like with the Canva templates, there’s also a con to this point.
Customization Options
Users can upload images and fonts, enabling brand consistency across presentations. Note: The upload fonts feature is only available for Canva Pro users.
Photo Editing and Animation Features
Canva lets users tweak their graphics with simple-to-use controls. These options help us to adjust opacity, apply photo filters, add animation effects, add bevels and shadows, and more.
Cross-Platform Compatibility
Can export presentations to various formats (as a PDF document, as a video presentation in MP4 format, or even as images), making them viewable on different devices and platforms. The export options allow us to post directly into social media, create printables, post to the web, etc. While some export formats require an upgrade to a Canva Pro subscription (like the ability to export to SVG format), the basic export features are enough for simple presentations and beginners.
Cons of Canva as a Presentation Tool
Limited offline functionality.
Requires an internet connection for full functionality, which can be a limitation in areas with poor connectivity, for business people working on an airline flight, while using Airplane mode, or for people traveling in other zones without Internet access.
Fewer Animation and Transition Options
Unlike PowerPoint, the available options for animations and transitions are limited. Users can find this reiterative, which may be unappealing to using these effects in our presentations.
Premium Content
Although the Canva library is extensive in terms of assets, the reality is that most of these elements are only available for premium users. This applies to templates, shapes, images (mostly), and exporting options. Resizing the graphics you create in Canva to repurpose your design is only available to premium users.
Template Overuse
Popular templates can be overused, making presentations look similar to many others. This is of particular interest to business professionals, as people tend to easily associate some designs as being made with Canva.
Design Decisions
Unlike using a PowerPoint template , you have to work your way with Canva content, as the PPT templates tend to be quite generic and do not offer tools for data representation. Consequently, you have to know how and where to introduce those elements on your own rather than working with a presentation template that already assigned the space for such graphics.
Lack of Advanced Multimedia Integration
Integrating complex multimedia elements like videos is not as seamless as in some desktop applications. You won’t find options to link to source elements; you need to upload the content to your personal Canva library and manually add the resource to the slide. Presenters can also lose third-party integrations via plugins for some multimedia resources.
Pros of PowerPoint as a Presentation Tool
Widespread use and familiarity.
PowerPoint is the leading market tool for presentations, making most audiences and presenters are familiar with it at a basic operational level. This can help us to outsource technical issues quickly rather than aiming to use web-based interfaces to share Canva-created content.
Offline Access
PowerPoint can be used offline, which is ideal for people traveling, areas where the Internet connection is unreliable, or simply because we want to focus on creating the slides rather than facing distractions via the Internet.
Integration with Other Microsoft Office Tools
Seamlessly integrates with other Microsoft products like Excel and Word, making it easy to import data and documents. This is ideal for creating complex graphics for data representation, where the content can be synced, importing databases, working with Gantt Charts in software like Microsoft Project, and more.
Also, Microsoft PowerPoint has the same text editing capabilities as Microsoft Word – a striking contrast with Canva’s limited features.
Templates and Design Options
This is PowerPoint’s forte: the capability of using third-party presentation templates, like the ones provided by SlideModel . Users can buy pre-designed slide decks from professional vendors and ease the need to make design-related decisions. On top of that, Microsoft already includes some basic templates with its 365 subscription.
Advanced Features
Offers a broad range of features, including detailed animations and transitions, which can enhance presentations. For example, the ability to work with SVG graphics allows presentation designers to make pixel-perfect presentations without losing image quality. This is available to all users, unlike Canva, which requires a subscription to unlock certain elements.
Multimedia Capabilities
Supports embedding of various multimedia elements like audio, video, and images directly into presentations. You can use hyperlinks to embed content or work with third-party plugins for specific tasks.
Extensive Support and Resources
As a long-established tool, users can find tutorials everywhere, support communities, and additional resources available online.
Cons of PowerPoint for Presenters
Some features can be complex to use, and the interface may be overwhelming for new users. In particular, this is linked to editing PowerPoint Shapes and graphs, working with Slide Master , applying advanced animation effects and so on.
Unlike Canva or Google Slides, PowerPoint requires purchasing Office 365 or a standalone license.
Heavy Files
PowerPoint files, especially those with multimedia content, can become large and difficult to share via email. As a side effect, those heavy files can be complicated to handle in computers that lack sufficient RAM and processing power. Moreover, they require significant free disk space on your PC.
Time-Consuming
Creating a high-quality presentation with custom animations and graphics can be time-consuming. That’s the reason why we highly recommend users work their way with PowerPoint templates, and mix and match designs to create a unique slide deck .
Learning Curve
Users need to invest time in learning the software to fully utilize its advanced features. This applies to both acquiring the knowledge and practicing the skills you learned. And still, for some users, it feels frustrating not to achieve results relatively quickly.
In this section, we will learn how to use Canva to create graphics for a product presentation. The idea is to create placeholder graphics containing images of a product; then, we will export that content to continue creating our presentation in PowerPoint.
After creating our Canva account, we find ourselves at the Home screen. Go to Templates, and you will see something similar to this UI.

We can go straight to the Presentations (16:9) option or use the search bar to locate the template we want. In this case, we will opt for that scenario and search “Product.”
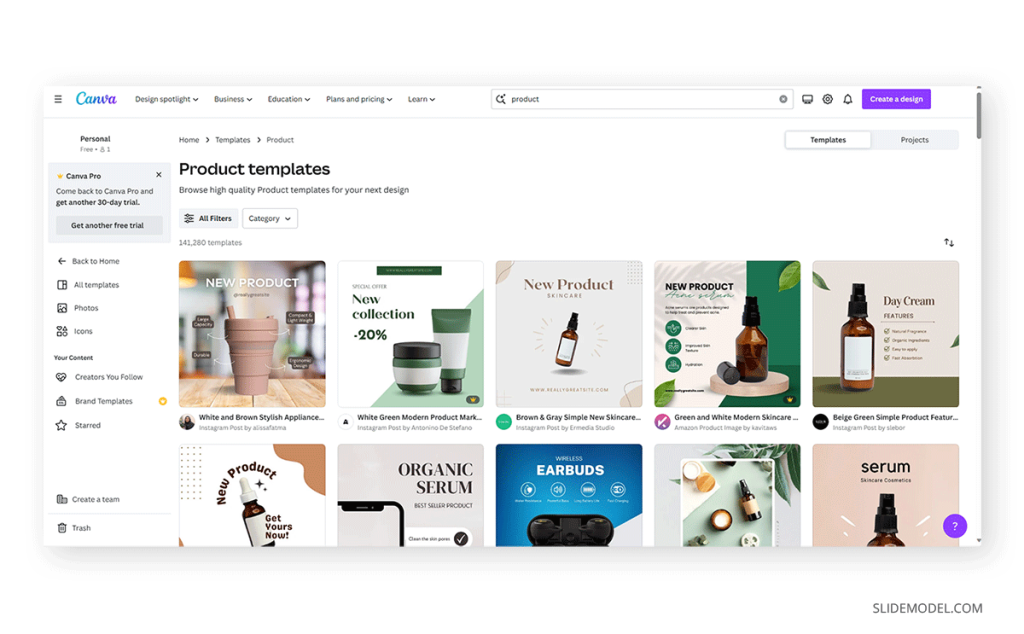
The images that show a little crown at the low right corner are premium templates, which means we cannot use them with a free account. We will pick a template that fits the needs of our presentation by clicking over it. At the contextual window that opens, select Customize this template .

The Canva builder may take a bit to load, especially if your internet connection is slow. You will find yourself with a window like this one, opened at the Design tab, which offers alternatives for other templates similar to the one you chose.

The Styles tab allows us to quickly change the layout, altering color themes and fonts. Sometimes, that can suit our needs immediately; sometimes, it requires extra work to customize to our preferences.

We can click on any element in this design and customize its content. Depending on the element type, the options are available for us. For this presentation, we will change the text and images, and alter font color at the button to make it stand out.

Next, it’s time to replace the images. We can drag and drop the image into Canva, or we can go to the Uploads button and add the content from there.

In this case, we’re using DALL-E-generated images for this product presentation, you can also use illustrations, photos, videos, or Midjourney illustrations . Once the images are uploaded, drag and drop them to replace the images in the placeholder areas. To complete this design, we removed the shape that came with the template – you can add a new shape by going to Elements > Graphics .

Learning how to use Canva for PowerPoint is pretty straightforward. Download your Canva design as a PowerPoint presentation, which you can do by accessing your design and going to the top-right corner to locate the button Share . Click on it, and then click on Download .
Under File Type , we will select PPTX , as it’s PowerPoint’s native format. Click on Download , and wait for the process of downloading the file to be completed. Depending on the graphic assets included, it can take a while.

At this point, don’t be surprised if you’ll be prompted to upgrade your Canva plan (if you don’t have a premium account). The reason is that Canva will charge you for exporting what they call premium graphics, and since most of the Canva presentation templates use premium graphics, this will be a limitation when exporting your Canva slides to PowerPoint.
A simple workaround is removing the premium graphics before exporting from Canva to PowerPoint. Although, take in mind this may affect the overall design of your presentation.
As you can see below, the PowerPoint file is entirely editable. Something to consider is that unless you have the font installed on your computer, PowerPoint will reassign to a generic font.

Remember the design we created before? Well, it’s time to use that image as part of a marketing deck presentation , which will represent a social media post to be used by the marketing team to promote the brand.
The first step is to download the design we created as PNG. We can close Canva after that.

We opened our PPT template, which is the Annual Marketing Plan PowerPoint Template , and customized the PowerPoint theme colors . Go to Insert > Pictures > This Device .

Select the image we created in Canva and upload it here. We will add some image shadow effects via Shape Format, and a textbox below that describes what the image is about.

And that’s how easily we can use graphics from Canva in our PowerPoint presentations. Remember, it’s best to work with PNG images rather than JPG to reduce file size and preserve image quality.
You can invite others to collaborate on your design by sharing a link to the editable design or by adding them via email as team members on your Canva account.
Canva uses standard cloud storage security measures to protect your data, but like any online platform, it’s important to use a strong password and follow good security practices.
There are two methods for this. You can upload a PPT template into Canva via the Canva Homepage by clicking on Projects , and then go to the Uploads folder. Drag and drop or click on Upload, as we’ve seen before. Once imported, you must click on that file to open it in the Canva editor. The second method is on the editor: go to the Uploads button and upload your PPT file as if it were an image or another media asset.
Yes, you can use SlideModel presentation templates in Canva. As a SlideModel subscriber, you can download .pptx files to import into Canva presentations. This way, you can enjoy the creative slide templates and graphics provided by SlideModel in your Canva presentations
Unfortunately, no, as Canva doesn’t have the same toolset to enable editing functions. That also applies to changing color, so we highly recommend you work with a final PPT file before switching to Canva.
Objects like charts, SmartArt, 3D objects, and WordArt aren’t supported in Canva and won’t be rendered if you upload a slide that contains them.
Yes, all users can download Canva presentations to PPTX format. In case the original Canva design isn’t a presentation file, like a banner or social media post, you won’t be able to resize for that output unless you have a premium account.
Yes, the file must be smaller than 70 MB, and you can import up to 300 slides.
Canva and PowerPoint can collaborate as complementary tools to help presenters overcome the limitations of each individual tool. It takes a while to create your desired workflow, but once that’s accomplished, you can elevate the quality of your PowerPoint or Google Slides presentations with Canva.
We don’t advise using Canva as an alternative to PowerPoint as the current state-of-the-art indicates it won’t support data representation or other PowerPoint stellar tools that make part of most PPT templates.

Like this article? Please share
Design, Microsoft PowerPoint Filed under Design
Related Articles

Filed under Google Slides Tutorials • April 23rd, 2024
How to Align Objects in Google Slides
Optimize your layouts by learning how to align objects in Google Slides presentations. Step-by-step guide with screenshots.

Filed under Google Slides Tutorials , PowerPoint Tutorials • April 17th, 2024
Google Slides vs. PowerPoint: A Detailed Comparison
Contrast and pick with presentation software suits your best. Check our guide on how the Google Slides vs. PowerPoint eternal debate.

Filed under PowerPoint Tutorials • April 16th, 2024
How to Insert an Equation in PowerPoint
Learn how to create easy-to-understand science slides by mastering how to insert an equation in PowerPoint. Step-by-step guide.
Leave a Reply
IMAGES
VIDEO
COMMENTS
Watch this video to learn how to add narration to your Canva presentations. Learn more about Canva through this playlist: https://www.youtube.com/playlist?li...
Wait for your recording to upload. On the next screen, you can do the following: Share a link to your recording: Click Copy link. Download your recording: Click Download. Delete your recording: Click Discard. Save your recording and go back to the editor: Click Save and exit. A Public view link is automatically created when you record a talking ...
Record talking heads that you can embed on your slides with Canva's video presentation maker and present ideas well at your own pace. Canva home. Design spotlight Design spotlight ... Record a talking head, complete with audio and video, to narrate your ideas. Present them asynchronously to your viewers through a link or downloadable MP4. How ...
Canva makes it easy to quickly record yourself narrating your slides and then save that recorded presentation as a video to share. Dozens of more Canva tips ...
Canva 2021 - Custom Narration for a Presentation - How to use your own MP3 Audio files in the free version of CanvaUse your own audio MP3 files in Canva (the...
Step 1: Open the presentation and select the slide where you want to add the voice-over. Step 2: Click the Uploads section on the left, then switch to the Audio tab to reveal all the audio files ...
Step 1: Open Your Presentation in Canva. Log into your Canva account and open the presentation you want to add narration to. You can open existing presentations or start from a blank slate. Make sure you open your presentation in the Canva desktop app for the best recording experience.
Dynamic narration across languages and tonalities. Engage your audience with the perfect voice you can create with the free AI voice generator. Upload your script and choose from over 120 AI voices in 20+ languages, including Spanish, Chinese, and French. Infuse a human element by customizing the voice's speed, pitch, emotion, and tonality.
Now, if you chose 'Talking Presentations' while creating the presentation, the option for 'Present and Record' will appear on the toolbar itself. Otherwise, click the 'three-dot' icon next to the 'Present' button. Then, select 'Present and Record' from the menu that appears. Click the 'Go to Recording Studio' button.
Make sure to save files as MP3s. In Canva, click on the "Uploads" tab. Drag and drop your voiceover MP3 files into the uploads area. Go back to your presentation slides. Click and drag your uploaded MP3 file onto the timeline of the slide where you want that voiceover to play. Drag voiceover to timeline. Repeat for all other slides and ...
Canvahas integrated recording into the editor so you can record your presentations and export audio files if necessary. I'll show you how to make that happen so you can simplify your virtual presentations in the future. Without further ado, let's hop in. CanvaPresentation is an incredible way for you to design powerful and engaging presentation ...
How to record voiceover in Canva // You're going to learn two exciting ways to record a voiceover in Canva.1. Canva Voiceover - Present and RecordFirstly I'l...
To add a voice over to a video in Canva: Open your video project in Canva and go to the video editing section. Click on the 'Music' tab in the left pane, then select 'Uploads'. Click on 'Upload an audio file' and choose the desired voiceover file from your device. Drag and drop the uploaded audio file onto your video timeline.
Learn how to create a recording of a presentation you've designed in Canva.
How to add narration to a design in Canva for Education.
Design, present, inspire with Canva Presentations. Reimagine Presentations with cinematic visuals that captivate your audience - no matter how or where you're presenting. With features to collaborate smarter, create stunning data visualizations, and deliver confidently, Canva Presentations bring impact to your ideas. Create a presentation.
Exporting a Canva presentation to PowerPoint. As you can see below, the PowerPoint file is entirely editable. Something to consider is that unless you have the font installed on your computer, PowerPoint will reassign to a generic font. Example of Canva presentation in PowerPoint (100% editable) How to Use Canva-made Graphics in PowerPoint
AI voice apps are an easy way to create a clone of your own voice and narrate a presentation, or you can even get creative and shift audience engagement up a notch with an avatar presenter from D-ID (opens in a new tab or window) or Neiro (opens in a new tab or window). Not only do they make an impact, they're also great for presenting ...
HOW TO ADD NARRATIONS TO CANVA PRESENTATIONS
How to Narrate PowerPoint Slides. If you have a microphone and camera then you can record voice narration and video capture with your slides. This tutorial will demonstrate the slide narration interface, as well as how to save the presentation as a PowerPoint show or video. Sean Nufer.
Go to the Design tab on the editor. Simply type a descriptive prompt in the search bar, and the AI presentation maker will generate beautiful drafts of slides for you. You can then edit the content and use other awesome AI tools to perfect your presentation. These AI features are super helpful for people new to design, as well as pros and teams ...
Make it simple and hassle-free with a collection of well-designed and easy-to-use presentation templates from Canva. To captivate your target audience, you need the proper presentation template design that suits your subject. After all, a pleasing visual, coupled with helpful and relevant content, can go a long way in creating a solid presentation.
52,354 templates. Create a blank Animated Presentation. Blue Futuristic Illustrative Artificial Intelligence Project Presentation. Presentation by Olmos Carlos. Red and Yellow Retro Bold Trivia Game Presentation. Presentation by Kreative Studio. Pink & Blue Futuristic Gaming Channel Youtube Intro. Video by MahaCreative.