- Our Mission

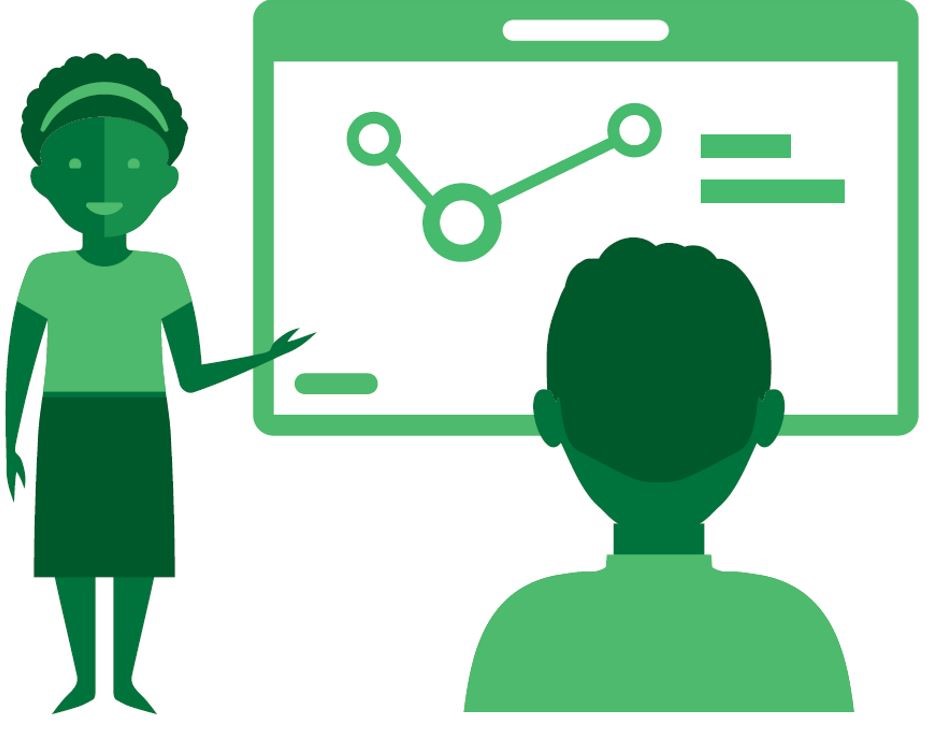
How a Simple Presentation Framework Helps Students Learn
Explaining concepts to their peers helps students shore up their content knowledge and improve their communication skills.

A few years ago, my colleague and I were awarded a Hawai‘i Innovation Fund Grant. The joy of being awarded the grant was met with dread and despair when we were informed that we would have to deliver a 15-minute presentation on our grant write-up to a room full of educational leaders. If that wasn’t intimidating enough, my colleague informed me that he was not going to be in Hawai‘i at the time of the presentation. I had “one shot,” just a 15-minute presentation to encapsulate all of the 17 pages of the grant I had cowritten, but how?
I worked hard to construct and deliver a presentation that was concise yet explicit. I was clear on the big picture of what the grant was composed of and provided a visual of it in practice. I made sure the audience understood the “why” behind the grant. I showed how it worked, the concrete elements of it, and how they made it successful. I finished with a scaffold that would help others know how to initiate it within their context, giving them the freedom to make it authentically their own.
I received good feedback from the presentation, and more important, what was shared positively impacted student learning in other classrooms across the state.
A Simple Framework for Presentations
That first presentation took me over a month to prepare, but afterward I noticed that my prep time for presentations shrank exponentially from a few months to a few (uninterrupted) days. Interestingly enough, as a by-product of creating the original presentation, I created an abstract framework that I have used for every professional learning presentation I have delivered since then. The “What, Why, How, and How-To” framework goes as follows:
- What? What can the audience easily connect to and know as a bridge to the unknown for the rest of the experience?
- Why? Why should they care to listen to (and learn from) the rest of the presentation? What’s in it for them to shift from passive listeners to actively engaged? The audience needs to know why you believe in this so much that you are compelled to share it.
- How? What are the key elements that make it unique? How is it effective in doing what it does? What are the intricacies of how it works?
- How-to? How could they start doing this on their own? How could this knowledge serve as a foundational springboard? Connect it to “why.”
Benefits for Students
One of the best parts of presentations is that they help the presenter to improve their communication skills. The presenter is learning how to give a presentation by doing it. To prepare a presentation, the presenter must know the intricate elements of what they are presenting and the rationale for their importance. In the presentation delivery, the presenter must be articulate and meticulous to ensure that everyone in the audience is able (and willing) to process the information provided.
It didn’t take long for me to realize that preparing and delivering presentations could provide a valuable learning opportunity for my students.
I recall teaching mathematical concepts whereby students would immediately apply knowledge learned to accomplish the task in silence and without any deeper questioning. Only after I asked them to provide presentations on these concepts did they regularly ask me, “Why is this important, again?” or “What makes this so special?” My students’ mathematical literacy grew through preparing presentations with the “What, Why, How, and How-To” framework, which supported them in their ability to demonstrate content knowledge through mathematical rigor (balancing conceptual understanding, skills and procedural fluency, and real-world application).
- The “what” served as the mathematical concept.
- The “why” demonstrated the real-world application of the concept.
- “The “how” demonstrated conceptual understanding of the concept.
- The “how-to” demonstrated skills and procedures of the concept.
In addition to content knowledge, the sequential competencies of clarity, cohesiveness, and captivation ensured that the presenter could successfully share the information with their audience. When combined, these framed a rubric that supported students in optimizing their presentation deliveries. The competencies are as follows:
1. Content knowledge. The presenter must display a deep understanding of what they are delivering in order to share the “what, why, how, and how-to” of the topic.
2. Clarity. The presenter must be clear with precise, academic language. As the content they deliver may be new to the audience, any lack of clarity will alienate the audience. Providing multiple modes of representation greatly addresses a variety of processing needs of a diverse audience.
3. Cohesiveness. When making clear connections, the presenter bridges gaps between each discrete component in how they all work together as integral elements of the topic. Any gaps too large may make the elements look disjointed or, worse, the audience feel lost.
4. Captivation. The presenter must captivate the audience through any combination of audience engagement or storytelling . They make the presentation flow with the energy of a song , and in the end, they leave the audience with a delicate balance of feeling fulfilled and inspired to learn more.
Anyone can build an effective presentation with the “What, Why, How, and How-To” framework, along with competencies of content knowledge, clarity, cohesiveness, and captivation. The better we teach and coach others on how to create and deliver presentations, the more we learn from these individuals through their work.
In my class, one multilingual learner responded to the prompt “What are the non-math (life lessons) you have found valuable from this class?” with “I learn what is learning and teaching... I truly understood how teaching is actually learning when I had presentation. I found a bit of desire to being a teacher. I hope you also learned something from this class.” I always learn from my students when they present.
The Center for Educational Resources (CER) is now known as the Center for Teaching Excellence and Innovation (CTEI). Same great staff, same great service.
Presentation Strategies
Effective communication is essential in the classroom and in the real world. Good presentation skills, including public speaking and the design of visual materials, can be learned. Following the best practices outlined in the videos and resources below will help you become more effective at communicating your ideas in a professional way, while developing your own personal style.
Quick links:
Videos on Presenting
Videos on design principles, narrated presentations in powerpoint, best practices for effective presentations - video.
This video provides strategies for planning and delivering an oral presentation.
Creating and Presenting Your Poster - Video
This video gives tips on what to consider when planning the content, structure, and presentation of a poster.
PowerPoint Design Concept - White Space
White space is a basic design concept that will help clarify information in your PowerPoint presentations and other forms of visual content.
PowerPoint Design Concept - Visual Hierarchy
Visual hierarchy is an important design concept that will help you communicate your main message more effectively.
Designing Effective Presentations - Fonts
Fonts can set the tone for your presentation but it is also important to understand how to make them as legible as possible while communicating your main message.
Designing Effective Presentations - Color
Making thoughtful color choices in your presentation not only helps to set the appropriate feel or style for your presentation but can also help to improve the clarity of your message.
After reviewing the materials above about presentation strategies and design principles, practice those ideas by creating a narrated presentation in PowerPoint. The newer versions of PowerPoint allow you to record yourself giving the presentation (just your voice). The result adds audio objects for each slide, which makes it possible to redo a slide or two if you make mistakes. The PowerPoint file can then be exported to a movie file, complete with slide transistions and animations, to be easily reviewed or shared. This can serve as great practice for your presentation before showtime.
Create a Narrated Presentation
The following link provides a helpful tutorial for both PC and Mac versions of PowerPoint: Recording a slide show with narrations and slide timings
Export a Video File
To export your slideshow as a MP4 file (or other video file) with your audio narrations, please review the following help page, which describes both the PC and Mac versions method: Save a presentation as a Movie file or MP4
NOTE : Not all versions of PowerPoint have the features mentioned above. Hopkins Affiliates have access to a Microsoft Office 365 license which will allow you to download the newest version of Office including PowerPoint. Please visit the following page for how to download Microsoft Office 365: Office 365 Communication Hub, Microsoft Office
- Effective Poster Presentation - Handout
- This PDF presents strategies to consider in determing poster content, structure, and graphic design. It includes tips on presentation logisitics
- The Open University
- Explore OpenLearn
- Get started
- Create a course
- Free courses
- Collections
My OpenLearn Create Profile
- Personalise your OpenLearn profile
- Save Your favourite content
- Get recognition for your learning
Already Registered?
- Welcome to this free course on 'General Teaching M...
- Information that is not to miss
- Alternative format
- Tell us what you think of this course
- Acknowledgements & references
- Course guide
- TOPIC 1 - QUIZ
- TOPIC 2 - QUIZ
- TOPIC 3 - QUIZ
- TOPIC 4 - QUIZ
- TOPIC 5 - QUIZ
- Introduction
- 1.1 DEFINITIONS, TYPES & PROCESSES OF LEARNING
- What is learning
- Behaviourism
- Constructivism
- Social-constructivism
- Cognitivism
- Conclusion on learning theories
- 1.2 LEARNING STYLES
- Introduction to learning styles
- Overview of learning styles
- Interpersonal learners
- Intrapersonal learners
- Kinesthetic learners
- Verbal learners
- Visual learners
- Logical learners
- Auditory learners
- Identifying learning styles
- 1.3 LEVELS OF COGNITION
- Introduction to Bloom's taxonomy
- How Bloom’s Taxonomy is useful for teachers
- 2.1 FOUNDATION AND RATIONALE
- Introduction to Active Teaching and Learning
- Defining Active Teaching and Learning
- Rationale for Active Teaching and Learning
- 2.2 METHODS, TECHNIQUES & TOOLS
- METHODS FOR ACTIVE TEACHING AND LEARNING
- Problem-based learning
- Project-based learning
- Learning stations
- Learning contracts
- TECHNIQUES FOR ACTIVE TEACHING AND LEARNING
- Demonstration
Presentation
- Brainstorming
- Storytelling
- TOOLS FOR ACTIVE TEACHING AND LEARNING
- Low cost experiments
- Charts and maps
- Student portfolio
- 2.3 BARRIES IN INTEGRATING ACTIVE TEACHING
- Identifying Barriers
- 3.1 INTRODUCTION TO CLASSROOM MANAGEMENT & ORGANIZATION
- Defining classroom management
- The role of the teacher
- Defining classroom organization
- Classroom seating arrangement
- Overview of classroom seating arrangement styles
- Benefits of effective classroom management and organization
- 3.2 STRATEGIES FOR EFFECTIVE CLASSROOM MANAGEMENT
- The teacher as a model
- Desired learner behaviour
- Rewarding learners
- Types of rewards
- Reinforcing learners
- Delivering a reinforcement
- 3.3 LESSON PLANNING
- Definition of a lesson plan
- Components of a lesson plan
- 4.1 INTRODUCTION TO ASSESSMENT AND EVALUATION
- Definition of assessment
- Formative vs. summative assessment
- Assessment for learning
- Assessment vs. evaluation
- 4.2 CLASS ASSESSMENT TOOLS
- Assessment rubrics
- Self-assessment
- Peer-assessment
- 4.3 REFLECTIVE PRACTICE
- Definition of reflective practice
- The reflective cycle
- 5.1 CONCEPT OF INSTRUCTIONAL MATERIALS
- Introduction to teaching and learning materials
- Purpose of teaching and learning materials
- 5.2 TYPES OF INSTRUCTIONAL MATERIALS
- Traditional and innovative resources
- Screencasts
- Educational videos
- Educational posters
- Open Educational Resources (OERs)
- 5.3 CHOOSING INSTRUCTIONAL MATERIALS
- Integrating instructional materials
- Factors to consider when selecting instructional materials
About this course
- 11 hours study
- 1 Level 1: Introductory
- Course description
Course rewards
Free Statement of Participation on completion of these courses.
Earn a free digital badge if you complete this course, to display and share your achievement.

General Teaching Methods
If you create an account, you can set up a personal learning profile on the site.
A presentation delivers content through oral, audio and visual channels allowing teacher-learner interaction and making the learning process more attractive. Through presentations, teachers can clearly introduce difficult concepts by illustrating the key principles and by engaging the audience in active discussions. When presentations are designed by learners, their knowledge sharing competences, their communication skills and their confidence are developed.
- Define the objectives of the presentation in accordance to the lesson plan (lesson planning)
- Prepare the structure of the presentation, including text, illustrations and other content (lesson planning)
- Set up and test the presentation equipment and provide a conducive seating arrangement and environment for the audience (lesson planning)
- Invite the audience to reflect on the presentation and give feedback (lesson delivery)
- After the presentation, propose activities or tasks to check the learners’ understanding
- Use Mentimeter for interactive presentations and to get instant feedback from your audience (consult this written tutorial on how to use Mentimeter).
- An infographic; graphic visual representations of information, data, or knowledge, is an innovative way to present. Use the digital tool Canva to create your own infographics (consult this written tutorial on how to use Canva).
- Use Google Slides or the Microsoft software PowerPoint , to easily create digital presentations.
- The purpose of a presentation is to visually reinforce what you are saying. Therefore the text should contain few words and concise ideas organised in bullet-point.
- Support your text using images .
- Provide time for reflection and interaction between the presenter and the audience, for example by using Mentimeter .
Techniques/ Demonstration Techniques/ Brainstorming
For further information, take a look at our frequently asked questions which may give you the support you need.
Have a question?
If you have any concerns about anything on this site please get in contact with us here.
Report a concern
Methods for Presenting Subject Matter
- Tips & Strategies
- An Introduction to Teaching
- Policies & Discipline
- Community Involvement
- School Administration
- Technology in the Classroom
- Teaching Adult Learners
- Issues In Education
- Teaching Resources
- Becoming A Teacher
- Assessments & Tests
- Elementary Education
- Secondary Education
- Special Education
- Homeschooling
- M.A., English, Western Connecticut State University
- B.S., Education, Southern Connecticut State University
The word educate comes from Latin, meaning "to bring up, to rise, and to nourish, to train." To educate is an active enterprise. In comparison, the word teach comes from German, meaning "show, declare, warn, persuade." To teach is a more passive activity.
The difference between these words, educate and teach, has resulted in many different instructional strategies, some more active and some more passive. The teacher has the option to choose one in order to successfully deliver content.
In choosing an active or passive instructional strategy, the teacher must also consider for other factors such as subject matter, the resources available, the time allotted for the lesson, and the background knowledge of the students. What follows is a list of ten instructional strategies that can be used to deliver content regardless of grade level or subject matter.
Lectures are instructor-centered forms of instruction given to a whole class. Lectures come in many different forms, some more effective than others. The least effective form of lecture involves a teacher reading from notes or the text without differentiating for student needs. This makes learning a passive activity and students may quickly lose interest.
The lecture is the most used strategy. An article in "Science Educator" titled "Brain Research: Implications to Diverse Learners" (2005) notes:
"Although lecturing continues to be the most widely employed method in classrooms across the country, research on the way we learn indicates that lecturing is not always very effective."
Some dynamic teachers, however, lecture in a more free-form manner by including students or providing demonstrations. Some skilled lecturers have the ability to engage students using humor or insightful information.
The lecture is often coined as "direct instruction" which can be can be made into a more active instructional strategy when it is part of a mini- lesson .
The lecture portion of the mini-lesson is designed in a sequence where the teacher first makes a connection to previous lessons. Then the teacher delivers the content using a demonstration or a think-aloud . The lecture part of the mini-lesson is revisited after students have an opportunity for hands-on practice when the teacher restates the content one more time.
Socratic Seminar
In a whole group discussion , the instructor and the students share the focus of the lesson. Typically a teacher presents information through questions and answers, trying to ensure that all students are involved in learning. Keeping all students on task, however, may be difficult with large class sizes. Teachers should be aware that using an instructional strategy of whole-class discussions may result in passive engagement for some students who may not participate .
To increase engagement, whole-class discussions may take several different forms. The Socratic seminar is where an instructor asks open-ended questions allowing students to respond and build on each others thinking. According to education researcher Grant Wiggins , the Socratic seminar leads to more active learning when,
"...it becomes the student’s opportunity and responsibility to develop habits and skills that are traditionally reserved for the teacher."
One modification to the Socratic Seminar is the instructional strategy known as the fishbowl. In the fishbowl, a (smaller) inner circle of students respond to questions while a (larger) outer circle of students observes. In the fishbowl, the instructor participates as a moderator only.
Jigsaws and Small Groups
There are other forms of small group discussion. The most basic example is when the teacher breaks the class up into small groups and provides them with talking points that they must discuss. The teacher then walks around the room, checking on the information being shared and ensuring participation by all within the group. The teacher may ask students questions to ensure that everyone's voice is heard.
The Jigsaw is one modification on small group discussion that asks each student to become an expert on a particular topic and then share that knowledge by moving from one group to another. Each student expert then "teaches" the content to the members of each group. All members are responsible to learn all content from one another.
This method of discussion would work well, for example, when students have read an informational text in science or social studies and are sharing information to prepare for questions posed by the instructor.
Literature circles are another instructional strategy that capitalizes on active small group discussions. Students respond to what they have read in structured groups designed to develop independence, responsibility, and ownership. Literature circles can be organized around one book or around a theme using many different texts.
Role Play or Debate
Roleplay is an active instructional strategy that has students take on different roles in a specific context as they explore and learn about the topic at hand. In many ways, role-play is similar to improvisation where each student is confident enough to offer an interpretation of a character or an idea without the benefit of a script. One example could be asking students to participate in a luncheon that is set in a historical period (ex: a Roaring 20s "Great Gatsby" party).
In a foreign language class, students might take on the role of different speakers and use dialogues to help learn the language . It is important that the teacher has a firm plan for including and assessing the students based on their role-playing as more than participation.
The use of debates in the classroom can be an active strategy that strengthens skills of persuasion, organization, public speaking, research, teamwork, etiquette, and cooperation. Even in a polarized classroom, student emotions and biases can be addressed in a debate that begins in research. Teachers can foster critical thinking skills by requiring students to provide evidence to support their claims before any debate.
Hands-on or Simulation
Hands-on learning allows students to participate in an organized activity best evidenced in stations or science experiments. The arts (music, art, drama) and physical education are those recognized disciplines that require hands-on instruction.
Simulations are also hands-on but are different than role-playing. Simulations ask students to use what they have learned and their own intellect to work through an authentic problem or activity. Such simulations might be offered, for example, in a civics class where students create a model legislature in order to create and pass legislation. Another example is having students participate in a stock market game. Regardless of the kind of activity, a post-simulation discussion is important for assessing student understanding.
Because these kinds of active instructional strategies are engaging, students are motivated to participate. The lessons do require extensive preparation and also require the teacher to make clear how each student will be assessed for their participation and then be flexible with the results.
Software Program(s)
Teachers can use a variety of educational software on different platforms to deliver digital content for student learning. The software might be installed as an application or a program that students access on the internet. Different software programs are selected by the teacher for their content ( Newsela ) or for the features that allow students to engage ( Quizlet ) with the material.
Longterm instruction, a quarter or semester, can be delivered over software platforms online such as Odysseyware or Merlot . These platforms are curated by educators or researchers who provide specific subject materials, assessment, and support materials.
Short term instruction, such as a lesson, can be used to engage students in learning content through interactive games ( Kahoot !) or more passive activities such as reading texts.
Many software programs can collect data on student performance which can be used by teachers to inform instruction in areas of weakness. This instructional strategy requires that teacher vets the materials or learns the software processes of the program in order to best use the data that records student performance.
Presentation Through Multimedia
Multimedia methods of presentation are passive methods of delivering content and include slideshows (Powerpoint) or movies. When creating presentations, teachers should be aware of the need to keep notes concise while including interesting and relevant images. If done well, a presentation is a kind of lecture that can be interesting and effective for student learning.
Teachers may want to follow a 10/20/30 rule which means there are no more than 10 slides , the presentation is under 20 minutes, and the font is no smaller than 30 points. Presenters need to be aware that too many words on a slide can be confusing to some students or that reading every word on the slide aloud can be boring for an audience that can already read the material.
Movies present their own set of problems and concerns but can be extremely effective when teaching certain subjects. Teachers should consider the pros and cons of using movies before using them in the classroom.
Independent Reading and Work
Some topics lend themselves well to individual classroom reading time. For example, if students are studying a short story, a teacher might have them read in class and then stop them after a certain time to ask questions and check for understanding. However, it is important that the teacher is aware of student reading levels to make sure that students do not fall behind. Different leveled texts on the same content may be necessary.
Another method some teachers use is to have students select their own reading based on a research topic or simply on their interests. When students make their own choices in reading, they are more actively engaged. On independent reading selections, teachers may want to use more generic questions to assess student understanding such as:
- What did the author say?
- What did the author mean?
- What words are the most important?
Research work in any subject area falls into this instructional strategy.
Student Presentation
The instructional strategy of using student presentations as a way to present content to the class as a whole can be a fun and engaging method of instruction. For example, teachers can divide up a chapter into topics and have the students "teach" the class by presenting their "expert" analysis. This is similar to the Jigsaw strategy used in small group work.
Another way to organize student presentations is to hand out topics to students or groups and have them present information on each topic as a short presentation. This not only helps students learn the material in a deeper manner but also provides them with practice in public speaking. While this instructional strategy is largely passive for the student audience, the student presenting is an active demonstrating a high level of understanding.
Should students choose to use media, they should also adhere to the same recommendations that teachers should use with Powerpoint (ex: a 10/20/30 rule) or for films.
Flipped Classroom
Student use of all manner of digital devices (smartphones, laptops, i-Pads, Kindles) that allow access to content brought the beginning of the Flipped Classroom. More than a switch of homework to classwork, this relatively new instructional strategy is where the teacher moves the more passive elements of learning such as watching a powerpoint or reading a chapter, etc.as an activity outside of the classroom, usually the day or night before. This design of the flipped classroom is where valuable class time is available for more active forms of learning.
In flipped classrooms, one goal would be to guide students to make decisions on how to learn better on their own rather than having the teacher deliver information directly.
One source of materials for the flipped classroom is Khan Academy, This site originally began with videos that explained math concepts using the motto "Our mission is to provide a free, world-class education to anyone, anywhere."
Many students preparing for the SAT for college entry might be interested to know that if they are using Khan Academy, they are participating in a flipped classroom model.
- Whole Group Discussion Pros and Cons
- 6 Tips to Liven Up Your Lectures
- 10 Ways to Keep Your Class Interesting
- Advantages and Disadvantages of Lecturing
- How Scaffolding Instruction Can Improve Comprehension
- Using Effective Instructional Strategies
- How to Facilitate Learning and Critical Thinking
- 6 Teaching Strategies to Differentiate Instruction
- How to Design Lessons When the Student Can't Read
- Teaching Strategies to Promote Student Equity and Engagement
- 5 Keys to Being a Successful Teacher
- Gradual Release of Responsibility Creates Independent Learners
- Topics for a Lesson Plan Template
- How to Make Lesson Plans for Adult Students
- Strategies for Teachers to Develop Positive Relationships With Students
- The Pros and Cons of Block Schedules
- Center for Innovative Teaching and Learning
- Instructional Guide
Teaching with PowerPoint
When effectively planned and used, PowerPoint (or similar tools, like Google Slides) can enhance instruction. People are divided on the effectiveness of this ubiquitous presentation program—some say that PowerPoint is wonderful while others bemoan its pervasiveness. No matter which side you take, PowerPoint does offer effective ways to enhance instruction when used and designed appropriately.
PowerPoint can be an effective tool to present material in the classroom and encourage student learning. You can use PowerPoint to project visuals that would otherwise be difficult to bring to class. For example, in an anthropology class, a single PowerPoint presentation could project images of an anthropological dig from a remote area, questions asking students about the topic, a chart of related statistics, and a mini quiz about what was just discussed that provides students with information that is visual, challenging, and engaging.
PowerPoint can be an effective tool to present material in the classroom and encourage student learning.
This section is organized in three major segments: Part I will help faculty identify and use basic but important design elements, Part II will cover ways to enhance teaching and learning with PowerPoint, and Part III will list ways to engage students with PowerPoint.
PART I: Designing the PowerPoint Presentation
Accessibility.
- Student accessibility—students with visual or hearing impairments may not be able to fully access a PowerPoint presentation, especially those with graphics, images, and sound.
- Use an accessible layout. Built-in slide template layouts were designed to be accessible: “the reading order is the same for people with vision and for people who use assistive technology such as screen readers” (University of Washington, n.d.). If you want to alter the layout of a theme, use the Slide Master; this will ensure your slides will retain accessibility.
- Use unique and specific slide titles so students can access the material they need.
- Consider how you display hyperlinks. Since screen readers read what is on the page, you may want to consider creating a hyperlink using a descriptive title instead of displaying the URL.
- All visuals and tables should include alt text. Alt text should describe the visual or table in detail so that students with visual impairments can “read” the images with their screen readers. Avoid using too many decorative visuals.
- All video and audio content should be captioned for students with hearing impairments. Transcripts can also be useful as an additional resource, but captioning ensures students can follow along with what is on the screen in real-time.
- Simplify your tables. If you use tables on your slides, ensure they are not overly complex and do not include blank cells. Screen readers may have difficulty providing information about the table if there are too many columns and rows, and they may “think” the table is complete if they come to a blank cell.
- Set a reading order for text on your slides. The order that text appears on the slide may not be the reading order of the text. Check that your reading order is correct by using the Selection Pane (organized bottom-up).
- Use Microsoft’s Accessibility Checker to identify potential accessibility issues in your completed PowerPoint. Use the feedback to improve your PowerPoint’s accessibility. You could also send your file to the Disability Resource Center to have them assess its accessibility (send it far in advance of when you will need to use it).
- Save your PowerPoint presentation as a PDF file to distribute to students with visual impairments.
Preparing for the presentation
- Consider time and effort in preparing a PowerPoint presentation; give yourself plenty of lead time for design and development.
- PowerPoint is especially useful when providing course material online. Consider student technology compatibility with PowerPoint material put on the web; ensure images and graphics have been compressed for access by computers using dial-up connection.
PowerPoint is especially useful when providing course material online.
- Be aware of copyright law when displaying course materials, and properly cite source material. This is especially important when using visuals obtained from the internet or other sources. This also models proper citation for your students.
- Think about message interpretation for PowerPoint use online: will students be able to understand material in a PowerPoint presentation outside of the classroom? Will you need to provide notes and/or other material to help students understand complex information, data, or graphics?
- If you will be using your own laptop, make sure the classroom is equipped with the proper cables, drivers, and other means to display your presentation the way you have intended.
Slide content
- Avoid text-dense slides. It’s better to have more slides than trying to place too much text on one slide. Use brief points instead of long sentences or paragraphs and outline key points rather than transcribing your lecture. Use PowerPoint to cue and guide the presentation.
- Use the Notes feature to add content to your presentation that the audience will not see. You can access the Notes section for each slide by sliding the bottom of the slide window up to reveal the notes section or by clicking “View” and choosing “Notes Page” from the Presentation Views options.
- Relate PowerPoint material to course objectives to reinforce their purpose for students.
Number of slides
- As a rule of thumb, plan to show one slide per minute to account for discussion and time and for students to absorb the material.
- Reduce redundant or text-heavy sentences or bullets to ensure a more professional appearance.
- Incorporate active learning throughout the presentation to hold students’ interest and reinforce learning.
Emphasizing content
- Use italics, bold, and color for emphasizing content.
- Use of a light background (white, beige, yellow) with dark typeface or a dark background (blue, purple, brown) with a light typeface is easy to read in a large room.
- Avoid using too many colors or shifting colors too many times within the presentation, which can be distracting to students.
- Avoid using underlines for emphasis; underlining typically signifies hypertext in digital media.
Use of a light background with dark typeface or a dark background with a light typeface is easy to read in a large room.
- Limit the number of typeface styles to no more than two per slide. Try to keep typeface consistent throughout your presentation so it does not become a distraction.
- Avoid overly ornate or specialty fonts that may be harder for students to read. Stick to basic fonts so as not to distract students from the content.
- Ensure the typeface is large enough to read from anywhere in the room: titles and headings should be no less than 36-40-point font. The subtext should be no less than 32-point font.
Clip art and graphics
- Use clip art and graphics sparingly. Research shows that it’s best to use graphics only when they support the content. Irrelevant graphics and images have been proven to hinder student learning.
- Photographs can be used to add realism. Again, only use photographs that are relevant to the content and serve a pedagogical purpose. Images for decorative purposes are distracting.
- Size and place graphics appropriately on the slide—consider wrapping text around a graphic.
- Use two-dimensional pie and bar graphs rather than 3D styles which can interfere with the intended message.
Use clip art and graphics sparingly. Research shows that it’s best to use graphics only when they support the content.
Animation and sound
- Add motion, sound, or music only when necessary. When in doubt, do without.
- Avoid distracting animations and transitions. Excessive movement within or between slides can interfere with the message and students find them distracting. Avoid them or use only simple screen transitions.
Final check
- Check for spelling, correct word usage, flow of material, and overall appearance of the presentation.
- Colleagues can be helpful to check your presentation for accuracy and appeal. Note: Errors are more obvious when they are projected.
- Schedule at least one practice session to check for timing and flow.
- PowerPoint’s Slide Sorter View is especially helpful to check slides for proper sequencing as well as information gaps and redundancy. You can also use the preview pane on the left of the screen when you are editing the PowerPoint in “Normal” view.
- Prepare for plan “B” in case you have trouble with the technology in the classroom: how will you provide material located on your flash drive or computer? Have an alternate method of instruction ready (printing a copy of your PowerPoint with notes is one idea).
PowerPoint’s Slide Sorter View is especially helpful to check slides for proper sequencing and information gaps and redundancy.
PowerPoint Handouts
PowerPoint provides multiple options for print-based handouts that can be distributed at various points in the class.
Before class: students might like having materials available to help them prepare and formulate questions before the class period.
During class: you could distribute a handout with three slides and lines for notes to encourage students to take notes on the details of your lecture so they have notes alongside the slide material (and aren’t just taking notes on the slide content).
After class: some instructors wait to make the presentation available after the class period so that students concentrate on the presentation rather than reading ahead on the handout.
Never: Some instructors do not distribute the PowerPoint to students so that students don’t rely on access to the presentation and neglect to pay attention in class as a result.
- PowerPoint slides can be printed in the form of handouts—with one, two, three, four, six, or nine slides on a page—that can be given to students for reference during and after the presentation. The three-slides-per-page handout includes lined space to assist in note-taking.
- Notes Pages. Detailed notes can be printed and used during the presentation, or if they are notes intended for students, they can be distributed before the presentation.
- Outline View. PowerPoint presentations can be printed as an outline, which provides all the text from each slide. Outlines offer a welcome alternative to slide handouts and can be modified from the original presentation to provide more or less information than the projected presentation.
The Presentation
Alley, Schreiber, Ramsdell, and Muffo (2006) suggest that PowerPoint slide headline design “affects audience retention,” and they conclude that “succinct sentence headlines are more effective” in information recall than headlines of short phrases or single words (p. 233). In other words, create slide titles with as much information as is used for newspapers and journals to help students better understand the content of the slide.
- PowerPoint should provide key words, concepts, and images to enhance your presentation (but PowerPoint should not replace you as the presenter).
- Avoid reading from the slide—reading the material can be perceived as though you don’t know the material. If you must read the material, provide it in a handout instead of a projected PowerPoint slide.
- Avoid moving a laser pointer across the slide rapidly. If using a laser pointer, use one with a dot large enough to be seen from all areas of the room and move it slowly and intentionally.
Avoid reading from the slide—reading the material can be perceived as though you don’t know the material.
- Use a blank screen to allow students to reflect on what has just been discussed or to gain their attention (Press B for a black screen or W for a white screen while delivering your slide show; press these keys again to return to the live presentation). This pause can also be used for a break period or when transitioning to new content.
- Stand to one side of the screen and face the audience while presenting. Using Presenter View will display your slide notes to you on the computer monitor while projecting only the slides to students on the projector screen.
- Leave classroom lights on and turn off lights directly over the projection screen if possible. A completely dark or dim classroom will impede notetaking (and may encourage nap-taking).
- Learn to use PowerPoint efficiently and have a back-up plan in case of technical failure.
- Give yourself enough time to finish the presentation. Trying to rush through slides can give the impression of an unorganized presentation and may be difficult for students to follow or learn.
PART II: Enhancing Teaching and Learning with PowerPoint
Class preparation.
PowerPoint can be used to prepare lectures and presentations by helping instructors refine their material to salient points and content. Class lectures can be typed in outline format, which can then be refined as slides. Lecture notes can be printed as notes pages (notes pages: Printed pages that display author notes beneath the slide that the notes accompany.) and could also be given as handouts to accompany the presentation.
Multimodal Learning
Using PowerPoint can help you present information in multiple ways (a multimodal approach) through the projection of color, images, and video for the visual mode; sound and music for the auditory mode; text and writing prompts for the reading/writing mode; and interactive slides that ask students to do something, e.g. a group or class activity in which students practice concepts, for the kinesthetic mode (see Part III: Engaging Students with PowerPoint for more details). Providing information in multiple modalities helps improve comprehension and recall for all students.
Providing information in multiple modalities helps improve comprehension and recall for all students.
Type-on Live Slides
PowerPoint allows users to type directly during the slide show, which provides another form of interaction. These write-on slides can be used to project students’ comments and ideas for the entire class to see. When the presentation is over, the new material can be saved to the original file and posted electronically. This feature requires advanced preparation in the PowerPoint file while creating your presentation. For instructions on how to set up your type-on slide text box, visit this tutorial from AddictiveTips .
Write or Highlight on Slides
PowerPoint also allows users to use tools to highlight or write directly onto a presentation while it is live. When you are presenting your PowerPoint, move your cursor over the slide to reveal tools in the lower-left corner. One of the tools is a pen icon. Click this icon to choose either a laser pointer, pen, or highlighter. You can use your cursor for these options, or you can use the stylus for your smart podium computer monitor or touch-screen laptop monitor (if applicable).
Just-In-Time Course Material
You can make your PowerPoint slides, outline, and/or notes pages available online 24/7 through Blackboard, OneDrive, other websites. Students can review the material before class, bring printouts to class, and better prepare themselves for listening rather than taking a lot of notes during the class period. They can also come to class prepared with questions about the material so you can address their comprehension of the concepts.
PART III: Engaging Students with PowerPoint
The following techniques can be incorporated into PowerPoint presentations to increase interactivity and engagement between students and between students and the instructor. Each technique can be projected as a separate PowerPoint slide.
Running Slide Show as Students Arrive in the Classroom
This technique provides visual interest and can include a series of questions for students to answer as they sit waiting for class to begin. These questions could be on future texts or quizzes.
- Opening Question : project an opening question, e.g. “Take a moment to reflect on ___.”
- Think of what you know about ___.
- Turn to a partner and share your knowledge about ___.
- Share with the class what you have discussed with your partner.
- Focused Listing helps with recall of pertinent information, e.g. “list as many characteristics of ___, or write down as many words related to ___ as you can think of.”
- Brainstorming stretches the mind and promotes deep thinking and recall of prior knowledge, e.g. “What do you know about ___? Start with your clearest thoughts and then move on to those what are kind of ‘out there.’”
- Questions : ask students if they have any questions roughly every 15 minutes. This technique provides time for students to reflect and is also a good time for a scheduled break or for the instructor to interact with students.
- Note Check : ask students to “take a few minutes to compare notes with a partner,” or “…summarize the most important information,” or “…identify and clarify any sticking points,” etc.
- Questions and Answer Pairs : have students “take a minute to come with one question then see if you can stump your partner!”
- The Two-Minute Paper allows the instructor to check the class progress, e.g. “summarize the most important points of today’s lecture.” Have students submit the paper at the end of class.
- “If You Could Ask One Last Question—What Would It Be?” This technique allows for students to think more deeply about the topic and apply what they have learned in a question format.
- A Classroom Opinion Poll provides a sense of where students stand on certain topics, e.g. “do you believe in ___,” or “what are your thoughts on ___?”
- Muddiest Point allows anonymous feedback to inform the instructor if changes and or additions need to be made to the class, e.g. “What parts of today’s material still confuse you?”
- Most Useful Point can tell the instructor where the course is on track, e.g. “What is the most useful point in today’s material, and how can you illustrate its use in a practical setting?”
Positive Features of PowerPoint
- PowerPoint saves time and energy—once the presentation has been created, it is easy to update or modify for other courses.
- PowerPoint is portable and can be shared easily with students and colleagues.
- PowerPoint supports multimedia, such as video, audio, images, and
PowerPoint supports multimedia, such as video, audio, images, and animation.
Potential Drawbacks of PowerPoint
- PowerPoint could reduce the opportunity for classroom interaction by being the primary method of information dissemination or designed without built-in opportunities for interaction.
- PowerPoint could lead to information overload, especially with the inclusion of long sentences and paragraphs or lecture-heavy presentations with little opportunity for practical application or active learning.
- PowerPoint could “drive” the instruction and minimize the opportunity for spontaneity and creative teaching unless the instructor incorporates the potential for ingenuity into the presentation.
As with any technology, the way PowerPoint is used will determine its pedagogical effectiveness. By strategically using the points described above, PowerPoint can be used to enhance instruction and engage students.
Alley, M., Schreiber, M., Ramsdell, K., & Muffo, J. (2006). How the design of headlines in presentation slides affects audience retention. Technical Communication, 53 (2), 225-234. Retrieved from https://www.jstor.org/stable/43090718
University of Washington, Accessible Technology. (n.d.). Creating accessible presentations in Microsoft PowerPoint. Retrieved from https://www.washington.edu/accessibility/documents/powerpoint/
Selected Resources
Brill, F. (2016). PowerPoint for teachers: Creating interactive lessons. LinkedIn Learning . Retrieved from https://www.lynda.com/PowerPoint-tutorials/PowerPoint-Teachers-Create-Interactive-Lessons/472427-2.html
Huston, S. (2011). Active learning with PowerPoint [PDF file]. DE Oracle @ UMUC . Retrieved from http://contentdm.umuc.edu/digital/api/collection/p16240coll5/id/78/download
Microsoft Office Support. (n.d.). Make your PowerPoint presentations accessible to people with disabilities. Retrieved from https://support.office.com/en-us/article/make-your-powerpoint-presentations-accessible-to-people-with-disabilities-6f7772b2-2f33-4bd2-8ca7-ae3b2b3ef25
Tufte, E. R. (2006). The cognitive style of PowerPoint: Pitching out corrupts within. Cheshire, CT: Graphics Press LLC.
University of Nebraska Medical Center, College of Medicine. (n.d.). Active Learning with a PowerPoint. Retrieved from https://www.unmc.edu/com/_documents/active-learning-ppt.pdf
University of Washington, Department of English. (n.d.). Teaching with PowerPoint. Retrieved from https://english.washington.edu/teaching/teaching-powerpoint
Vanderbilt University, Center for Teaching. (n.d.). Making better PowerPoint presentations. Retrieved from https://cft.vanderbilt.edu/guides-sub-pages/making-better-powerpoint-presentations/

Suggested citation
Northern Illinois University Center for Innovative Teaching and Learning. (2020). Teaching with PowerPoint. In Instructional guide for university faculty and teaching assistants. Retrieved from https://www.niu.edu/citl/resources/guides/instructional-guide
Phone: 815-753-0595 Email: [email protected]
Connect with us on
Facebook page Twitter page YouTube page Instagram page LinkedIn page
- Request a Consultation
- Workshops and Virtual Conversations
- Technical Support
- Course Design and Preparation
- Observation & Feedback
Teaching Resources
Improving Presentation Style
Resource overview.
Strategies for making your presentation style more effective in the classroom
Effective lecturers combine the talents of scholar, writer, producer, comedian, showman, and teacher in ways that contribute to student learning.”
Wilbert J. McKeachie, Teaching Tips
An effective teacher is an excellent communicator and therefore thinks about improving his or her presentation skills. One of the most important aspects of communicating is shaping both content and style to fit your audience. In the classroom, if you cannot communicate in a way that is both comprehensible and interesting to your students, their learning will be greatly reduced.
To strengthen your presentation skills, focus on improving your skills in these three areas:
Verbal and Non-Verbal Communication
- Find out all you can about the room in which you will be presenting. Visit the room ahead of time to familiarize yourself with its size and layout, as well as the type of chalkboards, chalk, erasers, and multimedia available. In addition, obtain any necessary training on the multimedia.
- Use the classroom as a stage. Move around to engage and interact with your audience. Do not stand in one spot the entire time. Move with purpose; do not walk aimlessly.
- Prepare. Preparation is essential. All excellent teachers are well prepared for each class. Practice in the room if you can, especially if you are new to teaching. In addition, prepare yourself emotionally and psychologically by taking the time to organize your thoughts and to look forward to teaching before every class.
- Speak loudly and clearly. Project your voice and face your audience when you are speaking. Speak slightly louder than you do in a normal conversation. Use a microphone in a medium to large classroom. The class may include students with hearing problems. Moreover, a microphone will help ensure that students can hear you even when you turn to the chalkboard momentarily.
- Modulate the tone, pitch, and speed of your speech. Do not speak in a monotone. Vary the pitch and speed of your voice for emphasis and effect. Use appropriate pauses. Rather than using filler words such as “uh,” for example, simply pause before moving on to the next idea or point.
- Use gestures and facial expressions to help you explain, emphasize, and communicate the material. However, be careful not to develop distracting habits such as pacing or repeatedly adjusting your glasses or hair. To find out if you are unconsciously doing anything that may be distracting to your audience, have a colleague observe one of your classes or have your class videotaped. To schedule a videotaping and teaching consultation, call The Teaching Center at 935-6810.
- Develop a teaching persona. Decide how you want to be perceived and what mannerisms you want to have. For example, do you want to be quiet, humorous, formal, or informal? Whatever persona is right for you, aim to convey confidence and ease. Move with certainty and assuredness, and be careful not to seem pompous or intimidating.
- Show passion and enthusiasm for the topic. If you are not interested in the subject, you cannot expect your students to be interested, either. Point out the fascinating aspects of what they are learning.
- Do not read your notes or slides. Doing so will lower your energy level and lead your audience to feel less engaged.
- Interact with and pay attention to your audience. Make eye contact with the students, not with the wall or chalkboard. Build a rapport with the class. Make sure the class is with you (following and understanding what you are discussing). If they appear to be lost, take additional time to explain points and to ask and answer questions.
- Do not take yourself too seriously. Be able to laugh at yourself and your mistakes. Feel free to bring humor into the classroom, but direct it at yourself, rather than at your students’ questions and ideas.
- Keep track of the time. Do not start early or end late. The students often do not recall or listen to information presented after the class period is technically finished.
Effective Use of the Chalkboard and Visual-Aids
Using the Chalkboard
- Write legibly and big enough that your writing can seen in the back of the room.
- Think about the organization of the material on the board.
- Fill one board at a time, starting at the top of each board and writing down.
- Do not scrunch in words at the very bottom of the board or in the margins. The students in the back will not see the words at the bottom, and no one will see the words in the margins.
- Underline or mark major assumptions, conclusions, etc.
- Use color to emphasize points.Before the course starts, determine which colors are most visible in the back of the room.
- Erase a board only when you have run out of room.
- If you find a mistake on a previous board, do not erase it. Cross it out, then write the correction in, which is what the students must do.
Using Visual Aids, such as PowerPoint Slides
- Do not use visual aids unless they serve a clear and important purpose. Visuals should aid quick comprehension and support the main points.
- Book and check out the presentation equipment in advance.
- Talk to your audience and not to the screen.
- Use the visuals to enhance your presentation, not as a substitute for a verbal presentation.
- Use a pointer, if necessary.
- Coordinate the audio and the visual.
- Design your visuals with clarity and simplicity in mind.
Effective Design and Meaningful Organization of Content
Visual Design Suggestions
- Use single words or phrases.
- Organize the content visually.
- Choose a font that is easy to see. Choose a font that is simple, plain, and easy to read such as Times New Roman, Ariel, or Helvetica. Select a font size that is large enough to be seen at the back of the room. The minimal acceptable size is typically 24-point. Use both upper- and lower-case letters; all upper-case letters are difficult to read.
- Keep the design simple. Too many words, graphics, or different colors are distracting and cause students to miss the important points.
- Use short quotes, not long extracts, from documents.
- Assign a title for each visual. Doing so will help your audience organize and retain the information on each visual.
- Use summary lists.
- Limit the number of ideas on each visual. For example, limit the number of bullets on a page to approximately 4 to 6. Each bullet should be short, approximately one line. Do not crowd the visual with text; it will be too difficult to read.
- Use color for emphasis and organization. Color is useful, but needs to be used judiciously. The color should be used for emphasis or for distinguishing among data. Think about the color wheel: adjacent colors blend together and colors directly opposite each other are contrasting and provide better readability. Reds and oranges stand out, but are hard to continually focus on; therefore, use these colors only for emphasis. Greens, blues, and browns are easier to continually focus on, but do not grab a person’s attention.
- Design diagrams and tables that are simple and clear, with readily recognized symbols. Your audience must be able to read all data in your diagrams and tables. Often, this means that you will have to simplify a more complex or detailed table or diagram that has been prepared for a printed format.
- Use horizontal (landscape) layout, not vertical (portrait). Screens, video monitors, and computer monitors are shaped for a horizontal, not a vertical, format. In addition, a horizontal format is easier to project in rooms with low ceilings.
Content Organization Suggestions
- Plan the content. Think about the type of students in the class, the goals for the course and the current session, the type of material to be presented in the current session, and the type of media, if any, that you are going to use.
- Provide a structure. Each class session or presentation should have a beginning, a middle, and an end.
- List objectives or provide an outline at the beginning of each class session. Providing an outline helps students identify the most important points and follow the lecture or discussion more effectively.
- Organize course content with a theme or storyline. How do you want to arrange the material? How does each part of the material relate to what comes next.
- Remember that a typical student’s attention span is 15-20 minutes. Every 15-20 minutes, either change your teaching method or change activities. Use different teaching methods in one session to keep the students’ attention and to reach students who have different learning preferences. (See Teaching with Lectures .)
- Allow for pauses and “wait-time.” Wait-time is the pause after the instructor either asks a question or asks for questions. Students need time to think of a response to a question, or to think of a question to ask. Do not be afraid of silence. Most instructors wait 1-3 seconds for a response. However, increasing the wait-time to 5-10 seconds dramatically increases the number and quality of responses. (See Asking Questions to Improve Learning .)

Clark, Donald. “Making Presentations that Audiences Will Love.” PowerPoint Presentation. http://www.nwlink.com/~donclark/hrd/templates/presentations.ppt .
—.“Monthly Speaking Tips.” LJL Seminars. http://www.ljlseminars.com/monthtip.htm .
“Common Visual Aids.” Faculty Development Committee. Honolulu Community College. http://letsgetengaged.wikispaces.com/file/view/using_visual_aids.pdf
“Creating Visual Aids That Really Work: Designing Effective Slides Using PowerPoint.” Effective Communications Group (ECG), Inc. http://ecgcoaching.com/library/ps/powerpoint.php
Davis, Barbara Gross. “Delivering a Lecture.” Tools for Teaching. San Francisco: Jossey-Bass Publishers. 1993.
Edwards, Paul N. “How to Give an Academic Talk.” School of Information. University of Michigan. http://pne.people.si.umich.edu/PDF/howtotalk.pdf .
McKeachie, Wilbert, et al. McKeachie’s Teaching Tips: Strategies, Research, and Theory for College and University Teachers. 12th ed. Boston: Houghton Mifflin, 2005.
“Presentations.” Teaching and Learning Center. Eastern Kentucky University.
Sammons, Martha. “Students Assess Computer-Aided Classroom Presentations.” The Journal Online, May 1995. http://thejournal.com/articles/1995/05/01/students-assess-computeraided-classroom-presentations.aspx?sc_lang=en
Have suggestions?
If you have suggestions of resources we might add to these pages, please contact us:
[email protected] (314) 935-6810 Mon - Fri, 8:30 a.m. - 5:00 p.m.
- Visit the University of Nebraska–Lincoln
- Apply to the University of Nebraska–Lincoln
- Give to the University of Nebraska–Lincoln
Search Form
- Presentation Style
One of the best ways an instructor can engage their students is by modifying their presentation style. Classes don't have to be lecture heavy and monotonous and it can be helpful for students to mix up your presentation strategy to keep things fresh and keep students interested (Bain 2004). Here we have included some ways to consider adjusting your presentation style.
Prepare. Of course, it's great to practice your lectures beforehand so you don't have to rely on reading off notes or slides. However, practicing your delivery can also be helpful. Play around with different gestures, facial expressions, and emphasis of words to change up your physical presence and speech patterns to keep students engaged (Gross Davis 1993). If your course is primarily online, consider having recorded videos posted on Canvas. Pre-recorded videos allow you to have multiple takes and include editing to make your presentation feel more dynamic. Preparation for in-person or online courses will also help with the stress before teaching.
Consider the verbal and non-verbal. If possible, familiarize yourself with the classroom in which you will be teaching before the semester. The room can act as your stage, so it's helpful to feel confident in the space as well as the material. This will make you seem more relaxed so you can present material that fits your personality, helping avoid rigidity and unclear or monotonous speech. If your class is online, you can have the flexibility of having different backgrounds and settings based on where you decide to record. This too can help you create a dynamic video that keeps your students interested.
Keep your audience in mind. Be sure to make eye contact, not just to show students you are paying attention to them, but to see how students are absorbing the information you are delivering (McKeachie 2005). Are people drifting off or seeming distracted? Do they look confused or overwhelmed? Keeping your audience in mind will allow you to present information according to their needs in ways that are difficult to cover during preparation.
Timing is key. Be sure that your information is paced well with necessary breaks or pauses built into the lecture itself. This will help keep students more engaged during class, but it will help you run on time since students often don't pay as close of attention before or after the official class time. Consider creating a timeline for your classes to help provide structure and keep you on track.
Visual aids should be a friend, but not a crutch. PowerPoints, whiteboards, images, and videos can all be helpful learning tools for your class. However, be careful to prepare before class, so they don't become a crutch for you to remember the information. Students are there for your instruction, relying too heavily on visual aids can lessen their interest as they feel they could have gotten this information on their own time (Sammons 1995).
Questions. Before class, come up with some clear, direct questions that you can ask the class. Questions help break up your lecture and to engage students in their own learning. When designing classes, keep in mind the learning objectives for that specific material in addition to the overarching course goals. Consider asking one question at a time if you plan on continuing to lecture afterward to help keep focus. If the lecture section is complete, consider having students ask each other questions related to the material. For an online course, questions are particularly helpful for discussion boards or collaborative discussion formats like a shared Google Doc or Box folder. Other ideas for facilitating group discussions can be found on the Knute Broady Collection's Active Learning page .
For more ideas, Washington University in St. Louis' effective lecture video can be a helpful resource.
Bain, Ken. (2004). "What the Best College Teachers Do." Harvard University Press.
Gross Davis, Barbara (1993). "Delivering a Lecture." Tools for Teaching.
McKeachie, Wilbert, et al. (2005). "McKeachie's Teaching Tips: Strategies, Research, and Theory for College and University Teachers." Boston: Houghton Mifflin, 12.
Sammons, Martha. (1995). " Students Assess Computer-Aided Classroom Presentations. " The Journal Online.
- Student Engagement
Knute Broady Collection
- Active Learning
- Classroom Assessment
- Course Design
- Inclusive Teaching
- Large Enrollment Courses
- Student Participation
- Fresh Voices on Student Engagement
- Additional Materials
- Scholarship of Teaching and Learning

What is ‘Presentation, Practice, Production’ (PPP)?
And how can i best use it in my classroom.

Presentation, practice, production (PPP) is a lesson structure, a way to order activities in your lessons.
Although quite old and heavily criticised over the years, PPP is probably the most commonly used lesson structure in teaching English to foreign learners today. It’s also still widely taught to new teachers and seen on initial teacher training courses like the CELTA and CertTESOL.
Most course books that you’re likely to use will structure their chapters in ways similar or the same as PPP, meaning that you’ll get a lot of exposure to this method.
As the name suggests, there are three stages to this lesson structure, which we’ll look at now.
Thanks for reading Barefoot TEFL Teacher! Subscribe for free to receive new posts.
The ‘presentation’ stage
This is where the language is introduced, or ‘presented’ to the learners, usually by introducing a context or situation. For example, you could:
Tell or act out a short story or anecdote ( “I woke up this morning with a nasty cold… AHHH-CHOOO! I went to the doctor and…”)
Play a short audio clip
Show a clip from a movie or TV show.
Show objects you’ve brought in (e.g. newspaper cuttings, plane tickets, hobby materials)
The aim is to ensure students understand the context and get them thinking about it. You could elicit ideas or suggestions from students, get them to talk to each other about what they know or think about the situation, etc. This also helps them start to remember the language and vocabulary they already know about the topic (or ‘activate the schemata’, if you want the fancy term for it).
The ‘practice’ stage
The ‘practice’ stage is when students use the language in a controlled way. This stage is sometimes divided into two — a controlled practice and a freer practice. Again, among many things, you could get students to:
Drill sentences or sounds, chorally or individually.
Substitution drill in pairs
Sentence matching activities
Gap-fill exercises
Pair work asking and answering questions
The aim of this stage is accuracy . Error correction is important in this stage, so monitor the students closely and take time to correct errors immediately. A delayed error correction section after the activity would be useful for target language errors that seem to be common.
The ‘production’ stage
The ‘production’ stage is where the language is used more openly. Things like:
Communication tasks
Collaborative tasks
Discussion activities
The focus of this stage is using the language as fluently and naturally as possible , as students would do outside of the classroom.
Theory behind Presentation, Practice, Production
This is where PPP gets criticised. It started in the 1960s, and language learning theory has developed considerably since then. Academics who study second language acquisition get annoyed at how PPP doesn’t tick any of the boxes for how we’re supposed to learn a language and yet is still so widespread.
Some learning assumptions behind presentation, practice, production are:
Students should be told the grammar rules and then practice them (a deductive approach).
Language learning is a skill like any other and should be practised as such.
There should be a high level of teacher control, slowly handed over to learners as the lesson progresses.
Language is a series of items that can be learned in sequence.
The target language should be practised by removing unnecessary language to help focus.
All of these have been shown that this isn’t how we best learn languages (in fact, the opposite is largely true!).
However, it isn’t all bad. Here’s my opinion on the advantages and disadvantages of PPP:
It’s easy to learn for new teachers.
It’s very flexible.
It’s easy to plan for and has a logical progression.
It works for most types of classes, including larger classes.
Most course books use this or a similar method to structure their lessons and chapters.
Disadvantages
Research shows that it may not be the best way to teach/learn a language.
Weaker learners may overuse the target language from the practice session, so it sounds unnatural.
Learners may not know how to use the target language in different contexts.
It can be boring if used repeatedly for higher-level students.
Thoughts on Presentation, Practice, Production
Academics are often far removed from the classroom and the real world, studying the individual phenomenon in isolation.
I’ve often seen a light bulb moment for students whilst teaching PPP (although one could argue that it’s not strict PPP, and it’d be hard to isolate the teaching method from other variables). Teaching over a period of time with this method, you do see students improve. Consider also that it’s not done in isolation — you should be getting your learners to interact in English naturally and read extensively outside of class, for starters.
Presentation, practice, production works. Maybe not as well as something like task-based learning (TBL), but TBL takes longer to plan and implement, which becomes very difficult when your teaching hours are high.
Sure, so it might not be theoretically perfect, but it does work.
How to adapt the PPP method
Also, I believe it has evolved from the ‘traditional’ PPP approach described above. Here are some ways you can adapt the classic PPP structure:
Spend more time in the presentation stage eliciting.
Turn the deductive aspect of explicit grammar instruction into an inductive aspect (so learners have to figure out the patterns themselves).
Add collaborative tasks during the practice stage, which learners must use the target language to complete successfully.
Include meta-learning strategies so students can learn how to learn.
Include more incidental language throughout the class so learners hear language in a more natural context.
Change the final stage into a task, such as you’d find in task-based learning .
These changes turn PPP into something else, a blended approach that addresses many of the criticisms of PPP.
Other structures have sought to improve upon the model of PPP. Variants include ESA (engage, study, activate) and CAP (context, analysis, practice)
However, the simplicity of PPP and its notoriety have kept it the most widely used model. I doubt it’s going away any time soon.
If you liked this article, you’ll love my books:

📝 Lesson Planning for Language Teachers - Plan better, faster, and stress-free (4.5 ⭐ , 175 ratings).
👩🎓 Essential Classroom Management - Develop calm students and a classroom full of learning (4.5 ⭐, 33 ratings).
🏰 Storytelling for Language Teachers - Use the power of storytelling to transform your lessons (4.5 ⭐, 11 ratings).
🤖 ChatGPT for Language Teachers - A collection of AI prompts and techniques to work better, faster (4.5 ⭐, 10 ratings).
💭 Reflective Teaching Practice Journal - Improve your teaching in five minutes daily (4.5 ⭐, 16 ratings).
📄 PDF versions available here.
Ready for more?
The Ultimate Guide to Effective Teacher Presentations: Strategies & Tips

Dianne Adlawan

Teachers, by nature, are considered professional presenters. Their main responsibility is to talk in front of their students to relay educational knowledge, sharpen their minds and skills, and even serve as a second guide alongside their parents. They also speak in front of parents, co-teachers, and school administrators. This just means that preparing for a presentation is already not new to them.
Still, teachers can become so comfortable with their presentation routine that their techniques turn into autopilot. The result of a repetitive task can become tiring and not challenging anymore which may result in students losing interest or attention span in the process.
The tips featured in this article are dedicated to these hard-working professionals. This will help them prepare and perform a better presentation in front of any type of audience.

Why You Should Prepare for a Presentation
- Preparation helps you build to structure your thoughts to create a well-organized presentation. By taking the time to prepare, you can decide what information is most important, plan the flow of the presentation, and make sure that everything is connected and easy to follow.
- Second, it allows you to think ahead of the questions that your audience might ask. Especially if you’re giving a presentation to a group of various audiences, who are curious about the topic at hand. By preparing in advance, you’ll be able to answer any questions they may have, which will not only increase their understanding but also boost your credibility as a teacher.
- Lastly, preparation helps you make the most of your time. Advanced preparation ahead of the presentation can ensure that you’re not wasting time trying to organize your thoughts at the last minute.
Effects of an Organized and Well-Planned Presentation
An audience engages with a speaker who knows their words and poses a confident attitude. While the projector may display clear and concise slides, the presenter is the main ingredient to every presentation.
For teachers, a well-planned lesson presentation helps the teacher maintain the attention and interest of their students, which is crucial for effective learning. Additionally, being organized and prepared will help teachers convey their ideas more effectively and it will help the teacher to feel more confident, which also impacts their teaching and in turn can help to build trust and rapport with their students.
Possible Outcomes of An Unprepared Presentation
Let’s suppose you haven’t allocated enough time to plan and prepare for an important presentation. What could be the potential outcomes?
- Increased Stress and Anxiety: Lack of preparation can lead to increased anxiety and stress, which can not only hinder your ability to deliver a convincing presentation but also hurt your mental health and work balance. It can cause a “mental block,” causing you to lose focus and concentration during your delivery.
- Poor Presentation Delivery: Without proper preparation, your presentation can appear scattered and disjointed. This can lead to an incoherent message that fails to convince your audience.
- Diminished credibility: Delivering an unprepared presentation can harm your reputation as a professional. It can portray you as disorganized and unreliable which could lead your colleagues or students to question your competence and reliability.
Effective Visual and Content Organization Tips
Consider this as the first stage towards an effective teacher presentation. Before moving on to improving your verbal communication cues, let’s enhance first your presentation visuals and content.
Visual Tips
1. add powerpoint animations and different media.
Establishing an attractive slideshow is one of the keys to a successful presentation. This will put a good impression on your audience that you’re prepared just by seeing how well-designed your presentation is. Of course, images add to slideshow attraction, but consider adding another forms of media such as GIFs and videos, as well as animations! Microsoft PowerPoint has a lot of fun & captivating features that you may not be aware of. Check out this example of an easy yet appealing Slide Zoom trick in PowerPoint that you can add to your presentation to wow your audience.
@classpoint.io Did someone say FREE??? Yes, we did. Here are free websites to help you upgrade your next PowerPoint presentation! 😎 #powerpoint #presentation #design #studytok #edutok #tutorial #tipsandtricks #ai ♬ original sound – r & m <33
Read Next: Make Your Presentations POP With This PowerPoint Animation Template
2. Use Readable Font Styles
Make sure to use the best font style that makes your presentation look sleek, readable, and won’t strain your audience’s eyes while reading. We all want to use a fancy font, trust me, I get it. But most of the time, simplicity is beauty, especially if you’re presenting a professional-looking slideshow. Font styles such as Poppins, Tahoma, Verdana, Montserrat, and Helvetica are great examples of font styles that screams simple yet professional to look at.
On the other hand, font styles such as Bradley Hand, Comic Sans, and Chiller are not ideal choices as they are not meant to captivate your audience’s eyes. And another tip is to stick to two or three fonts only!

3. Use Relevant Graphics
Selecting graphics for designing your presentation depends on your audience and the goals you aim to achieve with the presentation. For example, if you are presenting in front of students and your goal is to keep them engaged, motivated, and actively participating, then you might consider incorporating charts, tables, and relevant shapes into your design.
It’s important to remember that your presentation design should align with the theme of your topic.
Free Websites to Upgrade your Presentation Graphics:
- Craiyon. com
- The Noun Project
4. Use Audience Engagement tools to Activate Learning
Want the quickest solution to an engaged audience? Well, it’s audience interactive activities! Adding interactive activities to your presentation can help keep your audience engaged and interested. One of the easiest ways to do this is to use ClassPoint, an audience engagement tool added right into PowerPoint presentations.
With ClassPoint, you no longer need to worry about strategies to keep your students engaged, as this tool transforms PowerPoint into a teacher presentation tool with a teacher toolbelt and student quizzes , polls, and games that make presentations more fun & engaging.
By combining ClassPoint with your presentation techniques, you can focus solely on setting up your lesson content in PowerPoint and allow ClassPoint to handle the rest for achieving a learning-activated presentation lesson .
🔍 Learn more about ClassPoint, the teacher add-in for better lessons & student engagement 👍
5. Use a Laser Pointer
Help focus your audience attention by using a laser pointer!
With the help of a laser pointer device, teachers are able to attract the attention of their audiences and concentrate on essential points in their presentations. Highlighting these main ideas and terms assists the speaker in organizing their speech, preventing distraction, and increasing retention of the information presented.
You can use a physical laser pointer & clicker, or with the addition of ClassPoint into PowerPoint, presenters can easily turn their cursor into a laser or a spotlight . This can make it even easier for students to follow along and is a convenient tool for creating a more captivating teacher presentation.
Secret tip: if you write on your slide with the laser, it will leave disappearing ink! 🪄
Content Tips
1. research and fact-check your presentation.
As educators, it is crucial to equip ourselves with reliable and accurate information before presenting to our students. We have a responsibility to not only educate them but to also mold them into critical thinkers who are equipped with factual knowledge. Without thorough fact-checking, we risk disseminating misinformation and hindering their intellectual growth.
To avoid such situations, we must prioritize research and fact-checking before presenting any information. Conducting research helps us not only in finding accurate information but also in ensuring that the sources we use are reliable and credible. Moreover, taking the time to fact-check demonstrates our commitment to providing students with high-quality education and the desire to create a safe and accurate learning environment.
2. Be Prepared to Anticipate Questions during the Presentation
It is important to be well-prepared for a presentation especially anticipating and addressing questions. This applies particularly to a teacher presentation, as educators face varied expectations and questions. Adequate preparation allows you to organize ideas and justifications, and it can deepen understanding, boost confidence, and improve adaptability. Addressing questions, makes your audiences feel heard and appreciated. This will result in comprehensive presentations, enhanced confidence, improved information flow, and an atmosphere of respect and understanding.
A great & visual way you can elaborate, or explain your material in new ways, is by using ClassPoint’s whiteboard tools added to PowerPoint. ClassPoint’s added toolbar presents teachers with unlimited whiteboard slides they can open whenever they need, and user-friendly yet comprehensive pen tools with available shapes, and text boxes. Plus you can also use ClassPoint’s quick poll or other question types to assess students’ understanding with hard data & insights.
Addressing questions well makes your audience or students feel heard & appreciated leading to improved learning, enhanced confidence, and a respectful, safe learning environment.
3. Provide an Outline Structure of your Content
When you are preparing your presentation, it is best to first create an effective outline structure that will guide your presentation flow and help you focus on the main learning objective. But what you may not be doing, is offering that outline structure to your students, but you should!
Providing students with a clear understanding of what this lesson is about, the structure of the lesson, and what they will be able to take away from it is important. By doing so, you can help students stay focused and follow along with the material. Additionally, you are setting expectations and ensuring that everyone is on the same page, which can help promote student autonomy. So, include an outline at the start of your presentation lesson.
Step-by-Step Strategies for a Successful Presentation
Before presentation, know your audience, your students, or observers.
Once you have completed your deck, you may want to add a guide script and any additional notes with important points you don’t want to forget or you want to highlight in your presentation to impress your students .
Practice your presentation delivery/lesson
Practice delivering your presentation give you a chance to fine-tune your content and get your facts down. This will help you become more comfortable with the material and identify areas that need improvement. You can practice in front of a mirror, record yourself and watch it back, or even rehearse with a colleague or friend. When practicing, pay attention to your posture, tone of voice, and pacing. By doing so, you’ll be able to deliver a confident and engaging presentation that will captivate your audience.
Use a friendly tone of voice and pace
Adjust your tone to match your message, and avoid speaking too quickly so that your audience will get the chance to absorb the information you’re sharing. By being mindful of these aspects, you will capture your audience’s attention and leave them feeling informed and inspired.
Use engaging body language
Body language is essential for engaging your audience during a presentation. Stand up straight, make eye contact, and use hand gestures to emphasize important points. You can also move around the classroom to keep your students’ attention. By using engaging body language, you’ll be able to convey your message more effectively and keep your students interested throughout the presentation. You’ve got this!
During Presentation
Create an icebreaker.
Having an icebreaker is a warm-up for your students’ brains, allowing you to focus and engage with the material being presented. It also helps break down any barriers or tension between the presenter and the audience, making for a more relaxed and welcoming atmosphere. Additionally, an icebreaker provides an opportunity for the presenter to showcase their creativity and personality, adding an extra level of excitement and engagement to the presentation.
Good thing that ClassPoint has numerous features to help you perform an entertaining and unforgettable icebreaker. Here are some examples that you can use during an icebreaker.
- Quick Poll : Quick Poll allows you to create interactive polls right inside your presentation. When used as an icebreaker, it can engage the audience, initiate discussions, and provide valuable insights that help tailor the content to participants’ preferences.
- Word Cloud: Presenters can ask thought-provoking questions related to the topic or general interest. Using Word Cloud, the audiences can answer through their mobile which can be instantly seen as collective responses, with the most frequently mentioned words appearing larger.
- Short Answer : In short answer, you can challenge your audiences’ thought process in a short-form writing activity with no options to get from to test their ability to understand.
- Image Upload : Using single image, audiences can interpret what they feel like, or their mood using only the photos in their gallery or surroundings. A creative yet fun way for an icebreaker!
Speak clearly
Effective communication is crucial when presenting important information to students. Speaking clearly helps ensure that students understand the concepts being taught and follow instructions effectively. As a teacher, it’s important to focus on clear speech to promote effective communication and help your students comprehend the material being presented.
Pay attention to your audience’s attention
Since distractions are aplenty, attention spans are dwindling, it’s important for presenters to captivate their audience’s attention right from the beginning. For teachers, when speaking in front of your class, you should not only focus on the content of your presentation but also on your students’ attention.
To ensure that your students won’t start drifting away or zoning out, start with a compelling opening that immediately grabs their attention. Use vivid storytelling, examples, or demonstrations to engage your students and drive home your message. Don’t forget the power of humor, and never be afraid to be yourself – authentic, passionate, and confident.
Add Personality: share short relatable stories
“A great personality makes everyone feel energized; just like a flower’s fragrance that freshens ups the complete surrounding.” 29 Personality Quotes to Achieve Greatness
As to what is stated in the quote, having a positive and vibrant personality affects the overall mood of your surrounding, it can capture the audience’s attention and maintain their interest throughout the presentation. While the ultimate goal is to deliver a presentation rich with new learnings and knowledge, adding humor can do no harm to lift up the mood in the room. You might want to start by segueing a short story that your students can relate to and make interactions by encouraging them to share a story too or ask questions.
Post-Presentation Reflection
Take the comments by heart.
Receiving feedback from your students is a great way for evaluating the efficacy of a teacher presentation. This can help you identify areas where you can improve and tailor your teaching tactics to better suit the needs of your students. Listening to your students’ feedback can also promote a feeling of cooperation and enable them to become more actively involved in the learning experience. So, don’t be afraid to ask for feedback and take it to heart in order to continually improve your presentations.
Experienced educators understand that they are perpetually crafting their skills, and feedback from their audience brings an opportunity for professional advancement. In addition, accepting audience feedback illustrates esteem and worth for the students’ views. It promotes a feeling of cooperation and enables students to become more actively involved in the learning experience.
Preparing for a presentation is essential for teachers to deliver engaging and impactful content to their students. By structuring thoughts, anticipating questions, and preparing ahead, teachers can achieve a well-organized presentation that will enhance the students’ understanding and leave them feeling confident.
By following our strategies and tips teachers can achieve successful lessons using PowerPoint presentations. And, with the help of an advanced educational technology tool like ClassPoint, teachers can create dynamic and memorable presentations that their students will enjoy and actively participate in.
Try out ClassPoint today and experience a whole teacher presentation in PowerPoint! ✨
About Dianne Adlawan
Try classpoint for free.
All-in-one teaching and student engagement in PowerPoint.
Supercharge your PowerPoint. Start today.
500,000+ people like you use ClassPoint to boost student engagement in PowerPoint presentations.
National Extension Water Outreach Education
Division of extension.
Home » Water Outreach Education » BEP Website Resources » Use Education Resources » Tools for Teaching » Teaching and Presentation Skills
Teaching and Presentation Skills
Tools for teaching navigation.
Facilitation Skills : The art of group facilitation
Teaching and Presentation Skills : Keep these techniques in mind
Keep these five techniques in mind when developing or polishing your outreach skills.
Variety of Teaching Methods and Strategies
Create Effective Presentations
Use audiovisuals, teach outdoors, evaluate yourself and others, use a variety of teaching methods and strategies.
We each learn differently based on our learning style, multiple intelligences and past knowledge and experience. We learn best when we experience a teaching approach that matches our unique learning profile. For this reason, educators need to use a variety of teaching strategies to assure that they are meeting the needs of their learners (audiences).
A Continuum of Teaching Methods
Explanation of Teaching Continuum (pdf, 5 pp., 145 KB)
Photo courtesy of the Rock River Coalition, WI
A presentation is a spoken communication made in a prepared and formal way. You can give a presentation to one person or hundreds of people or thousands. The skills required can be learned and are very much the same regardless of the size of the group. Water management professionals are often called upon to give a wide variety of presentations. You may be asked to:
- Give a progress report to your supervisor.
- Demonstrate to a group of contractors how to install a BMP.
- Speak to a civic group on how to reduce NPS pollution.
- Show your commissioners how county money is used to leverage more money.
- Pique the interest of local farmers in renting your no-till drill.
- Conduct a workshop for 40 educators.
- Persuade legislators to support an increase in cost-share monies.
- Explain a new procedure to employees.
- Teach a group of scouts how to do water quality monitoring.
- Deliver a keynote speech at an annual meeting.
- Give a dedication speech for your new outdoor education area.
With such diversity, a broad range of skills is needed. Developing great speaking abilities is not unlike learning a new sport. Every sport has basic skills that you have to master individually as well as combined together in a game. Basketball players, for example, have to learn to dribble and pass the ball, shoot foul shots and lay-ups, grab rebounds and defend the opponent. While they may excel in some skills, a certain level of expertise is needed in all areas to have an overall successful game. In addition, ballplayers need to integrate their skills with others to work as a whole, i.e., as a team.
Learning to become an effective speaker is similar. In the beginning it can be just as frustrating as learning to properly dribble or throw a basketball. However, after learning a few basic skills, and, most importantly, practicing them, things usually improve. But to really learn to present well takes constant practice and mastery of the basic skills and the ability to weave them together as a whole, i.e., into a presentation.
Where to Start
Goals and Objectives
How to Present Your Content to Make the Most Sense
Effective Questioning Strategies
The “How and When” of Handling Audience Questions
Getting Ready and Making Room Arrangements: The Final Steps
Audiovisuals include any teaching tool used to focus attention, emphasize, clarify and reinforce key points. Visuals, in particular, are important presentation tools because humans are visual creatures we process visual information (pictures, graphs, etc.) 60,000 times faster than text and retain it up to five times longer.
Well-planned and well-executed audiovisuals can do many things for the audience:
- Capture attention and focus attention
- Reinforce (but not repeat verbatim) the verbal message
- Clarify information
- Accelerate learning
- Increase retention
and for the presenter:
- Help organize the presentation
- Increase presenter credibility
- Help manage time and help maintain control
- Help keep presenter/audience on the same track
General Tips for Planning Successful Audiovisuals
Advantages, disadvantages, and tips for common types of audiovisuals (pdf)
Water resource professionals provide outreach activities and programs for both youth and adults in outdoor settings. These include, for example, pond clinics, field days, water festivals, teacher workshops, camp programs, land lab activities as well as Earth Day, Arbor Day and other special events. Outdoor experiences serve as a powerful vehicle for first-hand learning and a means for helping youth and adult learners make connections that are personal and relevant. Whether learning best practices for pond management and soil erosion or the effects of water quality on organisms found in a stream, learners can become more engaged and successful through the use of hands-on experiences in the outdoors.
While the principles of good education serve equally well inside and outside, several strategies for outdoor learning can make these experiences more rewarding for both the learner and the leader. The following guidelines can help you as you explore the outdoors with learners young and old.
Preparing the Activity or Program
Preparing the Learners
Doing the Activity or Program
Following the Activity or Program
Becoming an effective presenter or teacher is a process, not an event. It takes many years of practice, focusing on one skill and then another and another, building your repertoire of presentation techniques, your style and your confidence. The best way to improve is through self-evaluation and comments by friends, colleagues and experts.
Strategies to Help Improve Your Skills
Additional Resource
A Guide for Growing Volunteer Monitoring Programs directs program coordinators to resources for building successful programs. See the USA Volunteer Water Quality Network website, and especially:
- Tools for Effective Outreach
- From the Trenches – Tips and Tools for Better Presentations
Adapted with permission from Soil and Water Conservation District Outreach: A Handbook for Program Development, Implementation and Evaluation . Ohio Department of Natural Resources, Division of Soil and Water Conservation, 2003.
More in this Section
- Teaching Skills: a continuum
- Teaching Skills: where to start
- Teaching Skills: goals and objectives
- Teaching Skills: effective questioning strategies
- Teaching Skills: audience questions
- Teaching Skills: final steps
- Teaching Skills: presenting content
- Teaching Skills: content organization
- Teaching Skills: audience retention
- Teaching Skills: the introduction
- Teaching Skills: things to avoid
- Teaching Skills: make presentation interesting
- Teaching Skills: increasing learning
- Teaching Skills: checking understanding
- Teaching Skills: powerful closing
- Teaching Skills: alert the audience
- Teaching Skills: tips for closings
- Teaching Skills: audiovisuals
- Teaching Skills: prepare activity
- Teaching Skills: prepare the learner
- Teaching Skills: doing the activity
- Teaching Skills: following the activity
- Teaching Skills: evaluate yourself
We teach, learn, lead and serve, connecting people with the University of Wisconsin, and engaging with them in transforming lives and communities.
Explore Extension »
Connect with your County Extension Office »

Find an Extension employee in our staff directory »

Get the latest news and updates on Extension's work around the state

Feedback, questions or accessibility issues: [email protected] | © 2024 The Board of Regents of the University of Wisconsin System Privacy Policy | Non-Discrimination Policy & How to File a Complaint | Disability Accommodation Requests
An EEO/AA employer, University of Wisconsin-Madison Division of Extension provides equal opportunities in employment and programming, including Title VI, Title IX, the Americans with Disabilities Act (ADA) and Section 504 of the Rehabilitation Act requirements.
EnglishPost.org
PPP Framework in Teaching: Presentation, Practice and Production
The PPP Teaching Framework is a model to describe the typical stages of language teaching lesson.
The PPP Teaching framework consist of four main stages: Warm-up, Presentation, Practice and Production and is used to teach speaking and writing lessons.
There is a variation when we use this framework to teach Listening and Reading skills .
The framework that we use to teach passive skills is the PDP framework which stands for Pre, While and Post
Let’s check all that you need to know to use the PPP Framework correctly
Table of Contents
PPP Framework: Criticism
Stages of the ppp framework, presentation, important considerations when planning lessons, considerations when teaching listening and reading, how to teach listening, how to teach reading , questions to ask yourself when creating ppp or pdp lessons, short quiz: how much did you learn, more on english language teaching.
This framework for teaching language classes is often criticized because:
- It forces students to use certain grammar structures and vocabulary.
- Since it forces students to use a target structure and vocabulary, this reduces the learner opportunities to use the language in spontaneous ways.
These are the stages of the PPP Framework:
- It’s an activity at the start of the class to warm up the learners. They tend to be short, dynamic activities.
- It is recommended that the warm- up is related to the topic studied during that class.
- In my opinion, the most important thing about a dynamic warm-up is that you continue with dynamic activities during the presentation, practice and production stage.
In the presentation stage, teacher introduces:
You can introduce the vocabulary and grammar in two different ways.
- Deductively : This involves the learners being given a general rule, which is then applied to specific language examples
- Inductively: This approach starts with examples and asks learners to find rules
Important things to take into account:
- Choose the vocabulary and grammar structures necessary for your students to succeed.
- Don’t introduce vocabulary and grammar that won’t be used during the lesson.
- Try not to introduce lots of words. Keep new words to a maximum of 20 per lesson.
- Get students involved in the presentation of the vocabulary and grammar so you can reduce teacher talking time and encourage learner-centered instruction
The practice stage aims to provide opportunities for learners to use the target structure and vocabulary used during class.
This stage is also controlled practiced since the tasks prepared by the teacher have controlled results.
Teacher should try to use the vocabulary and structures during the presentation stage for obvious reasons:
- What’s the point of introducing vocabulary and grammar you aren’t going to use?
- How can you expect students to succeed if you use different vocabulary and grammar to the one you taught in the presentation stage?
All meaningful activities which give students the opportunity to practice the language more freely.
It is impossible to be wrong if:
- Your activities encourage peer to peer interaction.
- Students are taught grammar inductively.
- Your lesson is made up of task that maximize student talking time.
- Students stand up and talk to others.
- There are games and activities that are fun and meaningful.
- Your scaffolding is good because students can do what you want them to do.
The Presentation, Practice and Production is usually used to teach speaking, writing or grammar.
If you want to focus on listening and reading, you have to take into account the PDP Framework
This framework is an approach to teaching reading and listening skills lessons.
PDP means Pre- During (while) and Post
The basic idea is:
- Try to help students to know a little about what they’re going to read or listen before they read or hear it
- Give them a reason to read or listen by setting questions or other reading listening tasks
- Ask them to do something with the information they get from the reading or listening.
The Framework for teaching listening is called Pre, While and Post.
Check out these resources to understand more about this framework
- 12 Types of Pre-Listening Activities
- 12 Examples of While-Listening Activities
- 10 Types of Post-Listening Activities for the ESL Classroom.
The Framework for teaching reading is called Pre, While and Post
- Stages for Teaching Reading
- 15 Examples of Pre-Reading Activities
- 10 Examples of While-Reading Activities
- 10 Examples of Post-Reading Activities
- Making Reading Communicative
These are some important questions that you should ask yourself when creating a PPP or PDP Lesson.
- Are the activities of the PPP lesson plan linked to each other?
- Are the activities of the PDP lesson plan linked to each other?
- Do the activities belong to the right stage of the lesson? For example, is the pre-reading activity an actual pre-reading activity?
- Is the lesson plan based on reality and not on impossible and unrealistic expectations
- Is the evaluation strategy measuring what you need to measure?
- Are activities engaging to the learner?
These are some statements that you should analyze and assign to a category of the PPP Framework
The categories being: Presentation (A), Practice (B) and Production (C)
- Teacher directs the activities during this stage ( )
- Teacher provides feedback to students ( )
- Activities include drills and multiple choice exercises ( )
- Students produce oral and written texts ( )
- Teacher uses visual aids to demonstrate a situation ( )
- Teacher describes grammar rules ( )
- Activities include oral presentations by the students ( )
- The teacher doesn’t necessarily intervene in this stage ( )
- Language is presented in context ( )
- Exercises in this stage can be productive or receptive ( )
I hope that you found everything that you were looking for about the PPP Framework
These are some posts with more ideas and information to teach English
- 5 Challenges English Language Learners Face
- 10 Characteristics of Teacher-Centered Instruction
- The Most Effective Classroom Seating Arrangements
15 Awesome ESL Games and Activities
- ESL Classroom Activities: Dictogloss
- Approaches and Methods in Language Teaching

I am Jose Manuel, English professor and creator of EnglishPost.org, a blog whose mission is to share lessons for those who want to learn and improve their English
Related Posts

Types of Listening in the ESL Classroom

5 Great Strategies to Cut Teacher Talking Time
Create Your Course
The 5 most effective teaching styles (pros & cons of each), share this article.
Even though every instructor is unique, the prevalent style of teaching has changed dramatically over the past 50 years, along with the new cultural norms and technological advancements.
Educational researchers today define at least five different teaching styles on a spectrum that moves from a teacher-centered approach to a student-centered one:
Other teaching methods outside of the core five exist as well. The Spectrum of Teaching Styles in Physical Education defines 11 distinct teaching styles that can be used to coach students in schools and universities.
While most instructors can be described by a single personal model of teaching, the best ones always adjust their teaching strategies to their students and the learning process at hand.
That’s why it’s important to know what the different teaching styles are and have a clear idea of how to use them when needed.
Skip ahead:
Demonstrator
Facilitator, is one style of teaching better than others , how to adapt teaching styles to different learning styles, does classroom diversity influence my style of teaching .

5 different teaching styles to use today
A lot of educators in traditional teaching environments with decades of experience are not aware of their primary teaching style, even though their approach to teaching has a direct effect on student participation and student engagement.
Let’s explore five teaching style examples to show how broad differentiated instruction in classroom settings can be.
The lecturer style (sometimes called the formal authority style) is familiar to anyone who’s sat through long unidirectional lectures in giant university auditoriums. In this teaching style, the teacher takes up a central role and delivers information to a large group of students in a structured and organized manner. The subject matter is usually singular and predetermined.
Because the students are many, there’s not enough room or time for personalized interactions between the teacher and the students. However, students are encouraged to take notes and ask questions at the end of each lecture. There are usually no activities planned.
An example of the Lecturer teaching style in action is when a guest speaker is invited to a school or an office to give a presentation. After the guest speaker presents the topic for an hour, they encourage students to ask questions if there’s anything they don’t understand or would like to clarify.
Pros of the Lecturer teaching style
- It’s p ossible to teach large groups of students at once
- It’s easy to prepare lecturers
- It provides a clear structure and organization to the content
- It can be time-effective in covering a broad range of material
Cons of the Lecturer teaching style
- There’s limited student engagement and interaction
- Students won’t be able to retain information properly because they’re not actively engaging with the lecturer
- This teaching method does not cater to diverse learning styles
Under the demonstrator style, the teacher still retains a lot of authority but is more open to trying a student-centered approach to teaching. You can see the demonstrator encouraging students to come up with problem-solving strategies, ask questions and simulate what they’ve just learned.
The demonstrator often goes beyond lectures and demonstrates concepts or skills to the students using visual aids (presentations, images, and films), hands-on activities, and practical examples. As a result, this method is applicable to more learning styles.
An example of the Demonstrator teaching style in action is when a teacher conducts a science experiment or an art workshop in the classroom. The students huddle around the demonstrator to observe and participate in the experiment or workshop. When the teacher is done with the demonstration, they encourage the students to emulate the processes that they’ve observed to create the same (or similar results).
As the students work, the teacher is there to provide them with visual aids and multimedia to enforce concepts and principles, and answer any questions they may have regarding the project. The teacher may also encourage peer sharing and feedback, which helps students to actively engage in the learning process.
Pros of the Demonstrator teaching style
- It incorporates a variety of teaching formats
- Hands-on learning can enhance students’ understanding of the subject matter
- Visual aids and demonstrations can make concepts more memorable
- Students can ask for immediate clarification through examples and practical applications
Cons of the Demonstrator teaching style
- It doesn’t accommodate the needs of all students
- This teaching style may not be suitable for all subjects or topics
- This style requires adequate resources and preparation, which can be hard if the teacher is short on time or has a low budget
- During a demonstration, there’s often no time to cover a large amount of content
The hybrid (also known as blended) style strives to strike a balance between teacher- and student-centered approaches. It also tries to integrate both traditional and modern teaching methods, which makes it a great style for adapting to the needs of diverse learners.
Most of the time, the teachers who follow the hybrid style bring their own knowledge and expertise into the class. They still have a structure for every lecture but are able to adjust their flow and come up with the right activities to keep the students engaged. A hybrid teaching style integrates lectures, demonstrations, group activities, and even technology into one learning session.
For example, a hybrid teacher may assign online readings or videos for students to review before class. There can also be an online discussion forum where students share insights and questions. In class, the students can build upon the online discussion with hands-on activities, group discussions, or problem-solving tasks related to the material they reviewed.
While the hybrid approach tends to be quite effective in a variety of settings, it can make covering information-heavy courses difficult due to its slower pace.
Pros of the Hybrid teaching style
- This teaching style uses a variety of methods that cater to diverse student needs
- It integrates traditional and modern approaches for a balanced learning experience
- It gives teachers the flexibility to adapt to different learning preferences
- Students remain active and engaged for longer
Cons of the Hybrid teaching style
- This teaching style requires careful planning and the coordination of different teaching elements
- Finding the right balance between traditional and modern teaching methods may be challenging
- It’s dependent on the available resources and technology
- It can be less focused and slow
- It requires a lot of energy from the teacher
Shifting to an even more student-centered approach, there’s the facilitator style of teaching.
Instead of giving one-directional lectures, a facilitator encourages inquiry-based learning. Students learn by thinking critically, asking questions, and discussing real-world case studies. Some other activities might be designed to improve problem-solving skills and help understand the subject matter better through practical challenges.
A great example of the Facilitator teaching style in action is a Socratic seminar, which promotes Socrates’ belief that asking questions, inquiring about things, and engaging in constructive debates are the best ways to learn.
In a Socratic seminar, students seek a deeper understanding of complex or vague ideas through thoughtful dialogue and divergent thinking. The facilitator provides a specific topic or text for students to read through and ponder upon. Then, the facilitator poses open-ended questions to stimulate critical thinking. The students answer these questions, argue civilly for or against a motion, share ideas, and build on each other’s responses to get an all-around understanding of the topic/text.
Another example is a case study analysis, where the facilitator presents a real-life case study related to the subject matter. Then, the facilitator prompts a class discussion where students analyze the case, identify key issues, and proffer solutions. The teacher guides the discussion, encouraging critical thinking and collaboration among students.
Pros of the Facilitator teaching style
- This teaching style helps students develop self-sufficiency, as the teacher provides guidance and support rather than direct instruction
- It fosters critical thinking, collaboration, and communication skills
- It supports student-centered learning and autonomy
Cons of the Facilitator teaching style
- This style doesn’t work well for theory-heavy classes
- It requires a skilled facilitator to guide discussions effectively
- It may take more time to cover content compared to traditional methods
- Students may need additional support if they’re not accustomed to this teaching method
The most student-centric teaching style of all is called the delegator style (also known as the group style). Here, the teacher is merely present as an observer, and it’s the group of students who are doing all the work.
Most of the learning in the delegator style happens peer-to-peer, through frequent collaborations and discussions. The instructor is practically removed from the position of authority and only facilitates the discussions instead.
The delegator style works best for lab-based experiments, group tutoring classes, creative writing, debates, and other peer-to-peer activities. In these activities, the teacher divides the class into small groups and assigns each group a project related to the course content. The students are responsible for planning, executing, and presenting their findings, while the teacher acts as a mentor, providing guidance and support throughout the project.
This approach encourages students to take ownership of their education and become self-directed learners.
Pros of the Delegator teaching style
- This teaching style encourages learning and collaboration among students
- It allows for individualized learning experiences
- It promotes the development of problem-solving and decision-making skills
Cons of the Delegator teaching style
- This teaching style can be inefficient since students have to find the right answers for themselves
- It may not be suitable for all subjects or students
These are just five of the most popular teaching styles that instructors can choose from when creating their courses. Depending on the system you look at, there might be even more, as described in a paper titled Teaching Styles and Language Performance by Edgar R. Eslit and Mercedita B. Tongson.
As you can see from the list above, each style of teaching has its pros and cons. So there’s no definitive winner here — rather, you should learn to mix and match based on a situation.
When preparing your course content, you can imagine which teaching style would help your students learn the material best. If you’re not sure, try experimenting with a few different styles for the first few student cohorts to find out.
We’ve written about the seven main types of learning styles before, which are essential for every instructor to understand.
There’s no doubt that different students shine under different teaching approaches.
There’s a famous “empty vessel” theory, for example, which asserts that students’ minds are essentially empty until teachers pour their knowledge into them, lecture-style.
But cooperative learning which requires more group work and would pair well with the facilitator or delegator style of teaching. Check out Cohort-Based Learning for a deeper dive into this kind of teaching style.
Interactive learning can be a great fit for the demonstrator or facilitator style, and so on.
Another reason to have different teaching styles in your arsenal is the diversity of students you might see in your class. As students learn better by different approaches and at a different speed, you should be able to adjust your teaching style on the fly to maximize the learning opportunity for all.
It’s likely that your primary teaching style won’t be purely of the big five discussed above, but rather an ever-changing mix that would be unique to you and the students you teach.
In addition, as teachers lead students and help students become future leaders, you should be aware of the kind of leadership that you want to facilitate through your teaching.
How to create a perfect course online
Do you want to put your teaching style to practice? There’s no better way to do that than creating a brand new online course. The only thing you need is a course-creation platform to do that.
Thinkific is an intuitive and easy-to-use platform for all teachers to create beautiful online courses in no time. The platform adjusts easily to various teaching styles through the use of multimedia materials, from presentations to videos to quizzes to member communities.
Best of all, no coding skills are required. Just pick a gorgeous template and quickly customize it to your need with a drag-and-drop editor.
Get started today for free and see how easy creating an effective course can be.
This was originally published in June 2022, it has since been updated in February 2024 to include new info.
Colin is a Content Marketer at Thinkific, writing about everything from online entrepreneurship & course creation to digital marketing strategy.
- 7 Top Challenges with Online Learning For Students (and Solutions)
- The Advantages and Disadvantages of Learning in Online Classes in 2023
- 6 Reasons Why Creators Fail To Sell Their Online Courses
- How To Craft Magnetic & Compelling Learning Outcomes
- Essential Questions To Ask In Your Training Evaluation Survey
Related Articles
What is the 70-20-10 rule in learning & development.
The 70-20-10 model is useful for designing a training mix that maximizes learning outcomes through Experiential, Social, and Formal training.
What Is A Brand Story? And Why You Need One (+Tips & Examples)
If you want to reach your audience and build a closer connection with them, you need to write your brand story. Here's how!
How To Maximize Student Engagement In Online Learning
You’ve got your course up, and you’re starting to get people signing up. Wahoo! Now – how do you maximize student engagement?
Try Thinkific for yourself!
Accomplish your course creation and student success goals faster with thinkific..
Download this guide and start building your online program!
It is on its way to your inbox
PPP TEFL Teaching Methodology
What is presentation, practice and production (ppp).
During your SEE TEFL certification course you will become more familiar with an established methodology for teaching English as a foreign language known as 3Ps or PPP – presentation, practice, production. The PPP method could be characterized as a common-sense approach to teaching as it consists of 3 stages that most people who have learnt how to do anything will be familiar with.
The first stage is the presentation of an aspect of language in a context that students are familiar with, much the same way that a swimming instructor would demonstrate a stroke outside the pool to beginners.
The second stage is practice, where students will be given an activity that gives them plenty of opportunities to practice the new aspect of language and become familiar with it whilst receiving limited and appropriate assistance from the teacher. To continue with the analogy, the swimming instructor allowing the children to rehearse the stroke in the pool whilst being close enough to give any support required and plenty of encouragement.
The final stage is production where the students will use the language in context, in an activity set up by the teacher who will be giving minimal assistance, like the swimming instructor allowing his young charges to take their first few tentative strokes on their own.

Advantages of the PPP (3Ps) Method
As with any well-established methodology, PPP has its critics and a couple of relatively new methodologies are starting to gain in popularity such as TBL (task based learning) and ESA (engage, study, activate) . However, even strong advocates of these new methodologies do concede that new EFL (English as a foreign language) teachers find the PPP methodology easiest to grasp, and that these new teachers, once familiar with the PPP methodology, are able to use TBL and ESA more effectively than new trainees that are only exposed to either TBL or ESA.
Indeed, there are strong arguments to suggest that experienced teachers trained in PPP use many aspects of TBL and ESA in their lessons, and that these new methodologies are in truth, the PPP methodology with some minor adjustments.
At this stage you might well be asking, It’s all very well having a clear methodology for how to teach but how do I know what to teach? The language that we call English today has absorbed a great many influences over the last thousand years or so. It has resulted in it becoming a language that can provide us with a sparklingly witty pop culture reference from a Tarantino script, 4 simple words spoken by Dr. Martin Luther King that continue to inspire us today, and something as simple and mundane as a road traffic sign.
The Job of the EFL Teacher
As EFL teachers our job is to break down this rich and complex language into manageable chunks for our students. These chunks of language are what EFL teachers call target languageWe are going to look at an example of what a piece of target language might be and then you will be given more detail on how this would be taught in a PPP lesson before finally watching three videos with some key aspects of each stage of the lesson highlighted for you.
During the course we will spend a great deal of time in the training room equipping you with the tools to employ a successful methodology for teaching the English language. You are going to get opportunities to both hone these skills in the training room and put them into practice in authentic classroom settings.
Of course you might be thinking, I don’t have any experience of being in a classroom! How on earth am I going to cope with standing at the front of a class with 20 plus pairs of eyes looking at me waiting to see what I do?
All good TEFL courses are designed to train those with no teaching experience whatsoever. We will spend the first part of the course in the training room making you familiar with all the new skills you will need whilst giving you opportunities to practice them in a supported and controlled environment.

Only after that, will you be put in an authentic classroom environment. It goes without saying that the first time anybody stands up and delivers their first lesson will be a nerve-racking experience. However, it is also an experience that mellows over time, and one that all teachers remember fondly as time goes by and they feel more at home in a classroom.
There will be some of you out there with experience of teaching in a classroom already. You may be well versed in employing many different methodologies and strategies in your classroom already, but many or most will have been with native English speaking students, or those with a near-native levels of English. This means that some of the skills we will be equipping you with may feel a little alien at first, but your experience will not prove to be a hindrance. Indeed, you will already have successful classroom management skills that can be adapted to fit a second language classroom fairly easily and other trainees on the course will benefit from your presence.
In addition, some of the skills that you will learn on the course can also be adapted to work in a classroom of native speakers too, and it is not unusual for experienced teachers to comment on exactly this after completing a good TEFL course.
Target Language in an EFL Lesson
Recall how it is the job of the EFL teacher to break down the rich tapestry of the English language into manageable bite-size chunks, suitable for study in an average study period of 50 minutes. As mentioned, we refer to these chunks as target language. As EFL teachers we will select target language that is appropriate for both the skill level and the age of the students.
The target language that you will see being presented in the videos is Likes and dislikes for 6 food items.
The teacher you will watch in the video has a clear aim, which is to ensure that:
**By the end of the lesson, students will know the names of 6 food items in English and will be able to express whether or not they like them in a spoken form by entering into a simple dialogue consisting of,
- Do you like ___?,
- Yes, I like ___., or
- No, I don’t like ___.
The six food items are ___. In short, the students will be able to name the 6 food items by the end of the lesson and tell whether they like them or not.**
Presentation – Part 1 of PPP
You may have delivered a few presentations in your time but the type of presentation we deliver in a second language classroom will differ quite a bit from those. For a start, you were speaking to proficient users of the English language about something they were, most likely, vaguely familiar with anyway. In an EFL classroom we don’t have those luxuries, so we have to be careful about the language we use and how clearly we present the new language that we wish for our students to acquire.
Let’s look at 4 key things that should be occurring in an effective second language classroom presentation:
1 – Attention in the Classroom
Learners are alert, have focused their attention on the new language and are responsive to cues that show them that something new is coming up. A simple way to ensure some of the above is if the teacher makes the target language interesting to the students.
The language will of course, be of more interest to the students if it is put into some type of context that the students are familiar with. In the case of likes and dislikes for young learners a visual associated with a facial expression will be something they can relate to. Naturally, the easier it is for them to relate to the context, the more likely they are to be interested in the language presented.
In the case of the target language for the videos a smiley face visual and a sad face visual on the whiteboard linked to the phrases I like ___. and I don’t like ___., respectively. A teacher might make exaggerated facial expressions whilst presenting these ideas to make the ideas both fun and easy to perceive for the students. This is often referred to as contextualization in EFL classrooms.
2 – Perception and Grading of Language
We want to ensure that the learners both see and hear the target language easily. So if a whiteboard is being used, it should be well organized with different colors being used to differentiate between different ideas. If images are being used, there should be no ambiguity as to what they represent and sounds made by the teacher should not only be clear, but should be repeated and the teacher needs to check the material has been perceived correctly, and can do this by asking the students to repeat the sounds he or she is making.
Learners will be bombarded with a series of images corresponding to sounds made by the teacher during the presentation stage and it is the teacher’s responsibility to ensure that they are not overloaded with information and that clear links are being made between the images and the associated sounds.
Therefore, there is an onus on the teacher not to use any unnecessary language at this stage. That is to say the grading of their language should be appropriate for the level of their students and the language they use should consist of the target language and any other essential language required to present the ideas clearly such as commands like listen! The commands should, whenever possible, be supported by clear body language.
3 – Target Language Understanding
The learners must be able to understand the meaning of the material. So in the case of likes and dislikes they perhaps need to see an image of a happy face and associate it with liking something and a sad face and associate that with disliking something.
We also need to have a way of checking if the learners did indeed, understand the material presented without asking the question, Do you understand? as this invariably triggers the response yes! from learners who are keen to please their teacher and not to lose face. We, as teachers, need to be a little more imaginative in checking our student’s understanding of material presented. Ideally, we should be checking the learners’ understanding in context. In the videos you will see, expect to see the teacher doing this during the presentation stage.
4 – Short-term Memory in the Classroom
The learners will have to retain the information from the presentation and use it further on in the lesson when we have consolidated their learning of the material and we will give them an opportunity to produce it on their own.
For the target language to be retained by the learners, it needs to be engaging and we need to consider that different learners will remember the material in different ways. Some by the way the material is seen, others by the way it is heard, and others if it is associated with a physical movement perhaps. We need to make sure our presentation has something to enable all these types of learners to retain the information.
Presentation Stage of a PPP EFL Lesson with subtitles
Practice – Part 2 of PPP
Practice can roughly be defined as the rehearsal of certain behaviors with the objective of consolidating learning and improving performance. Below are some of the characteristics of an effective language practice:
1 – Practice Validity
The practice activity must have learners rehearsing the skill or material it purports to practice. So in the case of the lesson you will view shortly, it must have the learners practicing both the food vocabulary items and the structure of the dialogue, i.e.,
- Yes, I like ___, or
2 – Pre-learning
Before we ask our learners to practice new language, we must have ensured that they have some understanding of the new language. We will have done this during the presentation stage. If they have not had the new language clearly presented to them and been aided in being given some understanding of it, then they (the learners) will not be practicing at this stage but will be going through another initial learning stage. Worse still, they will feel like they are being tested on something they haven’t been allowed to gain an understanding of.
3 – Volume (Amount) of Practice
Here, we are referring to the number of opportunities every student in the class has to practice the new language and not the level of sound. The more opportunities each student has to practice the target language, the more effective this stage of the lesson is.
So in the case of likes and dislikes, we might give the students individual worksheets where they have to fill in some part of the dialogue and the name of a food.
4 – Success Orientation
The students should have an opportunity to practice the new language and in order for this to happen they need an activity that both stretches them and is a task they can complete because of course, if it wasn’t, they wouldn’t be getting any opportunity to practice.
5 – Issuing Activity Instructions and Managing the Activity
Of course, whilst it is important to select an appropriate activity, it is equally important to issue clear and unambiguous instructions for the activity itself so all of your students are clear as to what is expected of them. We will be issuing instructions for the activity in the student’s second language so we need to make use of clear visuals to support any language we have to use and strong demonstrations of what is expected.
Managing the activity should consist of the teacher being mobile during the activity, offering praise and being on hand to show struggling students where relevant information may be found on the whiteboard.
Practice Stage of PPP EFL Lesson with subtitles
Production – Part 3 of PPP
The students have now had the target language presented to them clearly and have had an opportunity to practice it in a controlled environment. If we return to the swimming instructor analogy, it is now time to let them take their first few tentative strokes in the pool on their own with supervision and encouragement from the instructor.
As with the practice stage, we have to initiate an activity that allows them opportunities to use the target language in the classroom. In fact, the characteristics of a production stage activity are quite similar to the practice stage with one key difference and that is, student autonomy.
During this stage, the students will be producing the target language with minimal assistance from the teacher as opposed to the practice stage where the teacher will be on hand to assist students rehearse target language that has only just been presented to them.
Here are some of the key aspects of a production stage activity:
1 – Volume (Amount) of Production
As with practice, we want to create as many opportunities for our students to produce the target language albeit this time, more independently. This means we avoid activities where the students speak to the teacher as this allows limited opportunities (the students have to wait their turn before they get a chance to speak to the teacher). Instead for spoken activities, we look to get the students speaking in pairs, speaking to each other as much as possible, whilst we as the teachers go around the classroom offering minimal assistance but lots of positive reinforcement.
2 – Production Validity
Again, we should initiate an activity that allows the students to produce the target language that we presented to them and not a variation on it (although this is not strictly true with higher level students).
So, in the case of likes and dislikes for food, we should set up an activity where the students are saying, Do you like pineapple? as opposed to, What do you think of pineapples?
3 – Production Contextualization
The activity should simulate a real–life situation where they (the students) may use the target language. In the case of likes and dislikes for food this might be a menu with images of the food items or perhaps a series of images of the food items to prompt the dialogue,
- Yes, I like ____, or
Note that a successful production activity will also have aspects that set it apart from a practice activity, including:
4 – Student Autonomy
Students will be speaking, using the target language, with ideally, little or no support from the teacher.
They shouldn’t be looking things up on either the whiteboard or on any materials they have on their desk (e.g. a completed practice worksheet) so a teacher may choose to erase information from the whiteboard for this stage and the teacher might also choose to get students to clear their desks.
5 – Issuing Instructions for an Activity
As with the practice stage whilst it is important to select an appropriate activity, it is equally important to issue clear and unambiguous instructions for the activity itself so all of our students are clear as to what is expected of them. We will be issuing instructions for the activity in the student’s second language so we need to make use of clear visuals to support any language we have to use and strong demonstrations of what is expected, just as we will have done during the practice stage.
6 – Correcting Errors During the Activity
It is important that the students get as many opportunities to speak using the newly acquired language. Therefore, a teacher shouldn’t be drowning them out by speaking at length, over the top of them to correct any errors. This obviously differs from the practice where students expect the teacher to assist them as they rehearse (not produce) newly acquired language.
Clever use of body language by the teacher will enable them to be discrete in correcting errors and will allow them to offer much needed encouragement to students as well.
Production Stage of a PPP EFL Lesson with subtitles
- TEFL Student Online Training Task (password protected)
ChatGPT for Teachers
Trauma-informed practices in schools, teacher well-being, cultivating diversity, equity, & inclusion, integrating technology in the classroom, social-emotional development, covid-19 resources, invest in resilience: summer toolkit, civics & resilience, all toolkits, degree programs, trauma-informed professional development, teacher licensure & certification, how to become - career information, classroom management, instructional design, lifestyle & self-care, online higher ed teaching, current events, what is your teaching style 5 effective teaching methods for your classroom.

Every teacher has her or his own style of teaching. And as traditional teaching styles evolve with the advent of differentiated instruction, more and more teachers are adjusting their approach depending on their students’ learning needs.
But there are a few fundamental teaching styles most educators tend to use. Which one is yours?
You’ve Got Style
These teaching styles highlight the five main strategies teachers use in the classroom, as well as the benefits and potential pitfalls of each.

The Authority, or lecture style
The authority model is teacher-centered and frequently entails lengthy lecture sessions or one-way presentations. Students are expected to take notes or absorb information.
- Pros : This style is acceptable for certain higher-education disciplines and auditorium settings with large groups of students. The pure lecture style is most suitable for subjects like history, which necessitate memorization of key facts, dates, names, etc.
- Cons : It’s a questionable model for teaching children because there is little or no interaction with the teacher. Plus it can get a little snooze-y. That’s why it’s a better approach for older, more mature students.
The Demonstrator, or coach style
The demonstrator retains the formal authority role by showing students what they need to know. The demonstrator is a lot like the lecturer, but their lessons include multimedia presentations, activities, and demonstrations. (Think: Math. Science. Music.)
- Pros : This style gives teachers opportunities to incorporate a variety of formats including lectures and multimedia presentations.
- Cons : Although it’s well-suited for teaching mathematics, music, physical education, or arts and crafts, it is difficult to accommodate students’ individual needs in larger classrooms.
The Facilitator, or activity style
Facilitators promote self-learning and help students develop critical thinking skills and retain knowledge that leads to self-actualization.
- Pros : This style trains students to ask questions and helps develop skills to find answers and solutions through exploration; it is ideal for teaching science and similar subjects.
- Cons : Challenges teacher to interact with students and prompt them toward discovery rather than lecturing facts and testing knowledge through memorization. So it’s a bit harder to measure success in tangible terms.
The Delegator, or group style
The delegator style is best suited for curricula that require lab activities, such as chemistry and biology, or subjects that warrant peer feedback, like debate and creative writing.
- Pros : Guided discovery and inquiry-based learning place the teacher in an observer role that inspires students by working in tandem toward common goals.
- Cons : Considered a modern style of teaching, it is sometimes criticized as eroding teacher authority. As a delegator, the teacher acts more as a consultant rather than the traditional authority figure.
The Hybrid, or blended style
Hybrid, or blended style, follows an integrated approach to teaching that blends the teacher’s personality and interests with students’ needs and curriculum-appropriate methods.
- Pros : Inclusive! And it enables teachers to tailor their styles to student needs and appropriate subject matter.
- Cons : Hybrid style runs the risk of trying to be too many things to all students, prompting teachers to spread themselves too thin and dilute learning.
Because teachers have styles that reflect their distinct personalities and curriculum—from math and science to English and history—it’s crucial that they remain focused on their teaching objectives and avoid trying to be all things to all students.
What you need to know about your teaching style
Although it is not the teacher’s job to entertain students, it is vital to engage them in the learning process. Selecting a style that addresses the needs of diverse students at different learning levels begins with a personal inventory—a self-evaluation—of the teacher’s strengths and weaknesses. As they develop their teaching styles and integrate them with effective classroom management skills, teachers will learn what works best for their personalities and curriculum.
Our guide encapsulates today’s different teaching styles and helps teachers identify the style that’s right for them and their students. Browse through the article or use these links to jump to your desired destination.
- What is a teaching style inventory, and how have teaching styles evolved?
- What teaching method is best for today’s students?
How does classroom diversity influence teachers?
Emergence of the teaching style inventory.
How have teaching styles evolved? This is a question teachers are asked, and frequently ask themselves, as they embark on their careers, and occasionally pause along the way to reflect on job performance. To understand the differences in teaching styles, it’s helpful to know where the modern concept of classifying teaching methods originated.
The late Anthony F. Grasha, a noted professor of psychology at the University of Cincinnati, is credited with developing the classic five teaching styles. A follower of psychiatrist Carl Jung, Grasha began studying the dynamics of the relationship between teachers and learning in college classrooms. His groundbreaking book, Teaching with Style , was written both as a guide for teachers and as a tool to help colleagues, administrators and students systematically evaluate an instructor’s effectiveness in the classroom.
Grasha understood that schools must use a consistent, formal approach in evaluating a teacher’s classroom performance. He recognized that any system designed to help teachers improve their instructional skills requires a simple classification system. He developed a teaching style inventory that has since been adopted and modified by followers.
- Expert : Similar to a coach, experts share knowledge, demonstrate their expertise, advise students, and provide feedback to improve understanding and promote learning.
- Formal authority : Authoritative teachers incorporate the traditional lecture format and share many of the same characteristics as experts, but with less student interaction.
- Personal model : Incorporates blended teaching styles that match the best techniques with the appropriate learning scenarios and students in an adaptive format.
- Facilitator : Designs participatory learning activities and manages classroom projects while providing information and offering feedback to facilitate critical thinking.
- Delegator : Organizes group learning, observes students, provides consultation, and promotes interaction between groups and among individuals to achieve learning objectives.
Although he developed specific teaching styles, Grasha warned against boxing teachers into a single category. Instead, he advocated that teachers play multiple roles in the classroom. He believed most teachers possess some combination of all or most of the classic teaching styles.
How does differentiated instruction affect teaching styles?
Carol Ann Tomlinson, a professor at the University of Virginia, is an early advocate of differentiated instruction and a pioneer in the development of learning-based teaching styles. If Grasha laid the groundwork for 20th-century teachers to adopt styles tailored to match their personalities and strengths, Tomlinson has advanced this theme into the 21st century by focusing on differentiated instruction.
In the simplest terms, differentiated instruction means keeping all students in mind when developing lesson plans and workbook exercises, lectures, and interactive learning. These student-focused differences necessitate instructional styles that embrace diverse classrooms for students at all learning levels and from various backgrounds without compromising the teacher’s strengths.
What teaching style is best for today’s students?
Whether you’re a first-year teacher eager to put into practice all of the pedagogical techniques you learned in college, or a classroom veteran examining differentiated instruction and new learning methodologies, consider that not all students respond well to one particular style. Although teaching styles have been categorized into five groups, today’s ideal teaching style is not an either/or proposition but more of a hybrid approach that blends the best of everything a teacher has to offer.
The traditional advice that teachers not overreach with a cluster of all-encompassing teaching styles might seem to conflict with today’s emphasis on student-centered classrooms. Theoretically, the more teachers emphasize student-centric learning, the harder it is to develop a well-focused style based on their personal attributes, strengths, and goals.
In short, modern methods of teaching require different types of teachers—from the analyst/organizer to the negotiator/consultant. Here are some other factors to consider as teachers determine the best teaching method for their students.
Empty vessel : Critics of the “sage on the stage” lecture style point to the “empty vessel” theory, which assumes a student’s mind is essentially empty and needs to be filled by the “expert” teacher. Critics of this traditional approach to teaching insist this teaching style is outmoded and needs to be updated for the diverse 21st-century classroom.
Active vs. passive : Proponents of the traditional lecture approach believe that an overemphasis on group-oriented participatory teaching styles, like facilitator and delegator, favor gifted and competitive students over passive children with varied learning abilities, thereby exacerbating the challenges of meeting the needs of all learners.
Knowledge vs. information : Knowledge implies a complete understanding, or full comprehension, of a particular subject. A blend of teaching styles that incorporate facilitator, delegator, demonstrator, and lecturer techniques helps the broadest range of students acquire in-depth knowledge and mastery of a given subject. This stands in contrast to passive learning, which typically entails memorizing facts, or information, with the short-term objective of scoring well on tests.
Interactive classrooms : Laptops and tablets, video conferencing, and podcasts in classrooms play a vital role in today’s teaching styles. With technology in mind, it is imperative that teachers assess their students’ knowledge while they are learning. The alternative is to wait for test results, only to discover knowledge gaps that should have been detected during the active learning phase.
Constructivist teaching methods : Contemporary teaching styles tend to be group-focused and inquiry-driven. Constructivist teaching methods embrace subsets of alternative teaching styles, including modeling, coaching, and test preparation through rubrics scaffolding. All of these are designed to promote student participation and necessitate a hybrid approach to teaching. One criticism of the constructivist approach is that it caters to extroverted, group-oriented students, who tend to dominate and benefit from these teaching methods more than introverts; however, this assumes introverts aren’t learning by observing.
Student-centric learning does not have to come at the expense of an instructor’s preferred teaching method. However, differentiated instruction demands that teachers finesse their style to accommodate the diverse needs of 21st-century classrooms.
The ‘sage on the stage’ meets the ‘tiger mom’
The objective of blending teaching styles to leverage the teacher’s strengths while meeting the demands of diverse students has become increasingly difficult, as parents take a decidedly proactive role in child-learning techniques.
The traditional authoritative/expert, or “sage on the stage” lecture style, has come under attack by some parents—and contemporary educational leaders—who emphasize that a more diverse approach to teaching is necessary to engage students. This is compounded by the rise of “tiger moms,” a term made popular by parents devoted to improving the quality of education with laser-precision focus on A-list schools and a highly competitive job market.
Age of the proactive parent
Regardless of what style a teacher adopts, it’s important for teachers to develop positive attitudes, set goals, and establish high expectations for students.
“Assume students can excel!” education authors Harry and Rosemary Wong declare. As former teachers with a combined 80-plus years of educational experience, the Wongs emphasize in their best-selling book, The First Days of School: How to Be an Effective Teacher and their more recent, The Classroom Management Book that successful teachers share three common characteristics:
- effective classroom management skills
- lesson mastery
- positive expectations
All instructors, when developing their teaching styles, should keep in mind these three goals, as well as the primary objective of education: student learning.
It is abundantly clear that today’s teachers are responsible for students with a diverse range of learning abilities. The 21st-century teacher does not have the luxury of “picking the low-hanging fruit” and then leaving the rest of the tree for experts who specialize in children with behavioral issues or learning disorders.
Today’s teachers must develop instructional styles that work well in diverse classrooms. Effective teaching methods engage gifted students, as well as slow-learning children and those with attention deficit tendencies. This is where differentiated instruction and a balanced mix of teaching styles can help reach all students in a given classroom—not just the few who respond well to one particular style of teaching.
The wonderment of teaching, what author/educator Dr. Harry Wong refers to as “that a-ha moment” when a child “gets it,” is one of the most rewarding and seemingly elusive benefits of becoming a teacher. This transfer of knowledge from expert to student is an art form and a skill. Fortunately, both can be learned and perfected.
Knowing how to engage students begins with selecting the teaching style that’s right for you. And remember, even though you may prefer one teaching style over another, you must find the style that works best for your students! Try different styles to meet different objectives, and always challenge yourself to find ways to reach each student.
You may also like to read
- Effective Teaching Strategies for Adolescent Literacy Teachers
- Effective Teaching Strategies for Special Education
- Activities for Teaching Tolerance in the Classroom
- Interactive Teaching Styles Used in the Classroom
Categorized as: Tips for Teachers and Classroom Resources
Tagged as: Leadership and Administration , Mid-Career Teacher , New Teacher , Professional Development , Veteran Teacher
- Master's in Teaching Online | Distance-Learni...
- Online & Campus Master's in Elementary Educat...
- Certificates for Reading Specialist
- Professional development
- Knowing the subject
- Teaching Knowledge database N-P
PPP is a paradigm or model used to describe typical stages of a presentation of new language.

It means presentation, production and practice. The practice stage aims to provide opportunities for learners to use the target structure. Criticism of this paradigm argues that the freer 'practice' stage may not elicit the target language as it is designed to do, as in this meaning-based stage, students communicate with any language they can. It is not clear that forcing students to use certain structures to communicate in a practice activity will necessarily mean they will use these structures spontaneously later.
Example The teacher presents and illustrates the communicative purpose of a new structure 'If I was you…' for advice. Then learners use prompts to complete sentences with the correct forms of the verbs. They practise by giving each other advice.
In the classroom Despite current doubts about the usefulness of the practice stage in the PPP model, it is still a common framework to find in classes and in materials.
Further links: https://www.teachingenglish.org.uk/article/planning-a-grammar-lesson https://www.teachingenglish.org.uk/article/checking-understanding https://www.teachingenglish.org.uk/article/a-task-based-approach https://www.teachingenglish.org.uk/blogs/david-petrie/david-petrie-space-spontaneity
the article is interesting and beneficial
- Log in or register to post comments
Research and insight
Browse fascinating case studies, research papers, publications and books by researchers and ELT experts from around the world.
See our publications, research and insight
My English Language
English language resources for efl students and teachers.

PPP Technique in TEFL
Presentation, practice and production.
The PPP technique in teaching is a common way to introduce students to new words and concepts. This can be especially useful in the EFL classroom. The PPP method in English teaching is a three-step lesson plan and teaching approach that helps the student learn, understand and practice new vocabulary.
The three stages of a PPP lesson
There are three stages in a PPP TEFL lesson.
Firstly, the teacher presents the new word, an event which involves the presentation of pronunciation and spelling in context.
Next, the teacher allows the students to practice the new word in a controlled setting, making sure the student has understood the vocabulary and usage properly.
Lastly comes the production stage, where there is a period of less-controlled practice and an informal assessment of learning. This is where the students get chance to use the new word or phrase in an original way and to relate it to their knowledge and experiences.
These three stages of a PPP lesson help the student to consolidate the new word in their mental vocabulary bank.
The sequence of a PPP lesson in EFL teaching
This EFL teaching method of presentation, practice and production is an approach that follows a definite sequence:
- The teacher presents the new vocabulary and explains the form of the language in a meaningful context.
- The students practise this new vocabulary through controlled activities such as worksheets or question and answer activities to check comprehension.
- The students use or produce what they have learned in a communicative activity such as a role-play, communication game, or question and answer session.
Teaching English using the PPP technique
Each stage of the Presentation, Practice and Production lesson must be planned well to be effective. However, the PPP method in TEFL is a highly flexible approach to teaching and there are many different activities a teacher can employ for each stage.
Presentation can include mime, drawing and audio. In fact, it is a good idea to try to engage with the students’ different senses to get across the meaning of the new word, using visual, kinaesthetic (movement) and audio techniques.
It is also important to make sure that students have understood the new word before encouraging them to practise it. It is often fun and highly effective for students to play games to practise vocabulary and to produce it.
Current debate about the PPP technique in TEFL
In recent times, there has been increasing debate surrounding the PPP method of teaching, with many critics asking if teachers should be using the PPP technique so often in the EFL classroom.
Some critics of the PPP method in TEFL think it can be too formal and structured, with too little focus on student interaction. However, we think the PPP technique in EFL teaching offers a very flexible base from which to construct a lesson that is highly student-centred.
For ideas on ways to present new vocabulary and check comprehension , and activities which allow students to practice and produce their vocabulary , please browse this PPP teaching section.
- Is the PPP method old fashioned or is it still a useful and effective way to teach?
- Do you use the PPP technique in TEFL?
- What is your favourite way to present new vocabulary?
Let us know your thoughts in the comments box below.
9 thoughts on “ PPP Technique in TEFL ”
may I know who is the actual founder of PPP technique?
Sorry Sifa, we don’t know who originally developed the PPP technique. Can any readers help?
Yes, it was Jeremy Harmer. 😉
Thanks for this information, Miri! If any readers want to check out Jeremy Harmer’s explorations of the PPP technique, you can read more in his book: ‘How to Teach English’, published by Longman.
Catherine may you please help me with the same book by Jeremy Harmer, on soft copy I will highly appreciate it.
Hi Grace, Jeremy Harmer’s book can be found online to read or download at academia.edu.
It PPP useful and used in teaching reading?
Hi Muharram, thanks for your question. Yes the PPP method can be used to teach all areas of language, including reading.
In this type of lesson, any new target words would be presented in the early part of the class (pre-reading) before the student meets the vocabulary within a longer written text. While reading the text during the ‘practice’ stage, students should be able to identify the individual ideas expressed and understand how the new words are used in context.
After reading, students can analyse the material and discuss the text, hold a questions/answer session or write about it in the production stage. This helps them deepen their understanding and test their reading comprehension. I hope this gives you a few ideas – I’ll be adding more details about using the PPP method to teach reading and writing soon.
Can somebody help me with these questions of Unit 3 i-to-i (180 hour units) please:
Match the description to the stages to make a complete PPP lesson. The aim of the lesson is expressing past habits with ‘used to’ + infinitive. For example, When I was younger, I used to watch cartoons.
The teacher repeats the model sentence with natural linking, stress and intonation. The class repeats.
1)Teacher asks, “Did he play football in the past?” (Yes) “Does he play football now?” (No).
2)Teacher says ‘used to’ + infinitive can be used to talk about things we regularly did in the past, but don’t do now.
3)The students answer conversation questions about their childhood to introduce them to the topic.
4)The teacher asks some individuals how many people share their thoughts on living in London and corrects some errors if they are made.
5)The learners use the target language to talk about how their lives are different now they live in London and compare their country’s cultures to the UK.
6)The teacher writes the model sentence on the board. When I was younger, he used to play football. Draws a box round ‘used to’ and writes ‘infinitive’ over play.
7)Learners choose an activity they enjoyed as children then walk round the class asking if other people used to do the same thing. For example, Did you use to watch cartoons?
Leave a Reply
Your email address will not be published. Required fields are marked *
Three approaches to improve your online teaching
When designing online courses and teaching remotely, teachers need to select the framework that supports learning goals. Here, three academics break online learning techniques into their key parts
Antoni Badia
.css-76pyzs{margin-right:0.25rem;} ,, consuelo garcía, julio meneses, additional links.

You may also like

Popular resources
.css-1txxx8u{overflow:hidden;max-height:81px;text-indent:0px;} Emotions and learning: what role do emotions play in how and why students learn?
A diy guide to starting your own journal, universities, ai and the common good, artificial intelligence and academic integrity: striking a balance, create an onboarding programme for neurodivergent students.
Many university teachers need help identifying the right conceptual framework for designing online courses and teaching in virtual learning environments (VLEs). A quick online search will suggest a multitude of pedagogic approaches and supposed innovative teaching methods, but many of these are not evidence-based.
So, here we will summarise three research-based online teaching approaches that teachers can use to guide their work in VLEs. We explain the focus, roles of teacher and students, the online learning environment and learning resources for each approach.
The content-acquisition approach
The main aim of this approach is to provide subject content to students. It is designed to cover all the essential concepts and principles of the subject matter. The content should be accessible, clear, concise, relevant, interactive, well explained and up to date to facilitate the students’ comprehensive understanding of the subject matter.
- Make EDI in higher education a reality by building it into your course design
- The three stages of developing a framework to support students of open and distance learning
- Master the art of effective feedback
Teacher role: The teacher is the primary source of knowledge. They are responsible for selecting and organising the course content, choosing the appropriate learning resources for students, designing the learning activities and assessing students’ learning outcomes.
Student role: The student is expected to acquire and learn the course content from the provided resources and complete the learning assignments. Each student’s acquired knowledge should accurately represent the course content. Most students’ learning time is devoted to self-paced learning.
Online learning environment: This should facilitate learners’ content acquisition. Thus, technology-based tools are mainly used to produce, provide access to and deliver learning resources and materials. The VLE will contain lesson plans, activities and grades and class recordings. The technology used needs to deliver live online classes, with teachers’ real-time explanations, to many students worldwide. A prototype example of the content acquisition approach can be seen in most massive open online courses (Moocs).
Learning resources: Learning resources may be selected and designed to accurately represent the nature of the content and enhance students’ learning experience. Various kinds of resources may be used to represent and deliver the content, such as multimedia (video and audio tools), authoring tools, interactive resources (computer simulations, games, virtual labs), mobile resources and adaptive resources (intelligent tutoring systems).
The knowledge-building approach
The key feature of this approach is the knowledge-building processes through which students expand their individual understanding.
Teacher role: The teacher’s primary role is to guide, help and supervise students’ learning. The course design includes learning objectives, content, activities, scaffolding and support, and assessments. Course implementation involves supervision to ensure the correct application of learning skills and adequate task completion, correcting students’ misunderstandings, and monitoring and assessing the learning process and learning outcomes.
Student role: The student should actively engage in an individual knowledge-building process and activate high-level thinking processes. This is encouraged through enquiry-based assignments in which students must find solutions to project-based challenges or work through real-world or theoretical examples. Such assignments require a deep understanding of the content, challenging students to explore information, apply critical thinking , ask questions, design enquiries, interpret evidence, form explanations and communicate findings. Students must make connections, and apply and use their knowledge in authentic learning situations.
Online learning environment: Technology should help students to develop the best individual knowledge-building processes, learn content and complete activities. These environments integrate learning tools that support students’ learning and work on specific higher-order-thinking processes such as solving authentic problems. The web-based inquiry science environment (WISE) provides a good example of an online learning environment of this kind.
Learning resources: Generally referred to as instructional scaffolding, resources combine content and learning guides, question prompts, model examples and conceptual, procedural, strategic and metacognitive supports to guide learning.
The collaborative learning approach
The critical feature of this approach is students’ collaboration in learning in virtual environments, usually using synchronous and written communication.
Teacher role: The teacher aims to facilitate high-quality social participation among students in collaborative learning activities. To achieve this, the teacher should create a learning environment that promotes relationships of trust and mutual commitment and provide learning resources that guide students’ social participation and collaboration in groups and in the community. The teacher should encourage communication, solve student conflicts, control learning periods and monitor students’ learning pace. Content and activities, such as online debates and team presentations, should be designed to facilitate collaboration and learning among equals.
Student role: Students engage naturally and proactively in community participation and group work and collaborate with peers to complete learning assignments, solve problems and share knowledge and perspectives. They participate in discussion and group work, and use critical thinking and creativity .
Online learning environments: Digital tools should be used that facilitate group-work organisation, promote group communication and collaboration, support knowledge exchange, and elaborate on shared outcomes. One example of such an online environment is Moodle, particularly the chat, forum, wiki and glossary functions.
Learning resources: Participants are expected to take an active role, building on the initial selection of learning resources the teacher provides according to their learning needs. For example, a shared learning task for students may be solving a problem or tackling a learning challenge collaboratively. In that situation, the students should search for and select new information related to the specific issue or challenge of the learning assignment and share it with their peers.
Teachers may use a single teaching approach to design an online course, but it is more likely they will take features from all three and combine them to best fit the different elements of the course and its learning objectives.
Antoni Badia is director of the bachelor’s degree in primary education, and Julio Meneses is director of learning and teaching analysis at the eLearning Innovation Center; both are at the Open University of Catalonia. Consuelo García is vice-rector for teaching and educational innovation at the Valencian International University.
If you would like advice and insight from academics and university staff delivered direct to your inbox each week, sign up for the Campus newsletter .
For more teaching and learning insight from the authors, see “ Emotions in response to teaching online: Exploring the factors influencing teachers in a fully online university ”, as published in Innovations in Education and Teaching International .
Emotions and learning: what role do emotions play in how and why students learn?
Global perspectives: navigating challenges in higher education across borders, how to help young women see themselves as coders, contextual learning: linking learning to the real world, authentic assessment in higher education and the role of digital creative technologies, how hard can it be testing ai detection tools.
Register for free
and unlock a host of features on the THE site

- SUGGESTED TOPICS
- The Magazine
- Newsletters
- Managing Yourself
- Managing Teams
- Work-life Balance
- The Big Idea
- Data & Visuals
- Reading Lists
- Case Selections
- HBR Learning
- Topic Feeds
- Account Settings
- Email Preferences
How to Make a “Good” Presentation “Great”
- Guy Kawasaki

Remember: Less is more.
A strong presentation is so much more than information pasted onto a series of slides with fancy backgrounds. Whether you’re pitching an idea, reporting market research, or sharing something else, a great presentation can give you a competitive advantage, and be a powerful tool when aiming to persuade, educate, or inspire others. Here are some unique elements that make a presentation stand out.
- Fonts: Sans Serif fonts such as Helvetica or Arial are preferred for their clean lines, which make them easy to digest at various sizes and distances. Limit the number of font styles to two: one for headings and another for body text, to avoid visual confusion or distractions.
- Colors: Colors can evoke emotions and highlight critical points, but their overuse can lead to a cluttered and confusing presentation. A limited palette of two to three main colors, complemented by a simple background, can help you draw attention to key elements without overwhelming the audience.
- Pictures: Pictures can communicate complex ideas quickly and memorably but choosing the right images is key. Images or pictures should be big (perhaps 20-25% of the page), bold, and have a clear purpose that complements the slide’s text.
- Layout: Don’t overcrowd your slides with too much information. When in doubt, adhere to the principle of simplicity, and aim for a clean and uncluttered layout with plenty of white space around text and images. Think phrases and bullets, not sentences.
As an intern or early career professional, chances are that you’ll be tasked with making or giving a presentation in the near future. Whether you’re pitching an idea, reporting market research, or sharing something else, a great presentation can give you a competitive advantage, and be a powerful tool when aiming to persuade, educate, or inspire others.
- Guy Kawasaki is the chief evangelist at Canva and was the former chief evangelist at Apple. Guy is the author of 16 books including Think Remarkable : 9 Paths to Transform Your Life and Make a Difference.
Partner Center
IMAGES
VIDEO
COMMENTS
When combined, these framed a rubric that supported students in optimizing their presentation deliveries. The competencies are as follows: 1. Content knowledge. The presenter must display a deep understanding of what they are delivering in order to share the "what, why, how, and how-to" of the topic. 2.
A study of student attention using clickers. Journal of Chemical Education, 87(12, 1438-1443. Garner, J. K., & Alley, M. P (2013). How the design of presentation slides affects audience comprehension: A case for the assertion-evidence approach. International Journal of Engineering Education, 29(6), 1564-1579.
Effective Poster Presentation - Handout. This PDF presents strategies to consider in determing poster content, structure, and graphic design. It includes tips on presentation logisitics. The Center for Teaching Excellence and Innovation is the instructional support center for the Arts & Sciences and Engineering schools at Johns Hopkins University.
Presentation. Mark as done. A presentation delivers content through oral, audio and visual channels allowing teacher-learner interaction and making the learning process more attractive. Through presentations, teachers can clearly introduce difficult concepts by illustrating the key principles and by engaging the audience in active discussions.
Curriculum aims such as 'the goal of teaching essential skills, such as oral communication, in higher education is to prepare students to be more effective employees and responsible citizens' (Dunbar et al., 2006: 116) and assumptions such as 'evaluators of student presentations typically utilize an analytic rating system so that students ...
Student Presentation. The instructional strategy of using student presentations as a way to present content to the class as a whole can be a fun and engaging method of instruction. For example, teachers can divide up a chapter into topics and have the students "teach" the class by presenting their "expert" analysis.
Trying to rush through slides can give the impression of an unorganized presentation and may be difficult for students to follow or learn. PART II: Enhancing Teaching and Learning with PowerPoint Class Preparation. PowerPoint can be used to prepare lectures and presentations by helping instructors refine their material to salient points and ...
Effective lecturers combine the talents of scholar, writer, producer, comedian, showman, and teacher in ways that contribute to student learning." Wilbert J. McKeachie, Teaching Tips An effective teacher is an excellent communicator and therefore thinks about improving his or her presentation skills. One of the most important aspects of communicating […]
This approach to education, typically referred to as the Presentation -Practice -Production lesson, rejects the reliance on conventional teaching approaches, SN Soc Sci (2023) 3:47 Page 3 of 16 47 ...
Presentation Style. One of the best ways an instructor can engage their students is by modifying their presentation style. Classes don't have to be lecture heavy and monotonous and it can be helpful for students to mix up your presentation strategy to keep things fresh and keep students interested (Bain 2004). Here we have included some ways to ...
Oct 24, 2020. Presentation, practice, production (PPP) is a lesson structure, a way to order activities in your lessons. Although quite old and heavily criticised over the years, PPP is probably the most commonly used lesson structure in teaching English to foreign learners today.
The PPP method is a popular teaching approach used in many English language teaching (TEFL) classrooms around the world. This approach is based on the communicative approach to teaching a language, which emphasises the importance of communication as the ultimate goal of language learning. The PPP method involves three stages: presentation ...
Preparing for a presentation is essential for teachers to deliver engaging and impactful content to their students. By structuring thoughts, anticipating questions, and preparing ahead, teachers can achieve a well-organized presentation that will enhance the students' understanding and leave them feeling confident.
Create Effective Presentations. Use Audiovisuals. Teach Outdoors. Evaluate Yourself and Others. Use a Variety of Teaching Methods and Strategies. We each learn differently based on our learning style, multiple intelligences and past knowledge and experience. We learn best when we experience a teaching approach that matches our unique learning ...
The PPP Teaching framework consist of four main stages: Warm-up, Presentation, Practice and Production and is used to teach speaking and writing lessons. There is a variation when we use this framework to teach Listening and Reading skills. The framework that we use to teach passive skills is the PDP framework which stands for Pre, While and Post.
Presentation skills are the abilities and qualities necessary for creating and delivering a compelling presentation that effectively communicates information and ideas. They encompass what you say, how you structure it, and the materials you include to support what you say, such as slides, videos, or images. You'll make presentations at various ...
Pros of the Facilitator teaching style. This teaching style helps students develop self-sufficiency, as the teacher provides guidance and support rather than direct instruction. It fosters critical thinking, collaboration, and communication skills. It supports student-centered learning and autonomy.
What is Presentation, practice and production (PPP)?. During your SEE TEFL certification course you will become more familiar with an established methodology for teaching English as a foreign language known as 3Ps or PPP - presentation, practice, production. The PPP method could be characterized as a common-sense approach to teaching as it consists of 3 stages that most people who have ...
The Hybrid, or blended style. Hybrid, or blended style, follows an integrated approach to teaching that blends the teacher's personality and interests with students' needs and curriculum-appropriate methods. Pros: Inclusive! And it enables teachers to tailor their styles to student needs and appropriate subject matter.
PPP is a paradigm or model used to describe typical stages of a presentation of new language. It means presentation, production and practice. The practice stage aims to provide opportunities for learners to use the target structure. Criticism of this paradigm argues that the freer 'practice' stage may not elicit the target language as it is ...
Presentation, Practice and Production The PPP technique in teaching is a common way to introduce students to new words and concepts. This can be especially useful in the EFL classroom. The PPP method in English teaching is a three-step lesson plan and teaching approach that helps the student learn, understand and practice new vocabulary. The
The Presentation, Practice, and Producti on (PPP) Method is an approach in teaching structures (e.g., gra mmar or vo cabulary) in a foreign language (Harmer, 2015). Developing
Before we dive into various teaching styles, as well as the pros and cons for each of them, let's look at two different approaches to teaching: 1. Teacher-centered approach . Imagine walking (or tuning) into a class, and the teacher follows their lesson plan to a tee, never going off script. They take on the role of authority. Passing on ...
A quick online search will suggest a multitude of pedagogic approaches and supposed innovative teaching methods, but many of these are not evidence-based. So, here we will summarise three research-based online teaching approaches that teachers can use to guide their work in VLEs. We explain the focus, roles of teacher and students, the online ...
A strong presentation is so much more than information pasted onto a series of slides with fancy backgrounds. Whether you're pitching an idea, reporting market research, or sharing something ...
Building upon the circumplex approach to (de)motivating styles defined by self-determination theory, this research aimed: (a) to analyse the extent to which physical education (PE) teachers' (de)motivating teaching approaches differ across gender, school level, and years of teaching experience, and (b) to test paths from PE teachers' need-based experiences to their (de)motivating teaching ...