

Build a PHP & MySQL CRUD Database App From Scratch
In this tutorial, we're going to learn how to make the beginnings of a very simple database app, using PHP and MySQL. It will be half of a CRUD application, which stands for C reate, R ead, U pdate, D elete.
A quick example of a CRUD application would be a database of employees for a company. From the control panel, an admin would be about to add a new employee ( create ), view a list of employees ( read ), change an employee's salary ( update ) or remove a fired employee from the system ( delete ). In this lesson, we'll only be creating and reading entries, but if it proves popular I'll make a part two.
Looking up how to connect to MySQL with PHP in Google will lead to a lot of outdated resources using deprecated code, and my aim is to create a very simple walkthrough that will leave you will a technically functioning app that uses more modern and secure methods.
That being said, I leave you with the disclaimer that this tutorial is meant for beginner learning purposes - there can always be improvements to security and maintainability for code in the real world.
Prerequisites
- A basic knowledge of HTML - We'll be using HTML forms .
- A basic knowledge of PHP - I'm going to do my best to simplify as much as possible, but you should already have an idea of how variables and strings work. Here's a basic guide to some of the fundamentals .
- A local PHP and MySQL environment - Click on the link for a mini-tutorial on how to set one up. You will be using MAMP to install PHP and MySQL on a Windows or Apple computer.
- Alternatively: you can use Vagrant to set up LAMP on Ubuntu if you're more advanced.
- A database management app - You can use Sequel Pro on a Mac, and SQLYog on Windows. These are graphical user interfaces (GUI) to view the content of your database.
- Connect to a MySQL database with PHP using the PDO (PHP Data Objects) method.
- Create an installer script that creates a new database and a new table with structure.
- Add entries to a database using an HTML form and prepared statements .
- Filter database entries and print them to the HTML document in a table.
All the code throughout this article can be found on GitHub.
- View on GitHub
Update: Part Two is here! Learn how to update and delete entries.
- Part 2: Update and Delete
Step 1: Building the front end
To start, we have a PHP localhost set up, as mentioned in our prerequisites. I've created one and called it db.dev . Let's create a directory called public/ in the root of our project. This is where I'm going to put all my client-facing code, or what would be pages accessible from the internet.
Chrome no longer allows .dev localhost domains. I recommend to use .test instead of .dev . Throughout this article, .dev will be used in the examples.
Please make sure you read the above note before continuing.
We don't have a database set up or anything, but we're just going to set up the HTML front end in order to be prepared to start interacting with that data.
Index page and template partials
Our main/home page will be located at index.php , so create that file in your public/ directory.
Right now, all we have is a basic HTML skeleton that will link to our create and read pages. Here's what it looks like:
Since we want to keep our application relatively DRY (don't repeat yourself) , we're going to divide our page into layout sections.
Create a templates/ directory in public, and make a header.php and footer.php . You'll take everything from the <h1> tag and up and put it in the header.
And here's the footer.
All that remains in index.php at this point are the links to our two other pages.
We want to include the header and footer code in all our front end pages, so we'll be using a PHP include function to pull that code in.
Now the front end of our index file looks the same as before, but we have the reusable layout code that we can use in our other pages.
Add a new user page
Now we're going to make a file called create.php back in our public/ directory. This will be the page we use to add a new user to the database. We'll start the file with our header and footer loaded in.
I'm going to create a simple form here that gathers the first name, last name, email address, age, and location of a new user.
You'll notice that for each entry, I have a <label> , and each <input> has a name and id attribute.
Whenever we create forms with HTML, we need to make sure they're accessible for all users , and we do that by creating labels and associating each one to a specific. An input is associated to a label by its id.
So why do I have name="firstname" as well as id="firstname" , if only the id is necessary to associate the input to the label?
The name attribute is how PHP identifies and utilizes the data of the input, which we'll start getting into further on in the article. Therefore both the name and id attributes are necessary, but for different reasons.
Before I display the front end of the create.php code, let's quickly create a css/ folder and make style.css . CSS and style is not a focus of this article, but I'm going to add a line of CSS code to make the forms easier to read.
We have not specified a form action, so pressing the submit button will perform the action on the same page. Since we haven't written any PHP code to process the form yet, it won't do anything.
Query users page
Finally, we're going to create our read.php file, which will query the list of users by a parameter (in this case, location) and print out the results.
Again, we'll start with the header and footer code.
Then we'll add a small form for searching for users by location.
Now you have all the front end code set up and we can start. Here's everything you should have so far.
Here's a more visual representation of that.
Step 2: Initializing the database
Now that we have a front end, we're going to create the database. We could do this through the GUI of SequelPro or whatever database manager we're using, but I want to show you how to do it with actual SQL statements and PHP in an installer script.
SQL (Structured Query Language) is a language used to communicate with a database.
First, let's get into the database. Here's the login page for the front end of our database.
Your host will be localhost or 127.0.0.1 , which translate to the same thing for our purposes. Username and password will both be root . Entering that information in, you should be able to enter localhost.
Create a directory called data/ and create a file called init.sql . This will be our database initializing code.
SQL is a relatively straightforward code, so even if you've never seen it before, it should be easy to understand. Here's what the above means in plain English:
We're going to create a database called test . Then we're going to make sure we're using test for the rest of our code. In the test database, we'll create a table called users with 7 fields inside - id , firstname , lastname , email , age , location , and date . Next to each field is more information, options, and settings for each.
- INT() - this is an Integer . We specified INT(11) , which means up to 11 characters
- AUTO_INCREMENT - this is a number that will automatically increase with each entry.
- VARCHAR() - meaning Variable Character , this is a string that can contain letters and numbers. The number inside is the max amount of characters allowed.
- TIMESTAMP - this will add the current time in YYYY-MM-DD HH:MI:SS format by default.
Testing the SQL query
If you really want to see what this code will do before we create the installer, you can paste it into the Query section of your database program and Run Selection .
If you did that, you'll see I now have a test database, a users table, and all the database structure.
So we know our SQL works properly and has no errors. If you did that, delete the database because we're going to start over and do it through the script.
Using PDO to connect to a database
We're going to use PDO (PHP Data Objects) to connect to the database. The other major option is MySQLi . The critical difference between the two is that you can use PDO to connect to any number of databases, and mysqli code will only work with MySQL. Although we're using a MySQL database, PDO is more extendable in the future, and generally the preferred choice for new projects. So let's create that connection.
Create a file called install.php in the root of your directory.
We'll create a new PDO() object and place it into a variable named $connection .
The PDO object will ask for four parameters:
- DSN (data source name) , which includes type of database, host name, database name (optional)
- Username to connect to host
- Password to connect to host
- Additional options
install.php
Here's how that ends up looking after we fill in all the parameters.
Now we're going to organize it a bit more by putting all our database information into variables.
We'll create a config.php file that contains all the variables we can refer from.
Here's what we have in our installer so far. We're pulling in the database variables via config.php using require , which is similar to an include , except we're explicitly stating that the file is necessary for the script to run.
Now it's time to put that SQL code we created earlier to use. We'll be placing the contents of the data/init.sql file into a variable using the file_get_contents() function, and executing it with the exec() function.
At this point, we're going to want to use Exceptions to attempt to run the script and catch errors. We'll do this by putting all our code in a try/catch block, which looks like this:
Let's put our database code in the try block, and show our PDOException error message if something goes wrong trying to set up the database. Here's the final code for the installer.
To run the install, just navigate to your install.php file on the front end.
If you didn't delete your database from our test before, you might get this error, in which case you'll need to delete the database for the installer to run.
Congratulations, you just made an installer script to set up a new database and table with structure!
Step 3: Adding a new user
Now, we're finally going to write some code to make those forms do something.
In PHP, when you submit a form, all the inputs are placed into a $_POST array. So my <input type="text" name="firstname"> will translate to $_POST['firstname'] for us to work with.
We're going to go back to the public/create.php file. Right now, it's just a form with a header and footer being pulled in. The new code we write will be added to the top of the file.
First, we're going to tell this code only to run if the form has been submitted.
Just like with the installer, we're going to require our configuration file, and use a try/catch Exception to connect to the database.
If you'll notice, in the install.php script I was only connecting to mysql:host=$host in the first parameter (DSN). I didn't specify a database name, because we were creating the database in the file. Now that the database (named test ) is created, I'm adding that to the first parameter. $dsn is set to mysql:host=$host;dbname=$dbname .
Let's create an array with all our submitted form values.
We can use regular $_POST variables without further sanitization here because we're submitting to the database with prepared statements .
Now, the SQL code we're going to want to execute will look like this: INSERT INTO tablename (n) values (:n) . In our specific case, it will be the below code.
We could write out that code by hand and add each value every time we add one, but then we're updating things in three places and it becomes a pain. I learned a handy snippet of code from JeffreyWay of Laracasts to simplify that process.
We're going to use sprintf , which allows us to do the following: INSERT INTO x (y) values (:z) .
That code will print out the exact same thing, without having to write it multiple times. Now we'll just prepare and execute the code.
Here is the full code inside our try block.
Now the form is all ready to send. I'm going to fill out my information and submit it.
Going into my MySQL, if all went well, I can now view my entry in the database!
Excellent! There's just one more thing I want to do. Right now, after submitting the form, there's nothing letting me know that the user was submitted successfully.
Escaping HTML
Since in this case we're going to print out a $_POST variable to the HTML, we need to properly convert the HTML characters , which will aid in preventing XSS attacks.
Let's create a new file called common.php in the root of your project. Inspiration for this function and filename came from Jon's PHP blog tutorial . This is a file that can be used to store functions for later use. I'm only going to use it for one function today - an HTML escaping function.
With this function, we can wrap any variable in the escape() function, and the HTML entities will be protected.
Back in public/create.php , add a require "common.php"; . Now I'm just going to add this if statement below my header and above the "Add a user" title. It will check to see if a $_POST was submitted, and if a $statement was successful. If so, it will print a success message that includes the first name of the successfully added user.
And that's everything! Here's the final code to add a new user.
Step 4: Viewing and filtering users
Here's the last step - the "read" of our CRUD app. We already created the front end in public/read.php .
Really quickly, let's add a small amount of CSS to our public/css/style.css file to make the tables legible once we create them.
Now we're going to use the same require s from our new user page, as well as the try/catch block for connecting to the database.
Now we'll write a SELECT SQL query. We're going to select all ( * ) from the users table, and filter by location.
Then we'll put our $_POST into a varable.
Prepare, bind, and execute the statement.
Finally, we'll fetch the result.
Here's the full try connection code.
Great, now we have the whole process to retrieve the filtered data. All that's left is to print out the result.
Outside of the try/catch connection block and below the header, I'm going to insert the code for the table.
We'll check - if this is a POST request, and if the result of our query has more than 0 rows, open the table, loop through all the results, and close the table. If there are no results, display a message.
Here is the final code.
After adding a few entries, I can play around with it. I input the city.
And view the results.
Congratulations, you now have the very beginnings of a simple PHP database app without frameworks.
Now that you've learned how to create and read entries, check out part two!
Onto Part 2: Update and Delete
We went over a lot of valuable lessons in this tutorial, including but not limited to: connecting to a MySQL database with PDO, creating an installer script, inserting users into a database, selecting and printing out users from a database, and escaping printed HTML.
If this were a real world app, of course there would be more considerations to make. The backend would have to be password protected, which means you would make a login page and administrative users who are the only ones who have access to the app.
You would also add JavaScript validation to the front end of the site to ensure all required fields were being filled in, and using the correct type of characters for the input. (Although JavaScript validation is important, the most important part is that the back end that is receiving your data is protected).
Again, all the code from this article is available on GitHub if you got lost anywhere along the way. If you have suggestions on how to make the tutorial more clear or more secure, please don't hesitate to share! However, take into account this is meant to be a first look at the underlying code of database management, and not a full-fledged app.
Home » PHP MySQL Tutorial
PHP MySQL Tutorial
In this section, you will learn how to interact with MySQL using the PHP Data Objects or PDO.
The PDO is a data-access abstraction layer. PDO is a PHP extension that provides a lightweight and consistent interface for interacting with any database, including MySQL.
This tutorial assumes that you have basic PHP knowledge. If you want to learn PHP, check out the PHP tutorial .

Section 1. Connecting to MySQL
- Connecting to MySQL Database – show you how to connect to a MySQL database server using the PDO object.
Section 2. Creating Tables
- Creating a New Table – show you step by step how to create a table in MySQL using PDO
Section 3. Basic Operations: CRUD
- Querying Data – guide you on how to query data from MySQL database using PHP PDO and show you how to use PDO prepared statement to select data from a table.
- Inserting Data Into a Table – show you how to use PHP to insert data into MySQL a table.
- Updating Data – show you how to update data in a MySQL table using a PHP PDO prepared statement.
- Deleting Data – learn how to delete data from the MySQL database table using PHP PDO.
Section 4. Calling Stored Procedures
- Calling MySQL Stored Procedures – show you how to call MySQL stored procedures using PHP PDO. It guides you on how to call stored procedures that return result sets and stored procedures that accept input/output parameters.
Section 5. Managing Transactions
- Dealing with transactions – show you how to handle MySQL transactions in PHP to ensure the data integrity of databases.
Section 6. Working with BLOB
- Manipulating BLOB – show you how to handle BLOB data using PDO, including inserting, updating, and selecting BLOB data from the MySQL database.
Alex Web Develop

How to use PHP with MySQL: the complete tutorial (with examples)
This is the definitive, step-by-step guide to learn how to use PHP with MySQL .
If you want to:
- learn how PHP and MySQL work together
- learn how to connect to a MySQL server with PHP and execute SQL queries properly
- look at concrete examples using both MySQLi and PDO
Then this is the tutorial you are looking for.
(Looking for an advanced guide about SQL security? Take a look at my SQL injection guide ).
Ready to learn how to use PHP with MySQL?
Let’s dive in.
TABLE OF CONTENTS
1. php and mysql: an introduction, 2. how to get started, 3. the php mysql extensions: mysqli and pdo, 4. how to connect to mysql with php, 5. sql queries explained, 6. how to create tables, 7. how to read, insert and edit rows, 8. error handling and exceptions, 9. sql security, 10. conclusion, php and mysql: an introduction.
So, what is MySQL and why do you need it?
It all comes down to a simple fact:
Every dynamic web site needs to store some data.
An e-commerce needs to store the list of products and the orders from its clients, a blog needs to store its posts’ content, and so on.
Back-end languages like PHP and Python cannot “store” any information, except for some small temporary information saved in Sessions .
Therefore, web applications need a storage space where to keep all this data and where to read it from when needed.

This is what databases like MySQL are used for.
The vast majority of web applications rely on relational databases like MySQL , PostreSQL and Oracle .
You can think of a relational database as a collection of tables linked to each other. Data is stored inside these tables as rows .
You will see how they look like in a minute.
MySQL is by far the most used database for dynamic web sites (databases are also called DBMS , database management systems ).
Despite lacking some advanced features, it gained a lot of popularity for its open source license and its high performance for simple operations.
Many popular web sites like WordPress blogs and Wikipedia rely on MySQL (or some of its forks like MariaDB ).
Now, you are probably wondering:
“How can I use a MySQL database in my PHP application?”
Don’t worry, we’ll get there in a bit.
But first, let’s make sure you have everything you need to get started.
HOW TO GET STARTED
The best way to get started is to install a local development environment like XAMPP on your computer.
That way, you can do all your tests and exercises with PHP and MySQL locally.
Follow the steps from the Getting started chapter of my my How to learn PHP guide:
>> PHP in practice: getting started
When you’re done, start the web server and the MySQL server and open a web browser.
If you are using XAMPP, you can start Apache (the web server) and MySQL from the XAMPP Control Panel clicking on their Start buttons:

“All right! Now, how can I connect to the MySQL server?”
You need an SQL client .
You can use a stand alone application like the MySQL Workbench , a command line tool (useful when working on a remote server through an SSH connection) or a web application like phpMyAdmin .
phpMyAdmin is one of the most popular choices. It’s easy to use and you can run it from your browser like any other web application.
All PHP development environments include phpMyAdmin by default. To access it, you usually need to open the following URL:
http://localhost/phpmyadmin/
If you are using XAMPP, you can also get there by clicking the MySQL Admin button in the Control Panel:

Depending on its configuration, phpMyAdmin will let you access the database directly or will ask you for username and password. In that case, check the development environment documentation (you can try using root / root , a common default account).
When you’re in, you will see an interface like this one:

OK, BUT… HOW DOES A DATABASE WORK?
You can think of a MySQL installation as a pool of directories. These directories are called databases or schemas .
I usually prefer to use the term schema , because database can easily be confused with the whole installation.
Each of these schemas contains one or more tables . A table has one or more columns (or fields).
Finally, tables contain data as rows .
On the left side of the phpMyAdmin interface you can see the list of the schemas currently available on the MySQL installation:

Usually, each web application uses its own schema to store its data.
For example, phpMyAdmin itself stores its own data inside the schema called phpmyadmin (you can see it in the above screenshot).
Now it’s your turn:
For this tutorial, I want you to create create your own schema .
You will also create your own MySQL account . You will use this account to connect to MySQL from your PHP scripts.
I made a video that shows you how to:
- Create your new schema called “mySchema”
- Create your new account with username “myUser” and password “myPasswd”
- Give your account the privileges to work on your new schema
Here it is:
Can’t see the video? Here are the steps:
Step 1: create your new schema
- Click on New on the left side, above the schema list
- In the Database name field, insert the name of your database (for example, “mySchema”)
- Click on the Create button
Step 2: create your new account
- Click on the User accounts button in the upper section
- Click on Add user account (below the list of already existing users)
- In the User name row, make sure Use text field: is selected and input myUser in the text field
- In the Host name row, select local from the drop-down menu
- In the Password field, make sure Use text field: is selected and input myPasswd in the text field
- Enter myPasswd again in the Re-type: field
- Scroll down the page and click Go (bottom right)
- A message with You have added a new user. will appear
Step 3: set the account privileges
- Find the row with myUser and click on Edit privileges
- Click on Database in the upper section, next to Global (do not click on the Databases main tab)
- Select mySchema from the list and click the Go button (bottom right)
- Select the Check all checkbox to select all privileges
- Click on the Go button (bottom right)
- A message with You have updated the privileges for ‘myUser’@’localhost’. will appear
Note: MySQL permissions can be quite complex. You will learn them with time. For now, focus on the basics.
Now you have your own schema (called “mySchema”) and your own account (“myUser” with password “myPasswd”).
Congratulations, you’re ready to go!
You’re ready for the next step: how to connect to MySQL with PHP.
THE PHP MySQL EXTENSIONS: MySQLi AND PDO
how can you connect to mysql with php.
PHP comes with two extensions for connecting to MySQL databases: MySQLi and PDO .
MySQLi is a specific driver for MySQL databases, while PDO is a more general purpose driver supporting different database types.
Both extensions provide prepared statements to protect your code from SQL injection attacks . MySQLi provides escaping too.
“Ok Alex, but which one do I need to use?”
Both are fine, so you can pick the one you like the most.
MySQLi is probably the easiest of the two, and it provides an OOP-style syntax as well as a simpler procedural-style syntax.
Anyway, this tutorial will help you understand the differences between MySQLi and PDO.
In fact, you will find examples with:
- MySQLi with procedural-style syntax,
- MySQLi with OOP-style syntax,
Now it’s time to start writing some PHP code.
Would you like to talk with me and other developers about PHP and web development? Join my Facebook Group: Alex PHP café
See you there 🙂
HOW TO CONNECT TO MYSQL WITH PHP
How can you connect to your MySQL server using the PHP database extensions?
Here’s a concrete example.
First, create a new PHP file and name it “db_inc.php” (or any name you prefer).
This script will take care of the database connection.
The advantage of having a separate database connection script is clear: every time you need to access the database, you can just include that file instead of writing all the connection code again and again.
Here is how to connect to your MySQL server using the MySQLi extension, procedural-style:
The mysqli_connect() function connects to a MySQL server (argument #1 given as hostname or IP address; in this case, localhost means your local computer) using the provided username and password (arguments #2 and #3).
You can also provide a default schema (or default database ) as argument #4.
While not mandatory, it’s usually a good idea to do so. The above example uses the schema you made before (“mySchema”).
mysqli_connect() returns a connection resource variable.
It’s a special variable linked to the connected MySQL server. You will need to provide this resource to the other mysqli_* functions.
If a problem occurs during the connection (for example, if the password is wrong or the server is offline), FALSE is returned instead.
In that case, you can check the connection error code and message using the mysqli_connect_errno() and mysqli_connect_error() functions like in the example.
Important! You should not output MySQL connection errors in production environments, because such messages may be used for certain SQL injection attacks .
Forward them as an email message to yourself and output a generic error message instead.
Now, let’s see the same example using MySQLi OOP-style syntax .
I suggest you create a new PHP file and name it “db_inc_oop.php” , so you can keep using the one you made before when using the procedural-style MySQLi syntax.
Here’s the code:
Here, the MySQLi class constructor connects to the database just like mysqli_connect() does.
However, the constructor returns a MySQLi object instead of a resource variable.
To check whether a connection error occurred, you need to check if the connect_error class attribute is not NULL .
If it is NULL , it means no errors occurred. Otherwise, connect_error will contain the error message and the connect_errno attribute will contain the error code.
(Again, remember not to output these errors when in production mode).
MySQLi does not throw exceptions on errors by default, but it can be configured to do so.
You will see how you can enable exceptions in the “Error handling” chapter.
Now let’s move on to PDO .
Again, create a new script and name it “db_inc_pdo.php” .
Here is the connection example (remember that PDO supports OOP only):
The PDO class constructor , on line 25, takes three arguments:
- a connection string called “data source name” (or DSN) that sets the database type, the hostname and the default schema;
- the username;
- the password.
You need to specify mysql: inside the connection string because PDO can work with different database types.
For example, if you were connecting to a PostgreSQL database , the connection string would have begun with pgsql:
PDO throws exceptions on connection errors, which makes error handling a bit different from the MySQLi example. You need to enclose the connection code inside a try block and use a catch block to check if an exception has been thrown.
For example:
If set a wrong password and then you execute the PHP script from your browser, you will get this:

In order to enable exceptions on query errors too, you need to set the Error reporting mode to Exception using the PDO::setAttribute() . This is done on line 28 in the code above.
Ok, you have now mastered the MySQL connection steps.
Now the real fun begins: let’s see how to execute SQL queries .
SQL QUERIES EXPLAINED
SQL is the language understood by SQL servers like MySQL.
You can execute SQL queries , or SQL statements , to insert, edit and delete data from a database.
As you will see in the next chapter, you can use queries to create, edit and destroy tables too.
Actually, every database operation is done with an SQL query, including schema creation, permissions handling and configuration settings (like the time zone or the locale).
If you want a quick and clear introduction to SQL before moving on, here’s a nice video from Caleb Curry :
In most cases, operations such as table and schema editing are done “manually” from SQL clients like phpMyAdmin , just like you did before.
On the other hand, operations like data insertion and retrieval are often done programmatically by web applications.
Let’s see a couple of query examples.
This is a basic authentication procedure that, given an username and password couple sent from an HTML form, looks for a matching row inside a “users” table:
(Note: this is just an example to illustrate the idea of a query search. Follow this guide to learn more about authentication).
Another example is a “product page” that reads a product id from the request string and looks for a corresponding product item inside a products table:
Before looking at more practical examples, there is one important thing you must know:

SQL QUERIES ARE DANGEROUS.
Here’s why:
When you use your computer and you want to delete some files, the operating system will ask you if you are really sure and then move the files to the trash bin.
Only after the bin has been emptied the files are really gone.
SQL is not so kind.
In fact, if you execute the following query:
all data from the users table will be deleted instantly, without any chances of recover.
And this query:
will instantly destroy your entire schema and all the tables in it, without asking you anything!
Many queries are built using values from the request string. You *always* need to check and validate that values before executing the query.
After you finish this tutorial, be sure to check my SQL injection prevention guide to learn more about this topic.
Now, let’s move on and see how you can create a new table inside your schema.
HOW TO CREATE TABLES
I want you to really learn how tables work.
So, instead of just looking at some SQL code, in this tutorial you will pretend to run an online store.
You will create three tables inside your schema (mySchema):
- a products table with a list of all the products in your store;
- an orders table with a list of orders taken from your customers;
- an order_products table linking each order with a list of products.
Each table has 3 columns , or fields . The first column of each table is its primary key .
The primary key is an unique ID (different for each row) which can be used to refer to a specific row of the table. Here are the tables columns:
products table
- a product ID to identify the single product (this is the primary key)
- the product name
orders table
- an order ID to identify the single order (the primary key)
- the order date
- the name of the client who placed the order
order_products table
- an ID to identify the single row (the primary key)
- the order ID
- the product ID
Inside order_products , each row links a specific order (identified by its ID) with a specific product (again, identified by its ID).
This kind of relation is used extensively in databases. In fact, that’s why they are called relational databases in the first place.
If a client places an order with 3 products, there will be a single order row inside the orders table and 3 rows inside the order_products table, each one linking the order with one of the 3 products:

Almost 100% of the time, you will create tables manually using tools like phpMyAdmin.
But now, as an exercise, you will see how to execute the queries to create these tables using MySQLi and PDO.
At the end of this chapter you will find a video that will show you how to create these tables using phpMyAdmin, but I suggest you try executing these queries manually to get an idea of how MySQL tables work.
Note that the SQL syntax for creating a table can be quite complex, so we’re not going to look at the details here. But if you want to learn more, you’re welcome to ask me questions in the comments or in my Facebook group .
Let’s go:
here is the SQL code to create the three tables.
Each table needs three different queries:
the first one creates the table itself, the second one sets the ID column as the primary key , and the last one sets the ID column as auto-increment :
A primary key column acts as unique identifier for a row. When you need to refer to a specific row inside a table, you should always use the primary key value as reference.
Of course, primary keys must be different for each row, and this is why you set them as auto-increment :
in fact, auto-increment columns automatically assume an incremental numeric value when a new row is added to the table.
Don’t worry: you don’t need to remember the syntax 😉
Now let’s create the products table using the MySQLi procedural-style syntax:
Now create the orders table using the MySQLi OOP-style syntax:
The mysqli_query() function and the MySQLi::query() class method execute an SQL query (or SQL statement ).
Note that mysqli_query() requires the mysqli connection resource as first argument. Remember? It’s the variable returned by the mysqli_connect() function inside your db_inc.php connection script.
When you work with databases, it’s important that you always check for errors . You did that when connecting, and you should do every time you execute a query too.
The return value from mysql_query() or from MySQLi::query() can be:
- false if the query fails
- true if the query succeeded without returning a result (like in this case)
- A resource if the query succeeded and returned a result set (like when reading rows from a table)
In the above example, you check if the result is false and, in that case, you output the error message and terminate the script.
If the return value is either true or a result resource (which also evaluates to true ), it means that the query was executed successfully.
Now let’s create the last table, order_products . This time you will use PDO :
PDO throws a PDOException when an SQL query error occurs, so you must catch it with a try/catch block instead of checking the return value like you did with MySQLi.
Another difference is that PDO uses two methods for executing a single query: PDO::prepare() and PDOStatement::execute() .
Couldn’t it just use a “query()” method like MySQLi?
Well… yes, it could. In fact, a PDO::query() method exists and it does just that.
“So, Alex, why do you want me to learn this weird syntax instead?”
As you will see in the next chapter, in most cases you will need to use the prepare()/execute() syntax to make use of prepared statements .
So, instead of using query() here and prepare()/execute() later, it’s better to just stick with only one syntax that works in all cases.
After you execute the queries, you will see from phpMyAdmin that the new tables have been created inside MySchema .
Just click on “MySchema” on the left to see them.

As promised, here’s the video that shows you how to create the tables using phpMyAdmin:
HOW TO READ, INSERT AND EDIT ROWS
Data is added to databases as rows .
For example, each product is stored inside your database as a row of the products table:

- add a new row
- read one or more rows
- edit or delete one or more rows
you need to execute an SQL query, just like you did in the previous chapter.
Of course, the query itself will be different depending on what to want to do.
In this chapter you will learn how to add and read rows, how to edit them and how to delete them.
As usual, you will find examples using both MySQLi and PDO.
Let’s dive in.
HOW TO INSERT A NEW ROW
Let’s start by adding a new row inside the products table.
Suppose you have the product information available in your PHP script as variables, like this:
The SQL command for adding a new row is the INSERT command. The query for adding the above information as a new row is this:
However, you need to use your PHP variables to build the query.
Now, remember how SQL queries can be dangerous?
When you use variables to create your query, you must ALWAYS make sure that these variables are safe to use.
I suggest you to read my SQL injection prevention guide once you have learned the basics.
For now, you should know that all PHP variables used inside an SQL query must either be escaped or included inside the query using prepared statements .
Escaping takes care of parsing the variable by escaping all the dangerous characters (like ‘ and %). Prepared statements achieve a similar result but are even more safe.
MySQLi supports both operations, while PDO supports prepared statements only.
(PDO has a PDO::quote() function that can be used for escaping, but it’s not 100% safe and the PHP documentation itself discourages its use).
So, how do you execute the above query properly?
Let’s begin with MySQLi with procedural-style syntax. This is how you use escaping :
As you can see, escaping is quite straightforward.
You just need to use the mysqli_real_escape_string() function on the values you want to use inside the query.
This function makes a string safe to use by searching and escaping all dangerous characters that could lead to SQL errors or injection attacks .
Like many mysqli_* functions, it takes the connection resource as first argument (remember? It’s the $mysqli variable returned by mysqli_connect() ).
This is how you can use escaping with MySQLi’s OOP-style syntax:
Here, the MySQLi::escape() method works just like the procedural-style mysqli_real_escape() function.
Isn’t that difficult, is it?
Let’s move on to prepared statements .
Here an example using MySQLi, OOP-style syntax:
Prepared statements are a bit more complex than escaping.
Instead of building a complete query string with the escaped values, using prepared statements is a three-steps process:
- first, you send a query template to the MySQL server, using placeholders (as ? ) instead of values (lines 10-14 of the above example) ;
- then, you bind each placeholder to a PHP variable, specifying the variable type (lines 22-27 );
- finally, you execute the query (lines 29-34 ).
The MySQLi::prepare() method sends the query template (the query with placeholders instead of real values) to the MySQL server and returns a mysqli_stmt (mysqli statement) object.
This object is the link to the query template sent to the database.
Then, the binding step links a PHP variable to each of the placeholders you put in the query template. This is done with the mysqli_stmt::bind_param() method.
This method takes a string of variable types as first argument, and the actual PHP variables as next arguments. In the above example, the ‘si’ argument means that the first variable is a string (s) and the second is an integer number (i).
The last step is to run the mysqli_stmt::execute() method.
Every time you call it, the MySQL server will execute the query using the current values of the bound variables.
You need to perform the prepare and binding steps only once. Then, you can change the PHP variables and call mysqli_stmt::execute() multiple times.
For example:
This variable-binding prepared statements method is the only one supported by MySQLi.
PDO supports different prepared statements procedures , including a variable-binding syntax similar to MySQLi’s.
However, the method I suggest you to learn first is the param-binding syntax .
In fact, this syntax is easier to learn and it’s less error-prone, because you don’t need to keep track of the bound variables.
Let’s see an example:
The main difference compared to the MySQLi procedure is how the values are sent to the MySQL server in the execute step.
In the above example, the PDO query template uses named placeholders (as “:name” and “:price”) instead of generic placeholders (as question marks “?”).
The query template is sent to the database with the PDO::prepare() method which returns a PDOStatement object.
Note: named placeholders must start with a colon (“:”).
Then, instead of binding each placeholder to a PHP variable, an associative array is created ( $values ) to bind each named placeholder to a value. The array keys are the named placeholders and their values are the values to be sent to the database.
This array is passed to the PDOStatement::execute() method.
If you want to insert multiple rows with different values, you need to change the $values array each time, like this:
PDO also supports an alternative syntax with generic placeholders (“ ? “), just like MySQLi’s.
In that case, the values array must be an ordered, numeric-indexed array:
HOW TO READ ROWS FROM A TABLE
If you want to read some rows back from a database, you need to execute an SQL query (Remember? Every database operation is done with a query).
The process is just like adding a new row, but there is one big difference…
Can you guess what it is?
Yes, that’s right: this time you have a result set .
A result set is an object containing the rows returned by the SQL query.
How does it work?
Let’s see an example.
Let’s say that your products table contains 5 rows, like this:

Now suppose you want to read all these rows and print them inside your web page.
The SQL command to read rows from a table is the SELECT command.
This is the query to read all the rows from the products table:
When you execute this query with MySQLi or PDO, you get a list of rows in return.
Once you have that list, all you need to do is to iterate through it using specific functions.
Let’s see how to do it.
As usual, let’s start with the MySQLi procedural-style syntax.
The $result variable contains the result set. It’s a mysqli_result object.
To iterate through all the rows in this result set you need to use a mysqli_fetch_* function, like mysqli_fetch_assoc() used in the example.
These functions get the current row from the result set and return it as a standard PHP array or object.
In the example, mysqli_fetch_assoc() returns an associative array where the array key is the name of the column ( name and price ) and the values are the column values .
After each iteration, the result set internal pointer moves on by 1 row so that the next time mysqli_fetch_assoc() will read the next row, until no more rows are left.
This is what happens inside the while loop in the above example:
- mysqli_fetch_assoc() reads the first row from $result and returns an associative array inside $row
- The echo command prints: “Product name: Toothpaste, price: 5”
- At the next while iteration, the next row is read and the echo command prints: “Product name: Shoes, price: 50”
- When there are no more rows, mysqli_fetch_assoc() returns false and the while loop stops
If the query doesn’t return any row, the while loop does not run even once.
Now, let’s see another example.
Suppose you want to look up a specific product price from the table.
Instead of reading all the rows and looking for your product using PHP code, you can filter the SQL result directly from the database using a WHERE clause .
For example, if you want to limit the result to the rows where the product name is “Laptop” , you can use this query:
This query will return only one row (the one with “Laptop” as product name).
If you know that the result set contains only one row, like in this case, you can avoid the while loop and run the fetch command only once.
Important: remember to use escaping or prepared statements every time you want to insert a value inside your query (in this case, the “Laptop” string). The following example uses escaping.
This is how you can do it using MySQLi OOP-style syntax:
If you have any doubt, just leave a comment below, ok?
So, how about PDO ?
PDO syntax is similar to MySQLi’s.
Remember that the PDO prepare() method returns a PDOStatement object ?
From there, you can use the PDOStatement::fetch() method to iterate through its result rows.
In this last read example, you will search for all the products having a price higher than 10.
This is the query you will execute:
And here is the PDO example:
HOW TO EDIT AND DELETE ROWS
Just like any SQL operation, editing and deleting rows is done with an SQL query too.
Both operations do not return any result set.
Of course, you still need to check whether the operation succeeded by looking at the return value or by catching exceptions, just like you did in the previous examples.
Usually, when editing or deleting rows from a table you don’t want to affect all the rows in the table but only a subset .
Selecting the proper subset can be done in many different ways, but most of the time you will rely on a WHERE clause .

The WHERE clause limits the affected rows when executing an SQL query.
You already used it in two of the previous examples:
- when searching for the product with name “Laptop”,
- and when searching for all the products with a price tag higher than 10
Here’s a delete command example.

If you want to delete all the orders from a specific client, you must perform a DELETE operation on the orders table selecting the rows with a specific value in the client column.
This selection is done using a WHERE clause.
Remember: every time you use a value in your query (in this case, the client name) you must use escaping or prepared statements.
So, let’s say you want to delete all the orders placed by the client named “Spock”. This is the query you will execute:
If you remember the previous examples, you should have no problems finding out how to execute this query 😉
Anyway, here is how to do it using the MySQLi extension, using escaping and the procedural-style syntax:
In this example I introduced a new MySQLi function: mysqli_affected_rows()
This function (and the MySQLi::affected_rows attribute, when using OOP) returns the number of rows that have been affected by the last SQL query.
In this case, that is the number of deleted rows. This information can be very useful.
Now, what if you want to EDIT some rows?
The SQL command you need to use is UPDATE .
The UPDATE command modifies the column values for all the rows selected by the SQL query.
Just like for the DELETE operations, UPDATE operations too are usually done only on some specific rows instead of the whole table. So, you usually want to use a WHERE clause here too.
For example, let’s say you want to lower your product prices by 5, but only for the products with a price tag higher than 20.
Products that cost less or equal 20 must keep their current price, while the more expensive ones will have their price reduced by 5.
Let’s go straight to the example. This time, you will use PDO:
In this example, the UPDATE SQL command is used together with the SET command to specify the new values for the price column.
You can SET an explicit value, but you can also use the current column to calculate the new value.
That’s exactly what the example does:
- SET price = (price – 5)
That means: get the current price value, decrease it by 5 (price -5), then save the result as the new price value.
The PDOStatement::rowCount() at the end of the example returns the number of rows affected by the last SQL query, just like the mysqli_affected_rows() function does.
Important: be careful when executing UPDATE and DELETE statements.
If you make a mistake, you may loose all your data. Be sure to make a backup of the data your care about before executing these commands.
ERROR HANDLING AND EXCEPTIONS
SQL connection attempts and query executions can fail for many different reasons.
Connection errors are usually caused by network issues or wrong permissions, while query failures are often caused by syntax errors.

Unfortunately, you cannot presume that your application will be completely SQL-errors free , so you must assume that every SQL operation may fail for some reason and be ready to handle such events.
As you learned in the previous examples, you can catch errors in two ways:
- by checking if the return value from connection and query functions is false ;
- by catching exceptions with try/catch blocks .
You also learned how to get the specific error messages , using procedural-style functions (like mysqli_connect_error() ) and OOP-style class methods and attributes (like MySQLi::$error ) with MySQLi, and using the PDOException class methods with PDO.
In all the previous examples you checked the functions return values when using MySQLi, while you used Exceptions when using PDO.
But… what if you want to use exceptions with MySQLi or you do not want to use them with PDO?
Let’s see how you can do that.
Enabling exceptions with MySQLi is done with the mysqli_report() function.
The report mode must be set to STRICT for MySQLi functions to throw exceptions on errors. You can also set it to ALL to have both exceptions and function return values.
The thrown exception is a mysqli_sql_exception , a MySQLi specific exception class inherited from the more generic RuntimeException .
Here’s a practical example:
The above code will output:
SQL error: Table ‘myschema.wrong_table’ doesn’t exist
Now let’s look at PDO .
You can choose how PDO handles errors by changing the PDO::ATTR_ERRMODE attribute with the PDO::setAttribute() method.
That is what you did in the db_inc_pdo.php connection script:
Note that the connection operation (done by the PDO constructor ) always throws exceptions on errors, regardless of the error mode.
If you want to disable exceptions for query errors, you have to set the error mode to SILENT . If you do that, you must check for the functions return values to see if an error occurred.
Here’s an example:
Execute failed Error code: 1146 Error message: Table ‘myschema.wrong_table’ doesn’t exist
If there is an error in the prepare operation , you can use the PDO::errorInfo() method to fetch an array with the error information.
If there is an error in the execute operation , you need to call PDOStatement::errorInfo() instead.
SQL SECURITY
When you work with MySQL or with any other database, it’s very important that you care about security from the beginning.
According to OWASP , SQL-related attacks are the number #1 web security risk .
This is why I introduced escaping and prepared statements right from the start.
The most common security-related error I see is about using unsafe variables inside SQL queries.
That is: using PHP variables inside an SQL query without escaping them and without using prepared statements.
For example, suppose you have an HTML login form with username and password fields.
Your back-end code searches a users table for a row with the username and password values from the form.
Now, suppose you forget to escape the fields values (or to use prepared statements) inside your back-end code:
If a malicious user inputs “admin” in the username field and the string “wrong_password’ OR 1;–“ in the password field, do you know what happens?
The user will be authenticated as admin , without using the correct password!
This is just an example of the many possible SQL-related vulnerabilities.
As soon as you are familiar with the basics, I suggest you to read my SQL security guide here:
>> SQL Injection Complete Guide
Pheww, you made it!
Now you know all you need to start working with MySQL like a pro.
You understood how MySQLi and PDO work and what their differences are, and you have all the information you need to choose which one to go with.
You also saw a lot of examples that you can use to get started with your own web application.
If you have any question or if you just want to let me know what you think about this guide, please leave a comment below!
P.s. If this guide has been helpful to you, please spend a second of your time to share it… thanks!
66 thoughts on “How to use PHP with MySQL: the complete tutorial (with examples)”
I want to get training on php or take course
I was able to complete the first step, creating a new user and schema, but when I ran the 1st PHP code I got:
‘; echo ‘Error number: ‘ . mysqli_connect_errno() . ‘ ‘; echo ‘Error message: ‘ . mysqli_connect_error() . ‘ ‘; die(); } echo ‘Successfully connected! ‘;
What am I doing wrong?
Hello Peter, Unfortunately some of your code was lost in the submissions. Can you please share it again using PasteBin ( https://pastebin.com/ )?
I need sample PHP code for: Read Mysql table and create a radio button for 2 items from each row. After buttons are selected submit results to different database.
Example; A person would select 15 items from a choice of 30 items. The selected items would be placed in a table for each user.
I hope you can help….I’ve been having a hard time doing this. I’m a beginner. Do you provide help for a fee?
Thanks in advance, Ger
Hey Gerald, I suggest you open a discussion on my Facebook group so we can discuss this further: https://www.facebook.com/groups/289777711557686/ You can also share your code there, if you have any.
Thanks sir Alex.
hello , it is very helpful for me or you can also read my blog if you are interested.
Difference Between: Digitalization, Digitization and Digital Transformation
This lesson is wonderful, and each example works perfectly, but I’m having trouble understanding how to make it all function together with a remote MySQL server on the internet, with data sent from and received back to JavaScript active on my local browser. Googling for how to move data between JS and PHP brings up complex examples, each of which fails to explain how to fit their pieces of code into the bigger picture of what I’m trying to do.
So, have you made — or do you have a link to — a complete working example to serve as a guide for doing the following? Accept items such as keyboard typed text, file upload, or a complex array from my web page’s javascript, and send it to a remote host on the internet to be stored in a MySQL database. And likewise do the reverse, bringing such data back from the remote database, and return it to be handled by javascript on a web page.
You’ve already provided most of the pieces needed in this lesson, except for how to allow local JavaScript to handle the data both ways, and control the process through the keyboard.
(You requested the website below, but it is currently only where I am learning, and so is only partly functional.)
With appreciation, Tommy Paul
Hello Tommy, The idea is to use AJAX connections from JavaScript to execute a remote PHP script. The PHP script is executed just like if it was called in the standard way. Basic AJAX implementations are quite simple.
Very useful thank you very much for your efforts.
Why the quote() function is not useful for escaping a string ?
MySQLi quoting (or escaping) is specific for MySQL and it’s guaranteed to work properly. PDO’s quote() does escape characters such as ‘ and “, but it’s not guaranteed to work with all PDO drivers. In fact, the documentation says that some drivers do not support quote() at all.
So, quote() will probably work just fine with MySQL in most cases, but it’s not as reliable as MySQLi’s escaping. (I’m not aware of any real case where quote() fails, though).
It is better to define the primary key for the order_products table to (product_id, order_id) i.e. the key is made up of the primary keys of the products and orders tables.
Yes, that is a valid alternative. I usually prefer to create a separate key, but in this case a two-columns unique index will work as well.
Hi, Alex! What if we only want to make user can get the value from MYSQL database by just clicking button to select the value, it will automatically multiplied by 10/100 and pop-up on screen displaying the final price (original price – discount). I’m currently new in working with PHPmyadmin, and I’m stuck at getting and showing the data from database onto web so user can choose them by clicking it but the function not giving the result as expected I don’t know why. I have searched for solution of this problem but I still cannot solve it. Thanks a lot for this article and I will be very glad if you give me some technical steps or suggestions because I don’t want to lose my job…
Hello Hani,
Let’s take one step at a time. First, are you able to get the value from the database with PHP? You can copy one of the examples from this tutorial and try it.
Next, to multiply the value you can simply use the * operator. For example: $value = $row[‘db_value’] * 100;
There are other ways but this is the most simple. Finally, you need to output the value in the web page.
To give you more specific help I need to know where you are stuck exactly. Can you join my Facebook group so we can keep talking there? Here is the link: https://www.facebook.com/groups/289777711557686/
Thanks for sharing this post with us.
It’s nice narration Alex. Glad to read your blog. So we’ll informative.Thanks…
Thank you, Amar. Happy to help.
Wow! Thank you Alex, this was incredibly useful. I am coming from C# and .NET environment learning PHP for the first time, this tutorial is very on point and I picked up a lot of understanding coding along side it. Thank you for this.
One question, when using OOP, when is it appropriate to use MySQLi vs. PDO? Is it entirely the programmer’s preference, or are there situations when one is preferable? I guess I ask because I wonder if I should really get familiar with one I like (PDO seems closest to what I am used to) or should I really know both well?
Thanks again!
It’s really a matter of personal preference. PDO has a more structured OOP syntax, so if you are familiar with OOP you will probably like PDO more.
Thanks, Alex
You’re very welcome, Enzo.
Leave a Comment Cancel reply
CRUD Operations with PHP and MySQL (full tutorial for beginners)
- January 14, 2021
- Tony Teaches Tech

Hey there! Some links on this page may be affiliate links which means that, if you choose to make a purchase, I may earn a small commission at no extra cost to you. I greatly appreciate your support!
In this tutorial, you will learn how to do basic CRUD operations with PHP and a MySQL database. If you are not familiar, CRUD is a database acronym that stands for create, read, update, and delete.
By the end of this tutorial, you will have a working web page in which you can add, display, update, and delete records. Please understand that this is just a demonstration of how CRUD works and should not be used in a live website since we have not sanitized the user input.
Note: I’ll assume that you have root access to an Ubuntu or Debian server with a web server, PHP, and MySQL installed. I’m using Ubuntu 20.04 and Nginx in this tutorial.
1. Create a Database and Table
This tutorial will execute MySQL commands on the command line; however, feel free to use a tool like phpMyAdmin to create your database and table.
Execute the following MySQL commands to create your database and table. Please use values that meet your requirements.
These three MySQL commands simply create a database called php_demo and a table called demo_table.
Next, you’ll want to create a PHP file with your database credentials. In the directory above your website root, create a file called db.php with your database credentials like this.
My website root is at /var/www/html/ , so this file lives at /var/www/db.php . The reason for this is a security measure so that this file is not accessible by the public.
We will use this file later in the tutorial.
2. Design the Layout
Create an index.php file in the root of your web directory.

The page doesn’t do much of anything right now. Let’s fix that.
Notice how the form action references create.php. Next, we’ll add some PHP code to handle when a user clicks on the Add button.
3. Handle Add Button Clicks (CREATE)
Assuming your website root directory is /var/www/html/ , create the file /var/www/html/create.php with the following PHP code.
This block of PHP code inserts the values that originated from the form fields into the database table called demo_table . Notice how we are including our database credentials file on line 2.
At this point, when you click on the Add button, a record will be created in the database; however, there will be no indication of this from the user’s perspective. That’s what we’ll work on in the next section.
4. Display Database Values in a Table (READ)
Let’s first create a table to display the values that we add to the database. Edit index.php with the following highlighted changes.
Notice how we define a table element, but inside the tbody tag, we include a file called read.php.
Let’s create that file at /var/www/html/read.php with the following PHP code.
Again, you can see that we are including our database credentials on line 2. We then proceed to query the database for all records in the demo_table.
Notice the series of echo statements. What we are essentially doing for the rest of the file is generating dynamic HTML.
We define the table body outside of the for loop and then for each record in the database, we add a row to the table with four columns:
- Update button
- Delete button
Later on in the tutorial, we will implement the logic for update and delete, but for now just know that they exist.
Finally, we close the connection to the database on the second to last line.
You can test the read functionality be reloading your web page. When you add new records, the page will update and display those records.

5. Edit Existing Records (UPDATE)
Let’s add the ability to update a record in the table. This one is more complicated, so pay attention.
Recall from the previous section that there is an Update button in each row. Right now, the button doesn’t do anything other than load the same page except with a GET parameter for the id of the row tacked on to the URL. For example, if the id of the Tony row is 2, the Update button for Tony’s row will link to http://site2.xyz/?id=2.
This GET parameter serves as distinction so we can generate an editable form for this row.
We can make this distinction by modifying /var/www/html/read.php with the following highlighted changes.
Notice how we check to see if the GET id value matches the current row on line 7. If it does, we display a form that allows the user to edit the current row. Otherwise, we display the table row like normal.

There is one one other aspect to implement and that is the actual database update logic when the Save button is clicked. Create a new file at /var/www/html/update.php like this.
From the form in the table, the server receives the id, name, and score as POST parameters. With those values, the row matching the id is updated.
The last line in this code ensures we remain on the same page by modifying the header location value.
6. Delete Existing Records (DELETE)
The last aspect of CRUD is delete. Similar to update, we already have a Delete button in each table row, but right now it doesn’t do anything. Also similar to before, the Delete button points to a PHP file on the server. Again, if Tony has an id of 2, the Delete button will go to http://site2.xyz/delete.php?id=1.
Create /var/www/html/delete.php with the following PHP code.
This one is pretty easy. We get the id of the row that was clicked on as a GET parameter and execute a MySQL statement to delete that record.

At this point, you have the knowledge you need to implement your own CRUD operations in PHP and MySQL.
If you have any questions, as always, please let me know in the comments below.

With a strong software engineering background, Tony is determined to demystify the web. Discover why Tony quit his job to pursue this mission. You can join the Tony Teaches Tech community here .
9 Responses
Thanks for your CRUD Operations Tutorial with PHP and MySQL
I have a problem if i go to index i get this error Undefined index: id in C:\wamp64\www\Development\curd2021\curd1\read.php on line 7
but as soon as i have an id in like this index.php?id=0 it works i am using php 7.3.5
My guess is that your form does not have the hidden input tag on line 12 of read.php which defines id for POST and GET requests.
I have the same error. echo ”; echo ”; echo ”; echo ‘Save’; echo ”; echo ”;
how to fix that?
Hello Tony, Please I need help to do my project. How do I use php and mysql to carryout the following operations 1) Web Data Crawling 2) Collection, and 3) Storage What are the steps? I am using putty.
Sorry, I don’t have experience with those.
Notice: Undefined index: id in C:\wamp64\www\cinema\read.php on line 19 i have the exact same code as above and followed the video precisely also the save button just refreshes the index page without applying the changes. any help? the first error is showing in the index page above the entry i made with the add button
Hi Tony I have been trying your tutorial all day but it will not work for me which is unusual because all of your other tutorials I’ve followed I’ve been able to complete easily!
My problem starts after I make create.php file. When I put in values in fields then click add on website, the header(location: index.php) does not work and I am redirected to /create.php and get a 404 error from nginx.
When I add the read.php file, my index.php gets a 404 error.
If you have any advice on how to continue please let me know. I have been trying to do this all day to no avail.
I even tried this tutorial, https://mariadb.com/resources/blog/developer-quickstart-php-mysqli-and-mariadb/ but I get similar results.
I really want to move forward on this issue but I keep hitting this road block.
What can I do to narrow down my problem? I follow the directions exactly!!! That’s what makes it very frustrating.
The MariaDB tutorial includes an if statement that is supposed to print if the database connection is broken but it doesn’t help because I get a 404!
It is very confusing because if I use a simpler php block such as below it runs fine with no 404!
I am using a LEMP server I built following your guide. I also followed your php-fpm guide.
Hi Tony it may be worth mentioning that they mysqli php module has to be installed and enabled.
This is what was causing my problem and some kind souls in the Libera Chat #php IRC server helped me solve my problem.
#Check for php-mysqli module. php -m | grep mysqli
#install php mysql extension (Rocky 9) dnf install php-mysqlnd
Leave a Reply Cancel reply
Your email address will not be published. Required fields are marked *
Save my name, email, and website in this browser for the next time I comment.

Build Your Own Database Driven Web Site Using PHP & MySQL, Part 2: Introducing MySQL Article
Share this article
An Introduction to Databases

Logging On to MySQL
Structured query language, creating a database, creating a table.
- First, when creating a row in this table, this column is not allowed to be left blank ( NOT NULL ).
- Next, if we omit specifying a particular value for this column when we add a new entry to the table, we want MySQL to automatically pick a value that is one more than the highest value in the table so far ( AUTO_INCREMENT ).
- Finally, this column is to act as a unique identifier for the entries in the table, so all values in this column must be unique ( PRIMARY KEY ).
Inserting Data into a Table
Viewing stored data, modifying stored data, deleting stored data, let php do the typing, frequently asked questions (faqs) about getting started with mysql, how can i install mysql on my computer.
Installing MySQL on your computer is a straightforward process. For Windows users, you can download the MySQL installer from the official MySQL website. Once downloaded, run the installer and follow the on-screen instructions. For Mac users, you can use Homebrew to install MySQL. Open Terminal and type in “brew install mysql”. After installation, you can start the MySQL server using the command “mysql.server start”.
What is the purpose of PHPMyAdmin in MySQL?
PHPMyAdmin is a free software tool written in PHP, intended to handle the administration of MySQL over the Web. It provides a convenient visual interface for managing your databases, tables, and data. You can perform various tasks such as running SQL queries, optimizing and repairing tables, and managing users and permissions.
How can I connect to a MySQL database using PHP?
To connect to a MySQL database using PHP, you can use the mysqli_connect() function. This function takes four parameters: the hostname of your MySQL server, the username, the password, and the database name. If the connection is successful, it returns a MySQL link identifier that you can use for subsequent MySQL operations.
How can I handle errors in MySQL?
MySQL provides several ways to handle errors. One common method is to use the die() function in PHP. This function will stop the script and print a message if there is an error. Another method is to use the mysqli_error() function, which returns a string description of the last error.
How can I search for specific data in a MySQL database?
You can search for specific data in a MySQL database using the SQL SELECT statement. This statement allows you to specify the columns you want to retrieve and the conditions that the data must meet. For example, to find all records with a certain value in a certain column, you can use a query like “SELECT * FROM table WHERE column = value”.
How can I update data in a MySQL database?
To update data in a MySQL database, you can use the SQL UPDATE statement. This statement allows you to modify the values of one or more columns in one or more rows. The syntax is “UPDATE table SET column1 = value1, column2 = value2 WHERE condition”.
How can I delete data from a MySQL database?
To delete data from a MySQL database, you can use the SQL DELETE statement. This statement removes one or more rows from a table. The syntax is “DELETE FROM table WHERE condition”. Be careful when using this statement, as it permanently removes data.
How can I optimize a MySQL database?
MySQL provides several tools for optimizing databases. One of these is the OPTIMIZE TABLE statement, which reorganizes the physical storage of table data and associated index data to reduce storage space and improve I/O efficiency.
How can I backup a MySQL database?
To backup a MySQL database, you can use the mysqldump utility. This utility creates a text file with a series of SQL statements that can be used to recreate the database. The syntax is “mysqldump -u username -p database > backup.sql”.
How can I restore a MySQL database from a backup?
To restore a MySQL database from a backup, you can use the mysql utility. This utility executes the SQL statements in a text file. The syntax is “mysql -u username -p database < backup.sql”.
Kevin Yank is an accomplished web developer, speaker, trainer and author of Build Your Own Database Driven Website Using PHP & MySQL and Co-Author of Simply JavaScript and Everything You Know About CSS is Wrong! Kevin loves to share his wealth of knowledge and it didn't stop at books, he's also the course instructor to 3 online courses in web development. Currently Kevin is the Director of Front End Engineering at Culture Amp.

- Language Reference
Assignment Operators
The basic assignment operator is "=". Your first inclination might be to think of this as "equal to". Don't. It really means that the left operand gets set to the value of the expression on the right (that is, "gets set to").
The value of an assignment expression is the value assigned. That is, the value of " $a = 3 " is 3. This allows you to do some tricky things: <?php $a = ( $b = 4 ) + 5 ; // $a is equal to 9 now, and $b has been set to 4. ?>
In addition to the basic assignment operator, there are "combined operators" for all of the binary arithmetic , array union and string operators that allow you to use a value in an expression and then set its value to the result of that expression. For example: <?php $a = 3 ; $a += 5 ; // sets $a to 8, as if we had said: $a = $a + 5; $b = "Hello " ; $b .= "There!" ; // sets $b to "Hello There!", just like $b = $b . "There!"; ?>
Note that the assignment copies the original variable to the new one (assignment by value), so changes to one will not affect the other. This may also have relevance if you need to copy something like a large array inside a tight loop.
An exception to the usual assignment by value behaviour within PHP occurs with object s, which are assigned by reference. Objects may be explicitly copied via the clone keyword.
Assignment by Reference
Assignment by reference is also supported, using the " $var = &$othervar; " syntax. Assignment by reference means that both variables end up pointing at the same data, and nothing is copied anywhere.
Example #1 Assigning by reference
The new operator returns a reference automatically, as such assigning the result of new by reference is an error.
The above example will output:
More information on references and their potential uses can be found in the References Explained section of the manual.
Arithmetic Assignment Operators
Bitwise assignment operators, other assignment operators.
- arithmetic operators
- bitwise operators
- null coalescing operator
Improve This Page
User contributed notes 4 notes.
- PHP All Exercises & Assignments
Practice your PHP skills using PHP Exercises & Assignments. Tutorials Class provides you exercises on PHP basics, variables, operators, loops, forms, and database.
Once you learn PHP, it is important to practice to understand PHP concepts. This will also help you with preparing for PHP Interview Questions.
Here, you will find a list of PHP programs, along with problem description and solution. These programs can also be used as assignments for PHP students.
Write a program to count 5 to 15 using PHP loop
Description: Write a Program to display count, from 5 to 15 using PHP loop as given below.
Rules & Hint
- You can use “for” or “while” loop
- You can use variable to initialize count
- You can use html tag for line break
View Solution/Program
5 6 7 8 9 10 11 12 13 14 15
Write a program to print “Hello World” using echo
Description: Write a program to print “Hello World” using echo only?
Conditions:
- You can not use any variable.
View Solution /Program
Hello World
Write a program to print “Hello PHP” using variable
Description: Write a program to print “Hello PHP” using php variable?
- You can not use text directly in echo but can use variable.
Write a program to print a string using echo+variable.
Description: Write a program to print “Welcome to the PHP World” using some part of the text in variable & some part directly in echo.
- You have to use a variable that contains string “PHP World”.
Welcome to the PHP World
Write a program to print two variables in single echo
Description: Write a program to print 2 php variables using single echo statement.
- First variable have text “Good Morning.”
- Second variable have text “Have a nice day!”
- Your output should be “Good morning. Have a nice day!”
- You are allowed to use only one echo statement in this program.
Good Morning. Have a nice day!
Write a program to check student grade based on marks
Description:.
Write a program to check student grade based on the marks using if-else statement.
- If marks are 60% or more, grade will be First Division.
- If marks between 45% to 59%, grade will be Second Division.
- If marks between 33% to 44%, grade will be Third Division.
- If marks are less than 33%, student will be Fail.
Click to View Solution/Program
Third Division
Write a program to show day of the week using switch
Write a program to show day of the week (for example: Monday) based on numbers using switch/case statements.
- You can pass 1 to 7 number in switch
- Day 1 will be considered as Monday
- If number is not between 1 to 7, show invalid number in default
It is Friday!
Write a factorial program using for loop in php
Write a program to calculate factorial of a number using for loop in php.
The factorial of 3 is 6
Factorial program in PHP using recursive function
Exercise Description: Write a PHP program to find factorial of a number using recursive function .
What is Recursive Function?
- A recursive function is a function that calls itself.
Write a program to create Chess board in PHP using for loop
Write a PHP program using nested for loop that creates a chess board.
- You can use html table having width=”400px” and take “30px” as cell height and width for check boxes.

Write a Program to create given pattern with * using for loop
Description: Write a Program to create following pattern using for loops:
- You can use for or while loop
- You can use multiple (nested) loop to draw above pattern
View Solution/Program using two for loops
* ** *** **** ***** ****** ******* ********
Simple Tips for PHP Beginners
When a beginner start PHP programming, he often gets some syntax errors. Sometimes these are small errors but takes a lot of time to fix. This happens when we are not familiar with the basic syntax and do small mistakes in programs. These mistakes can be avoided if you practice more and taking care of small things.
I would like to say that it is never a good idea to become smart and start copying. This will save your time but you would not be able to understand PHP syntax. Rather, Type your program and get friendly with PHP code.
Follow Simple Tips for PHP Beginners to avoid errors in Programming
- Start with simple & small programs.
- Type your PHP program code manually. Do not just Copy Paste.
- Always create a new file for new code and keep backup of old files. This will make it easy to find old programs when needed.
- Keep your PHP files in organized folders rather than keeping all files in same folder.
- Use meaningful names for PHP files or folders. Some examples are: “ variable-test.php “, “ loops.php ” etc. Do not just use “ abc.php “, “ 123.php ” or “ sample.php “
- Avoid space between file or folder names. Use hyphens (-) instead.
- Use lower case letters for file or folder names. This will help you make a consistent code
These points are not mandatory but they help you to make consistent and understandable code. Once you practice this for 20 to 30 PHP programs, you can go further with more standards.
The PHP Standard Recommendation (PSR) is a PHP specification published by the PHP Framework Interop Group.
Experiment with Basic PHP Syntax Errors
When you start PHP Programming, you may face some programming errors. These errors stops your program execution. Sometimes you quickly find your solutions while sometimes it may take long time even if there is small mistake. It is important to get familiar with Basic PHP Syntax Errors
Basic Syntax errors occurs when we do not write PHP Code correctly. We cannot avoid all those errors but we can learn from them.
Here is a working PHP Code example to output a simple line.
Output: Hello World!
It is better to experiment with PHP Basic code and see what errors happens.
- Remove semicolon from the end of second line and see what error occurs
- Remove double quote from “Hello World!” what error occurs
- Remove PHP ending statement “?>” error occurs
- Use “
- Try some space between “
Try above changes one at a time and see error. Observe What you did and what error happens.
Take care of the line number mentioned in error message. It will give you hint about the place where there is some mistake in the code.
Read Carefully Error message. Once you will understand the meaning of these basic error messages, you will be able to fix them later on easily.
Note: Most of the time error can be found in previous line instead of actual mentioned line. For example: If your program miss semicolon in line number 6, it will show error in line number 7.
Using phpinfo() – Display PHP Configuration & Modules
phpinfo() is a PHP built-in function used to display information about PHP’s configuration settings and modules.
When we install PHP, there are many additional modules also get installed. Most of them are enabled and some are disabled. These modules or extensions enhance PHP functionality. For example, the date-time extension provides some ready-made function related to date and time formatting. MySQL modules are integrated to deal with PHP Connections.
It is good to take a look on those extensions. Simply use
phpinfo() function as given below.
Example Using phpinfo() function

Write a PHP program to add two numbers
Write a program to perform sum or addition of two numbers in PHP programming. You can use PHP Variables and Operators
PHP Program to add two numbers:
Write a program to calculate electricity bill in php.
You need to write a PHP program to calculate electricity bill using if-else conditions.
- For first 50 units – Rs. 3.50/unit
- For next 100 units – Rs. 4.00/unit
- For next 100 units – Rs. 5.20/unit
- For units above 250 – Rs. 6.50/unit
- You can use conditional statements .

Write a simple calculator program in PHP using switch case
You need to write a simple calculator program in PHP using switch case.
Operations:
- Subtraction
- Multiplication

Remove specific element by value from an array in PHP?
You need to write a program in PHP to remove specific element by value from an array using PHP program.
Instructions:
- Take an array with list of month names.
- Take a variable with the name of value to be deleted.
- You can use PHP array functions or foreach loop.
Solution 1: Using array_search()
With the help of array_search() function, we can remove specific elements from an array.
array(4) { [0]=> string(3) “jan” [1]=> string(3) “feb” [3]=> string(5) “april” [4]=> string(3) “may” }
Solution 2: Using foreach()
By using foreach() loop, we can also remove specific elements from an array.
array(4) { [0]=> string(3) “jan” [1]=> string(3) “feb” [3]=> string(5) “april” [4]=> string(3) “may” }
Solution 3: Using array_diff()
With the help of array_diff() function, we also can remove specific elements from an array.
array(4) { [0]=> string(3) “jan” [1]=> string(3) “feb” [2]=> string(5) “march” [4]=> string(3) “may” }
Write a PHP program to check if a person is eligible to vote
Write a PHP program to check if a person is eligible to vote or not.
- Minimum age required for vote is 18.
- You can use PHP Functions .
- You can use Decision Making Statements .
Click to View Solution/Program.
You Are Eligible For Vote
Write a PHP program to calculate area of rectangle
Write a PHP program to calculate area of rectangle by using PHP Function.
- You must use a PHP Function .
- There should be two arguments i.e. length & width.
View Solution/Program.
Area Of Rectangle with length 2 & width 4 is 8 .
- Next »
- PHP Exercises Categories
- PHP Top Exercises
- PHP Variables
- PHP Decision Making
- PHP Functions
- PHP Operators

Don't be Afraid of Source Code
PHP Projects
Student Management System using PHP and MySQL
by Anuj Kumar
Student Management System Introduction
Student management system using PHP and MySQL is a web-based application. Student Management Project is software that is helpful for students as well as the school authorities. In the current system, all the activities are done manually. It is very time-consuming and costly. Our online Student Management System in PHP deals with the various activities related to the students.
Project Requirements
Student management system project modules.
The two main users involved in this system are
- User(i.e. Students)
- Dashboard : In this section, admin can see all detail in brief like Total Classes, Total Students, Total Class Notices and Total Public Notices.
- Class : In this section, admin can manage class (Add/Update/Delete).
- Students : In this section, admin can manage the students (Add/Update/Delete).
- Notices: In this section, the admin can manage notices (Add/Update/Delete).
- Public Notices: In this section, the admin can manage public notices.
- Pages: In this section admin, can manage about us and contact us page of administration
- Search: In this section admin, can search students by their student id.
- Reports: In this section admin, can view how much students has been register in particular period.
- Admin can also update his profile, change the password and recover the password.
User (Students):
- Dashboard : It is welcome page for students.
- View Notices : In this section, user can view notices which are announced by administrator.
- Student can also view his profile, change the password and recover the password.
User (Non-Register):
- Home : It is welcome page for user.
- About : User can view about us page.
- Contact: User can view contact us page.
Project Output Screens

Student/User Login

Admin Dashboard

Add Students
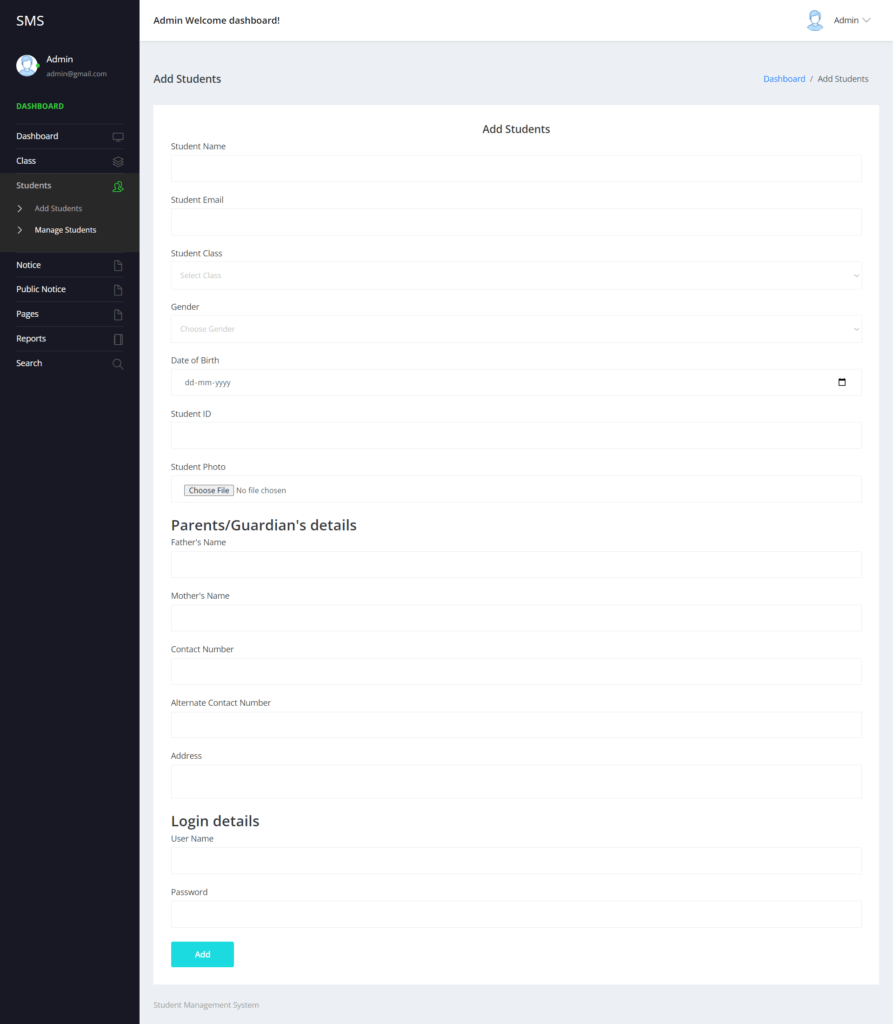
How to run the Student Management Project using PHP and MySQL
1. Download the project zip file
2. Extract the file and copy studentms folder
3.Paste inside root directory(for xampp xampp/htdocs, for wamp wamp/www, for lamp var/www/Html)
4.Open PHPMyAdmin (http://localhost/phpmyadmin)
5. Create a database with the name studentmsdb
6. Import studentmsdb.sql file(given inside the zip package in SQL file folder)
7. Run the script http://localhost/studentms
Admin Credential Username: admin Password: Test@123
Credential for Student / User panel :
Username: anujk3 Password: Test@123
Or Register a new Student/User.
Project Demo
Project report.
Tags: Student Management Project Student Management Project in PHP Student Management System Student Management System in PHP

Hi! I am Anuj Kumar, a professional web developer with 5+ years of experience in this sector. I found PHPGurukul in September 2015. My keen interest in technology and sharing knowledge with others became the main reason for starting PHPGurukul. My basic aim is to offer all web development tutorials like PHP, PDO, jQuery, PHP oops, MySQL, etc. Apart from the tutorials, we also offer you PHP Projects, and we have around 100+ PHP Projects for you.
- Next story How to Create Pagination in CodeIgniter
- Previous story Sanitization Management System Using PHP and MySQL
Recommended Tutorials for you
You may also like....
Daily Expense Tracker Using PHP and MySQL

Employee Transport System using PHP and MySQL

Online Tiffin Service System Using PHP and MySQL

Online Cloth Rental System using PHP and MySQL

Emergency Ambulance Hiring Portal using PHP and MySQL

Support Ticket System using PHP and MySQL

Electronic Waste Management system using PHP and MySQL

Employees Attendance System using PHP and MySQL

Meeting and Conference Booking System using PHP and MySQL

Online Notes Sharing System using PHP and MySQL

College Alumni System using PHP and MySQL

College Fee System using PHP and MySQL

Orphanage Management System using PHP and MySQL

Nipah virus (NiV) – Testing Management System Using PHP and MySQL

Toy Shop Management System using PHP and MySQL

Online Book Store using PHP and MySQL

Food Recipe System Using PHP and MySQL

Online College Faculty Record Management System using PHP and MySQL

Scholarship Management System using PHP and MySQL

Restaurant Table Booking System using PHP and MySQL

Teacher Subject Allocation Management System using PHP and MySQL

Online Railway Catering Management System using PHP and MySQL

Maid Hiring Management System using PHP and MySQL

Rail Pass Management System using PHP and MySQL

Pre-School Enrollment System using PHP and MySQL

BP Monitoring Management System using PHP and MySQL

Art Gallery Management System using PHP and MySQL

Nursery Management System using PHP and MySQL

Student Study Center Management System using PHP and MySQL

RTO Management System Using PHP and MySQL

Bank Locker Management System using PHP and MySQL

Employee Management System using PHP and MySQL

Doctor Appointment Management System Using PHP and MySQL

CREDIT CARD Application Management System Using PHP and MySQL

Covid Vaccination Management System using PHP and MySQL

Online Security Guards Hiring System using PHP and MySQL

Cricket Academy Management System Using PHP and MySQL

Auto/Taxi Stand Management System using PHP and MySQL

Garbage Management System using PHP and MySQL

Laptop and Desktop Rental Management System using PHP and MySQL

Traffic Squad Management System Using PHP and MySQL

Fuel Delivery Management System Using PHP and MySQL

Online Course Material Management System using PHP and MySQL

Old Age Home Management System using PHP and MySQL

GYM Management System using PHP and MySQL

Online Fire Reporting System Using PHP and MySQL

Online Temple Management System using PHP and MySQL

e-Diary Management System using PHP and MySQL

Blog Management System using PHP and MySQL

Employee Task Management System using PHP and MySQL

Online Shopping Portal Pro Version using PHP and MySQL

Online Banquet Booking System using PHP and MySQL

Jewelry Shop Management System Using PHP and MySQL

Driver Hiring Management System Using PHP and MySQL

Sanitization Management System Using PHP and MySQL

News Portal Using CodeIgniter

Food Waste Management System Using PHP & MySQL

Internet Service Provider Management System Using PHP and MySQL

Blood Donor Management System Using CodeIgniter

Home Loan Management System Using PHP and MySQL

Car Washing Management System using PHP and MySQL

Curfew e-Pass Management System Using PHP and MySQL Pro Version

Teachers Record Management System using CodeIgniter

Cold Storage Management System using PHP and MySQL

Baby Daycare Management System using PHP

Pre-owned/Used Car Selling Management System using PHP

Directory Listing Management System using PHP
Daily Expense Tracker System Pro Version Using PHP

IFSC Code Finder Project Using PHP

Vehicle Breakdown Assistance Management System Using PHP

Mobile Store Management System using PHP and MySQL

Men Salon Management System Using PHP and MySQL

Cake Bakery Management System Using PHP & MySQL

Bus Pass Management System Using PHP and MySQL

Lawyers Record Management System Using PHP and MySQL

Computer Service Management System Using PHP and MySQL

COVID19 Testing Management System Using PHP and MySQL

Apartment Visitors Management System Developed using CodeIgniter

User Management System in PHP using Stored Procedure

Online Magazine Management System using PHP and MySQL

PHP Projects Free Download – Benefits of PHP Web Application Development
How to Download PHP Projects With Source Code?

Inventory Management System Using PHP and MySQL

Online College Assignment System Using PHP and MySQL

Zoo Management System Using PHP and MySQL

Theme Park Management System Using PHP and MYSQL

Online Dance Classes Registration System Using PHP and MySQL

AC Repairing System Using PHP and MySQL

Complaint Management System Pro version using PHP and MySQL

Online Catering Management System Using PHP and MySQL

Crime Record Management System Using PHP and MySQL

Health Monitoring Management System Using PHP and MySQL

Yoga Classes Registration System using PHP and MySQL
Online Furniture Shop Management System using PHP and MySQL

Online Marriage Registration System using PHP and MySQL
Daily Expense Tracker using CodeIgniter

Hotel Booking Management System Using PHP and MySQL

Curfew e-Pass Management System using PHP and MySQL

Online Gas Booking System Using PHP and MySQL

Online Birth Certificate System Using PHP and MySQL

Online DJ Booking Management System Using PHP and MySQL

Online Diagnostic Lab Management System using PHP and MySQL
Park Ticketing Management System Using PHP and MySQL
Society Management System using PHP and MySQL

Dairy Farm Shop Management System Using PHP and MySQL

Movers and Packers Management System using PHP and MySQL

Vehicle Rental Management System using PHP and MySQL

Local Services Search Engine Management System Using PHP and MySQL

Client Management System using PHP & MySQL

Teachers Record Management System Using PHP and MySQL

Campus Recruitment Management System using PHP and MySQL

Real Estate Management System Using PHP and MySQL
Toll Tax Management System using PHP and MySQL

Beauty Parlour Management System using PHP and MySQL
Water Supply Management System Using PHP and MySQL

Cyber Cafe Management System Using PHP & MySQL

Pharmacy Management System using PHP and MySQL

Car Showroom Management System Using PHP and MySQL

Apartment Visitors Management System using PHP and MySQL

Vehicle Parking Management System using PHP and MySQL

Paying Guest Accommodation System using PHP & MySQL

Event Management System Using PHP and MySQL

Car Driving School Management System Using PHP and MySQL

Attendance Monitoring System using PHP and MySQL

Food Ordering System Using PHP and MySQL

Company Visitors Management System using PHP and MySQL
Courier Management System Using PHP and MySQL

Vehicle Service Management System Using PHP and MySQL

Laundry Management System Using PHP and MySQL

Directory Management System Using PHP and MySQL

College Admission Management System in PHP and MySQL

Insurance Management System using PHP and MySQL

Employee Record Management System in PHP and MySQL

User Management System in CodeIgniter

Contact form with mail function and Storing data in the database – Mini Project

News Portal Project in PHP and MySql

Employee Leaves Management System (ELMS)

Student Result Management system using PHP & MySQL

Online Library Management System using PHP and MySQL

Blood Bank & Donor Management System using PHP and MySQL

Car Rental Project in PHP and Mysql

Tourism Management System in PHP with Source code

Complaint Management System in PHP

Online Course Registration Using PHP and MySQL

Hospital Management System In PHP

Small CRM in PHP

Student Record System Using PHP and MySQL
Hostel Management System in PHP

Online Shopping Portal Project

Job Portal Project using PHP and MySQL

User Registration & Login and User Management System With admin panel
Welcome to PHPGurukul .
How can I help you?
🟢 Online | Privacy policy
15.7.6.1 SET Syntax for Variable Assignment
SET syntax for variable assignment enables you to assign values to different types of variables that affect the operation of the server or clients:
User-defined variables. See Section 11.4, “User-Defined Variables” .
Stored procedure and function parameters, and stored program local variables. See Section 15.6.4, “Variables in Stored Programs” .
System variables. See Section 7.1.8, “Server System Variables” . System variables also can be set at server startup, as described in Section 7.1.9, “Using System Variables” .
A SET statement that assigns variable values is not written to the binary log, so in replication scenarios it affects only the host on which you execute it. To affect all replication hosts, execute the statement on each host.
The following sections describe SET syntax for setting variables. They use the = assignment operator, but the := assignment operator is also permitted for this purpose.
User-Defined Variable Assignment
Parameter and local variable assignment, system variable assignment, set error handling, multiple variable assignment, system variable references in expressions.
User-defined variables are created locally within a session and exist only within the context of that session; see Section 11.4, “User-Defined Variables” .
A user-defined variable is written as @ var_name and is assigned an expression value as follows:
As demonstrated by those statements, expr can range from simple (a literal value) to more complex (the value returned by a scalar subquery).
The Performance Schema user_variables_by_thread table contains information about user-defined variables. See Section 29.12.10, “Performance Schema User-Defined Variable Tables” .
SET applies to parameters and local variables in the context of the stored object within which they are defined. The following procedure uses the increment procedure parameter and counter local variable:
The MySQL server maintains system variables that configure its operation. A system variable can have a global value that affects server operation as a whole, a session value that affects the current session, or both. Many system variables are dynamic and can be changed at runtime using the SET statement to affect operation of the current server instance. SET can also be used to persist certain system variables to the mysqld-auto.cnf file in the data directory, to affect server operation for subsequent startups.
If a SET statement is issued for a sensitive system variable, the query is rewritten to replace the value with “ <redacted> ” before it is logged to the general log and audit log. This takes place even if secure storage through a keyring component is not available on the server instance.
If you change a session system variable, the value remains in effect within your session until you change the variable to a different value or the session ends. The change has no effect on other sessions.
If you change a global system variable, the value is remembered and used to initialize the session value for new sessions until you change the variable to a different value or the server exits. The change is visible to any client that accesses the global value. However, the change affects the corresponding session value only for clients that connect after the change. The global variable change does not affect the session value for any current client sessions (not even the session within which the global value change occurs).
To make a global system variable setting permanent so that it applies across server restarts, you can persist it to the mysqld-auto.cnf file in the data directory. It is also possible to make persistent configuration changes by manually modifying a my.cnf option file, but that is more cumbersome, and an error in a manually entered setting might not be discovered until much later. SET statements that persist system variables are more convenient and avoid the possibility of malformed settings because settings with syntax errors do not succeed and do not change server configuration. For more information about persisting system variables and the mysqld-auto.cnf file, see Section 7.1.9.3, “Persisted System Variables” .
Setting or persisting a global system variable value always requires special privileges. Setting a session system variable value normally requires no special privileges and can be done by any user, although there are exceptions. For more information, see Section 7.1.9.1, “System Variable Privileges” .
The following discussion describes the syntax options for setting and persisting system variables:
To assign a value to a global system variable, precede the variable name by the GLOBAL keyword or the @@GLOBAL. qualifier:
To assign a value to a session system variable, precede the variable name by the SESSION or LOCAL keyword, by the @@SESSION. , @@LOCAL. , or @@ qualifier, or by no keyword or no modifier at all:
A client can change its own session variables, but not those of any other client.
To persist a global system variable to the mysqld-auto.cnf option file in the data directory, precede the variable name by the PERSIST keyword or the @@PERSIST. qualifier:
This SET syntax enables you to make configuration changes at runtime that also persist across server restarts. Like SET GLOBAL , SET PERSIST sets the global variable runtime value, but also writes the variable setting to the mysqld-auto.cnf file (replacing any existing variable setting if there is one).
To persist a global system variable to the mysqld-auto.cnf file without setting the global variable runtime value, precede the variable name by the PERSIST_ONLY keyword or the @@PERSIST_ONLY. qualifier:
Like PERSIST , PERSIST_ONLY writes the variable setting to mysqld-auto.cnf . However, unlike PERSIST , PERSIST_ONLY does not modify the global variable runtime value. This makes PERSIST_ONLY suitable for configuring read-only system variables that can be set only at server startup.
To set a global system variable value to the compiled-in MySQL default value or a session system variable to the current corresponding global value, set the variable to the value DEFAULT . For example, the following two statements are identical in setting the session value of max_join_size to the current global value:
Using SET to persist a global system variable to a value of DEFAULT or to its literal default value assigns the variable its default value and adds a setting for the variable to mysqld-auto.cnf . To remove the variable from the file, use RESET PERSIST .
Some system variables cannot be persisted or are persist-restricted. See Section 7.1.9.4, “Nonpersistible and Persist-Restricted System Variables” .
A system variable implemented by a plugin can be persisted if the plugin is installed when the SET statement is executed. Assignment of the persisted plugin variable takes effect for subsequent server restarts if the plugin is still installed. If the plugin is no longer installed, the plugin variable no longer exists when the server reads the mysqld-auto.cnf file. In this case, the server writes a warning to the error log and continues:
To display system variable names and values:
Use the SHOW VARIABLES statement; see Section 15.7.7.41, “SHOW VARIABLES Statement” .
Several Performance Schema tables provide system variable information. See Section 29.12.14, “Performance Schema System Variable Tables” .
The Performance Schema variables_info table contains information showing when and by which user each system variable was most recently set. See Section 29.12.14.2, “Performance Schema variables_info Table” .
The Performance Schema persisted_variables table provides an SQL interface to the mysqld-auto.cnf file, enabling its contents to be inspected at runtime using SELECT statements. See Section 29.12.14.1, “Performance Schema persisted_variables Table” .
If any variable assignment in a SET statement fails, the entire statement fails and no variables are changed, nor is the mysqld-auto.cnf file changed.
SET produces an error under the circumstances described here. Most of the examples show SET statements that use keyword syntax (for example, GLOBAL or SESSION ), but the principles are also true for statements that use the corresponding modifiers (for example, @@GLOBAL. or @@SESSION. ).
Use of SET (any variant) to set a read-only variable:
Use of GLOBAL , PERSIST , or PERSIST_ONLY to set a variable that has only a session value:
Use of SESSION to set a variable that has only a global value:
Omission of GLOBAL , PERSIST , or PERSIST_ONLY to set a variable that has only a global value:
Use of PERSIST or PERSIST_ONLY to set a variable that cannot be persisted:
The @@GLOBAL. , @@PERSIST. , @@PERSIST_ONLY. , @@SESSION. , and @@ modifiers apply only to system variables. An error occurs for attempts to apply them to user-defined variables, stored procedure or function parameters, or stored program local variables.
Not all system variables can be set to DEFAULT . In such cases, assigning DEFAULT results in an error.
An error occurs for attempts to assign DEFAULT to user-defined variables, stored procedure or function parameters, or stored program local variables.
A SET statement can contain multiple variable assignments, separated by commas. This statement assigns values to a user-defined variable and a system variable:
If you set multiple system variables in a single statement, the most recent GLOBAL , PERSIST , PERSIST_ONLY , or SESSION keyword in the statement is used for following assignments that have no keyword specified.
Examples of multiple-variable assignment:
The @@GLOBAL. , @@PERSIST. , @@PERSIST_ONLY. , @@SESSION. , and @@ modifiers apply only to the immediately following system variable, not any remaining system variables. This statement sets the sort_buffer_size global value to 50000 and the session value to 1000000:
To refer to the value of a system variable in expressions, use one of the @@ -modifiers (except @@PERSIST. and @@PERSIST_ONLY. , which are not permitted in expressions). For example, you can retrieve system variable values in a SELECT statement like this:
A reference to a system variable in an expression as @@ var_name (with @@ rather than @@GLOBAL. or @@SESSION. ) returns the session value if it exists and the global value otherwise. This differs from SET @@ var_name = expr , which always refers to the session value.
Complete user registration system using PHP and MySQL database
In this tutorial, I walk you through the complete process of creating a user registration system where users can create an account by providing username, email and password, login and logout using PHP and MySQL. I will also show you how you can make some pages accessible only to logged-in users. Any other user not logged in will not be able to access the page.
The first thing we'll need to do is set up our database.
Create a database called registration . In the registration database, add a table called users . The users table will take the following four fields.
- username - varchar(100)
- email - varchar(100)
- password - varchar(100)
You can create this using a MySQL client like PHPMyAdmin.

Or you can create it on the MySQL prompt using the following SQL script:
And that's it with the database.
Now create a folder called registration in a directory accessible to our server. i.e create the folder inside htdocs (if you are using XAMPP server) or inside www (if you are using wampp server).
Inside the folder registration, create the following files:
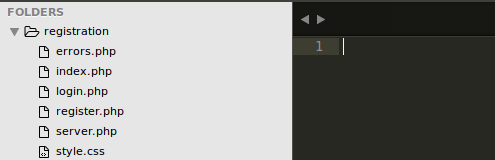
Open these files up in a text editor of your choice. Mine is Sublime Text 3.
Registering a user
Open the register.php file and paste the following code in it:
regiser.php:
Nothing complicated so far right?
A few things to note here:
First is that our form's action attribute is set to register.php. This means that when the form submit button is clicked, all the data in the form will be submitted to the same page (register.php). The part of the code that receives this form data is written in the server.php file and that's why we are including it at the very top of the register.php file.
Notice also that we are including the errors.php file to display form errors. We will come to that soon.
As you can see in the head section, we are linking to a style.css file. Open up the style.css file and paste the following CSS in it:
Now the form looks beautiful.
Let's now write the code that will receive information submitted from the form and store (register) the information in the database. As promised earlier, we do this in the server.php file.
Open server.php and paste this code in it:
Sessions are used to track logged in users and so we include a session_start() at the top of the file.
The comments in the code pretty much explain everything, but I'll highlight a few things here.
The if statement determines if the reg_user button on the registration form is clicked. Remember, in our form, the submit button has a name attribute set to reg_user and that is what we are referencing in the if statement.
All the data is received from the form and checked to make sure that the user correctly filled the form. Passwords are also compared to make sure they match.
If no errors were encountered, the user is registered in the users table in the database with a hashed password. The hashed password is for security reasons. It ensures that even if a hacker manages to gain access to your database, they would not be able to read your password.
But error messages are not displaying now because our errors.php file is still empty. To display the errors, paste this code in the errors.php file.
When a user is registered in the database, they are immediately logged in and redirected to the index.php page.
And that's it for registration. Let's look at user login.
Logging a user in is an even easier thing to do. Just open the login page and put this code inside it:
Everything on this page is quite similar to the register.php page.
Now the code that logs the user in is to be written in the same server.php file. So open the server.php file and add this code at the end of the file:
Again all this does is check if the user has filled the form correctly, verifies that their credentials match a record from the database and logs them in if it does. After logging in, the user is redirected them to the index.php file with a success message.
Now let's see what happens in the index.php file. Open it up and paste the following code in it:
The first if statement checks if the user is already logged in. If they are not logged in, they will be redirected to the login page. Hence this page is accessible to only logged in users. If you'd like to make any page accessible only to logged in users, all you have to do is place this if statement at the top of the file.
The second if statement checks if the user has clicked the logout button. If yes, the system logs them out and redirects them back to the login page.
And that's it!
Now go on, customize it to suit your needs and build an awesome site. If you have any worries or anything you need to clarify, leave it in the comments below and help will come.
You can always support by sharing on social media or recommending my blog to your friends and colleagues.
Best regards :D
Awa Melvine
You might also like:
How to create a blog in php and mysql database.
Related posts

PHP CRUD Create, edit, update and delete posts with MySQL database

Image upload using php and MySQL database

Admin and user login in php and mysql database

Check if user already exists without submitting form

How to send email in php

User account management, roles, permissions, authentication PHP and MySQL
Subscribe to get updates, popular posts.
Privacy Policy | Terms and conditions | About Us
CodeWithAwa © 2023
PHP Tutorial
Php advanced, mysql database, php examples, php reference, php mysql prepared statements.
Prepared statements are very useful against SQL injections.
Prepared Statements and Bound Parameters
A prepared statement is a feature used to execute the same (or similar) SQL statements repeatedly with high efficiency.
Prepared statements basically work like this:
- Prepare: An SQL statement template is created and sent to the database. Certain values are left unspecified, called parameters (labeled "?"). Example: INSERT INTO MyGuests VALUES(?, ?, ?)
- The database parses, compiles, and performs query optimization on the SQL statement template, and stores the result without executing it
- Execute: At a later time, the application binds the values to the parameters, and the database executes the statement. The application may execute the statement as many times as it wants with different values
Compared to executing SQL statements directly, prepared statements have three main advantages:
- Prepared statements reduce parsing time as the preparation on the query is done only once (although the statement is executed multiple times)
- Bound parameters minimize bandwidth to the server as you need send only the parameters each time, and not the whole query
- Prepared statements are very useful against SQL injections, because parameter values, which are transmitted later using a different protocol, need not be correctly escaped. If the original statement template is not derived from external input, SQL injection cannot occur.
Prepared Statements in MySQLi
The following example uses prepared statements and bound parameters in MySQLi:
Example (MySQLi with Prepared Statements)
Code lines to explain from the example above:
In our SQL, we insert a question mark (?) where we want to substitute in an integer, string, double or blob value.
Then, have a look at the bind_param() function:
This function binds the parameters to the SQL query and tells the database what the parameters are. The "sss" argument lists the types of data that the parameters are. The s character tells mysql that the parameter is a string.
The argument may be one of four types:
- i - integer
We must have one of these for each parameter.
By telling mysql what type of data to expect, we minimize the risk of SQL injections.
Note: If we want to insert any data from external sources (like user input), it is very important that the data is sanitized and validated.
Advertisement
Prepared Statements in PDO
The following example uses prepared statements and bound parameters in PDO:
Example (PDO with Prepared Statements)

COLOR PICKER

Contact Sales
If you want to use W3Schools services as an educational institution, team or enterprise, send us an e-mail: [email protected]
Report Error
If you want to report an error, or if you want to make a suggestion, send us an e-mail: [email protected]
Top Tutorials
Top references, top examples, get certified.
Simple User Role Management System With PHP MySQL (Free Download)
Welcome to a tutorial on how to create a user role management system with PHP and MySQL. So you have a project that needs to identify and restrict what each user is able to do? Creating a permissions structure is often a pretty grueling task and a pain to integrate… But we shall walk through a simple permissions structure in this guide, step-by-step. Read on!
TABLE OF CONTENTS
Download & notes.
Here is the download link to the example code, so you don’t have to copy-paste everything.
EXAMPLE CODE DOWNLOAD
Source code on GitHub Gist
Just click on “download zip” or do a git clone. I have released it under the MIT license, so feel free to build on top of it or use it in your own project.
SORRY FOR THE ADS...
But someone has to pay the bills, and sponsors are paying for it. I insist on not turning Code Boxx into a "paid scripts" business, and I don't "block people with Adblock". Every little bit of support helps.
Buy Me A Coffee Code Boxx eBooks
PHP MYSQL USER ROLE MANAGEMENT
All right, let us now get into the details of building a user role management system with PHP and MYSQL.
TUTORIAL VIDEO
PART 1) THE DATABASE

1A) ROLES TABLE
- role_id Primary key and auto-increment.
- role_name Name of the role.
First, let us address the elephant in the room. A role management system needs to have… roles. For this example, we go with Manager and Supervisor .
1B) PERMISSIONS TABLES
- perm_id Primary key and auto-increment.
- perm_mod Module code. For example USR for users, INV for inventory.
- perm_desc A description of the action.
1C) ROLE PERMISSIONS TABLES
- role_id Primary and foreign key.
- perm_id Primary and foreign key.
Which role has permission to do what? In this example:
- Manager can get, save, and delete users.
- Supervisor can only get users.
1D) USERS TABLES
- user_id Primary key, auto-increment.
- user_email User’s email, unique to prevent duplicates.
- user_password User’s password.
- role_id User’s role, foreign key.
Lastly, this is just a good old user table, with an “additional” role_id field. In this example:
- [email protected] Manager.
- [email protected] Supervisor.
PART 2) PHP LIBRARY
2a) initialize.
The library looks massive at first, but keep calm and look carefully:
- (A, B, J) When $_USR = new User() is created, the constructor connects to the database. The destructor closes the connection.
- (C) query() A helper function to run an SQL query.
- (I) The database settings, remember to change to your own.
2B) LOGIN & SESSION
Next, login() is what we use to sign in as a user. Take note of how the permissions are stored into $_SESSION .
- $_SESSION["user"] User ID, email, role.
- $_SESSION["user"]["permissions"] Allowed actions, in the format of MODULE => [PERMISSION ID, PERMISSION ID, ...] .
P.S. This is a lazy example, passwords should be encrypted – PHP password hash and verify is a good start.
P.P.S. $_SESSION is not the only “login mechanism”, there is also JSON Web Token. A little on the advanced side, but I will leave links below if you want to learn more.
2C) PERMISSIONS & FUNCTIONS
- get() Get a user by email.
- save() Add or update a user.
- del() Delete a user.
- (D) Take note of how get() , save() , and del() all do a permission check() before they are allowed to run. check() simply does a check against $_SESSION["user"]["permissions"] if the current user has permission to run the function.
PART 3) INTEGRATION & TESTING
This should be straightforward – Simply use $_USR->login(EMAIL, PASSWORD) to sign in. In this example, we will sign in as [email protected] .
3B) TEST RUN
Finally, to verify that the permission checks work –
- [email protected] is a Supervisor .
- Can only get users.
- Cannot save and delete users.
Yep, it works. Go ahead and login as [email protected] next and run this again – Joe should have permission to save and delete users.
That’s it for all the code, and here are a few small extras that you may find to be useful.
CONTROLLING ACCESS TO HTML PAGES
Multiple user roles.
Of course, we can. Just create another user_roles table with 2 fields – user_id and role_id . But think twice, the complexity will increase exponentially. You need to check for duplicate permissions and even a possible clash of interests. For example, can a customer also be an administrator? Does this even make any sense?
LINKS & REFERENCES
- Simple User Login – Code Boxx
- JWT Login & Authentication With PHP MYSQL – Code Boxx
- User Registration Form – Code Boxx
- Encrypt & Decrypt Password – Code Boxx
Thank you for reading, and we have come to the end of this guide. I hope that it has helped you to better manage access permissions in your project. If you have anything to share with this guide, please feel free to comment below. Good luck, and happy coding!
20 thoughts on “Simple User Role Management System With PHP MySQL (Free Download)”
ALTER TABLE `roles_permissions` ADD PRIMARY KEY (`role_id`,`perm_id`);
Is that even possible (having two primary keys on the same table?)
Why not? Composite keys are very common in RDB.
I am running into the error: Error SQL query:
ALTER TABLE `roles` ADD PRIMARY KEY (`role_id`), ADD UNIQUE KEY `role_name` (`role_name`) MySQL said: Documentation
#1071 – Specified key was too long; max key length is 767 bytes when I try to install the database. can I please get help with this? I can’t seem to change things to resolve this.
https://stackoverflow.com/questions/1814532/mysql-error-1071-specified-key-was-too-long-max-key-length-is-767-bytes
Leave a Comment Cancel Reply
Your email address will not be published. Required fields are marked *

IMAGES
VIDEO
COMMENTS
MySQL is a database system used on the web. MySQL is a database system that runs on a server. MySQL is ideal for both small and large applications. MySQL is very fast, reliable, and easy to use. MySQL uses standard SQL. MySQL compiles on a number of platforms. MySQL is free to download and use. MySQL is developed, distributed, and supported by ...
How to run the Online College Assignment System Project Using PHP and MySQL. 1.Download the zip file. 2.Extract the file and copy ocas folder. 3.Paste inside root directory(for xampp xampp/htdocs, for wamp wamp/www, for lamp var/www/html)
Step 4: Viewing and filtering users. Here's the last step - the "read" of our CRUD app. We already created the front end in public/read.php. Really quickly, let's add a small amount of CSS to our public/css/style.css file to make the tables legible once we create them.
This tutorial assumes that you have basic PHP knowledge. If you want to learn PHP, check out the PHP tutorial. Section 1. Connecting to MySQL. Connecting to MySQL Database - show you how to connect to a MySQL database server using the PDO object. Section 2. Creating Tables. Section 3. Basic Operations: CRUD.
An e-commerce needs to store the list of products and the orders from its clients, a blog needs to store its posts' content, and so on. Back-end languages like PHP and Python cannot "store" any information, except for some small temporary information saved in Sessions.. Therefore, web applications need a storage space where to keep all this data and where to read it from when needed.
I'm using Ubuntu 20.04 and Nginx in this tutorial. 1. Create a Database and Table. This tutorial will execute MySQL commands on the command line; however, feel free to use a tool like phpMyAdmin to create your database and table. Execute the following MySQL commands to create your database and table.
A MySQL database; PHP MySQL extension (included in most PHP installations) Understanding PHP and MySQL Connection. A PHP and MySQL connection involves two main components: PHP and a MySQL database. PHP is a server-side scripting language used for creating dynamic web pages, while a MySQL database is used for storing and retrieving data.
Read Build Your Own Database Driven Web Site Using PHP & MySQL, Part 2: Introducing MySQL Article and learn with SitePoint. Our web development and design tutorials, courses, and books will teach ...
Assignment Operators. The basic assignment operator is "=". Your first inclination might be to think of this as "equal to". ... An exception to the usual assignment by value behaviour within PHP occurs with object s, which are assigned by reference. Objects may be explicitly copied via the clone keyword. Assignment by Reference.
#phpprojects #phpprojectswithsourcecode #phpgurukulOnline College Assignment System Using PHP and MySQLProject Link: https://bit.ly/3c4Qm9RProjects List: htt...
PHP MySQL. HTML Top Exercises. HTML Basics. PHP Popular Exercise. Write a PHP program to check whether a number is positive, negative or zero. Write a PHP program to check if a person is eligible to vote. Write a simple calculator program in PHP using switch case. Write a program to calculate Electricity bill in PHP.
MySQL is the world's most widely used open-source relational database management system (RDBMS), enabling the cost-effective delivery of reliable, high-performance and scalable Web-based and embedded database applications. It is widely-used as the database component of LAMP (Linux, Apache, MySQL, Perl/PHP/Python) web application software stack.
When we install PHP, there are many additional modules also get installed. Most of them are enabled and some are disabled. These modules or extensions enhance PHP functionality. For example, the date-time extension provides some ready-made function related to date and time formatting. MySQL modules are integrated to deal with PHP Connections.
Student management system using PHP and MySQL is a web-based application. Student Management Project is software that is helpful for students as well as the school authorities. In the current system, all the activities are done manually. It is very time-consuming and costly.
If you read the manual at PHP.net , it will show you exactly what to do. In short, you perform the query using mysql_query (as you did), which returns a Result-Resource. To actually get the results, you need to perform either mysql_fetch_array, mysql_fetch_assoc or mysql_fetch_object on the result resource. Like so:
The following discussion describes the syntax options for setting and persisting system variables: To assign a value to a global system variable, precede the variable name by the GLOBAL keyword or the @@GLOBAL. qualifier: Press CTRL+C to copy. SET GLOBAL max_connections = 1000; SET @@GLOBAL.max_connections = 1000;
Insert Data Into MySQL Using MySQLi and PDO. After a database and a table have been created, we can start adding data in them. Here are some syntax rules to follow: The SQL query must be quoted in PHP; String values inside the SQL query must be quoted; Numeric values must not be quoted; The word NULL must not be quoted
The first thing we'll need to do is set up our database. Download my source code on how to build a complete blog with PHP & MySQL database. $2 only! 👉 Complete Blog - HTML, CSS, PHP & MySQL. Create a database called registration. In the registration database, add a table called users. The users table will take the following four fields.
Start MySQL Exercises. Good luck! If you don't know MySQL, we suggest that you read our MySQL Tutorial from scratch. Track your progress - it's free! Well organized and easy to understand Web building tutorials with lots of examples of how to use HTML, CSS, JavaScript, SQL, Python, PHP, Bootstrap, Java, XML and more.
A prepared statement is a feature used to execute the same (or similar) SQL statements repeatedly with high efficiency. Prepared statements basically work like this: Prepare: An SQL statement template is created and sent to the database. Certain values are left unspecified, called parameters (labeled "?").
I am trying to assign php variables to my sql query results, and I thought I saw it work in this fashion, but it doesn't seem to be working for me: ... PHP mySQL result to variable. 2. How to assign the result of a query into a variable? 2. PHP: How can variables be assigned values from a MySQL Query? 2.
MySQL user rights restrict user access on tables, creating tables,deletion and insertion etc. Now if you create different users in database with custom user rights you will have to include different connection credentials for each of the users. Further in controlling PHP pages restrict user access with user pages assignment by php codes.
ADD UNIQUE KEY `role_name` (`role_name`); MODIFY `role_id` bigint(20) NOT NULL AUTO_INCREMENT; role_id Primary key and auto-increment. role_name Name of the role. First, let us address the elephant in the room. A role management system needs to have… roles. For this example, we go with Manager and Supervisor.