
How to Use Canva Presentations
Make visually appealing presentations that'll stand out among others using Canva.

Canva, a graphic design platform, is gaining a lot of traction as a design tool. Its basic premise – it’s just as easy to use for non-designers. You don’t need to be an expert in graphic designing to use Canva, and that is one of the main reasons behind its popularity.
With design becoming one of the hottest commodities for just about every field, Canva makes it accessible to everyone. Whether you’re an entrepreneur, a marketer, influencer, or a blogger, you can use Canva to make fetching content for social media, posters, graphics, design your own business cards even. If you’ve got even a little eye for design, Canva can help you cut down on the costs of hiring professional designers.
But did you know you can also use it to make just as engaging and stimulating presentations? Whether you want to make presentations for a professional environment or personal use (like a birthday surprise), Canva Presentations have got you covered. Let’s dive right into it!
Getting Started
Canva offers a web app you can immediately start using on your desktop without having to download anything. Unfortunately, the web app is your only option as there is no desktop app. So you need an internet connection to work with Canva as it stores all your work on its servers.
Canva also has a mobile app for iPhone and Android, which you can use on the go. But when getting started, using the web app is the best course of action.
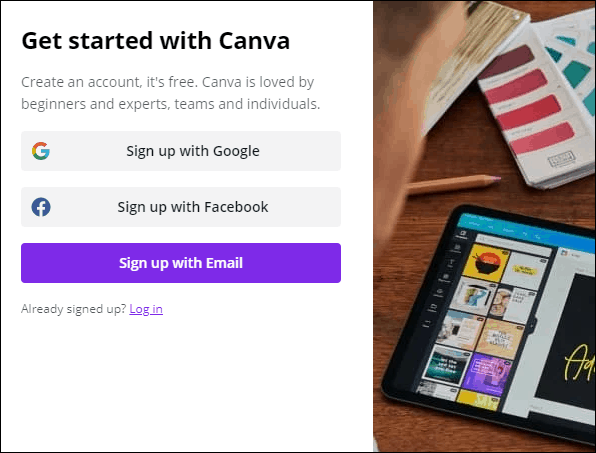
Go to canva.com and create a free account. Click the ‘Sign Up’ button to create a new account.

You can sign up with your Google account, Facebook account, or your email address.
Canva has a freemium structure, so you can use it for free with limited features or get a Pro or Enterprise subscription for complete access. It also offers a 30-day free trial to its Pro features, so you can try it out before deciding whether you want to convert to a paid user.
Now, from the Canva home page, click the ‘Presentations’ button under the Design anything banner. If you can’t find the option, you can also search for ‘Presentation’ from the search bar.

There are plenty of size options to choose from when creating a presentation. Let’s stick with the standard size ‘1920 x 1080 px’ here.

One of the things that makes Canva so easy to use for everyone is the sheer number of templates. The assortment of templates in existence ensures that you’ll find something to match your needs. But if not, you can also start with a blank slate and create your presentation from scratch.
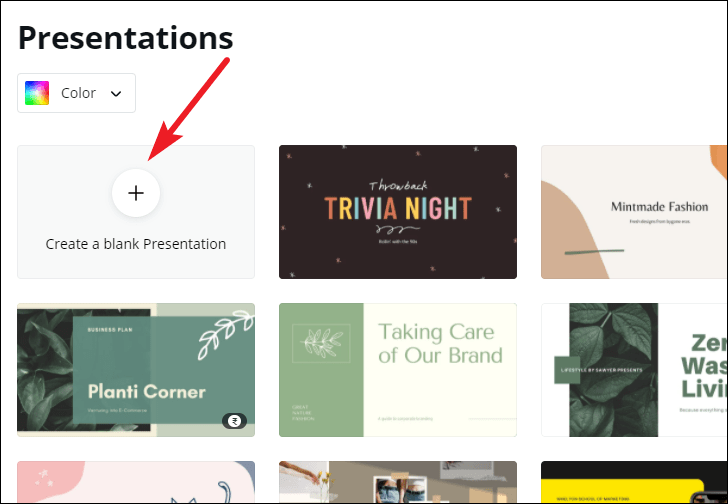
For this guide, we are selecting a template for the presentation. Before selecting a template, you can see what it has to offer by clicking the three-dot menu and selecting ‘Preview this template’.

Click ‘Use this template’ to select the template if you like it or go back and select another.

Editing the Presentation
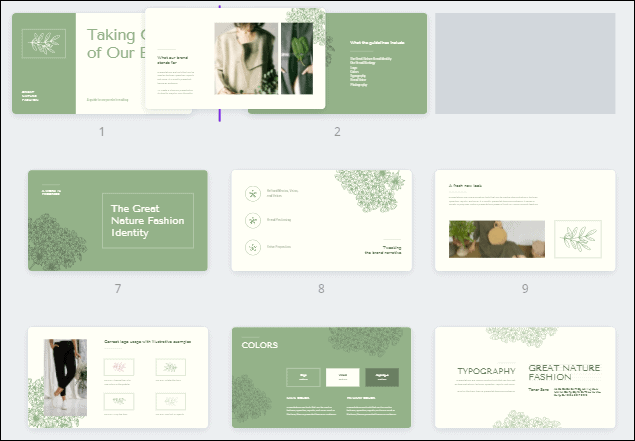
The template will load into the editing interface. Canva has an eerily easy editing interface. Let’s navigate the interface first. Below the slide is the thumbnail view where you can see all the slides in thumbnails side by side.
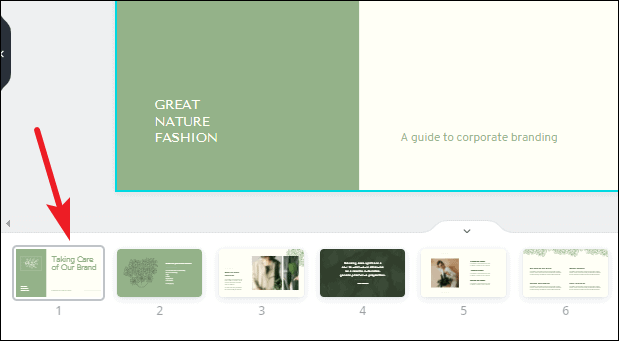
To turn off the thumbnail view, click the on/ off toggle (arrow).

Click the grid view button to switch views.
The grid view is helpful when there are a lot of slides in your presentation. Using grid view, you can get an overview of them all. You can also rearrange the slides by dragging and dropping slides into a new position. Click the ‘Grid View’ button again to switch back.
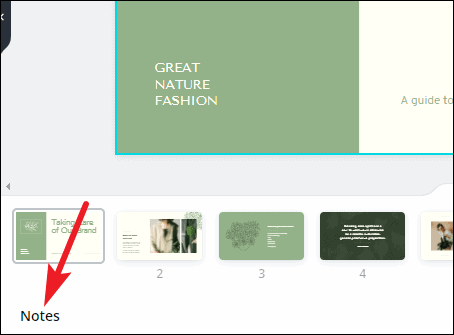
Click the ‘Notes’ option to add notes to the presentation that you can use for reference while presenting.
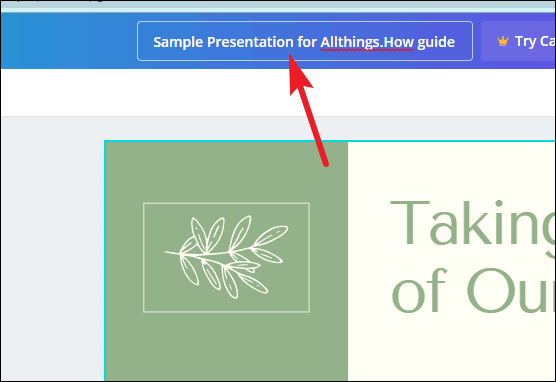
The name of the presentation can be edited from the top-most toolbar.
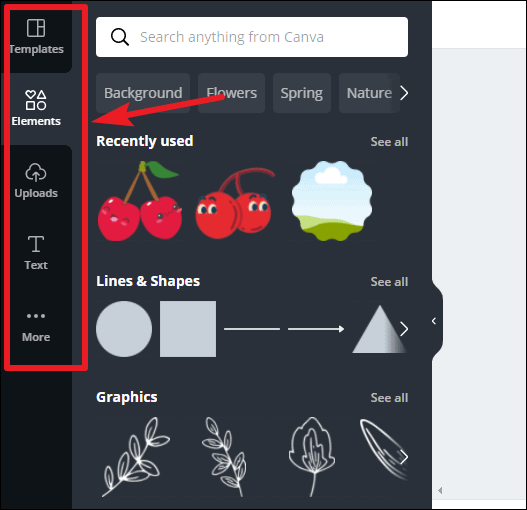
Now, on the left is the toolbar that houses all the tools for editing the design elements in the presentation.
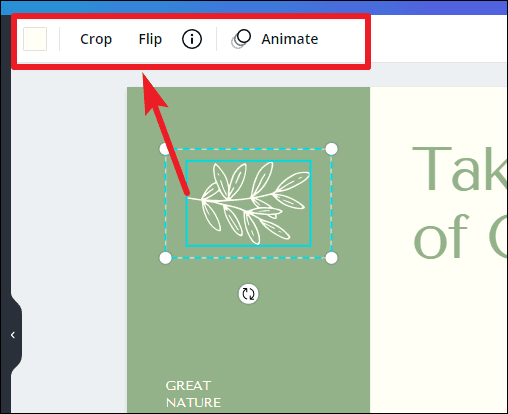
When you’re using a template, almost all of the elements can be selected and edited. You can delete an element, change color, font (for text). To select an element, hover over it. The part of that element will be highlighted in blue. Click it to select it.
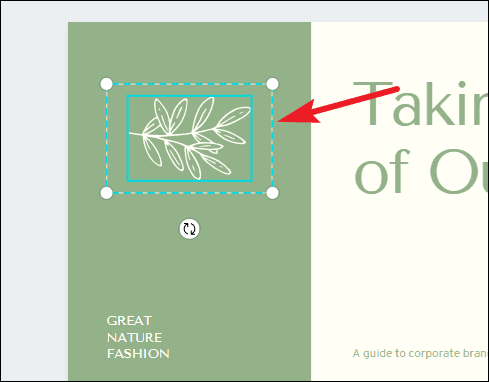
Another toolbar will appear above the slide with editing options specific to the element you have selected. Depending on the element, you can change it’s color, font, font size.
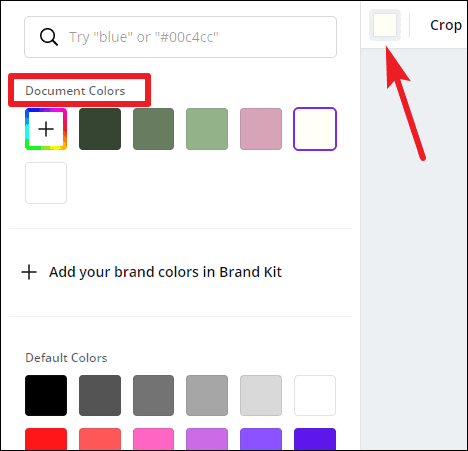
When you click the color option, a palette for document colors will appear above, followed by available default colors. For free users, only limited color options are available. If you have a Brand Kit (available only for Canva Pro users), that palette will also appear here.
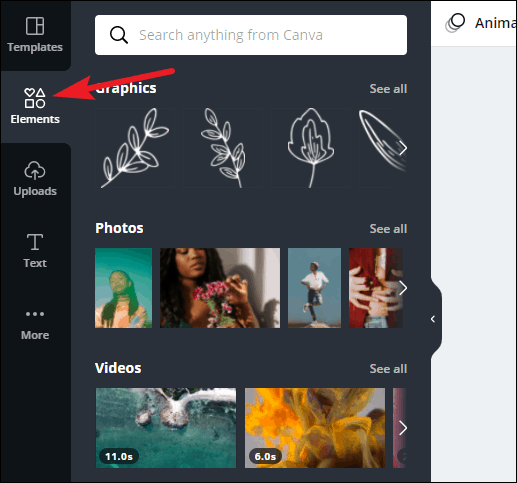
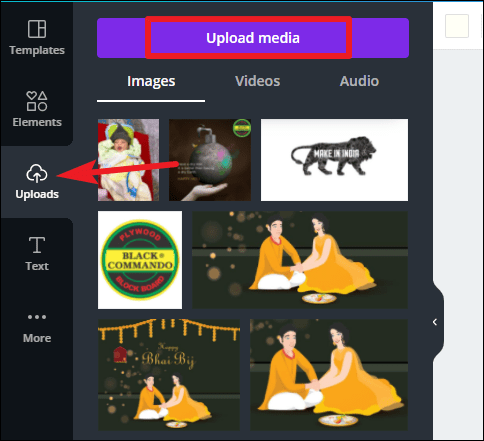
Click on the ‘Elements’ option on the left toolbar to add elements like photos, videos, graphics, audio, charts, etc. to your presentation.
To add photos, videos, or audio from your computer, click the ‘Uploads’ button. Then, click the ‘Upload media’ button to select content. Any media you previously uploaded will also be available here.
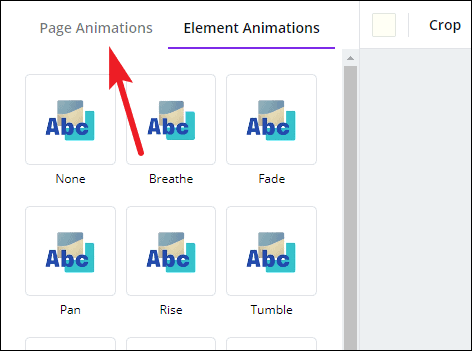
You can also add animations to individual elements or the entire page. Select an element and click the ‘Animate’ button.
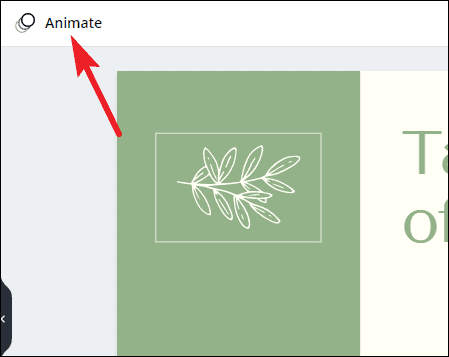
‘Element animations’ will open. To switch to page animations, click the ‘Page Animations’ tab.
Presenting your Presentation
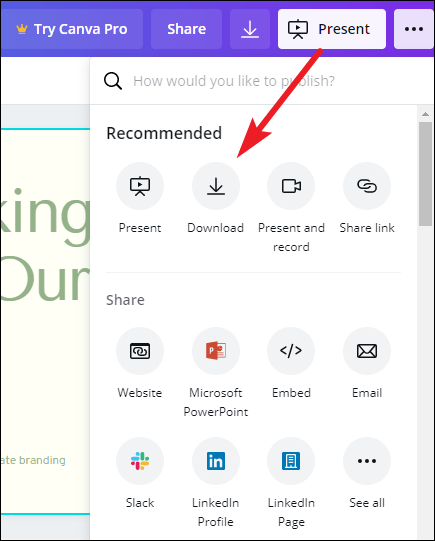
Once your presentation is complete comes the main part – presenting it. Canva offers a lot of options for your finished presentation. You can present it right from Canva or publish or download it for various platforms.
To publish it elsewhere or download it, click the ‘three-dot’ menu on the top-right corner.
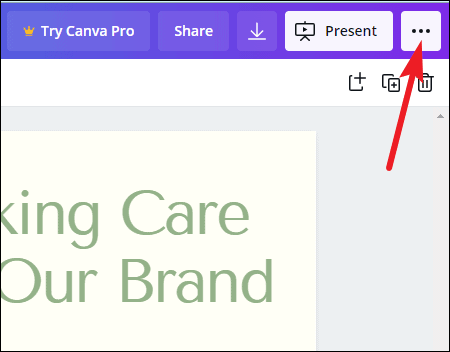
A list of options will appear. You can download it onto your computer, or as a PowerPoint presentation, share a link to the presentation, publish it as a website, embed it on your website, and much more. You can also record it while presenting with a voiceover.
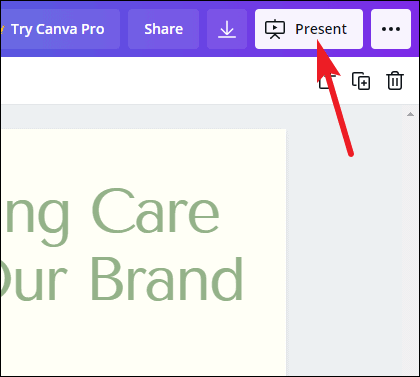
To present straight from Canva, click the ‘Present’ button.
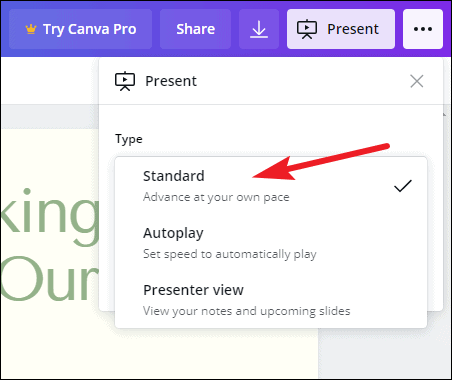
Click the drop-down menu below ‘Type’ and select how you want to present it.

There are three options to choose from: ‘Standard’ – where you present at your own pace, ‘Autoplay’ – where the presentation advances automatically, and ‘Presenter View’ – where you can view your notes and upcoming slides, but the rest of the people cannot. Presenter View is best used when you’re presenting on a projector.
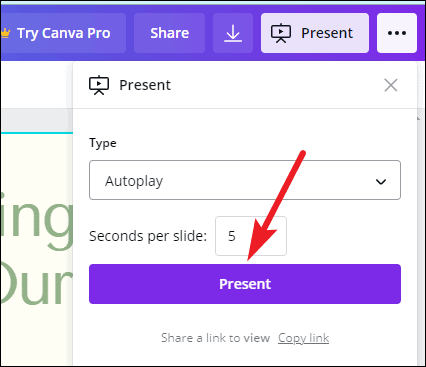
After selecting the type, click the ‘Present’ button.
Bonus Tips for your Presentation
While presenting the presentation on Canva, you can add special effects to enhance the performance with some keyboard shortcuts. All you need to do is press the associated key with each effect to bring it into action. Press the same key to stop it. You can also press multiple keys to add 2 or more special effects. With these effects, your presentation is bound to stand out to your audience and be memorable.
Drumroll : Add a drumroll before a slide by pressing the key ‘D’ before a big reveal.

Confetti : Add a shower of confetti to celebrate something with the key ‘C’ .

Countdown : Add a countdown from ‘1-9’ by pressing one of the keys.
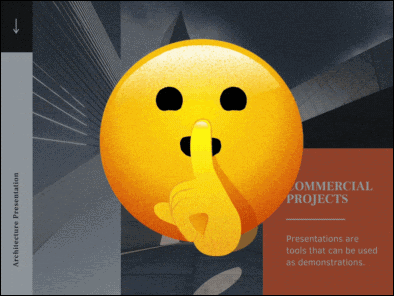
Quiet : Bring a 🤫 emoji to screen to hush your audience with the ‘Q’ key.
Bubbles : Press down the ‘O’ key to bring bubbles on the screen.

Blur : Build tension and add drama to the atmosphere by blurring the screen with the key ‘B’.

Presentations are a huge part of professional life, whether you’re presenting to your clients, doing a webinar, promoting your brand, to name a few. With Canva, you can make presentations that’ll leave a long-lasting impact but won’t take long to make.

Microsoft Copilot Pro Review: There is a lot of Unrealized Potential

How to Create a Custom Copilot GPT

How to Use Gemini AI
Get all the latest posts delivered straight to your inbox., member discussion.

How to Use Magic Switch in Canva to Instantly Convert Your Designs

How to Use Soundraw AI Music Generator in Canva

How to Use Magic Studio in Canva to Transform Your Ideas into Videos

How to Make Artistic QR Code in Canva using Mojo AI

How to Create AI Art & Graphics Using Canva Magic Studio
How to Create the Perfect Professional Presentation in Canva
You may not need Microsoft PowerPoint! Canva can help you make professional presentations in half the time.
These days there's a lot of options for creating workplace presentations, ranging from old-school classics like Microsoft PowerPoint to relative newcomers like Google Slides. Another platform that you can use to create a presentation is Canva.
As a template design site where you can craft beautiful documents, Canva makes the act of creating presentations as simple as Google Slides---perhaps even simpler. Here's how to design a workplace presentation in Canva.
Step 1: Launch Canva
If you don't have an account with Canva yet, check out our rundown on what the site is and what it's good for . If you already have an account, log in and go to your homepage.
Under Create a design , click Presentation .
You can also look for Presentation in the search bar, under the sign that says Design anything .
After you click on Presentation , you'll be taken to a blank workspace. Like all Canva's workspaces, you'll see a collection of pre-made templates along the left-hand side.
If you want to create a presentation from the ground up, you can. We've already got a great tutorial on how to create a resume from scratch using Canva , and it uses very similar principals.
If you're creating this presentation for work, however---and you're short on time---then it's probably best to go with a template.
Canva divides these templates based upon their stated purpose, ranging from creative applications to pitch decks. For this tutorial, let's go to the Professional Presentation section, as it has templates that are well suited for our purpose. Pick one that you like.
Once you click on a design, you'll see a bunch of different pages displayed along your sidebar. Each of these pages has a slightly different layout, but they all use similar elements and color schemes.
Step 2: Pick a Page Design, Change Your Text
The great thing about Canva is that there's no order in which these individual pages have to be arranged. You can use one or several designs multiple times, back-to-back, or never use them at all.
To apply a design to your first page, simply click on your blank workspace so the page is active. Then click on one of the premade designs sitting to the left. Canva will automatically load it into the page and you can begin modifying.
For this tutorial, I've decided to pick a design that would work well as a title page. By clicking on the individual text boxes within this page, I can erase the placeholder text and put down my own.
If you want to further adjust the size, color, weight, and spacing, you can do so in the Text editing box, seen here highlighted in red.
Step 3: Adjust Your Visual Elements
Having the right text---but not too much text---is one of the most important things you can consider when you're putting together your presentation. Making sure the visual elements match up is really important too.
In Canva, you can keep or delete however many graphic elements you want. You can also move them around.
To Delete an element, click on it so its bounding box shows up. Press Delete .
To Move an element, click and drag it around the page.
If you want to change the color of an element, go to the color swatch icon at the top of the screen. You can pick a color swatch from the premade palette, or you can choose a custom color with the color picker by clicking on the + .
Step 4: Add Page Notes
One of the last things that you'll want to add to your page is your presentation notes. Notes are not required, of course, but they can help you remember what you're going to say, especially if you're presenting in front of a group.
To add notes in Canva, go to the top right-hand corner of your page and click on the Add notes icon, seen here in red. When you do, another pop-up box will emerge.
Start typing your notes into the box. There's a word limit, of course, but we doubt you'll run over it. When you're done, click Save .
Step 5: Add a New Page
The whole point of slideshows is that you're showing off a series of pages. If you just had one page, for example, it would technically be a poster, so chances are high you'll want to add more.
After you finish your first page, go to the bottom of your workspace and click on +Add a new page . Canva will add another page to your presentation.
If you want to switch this page to a different style, go to the page designs on the left-hand side of your screen. Click on the one that you want.
Once you create more than one page, you might want to label them to keep your workspace organized.
To label your pages, go to the top left-hand corner of your active page where you see the dotted line. Click on it and start typing. From there you'll be able to enter a new title.
If you're not happy with this new page at all, you can delete the whole thing. At the top right-hand corner of the page, you'll see a trash can icon. Click on it.
Did you hit delete by accident, or have you changed your mind? No worries: just use the Undo button in the top left-hand corner of your workspace.
Step 6: Add a Graph
One of the best features about Canva is its ability to easily insert graphs into your presentation. It then allows you to customize those graphs to your needs.
To add a graph, find a page design that has a graph in it. Once that page is applied to your presentation, double-click on the graph inside that page so its bounding box lights up.
In the left-hand toolbar, you'll see your graph controls emerge. At the top of those controls is a dropdown menu showing you what type of graph you're using. Beneath that is a list of items, along with their values.
To change the name of these items, click on each individual box and start typing. To change the values, click on the box and insert the appropriate number.
Every time you change these values, Canva will automatically update your graph in real time, so you can see how it looks.
If you want to change the style of the graph you're using, click on the dropdown menu and choose another. Canva will automatically change the appearance of your graph while keeping your values intact.
Finally, you can also adjust the color of your graph.
Make sure your graph's bounding box is active, then go to your Edit controls in the top left-hand corner of your screen, seen here in red. Start experimenting with them to get the right effect.
Step 7: Check Your Presentation and Add Transitions
As you wrap things up, you'll want to check your presentation for errors. You might also want to add transitions between your pages.
To add transitions, go to the Present button at the top right-hand corner of your screen. Click on the icon.
When you click on that icon, Canva will open up a dropdown menu where you can pick the Transition style that you want.
After you choose your Transition style , you can also choose your Type . Type allows you to control the speed at which your presentation plays.
When you have all these things squared away, click on the blue Present button to watch your slideshow play out. It will take you to a full-screen version of it, where you can scan for errors.
When you're done checking your presentation for errors, press the Escape key to exit out of the window. Make any changes that you need to---if applicable---then finalize the design.
Step 8: Download Your Presentation for Work
Once your presentation is finished, you're ready to download. To download your presentation---or use it in another format---click on the dropdown menu beside the Present button.
Most of these options are free-to-use with a basic account, but for those that aren't, you'll see a gold "crown" symbol beside it. There's also a ton of options, ranging from downloading the file, emailing it to your coworkers, or embedding the file on another platform.
And that's it. You're done.
Ace That Slideshow Presentation
Now that you've seen how to put together a workplace presentation in Canva, you can start exploring. There's a lot of customization options, so it's best if you fiddle with those settings yourself.
Looking for other things you can design? Here's how to create a cover letter with Canva .
We explain and teach technology, solve tech problems and help you make gadget buying decisions.
How to Create Presentations in Canva
Canva recently introduced new tools to create docs, whiteboards, videos, websites, and presentations. As such, you no longer need to rely on traditional software solutions like Google Slides, PowerPoint, or Keynote to create an upcoming business presentation. You can easily create presentations in Canva using its familiar suite of editing tools.

Canva offers real-time collaboration, several export options, a present tool, AI add-ons, and much more to make a professional PPT. Canva also lets you make instant presentations with pre-filed slides. Without further ado, let’s get started.
Pick Up an Aspect Ratio and Template
Before you start, make sure to pick a relevant aspect ratio for your presentation. If it’s a traditional PPT, go with a 16:9 aspect ratio. If you plan to show your PPT on mobile, use the 9:16 aspect ratio.
Tablet users can start with a 4:3 aspect ratio. Canva also offers some ready-to-use templates to get started. We highly recommend starting with a template to save some time.

You can also filter templates via style, theme, feature, and color. For example, you can check company, marketing, corporate, marketing, school, and other templates. Most templates are free to use, while some may require a Canva Premium subscription.
Under templates, you also find an option to create instant presentations. You can enter a prompt and check Canva’s suggestions to get started.

Customize a Page With Editing Features
Once you pick up a template, you have the option to add all pages to your presentations. You can click ‘Apply all pages’ and check every slide at the bottom. You can always select a slide and hit delete to remove it from your presentation.

Canva lets you change every aspect of the template with different text styles, filters, and image editing tools. You can change color, tweak transparency, copy style, and more.

We suggest spending some time with editing tools to customize your Canva presentation and add some personal touches.
Add Graphics, Stickers, and Images
Your presentation will not seem as interesting without graphics, stickers, images, and videos. Unlike Google Slides or PowerPoint, you don’t need to import media files to Canva to complete your slides. You can easily add relevant elements from the sidebar.
Step 1: Open a slide in your Canva presentation.
Step 2: Select Elements from the sidebar. Add graphics, icons, stickers, tables, videos, and more.
Step 3: You can explore the AI image generator and turn your creative ideas into images and videos with a single click.

You can add simple descriptions and even turn generated images into videos. Canva also offers a long list of graphics packs in several categories. The possibilities are endless here. It’s up to you to make a compelling slide using useful tools.
Tweak Page Animation
Once you create a page, tweak its animation to make a smooth transition between pages.
Step 1: Select a slide in Canva.
Step 2: Click Animate at the top.
Step 3: Check basic, exaggerated, photo movement, and other animation types from the left sidebar.

You can also tweak the animation intensity, which is great.
Add Presenter Notes
Do you plan to present your Canva PPT on a video conference? You can add notes to each slide so they appear during the Presenter view (more on that later).
When you create a PPT, select a slide and hit Notes at the bottom. Enter your notes that you want to remember or talk about during a video meeting.

Collaborate and Edit in Real Time
Similar to Google Slides and Microsoft PowerPoint, Canva lets you share and edit a presentation in real time. You can take inputs from your colleagues and create a share-worthy presentation in no time.
Step 1: When you are done making changes to your presentation, click Share at the top.
Step 2: Enter people, groups, or your team. Expand the collaboration link menu and select Anyone with the link.
Step 3: Expand the permission menu and select Can edit.

You can also share a link with view or comment-only permission. Select the Copy link and share it with your co-workers.
Enable Presenter View
Presenter view is a thoughtful touch from Canva to give presentations over a Google Meet or Teams call.
You can open a presentation in Canva and select Present at the top. Click Presenter View and check two windows opening up on your computer.

One window shows your presentation with notes open on the sidebar. Another window displays the current slide you are sharing with others over a call.

Download and Share Your Presentation
As expected, Canva gives several options to share and export your presentation. When you complete your presentation, click Share in the top-right corner and expand Download.
You can convert a presentation to PDF, PPTX (Microsoft PowerPoint compatible), MP4, JPG, PNG and SVG formats. Check our dedicated post if you wish to print your Canva presentation .

Use Canva Like a Pro
Canva has done a solid job, granting users access to rich tools to create a convincing presentation. We can’t wait to see how the Australian startup enhances our PPT experience with AI features in the future. Speaking of which, we would love to see a feature similar to ‘Design Ideas from Microsoft PowerPoint’ on Canva. Do let us know if you use Canva for presentations in the comments below.
Last updated on 07 January, 2024
The above article may contain affiliate links which help support Guiding Tech. However, it does not affect our editorial integrity. The content remains unbiased and authentic.

DID YOU KNOW

Parth Shah is an evergreen freelance writer covering how-tos, app guides, comparisons, listicles, and troubleshooting guides on Android, iOS, Windows, Mac, and smart TV platforms. He has over five years of experience and has covered 1,500+ articles on GuidingTech and Android Police. In his free time, you will see him binge-watching Netflix shows, reading books, and traveling.
More in Internet and Social

Bypass Ads and Pop ups While Downloading On Rapidshare With Skipscreen

How to Create and Customize Tables in Canva
Join the newsletter.
Get Guiding Tech articles delivered to your inbox.
How to Share Canva Presentation with Notes

Sharing presentations with notes is extremely useful for presenters. The notes allow you to add extra information and details that may not fit nicely on the slides themselves.
When creating presentations in Canva, you have the ability to add presenter notes that can be included when sharing or exporting your designs. This allows you to share a presentation that contains both the slides visible to your audience and separate notes visible only to you as the presenter.
In this blog post, we’ll walk through exactly how to create presentations with notes in Canva and the different ways you can share those presentations while keeping the notes intact.
Creating Notes in Canva Presentations
Adding notes in Canva Presentations is simple:
- Open your presentation and select a slide.
- In the left sidebar, toggle on the switch for Speaker Notes to open the notes panel below the slide.
- Type your notes for that slide into the notes panel. The notes will automatically save.
- Repeat for each slide that needs notes.
You’ll see your notes in the presenter view when presenting your slides.
Pro Tip: Add the slide number at the start of each slide’s notes to keep things organized if making changes later.
Sharing Canva Presentations with Notes
Once your presentation notes are added, there are a few ways to export or share your presentation while keeping the notes intact:
Download as PDF
- Click Share in the Canva toolbar.
- Select Download > PDF Print .
- Check the box for Include notes .
- Download the PDF, which will contain both slides and notes.
Export Presentation to PowerPoint
- Click Share > Export > PowerPoint Presentation .
- In PowerPoint, go to File > Print to access print options.
- Under Settings, choose Notes next to slides .
- Print or save as PDF to get a file with slides and notes.
Share View-Only Link
- Get the View-only link.
- When you present your slides in Canva’s Presenter Mode, your notes will be visible to you but not your audience.
Learn more about Canva Presenter Mode .
Share Collaboratively
- Under Collaboration, choose Anyone with the link can view .
- Send the collaboration link so others can view the presentation with notes in Presenter Mode.
Learn more about collaborating on Canva designs.
Presenting with Canva Speaker Notes
Once you’ve shared your presentation containing notes, presenting with those notes is easy:
- Open your presentation in Canva.
- Select Present in the top right.
- Choose Presenter View to view your notes privately during your presentation.
In Presenter View you’ll see your slides, notes, and a presentation timer. Toggle between your slides as needed while referring to your notes that the audience can’t see.
Your notes will stay in sync automatically as you change slides during your presentation.
Extra Tips for Canva Presentation Notes
Here are some additional tips for working with notes in Canva:
- Add images/visuals – Include screenshots or diagrams in your notes for extra context.
- Present online – Share a view-only link for virtual presentations using Presenter View.
- Use the mobile app – Easily present from your mobile device using the notes.
- Print as handouts – Print slides with notes as handouts for in-person meetings.
- Collaborate with team members – Co-create presentations and notes in real-time.
- Add feedback – Have colleagues review slides and leave feedback on your notes.
Key Takeaways
- Add speaker notes for each slide while creating Canva presentations.
- Export presentations as PDFs or PowerPoints to retain notes.
- Present slides in Canva itself using Presenter View to privately view notes.
- Share view-only links for online presentations with notes visible in Presenter View.
- Print slides with notes as handouts or present from mobile with notes on the go.
With Canva Presentations, seamlessly sharing presentations with integrated speaker notes boosts your public speaking confidence. Give your next talk a boost using these Canva features!
About The Author
Vegaslide staff, related posts.

How to Make Canva Presentation Animate on Click

How to Add Video to Canva Presentation

How to Share a Canva Presentation with Someone

How to Add Narration to Canva Presentation

Canva Presentations: How to Create and Share Them
Canva may not be your first thought for creating a presentation. However, this popular web-based design tool offers a robust slideshow feature set. We’ll walk through how to create a Canva presentation, present it to your audience, and share it using a variety of methods.
Create a Canva Presentation
If you’ve never made a presentation with Canva, don’t worry. This online graphic design application goes beyond creating images and crafting infographics . Canva makes it super easy to create and set up a presentation for your audience.
On the Canva home page, select Presentations below the Search bar. Then, choose a slideshow size or Canva presentation template to get started.

Note : If you’re using Canva Docs , you can also convert your document to a presentation by selecting Convert at the top. Follow the prompts, and you’ll see your presentation open in the Canva editor.
Once in the Canva editor, use the menu on the left side to add slide elements. You can select or drag items like shapes, images, or text boxes onto your slides.

You can also edit or remove a slide element by selecting it and using the tools that display near the item or in the top toolbar. For example, you can change the style of text or transparency of an image.

Be sure to check out the full set of Canva presentation tools in the editor. You can add animations, insert slide transitions, use the grid view to rearrange presentation slides, and more.
Set Up the Presentation
After you tap your creativity to make an attractive and informative presentation, you can add notes, clock your speaking time, and adjust the slide durations.
Add Presenter Notes
To add presenter notes to a slide, select Notes in the bottom toolbar. Then, type your note in the panel that displays on the left. You can then move to your other slides and add notes the same way.

When you finish, deselect Notes in the toolbar.
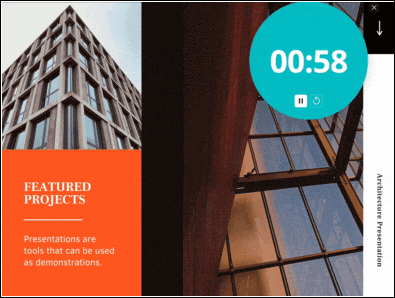
Use the Timer
If you’d like to time your presentation, you can use the built-in countdown Timer feature. Select Timer in the bottom toolbar to display the timer. By default, the timer is set for five minutes, but you can change this using the plus and minus buttons.

Press the Play button to start the countdown, the Pause button to temporarily stop the timer, and the Reset button to restart the timer.

To close the Timer, deselect Timer in the toolbar.
Set the Slide Duration
Maybe you’re using Autoplay (described below) and would like to display particular slides for a longer or shorter time. You can adjust the slide duration for each or all slides in two different ways in Canva.
Use the Duration Slider
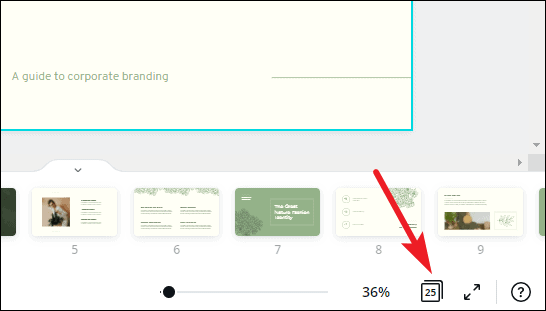
Expand the bottom section by selecting the Show Pages arrow. Then, choose Duration on the left to see the default timing for each slide.

Select a slide thumbnail (page) and hover your cursor over the left or right side of it to display the duration slider. Then, drag the slider in or out to shorten or lengthen the duration.

When you finish, deselect Duration in the toolbar and optionally use the Hide Pages arrow to minimize the bottom section.
Use the Timing Feature
Another way to change the duration of a slide is by using the Timing option at the top of the editor. Select a slide to see its duration and choose the current timing to enter a new duration, or use the slider to adjust it.
You can also turn on the toggle to apply the new duration to all pages (slides) in the presentation.

To close the Timing tool, deselect it in the top toolbar.
Show a Canva Presentation
The great thing about creating a presentation in Canva is that you can present from it as well. If you prefer not to download and present using a different application, you have a few options to show your slideshow directly from Canva.
When you’re ready to present or practice your presentation, select Present on the top right. You’ll then see the options below.

Present in Full Screen Mode
Choose the Present full screen option to enter presentation mode. You’ll see your presentation consume your entire screen and have controls at the bottom.

Use the arrows on the left to move through the slides and the controls on the right to zoom, interact, use shortcuts, or exit full-screen mode.
Use Presenter View
To see your notes and controls on one screen with your presentation on another for your audience, choose Presenter view .

Your screen shows the time, a count-up timer, and other controls for a countdown, AutoPlay, and the font size for your notes.
You can drag the other screen wherever needed for your audience to view.

Present and Record
Maybe you want to incorporate your smiling face into your presentation. For this, pick the Present and record option to record yourself live as the presentation plays. You can then share the whole presentation as if you’re in the same room.
Note : This feature is currently only available when using the Google Chrome web browser.
You’ll see your face appear in a circle on the bottom left of the presentation. You can use the Pause and End recording buttons at the top to control the recording as well as see your presenter notes.

When you finish, you’ll see a link that you can copy and have the option to download the recorded presentation immediately.

Use Autoplay
Like Autoplay for a PowerPoint presentation , this is one more way to present a slideshow using Canva. With Autoplay, you can start the presentation and let it play on its own. This is ideal for kiosk presentations or when you are unable to present yourself.

When you choose Autoplay , the presentation begins and moves through each slide using the Durations you set (explained earlier). You can also manually control the presentation if needed using the same tools as the Present Full Screen option.
Share a Canva Presentation
Along with or instead of actually presenting a slideshow with Canva, you can share it in a variety of ways. Whether you want to collaborate with your team, download the file to your device, or pop the presentation up on social media, Canva has you covered.
Select Share in the top right corner and then choose one of the following ways to share.

Collaborate With Others
Maybe you want to work on the final presentation with a team member or coworker. You can grant access to others and provide them with a collaboration link.
Enter the people, groups, teams, or email addresses in the People with access field. Then, open the Collaboration link drop-down menu and pick Anyone with link to provide access.

Download a Presentation
If you’d like to save your presentation to your device or download it as a Microsoft PowerPoint file, this is easy too.
Select Download and use the File type drop-down to pick PDF, PPTX, GIF, PNG, or another format.
You can then choose to flatten the PDF, include notes, or download only certain pages (slides).

Share on Social Media
Want to post your presentation directly to Facebook, Instagram, or another social media network? Select Share on social , choose the location, and follow the subsequent prompts to sign in and set up the social media post.

More Sharing Options
If you don’t see the sharing avenue you want, don’t despair because there are even more. Select More at the bottom of the Share menu.
You’ll then see sections for Share, Social, Save, Messaging, Design, and More Options giving you a ton of sharing methods. As examples, you can obtain a public link, send it to your phone, get an embed code for your blog, upload it to Dropbox or Google Drive, send it to Slack or WhatsApp, and more.

Will You Create a Presentation in Canva?
Now that you know the basics, are you going to use Canva for your next presentation? If so, let us know what you think of the tools and features. For doing even more, check out how to blur a face in a photo using Canva .

Sandy Writtenhouse is a freelance technology writer and former Project, Department, and Program Manager. She turned her education, job experience, and love of technology into a full-time writing career. With all sorts of gadgets in her home and her hands, she seeks to help others make life easier through technology. Read Sandy's Full Bio
Read More Posts:

Leave a Reply
Your email address will not be published. Required fields are marked *
How to Print Notes in Canva Presentation: A Step-by-Step Guide
Canva has revolutionized the way we create visually stunning presentations, but when it comes to printing those presentations with accompanying notes, many users find themselves
James Davis
June 22, 2023
Canva has revolutionized the way we create visually stunning presentations, but when it comes to printing those presentations with accompanying notes, many users find themselves at a loss. If you’re looking for a comprehensive guide on how to print notes in Canva presentation, you’ve come to the right place. In this article, we will walk you through the process step-by-step, ensuring that you can easily print your Canva presentation with all the important notes intact.
Before we dive into the details, let’s briefly explain why printing notes in a Canva presentation can be so valuable. While the visual elements of a presentation are crucial, the notes section provides an opportunity to include additional information, key points, and reminders for the presenter. Having these notes in hand during a presentation can significantly enhance the delivery and ensure that no important details are overlooked.
Table of Contents
Accessing the Notes Section in Canva
When it comes to printing notes in Canva presentations, the first step is to locate and access the notes section. Here’s how:
Step 1: Open Canva and Select Your Presentation
To begin, log in to your Canva account and open the presentation you want to print with notes. If you haven’t created a presentation yet, you can start a new one or select a pre-designed template from Canva’s extensive library.
Step 2: Navigate to the “Notes” Tab
Once your presentation is open, look for the “Notes” tab located either at the bottom of the screen or in the sidebar. Click on this tab to access the notes section where you can add and edit your presentation notes.
Step 3: Add and Edit Your Notes
Now that you’ve accessed the notes section, you can add and edit your presentation notes. Canva provides a user-friendly interface that allows you to type, format, and customize your notes according to your preferences. Take your time to input all the necessary information, key points, and reminders that will assist you during your presentation.
Adding and Formatting Notes
Now that you know how to access the notes section in Canva, let’s explore how you can add and format your notes to make them visually appealing and easy to read. Follow these steps:
Step 1: Select the Text Box Tool
To add notes to your Canva presentation, click on the “Text” tab located in the sidebar. This will give you access to various text tools and options.
Step 2: Create a Text Box for Your Notes
Click and drag your cursor on the canvas where you want to place your notes. This action will create a text box where you can input your notes.
Step 3: Input and Format Your Notes
Type your notes into the text box. Canva offers a range of formatting options, including font style, size, color, alignment, and more. Experiment with different formatting choices to make your notes visually appealing and easy to read.
Step 4: Customize Your Notes’ Appearance
In addition to formatting the text itself, you can also customize the appearance of your notes section. Canva allows you to change the background color, add borders, and apply other design elements to make your notes visually distinct from the main presentation slides.
Adjusting Slide Layout for Printing
Now that you have added and formatted your notes, it’s important to ensure that the slide layout is adjusted properly for printing. Follow these steps to optimize your notes section:
Step 1: Navigate to the “Layout” Tab
In Canva, the “Layout” tab provides options for adjusting the slide layout and design. Locate this tab either at the bottom of the screen or in the sidebar.
Step 2: Customize the Slide Layout
Click on the “Layout” tab to access various layout templates and options. Experiment with different layouts until you find one that accommodates both your main presentation content and the notes section. Ensure that the notes section does not overlap with or obscure any important elements of the main slide.
Step 3: Resize and Reposition Elements
If necessary, resize and reposition the elements on your slide to create space for the notes section. Canva provides a drag-and-drop interface that allows you to easily move and adjust elements as needed.
Exporting the Presentation as a PDF
Once you have finalized your presentation and adjusted the slide layout, it’s time to export it as a PDF file. Follow these steps:
Step 1: Click on the “Download” Button
In Canva, the “Download” button is located in the top right corner. Click on this button to access the download options.
Step 2: Select PDF as the File Format
From the download options, choose the PDF file format. Canva offers various file formats, but for printing purposes, PDF is the most suitable as it preserves the layout, formatting, and notes.
Step 3: Customize the PDF Settings
Before downloading, you can customize the PDF settings according to your preferences. Canva allows you to include or exclude certain elements, such as the notes section or specific slides. Make sure to select the options that best suit your printing needs.
Step 4: Download and Save the PDF File
Once you have customized the PDF settings, click on the “Download” button to initiate the download process. Save the PDF file to your desired location on your computer.
Printing the Presentation with Notes
Now that you have the PDF file with your notes, it’s time to print your Canva presentation. Follow these steps to ensure a seamless printing experience:
Step 1: Open the PDF File
Locate the PDF file you just downloaded and open it using a PDF reader or a compatible software on your computer. This will allow you to preview the presentation and ensure that the notes are included.
Step 2: Adjust Print Settings
Before printing, access the print settings on your computer. Depending on your printer and software, the process may vary slightly. Make sure to select the appropriate paper size, orientation, and quality settings for your desired printout.
Step 3: Select the Notes Printing Option
Within the print settings, look for an option that allows you to print the notes section. This option may be called “Print notes” or “Print speaker notes.” Enable this option to ensure that the notes are included in the printout.
Step 4: Print Your Presentation
Once you have adjusted the print settings and selected the notes printing option, click on the “Print” button to start printing your Canva presentation. Make sure your printer is properly connected and loaded with the appropriate paper.
Troubleshooting Printing Issues
Printing can sometimes be a challenging process, but don’t worry – we’ve got you covered. Here are some common printing issues and their solutions:
Issue 1: Notes Not Printing
If you find that the notes section is not printing or is missing from your printout, double-check the print settings to ensure that the notes printing option is enabled. Also, make sure that the notes section is properly positioned within the slide layout and is not overlapping or obscuring any other elements.
Issue 2: Notes Cut Off or Truncated
If your notes are cut off or truncated in the printout, check the slide layout to ensure that there is enough space allocated for the notes section. Adjust the layout as needed to accommodate the length of your notes.
Issue 3: Poor Print Quality
If you are experiencing poor print quality, ensure that you have selected the appropriate print settings for your desired outcome. Check the resolution and paper quality settings to ensure a high-quality printout.
Alternatives to Printing Notes
If you prefer digital solutions or want to explore alternatives to printing, Canva offers various options for accessing and presenting your notes digitally. Here are some alternatives:
Option 1: Presenting with Presenter View
Canva provides a Presenter View option that allows you to view your presentation notes while presenting. This feature is especially useful if you have access to a second screen or a projector. By selecting Presenter View, you can deliver your presentation smoothly while having your notes visible only to you.
Option 2: Exporting as a PowerPoint Presentation
If you need to present your Canva presentation on a platform that supports PowerPoint files, you can export your Canva presentation as a PowerPoint file. This way, you can take advantage of PowerPoint’s built-in presenter view, which allows you to view your notes while presenting.
Option 3: Sharing as a Digital Handout
Instead of printing physical handouts, you can share your Canva presentation as a digital handout. Export your presentation as a PDF file and distribute it electronically toyour audience via email, file-sharing platforms, or presentation sharing websites. This way, they can access the presentation and view the accompanying notes on their own devices.
Option 4: Using Canva’s Presentation Mode
Canva offers a Presentation Mode feature that allows you to present your slides directly within the Canva platform. This mode provides a fullscreen view of your presentation, making it easier for you to read your notes while presenting. Simply click on the “Present” button in Canva to enter Presentation Mode.
Option 5: Creating a Digital Notebook
If you prefer a more interactive approach, you can create a digital notebook using Canva. Design separate pages for each slide, including the notes section, and link them together. This way, you can navigate through your presentation digitally, accessing the corresponding notes for each slide as needed.
Best Practices for Printing Presentation Notes
Now that you know how to print your Canva presentation notes, let’s explore some best practices to ensure the best possible outcome:
1. Use Readable Font Sizes
When adding notes to your Canva presentation, ensure that the font sizes are readable when printed. Test the readability by printing a sample page and adjusting the font size if necessary. Aim for a font size that is comfortable to read without straining the eyes.
2. Opt for Legible Fonts
Choose fonts that are clear and easy to read. Avoid elaborate or decorative fonts that may hinder legibility when printed. Stick to fonts that are commonly used and widely recognized to ensure that your notes are easily understood.
3. Select Appropriate Paper Size
Consider the paper size when printing your Canva presentation with notes. If you have a lot of content in the notes section, choose a larger paper size, such as A4 or letter, to ensure that the notes are not cramped and remain legible.
4. Use High-Quality Paper
Invest in high-quality paper for printing your presentation with notes. Opt for a paper weight that is sturdy enough to withstand handling and won’t easily tear or crease. Choosing a paper finish, such as matte or glossy, is a matter of personal preference and the desired look and feel of your printed presentation.
5. Consider Double-Sided Printing
If your presentation with notes spans multiple pages, consider printing double-sided to save paper and create a more compact booklet. Ensure that the double-sided printing is aligned correctly and that the notes section corresponds to the correct slide on the opposite side.
6. Review and Proofread Before Printing
Before hitting the print button, thoroughly review and proofread your presentation with notes. Check for any spelling or grammatical errors, formatting inconsistencies, or missing information. It’s essential to ensure that the content of your notes is accurate and well-presented.
7. Print a Test Page
Before printing a large batch of your presentation with notes, print a test page to check the overall appearance and quality. This will allow you to make any necessary adjustments or corrections before proceeding with the full print run.
Using Canva Pro Features for Enhanced Printing
If you are a Canva Pro user, you have access to additional features that can enhance your printing experience. Here are some notable features:
Advanced Customization Options
Canva Pro offers a wide range of advanced customization options, allowing you to create unique and visually appealing presentations. Explore custom color palettes, advanced typography settings, and other design features to make your printed presentation with notes stand out.
Collaborative Printing
With Canva Pro, you can collaborate with team members or clients on your presentation and streamline the printing process. Share your Canva presentation with others, gather feedback, and make necessary revisions collaboratively before printing the final version.
Priority Support
Canva Pro users enjoy priority support, which means that if you encounter any issues or have questions regarding printing your presentation with notes, you can reach out to Canva’s support team for assistance. They can provide guidance, troubleshoot any problems, and ensure a smooth printing experience.
Brand Kit Integration
If you have a Brand Kit set up in Canva, you can easily apply your brand colors, fonts, and logos to your presentation with notes. This ensures consistency with your brand identity and reinforces your professional image.
Printing notes in a Canva presentation is a valuable skill that can greatly enhance your presentation delivery. By following the step-by-step guide provided in this article, you can easily print your Canva presentation with all the important notes intact. Whether you prefer a hard copy or a digital solution, Canva provides the tools and features to meet your needs. Start creating stunning presentations with well-crafted notes today and take your presentations to the next level!
Related Post
How to get to svalbard: the ultimate travel guide.
December 12, 2023
How to Get Gorilla Tag Mods Without PC: The Ultimate Guide
Get in-n-out delivered – a guide to satisfying your cravings at home.
December 11, 2023
Installing an Attic Ladder: A Step-by-Step Guide to Easy Access and Extra Space
How to get rid of hoa: a comprehensive guide to freedom from homeowners associations.
December 10, 2023
How to Fix a Dented Garage Door: A Comprehensive Guide to Restoring Your Door’s Appearance and Functionality
How to hide garbage cans outside: clever solutions for a tidy yard.
December 9, 2023
Leave a Comment Cancel reply
You must be logged in to post a comment.
How to Say “To Leave” in Spanish: A Complete Guide
Learn How to Say This in Italian: A Complete Guide
How to Say the B Word in Sign Language: Mastering the Art of Expressive Communication
Unlocking the Linguistic Richness: How to Say “Old” in Spanish
Discovering the Art of Pronouncing Pinot Noir
Popular Post
Seal Garage Door Gaps: Keep Out Unwanted Elements and Save Energy
How to Sell Pokemon Cards on eBay: A Comprehensive Guide to Maximizing Your Profits
Mastering the Art of Saying “Understand” in Spanish: A Comprehensive Guide
Who Viewed Your Public Profile on Snapchat: The Ultimate Guide
[email protected]
Quick Links
Privacy policy
How To Print Notes In Canva Presentation
Canva is a comprehensive online graphic design platform with an easy-to-use drag and drop interface, allowing users to create professional-quality visuals for web, print, and other tasks.
It offers a wide selection of templates, fonts, images and illustrations to help users craft beautiful designs quickly and easily.
Software: Canva | Canva Affiliate Program
Notes are an essential part of any presentation. They help you remember what you want to say and keep your audience engaged. Canva Presentations makes it easy to print your notes so you can have them with you when you present. To print your notes in Canva Presentation, first open the presentation you want to print
Click the “Notes” icon in the bottom left corner of the screen. A new window will open with your notes. From here, you can print your notes by clicking the “File” menu and selecting “Print”. Make sure to select “Notes” in the print settings so that only your notes will print
You can also choose to print your notes on separate pages so they’re easy to reference. Once you’ve clicked “Print”, your notes will print and you’ll be ready to present!
Similar Posts
Chalk fonts on canva.
Chalk Fonts On Canva If you’re looking for a fun and unique font to add to your next Canva design, consider using a chalk font. Chalk fonts have a hand-drawn look that can add a playful touch to any design Plus, they’re easy to find and use on Canva. Here’s a guide to using chalk…
How Do You Print In Canva
How Do You Print In Canva As a free online design platform, Canva is a great way to create professional designs for both personal and business use. But how do you print your Canva designs? Here’s a step-by-step guide: First, open the design you want to print in Canva and click the “Download” button in…
Canva Vs Figma
Canva Vs Figma When it comes to design software, there are a lot of options to choose from. However, two of the most popular and well-known choices are Canva and Figma. Both have their own unique set of features and advantages, but which one is the better option for you? Canva is a great choice…
Adobe Creative Cloud Vs Canva
Adobe Creative Cloud Vs Canva Adobe Creative Cloud is a set of tools and services from Adobe that gives users access to creative products and services. Canva is a website and app that offers users easy-to-use design tools. Both Adobe Creative Cloud and Canva offer users a way to create stunning visuals However, they differ…
Why Does My Canva Download Keep Failing
Why Does My Canva Download Keep Failing Why Does My Canva Download Keep Failing? If you’re experiencing issues downloading from Canva, it may be due to any of the following reasons: 1. Canva may be down. If Canva’s servers are down, this will cause downloads to fail You can check the Canva status page to…
Canva To Google Slides
Canva To Google Slides If you’re like most people, you probably use Google Slides to create presentations. But did you know that you can also use it to design amazing posters, flyers, and other graphic designs? With Canva’s easy-to-use tools, you can create stunning designs for your Google Slides presentations in minutes – without any…
How to See Notes on Canva Mobile App
Home » Blog » How to See Notes on Canva Mobile App

Founder of CanvaTemplates.com & Professional Graphic Designer
Jake Tucker
Canva Templates is reader supported. When you buy through links on our site, we may earn an affiliate commission. Learn more
Canva is a popular graphic design platform that allows users to create stunning designs for various purposes. One of its useful features is the ability to add notes to your designs, which can be helpful when collaborating with others or presenting your work. However, some users may not know how to access these notes on the Canva mobile app.
To see notes on the Canva mobile app, users can follow a few simple steps. First, they need to open the Canva app and select the design they want to view. Then, they can tap the “…” icon in the top right corner of the screen and select “Presentation Mode.” This will open the design in full screen mode, and users can swipe left to access the notes section.
By following these steps, users can easily view notes on the Canva mobile app and stay organized when working on their designs. Whether you’re collaborating with a team or presenting your work, notes can be a valuable tool to help you communicate your ideas effectively.
Understanding Canva Mobile App
Canva is a graphic design platform that allows users to create professional-looking designs with ease. The Canva Mobile App is a version of Canva that is designed specifically for mobile devices. It is available for both Android and iOS devices and can be downloaded for free from the App Store or Google Play.
The Canva Mobile App provides users with a wide range of design templates that can be customized to fit their specific needs. Users can choose from a variety of templates such as social media posts, presentations, flyers, and more. Each template is designed to be fully customizable, allowing users to change the text, images, and colors to fit their specific needs.
In addition to templates, the Canva Mobile App also provides users with a wide range of design elements that can be added to their designs. These design elements include images, icons, shapes, and more. Users can also upload their own images and use them in their designs.
The Canva Mobile App also provides users with a range of tools that can be used to edit their designs. These tools include the ability to crop images, adjust the brightness and contrast, and add filters to images. Users can also add text to their designs and choose from a wide range of fonts and colors.
Overall, the Canva Mobile App is a powerful tool that allows users to create professional-looking designs on the go. With its wide range of templates, design elements, and editing tools, the Canva Mobile App is a must-have for anyone who needs to create high-quality designs on their mobile device.
Accessing Notes on Canva Mobile App
To access notes on the Canva mobile app, the user needs to follow a few simple steps. Firstly, the user needs to open the Canva app on their mobile device and log in to their account. Once they are logged in, they need to select the design they want to work on and tap on it to open it.
Next, the user needs to tap on the “More” button located at the bottom right corner of the screen. This will open a menu with various options. The user needs to select the “Notes” option from the menu to open the notes section.
Once the notes section is open, the user can view all the notes that have been added to the design. The notes are displayed in chronological order, with the most recent note appearing at the top. The user can tap on a note to view its content and tap again to close it.
In addition to viewing notes, the user can also add new notes to the design from the notes section. To add a new note, the user needs to tap on the “Add Note” button located at the bottom of the screen. This will open a text box where the user can type their note. Once the note is typed, the user needs to tap on the “Save” button to add it to the design.
Overall, accessing notes on the Canva mobile app is a simple and straightforward process. With just a few taps, the user can view and add notes to their designs, making collaboration and communication easier than ever.
Creating Notes on Canva Mobile App
Step by step guide.
Creating notes on the Canva mobile app is a simple process. Here is a step-by-step guide to help you create notes on Canva mobile app:
- Open the Canva mobile app on your device and log in to your account.
- Select the design you want to add notes to.
- Tap the “Page Notes” icon located at the bottom of the screen.
- Type in the notes you want to add to the page.
- Tap “Save” to save the notes.
Tips and Tricks
Here are some tips and tricks to help you create effective notes on Canva mobile app:
- Use bullet points to organize your notes. This makes it easier to read and understand.
- Use bold text to highlight important information.
- Keep your notes brief and to the point. Paragraphs should contain no more than 3 sentences.
- Use tables to organize information in a clear and concise manner.
- Use different colors and fonts to make your notes stand out and more visually appealing.
By following these tips and tricks, you can create effective notes on the Canva mobile app that will help you stay organized and productive.
Editing Notes on Canva Mobile App
Editing process.
To edit notes on the Canva Mobile App, follow these simple steps:
- Open the Canva Mobile App on your phone.
- Select the design with the notes you want to edit.
- Tap on the “Presenter View” button located at the bottom of the screen.
- Swipe left or right to navigate between slides.
- Tap on the “Edit” button located at the top right corner of the screen.
- Edit the notes as desired.
- Tap on the “Done” button to save your changes.
Best Practices
When editing notes on Canva Mobile App, it’s important to keep in mind the following best practices:
- Keep your notes concise and to the point.
- Use bullet points or numbered lists to break up long paragraphs.
- Use bold or italicized text to highlight important points.
- Make sure your notes are easy to read by using a legible font and appropriate font size.
- Proofread your notes for spelling and grammar errors before saving your changes.
By following these best practices, you can ensure that your notes are clear, concise, and easy to read on the Canva Mobile App.
Sharing Notes from Canva Mobile App
Canva Mobile App is a powerful tool that allows users to create designs on-the-go. In addition to creating designs, users can also add notes to their designs. These notes can be used to provide additional information or context about the design.
To share notes from Canva Mobile App, users can follow these steps:
- Open the Canva Mobile App and navigate to the design with the notes that you want to share.
- Tap on the “Share” button located at the bottom of the screen.
- Select the platform where you want to share the notes. Users can choose from various social media platforms, messaging apps, or email.
- Add a message to the notes to provide additional context to the recipient.
- Tap on the “Send” button to share the notes.
Sharing notes from Canva Mobile App is a great way to collaborate with others and get feedback on designs. By following these steps, users can easily share notes with others and get the feedback they need to improve their designs.
Troubleshooting Common Issues
If you are experiencing issues with seeing notes on the Canva mobile app, there are a few common problems that you may encounter. Here are some troubleshooting tips to help you resolve these issues:
Note Visibility Issues
If you are having trouble seeing notes on your Canva mobile app, the first thing to check is whether or not the notes are visible on the desktop version of Canva. If the notes are visible on the desktop version, but not on the mobile app, then the issue may be with your mobile device.
One common issue is that the notes may be hidden behind other elements on the design. To check if this is the case, try zooming out on the design to see if the notes become visible. If the notes are still not visible, try closing and reopening the app to see if that resolves the issue.
Syncing Issues
If you are having trouble syncing notes between the desktop version of Canva and the mobile app, there are a few things to check. First, make sure that you are logged in to the same account on both the desktop and mobile versions of Canva. If you are logged in to different accounts, the notes may not sync correctly.
Another common issue is that the notes may not be syncing due to a poor internet connection. Check that you have a strong internet connection on both the desktop and mobile versions of Canva. If your internet connection is weak, try moving closer to your router or connecting to a different Wi-Fi network.
If you are still experiencing issues with syncing notes, try logging out of both the desktop and mobile versions of Canva, and then logging back in. This can sometimes help to resolve syncing issues.
Additional Resources and Help
Canva has a dedicated help center that provides step-by-step guides, articles, and resources to help users navigate through the app. Users can access the help center by clicking on the “Help” button located on the bottom right corner of the app.
In addition to the help center, Canva offers a Design School section where users can take courses to improve their design skills. The Canva on your mobile course is particularly helpful for users who want to learn more about using the app on their mobile devices.
Users can also reach out to Canva’s support team for additional help. The support team is available 24/7 and can be reached through the “Contact Us” form on the Canva website.
Overall, Canva provides a wealth of resources and support options for users who need help with the app. By taking advantage of these resources, users can learn how to use Canva to its fullest potential and create stunning designs on their mobile devices.
IMAGES
VIDEO
COMMENTS
Choosing the presenter view opens two windows. Audience window: shows the design in standard view. Presenter window: displays page notes and the upcoming slides. Moving the slides on the presenter window will reflect on the audience window. Page Notes can now be resized, and an Edit button has been added to prevent accidental editing.
Design, present, inspire with Canva Presentations. Reimagine Presentations with cinematic visuals that captivate your audience - no matter how or where you're presenting. With features to collaborate smarter, create stunning data visualizations, and deliver confidently, Canva Presentations bring impact to your ideas. Create a presentation.
Use the same 'banner' or title font throughout your design. Have the same 'frame' or 'grid' throughout your design. Apply the same background throughout your design. Use consistent fonts. 2. Work smarter, not harder. Create a template page for your presentation to keep all the points above about consistency in line.
To view your slides and notes while presenting, you need to use Canva's Presenter View. Here's how: Click on the "Present" button in the top right of the editor. Select "Presenter View" from the dropdown menu. Two windows will open: Audience view: Shows slides in standard view. Presenter view: Displays notes and upcoming slides.
With Canva, adding presenter notes is a breeze. To add presenter notes in Canva, users can simply open their presentation and click on the "Presenter View" button. This will open a new window that displays the presentation in standard view, while the presenter view displays page notes and upcoming slides.
. 🎨 Canva - How I Design Animations & Thumbnails - https://partner.canva.com/JustAsk🚀 VidIQ - How I optimize my YouTube videos - https://vidiq.com/JustAskM...
Drumroll : Add a drumroll before a slide by pressing the key 'D' before a big reveal. Confetti : Add a shower of confetti to celebrate something with the key 'C'. Countdown : Add a countdown from '1-9' by pressing one of the keys. Quiet : Bring a 🤫 emoji to screen to hush your audience with the 'Q' key.
One of the last things that you'll want to add to your page is your presentation notes. Notes are not required, of course, but they can help you remember what you're going to say, especially if you're presenting in front of a group. To add notes in Canva, go to the top right-hand corner of your page and click on the Add notes icon, seen here in ...
In this video, I'm going to show you everything you need to know about Notes in Canva, from how to add them to how to see them.Notes in Canva are a powerful ...
Method 2: Use the Add Comment Tool. The easiest way to add simple notes is using the "Add comment" tool. This allows you to insert notes directly on specific slides: Click on the "Add comment" icon in the upper right corner of the editor. It looks like a speech bubble. A pop-up will appear where you can type your note.
You can create your presentations in Canva and download your notes as a PDF to help you present with confidence to your audience. This video will show you ho...
Step 1: Open a slide in your Canva presentation. Step 2: Select Elements from the sidebar. Add graphics, icons, stickers, tables, videos, and more. Step 3: You can explore the AI image generator ...
Open your presentation and select a slide. In the left sidebar, toggle on the switch for Speaker Notes to open the notes panel below the slide. Type your notes for that slide into the notes panel. The notes will automatically save. Repeat for each slide that needs notes.
On the Canva home page, select Presentations below the Search bar. Then, choose a slideshow size or Canva presentation template to get started. Note: If you're using Canva Docs, you can also convert your document to a presentation by selecting Convert at the top. Follow the prompts, and you'll see your presentation open in the Canva editor.
Step 3 - Print the Notes in your Canva Presentation. Once you have added all of your notes to the template, you can download the file as a PDF and include the notes for printing. Click on the Share button in the top right-hand corner to open the menu options. Next, click on the Download button. Download options will be available in various file ...
Consider the paper size when printing your Canva presentation with notes. If you have a lot of content in the notes section, choose a larger paper size, such as A4 or letter, to ensure that the notes are not cramped and remain legible. 4. Use High-Quality Paper. Invest in high-quality paper for printing your presentation with notes.
Presenting your design. Easily present your reports, pitch decks, and more. Computer. Mobile. On the editor menu bar, click Present. If you don't see it, click on Share first, and then look for the Present option. Select a presentation type from the options. Learn more about the different presentation modes. Click Present.
To print your notes in Canva Presentation, first open the presentation you want to print. Click the "Notes" icon in the bottom left corner of the screen. A new window will open with your notes. From here, you can print your notes by clicking the "File" menu and selecting "Print". Make sure to select "Notes" in the print settings ...
Free lessons, worksheets and templates, just for educators. Integrate Canva with your learning management system. Hear how others deliver creative and collaborative learning. Inspire future generations with the power of design. Create and publish your own resources on Canva and earn by sharing.
To include notes in the printout, the user needs to select the option "Print speaker notes" in the print dialog box. This will ensure that the notes are printed along with the presentation slides. Alternatively, the user can use keyboard shortcuts "Ctrl+P" (Windows) or "Command+P" (Mac) to directly open the print dialog box.
Open the Canva Mobile App on your phone. Select the design with the notes you want to edit. Tap on the "Presenter View" button located at the bottom of the screen. Swipe left or right to navigate between slides. Tap on the "Edit" button located at the top right corner of the screen. Edit the notes as desired.
Save or print a copy of your design with your notes by downloading them as a PDF. Computer. Mobile. Open the design you want to download. Above the editor, click Share, and select Download. Select PDF Standard or PDF Print from the dropdown. Check Include notes to tick the checkbox. Click Download. If you used paid elements, click Pay and Download.
Create and publish your own resources on Canva and earn by sharing. For anyone to design anything, on their own or with family, friends, or others. No experience required. For individuals wanting unlimited access to premium content and design tools. Collaborate in teams of all sizes and scale your brand with ease.