- Skip to main content
- Skip to primary sidebar
- Skip to footer

Additional menu
FreshSpectrum - Data Visualization Made Easy
Learn how you can use simple methods and tools, like Canva, Flourish, and Datawrapper, to improve your data communication skills.

How to design a research poster using Canva
Today’s post is about designing research poster presentations using Canva. Even if you’ve never created a research poster in your life, I think this post can really help you get a solid jump on your next design.
Because ready or not, it’s happening. After a long COVID-19 break, a bunch of evaluation conferences are going to be live again. And with live conferences you also get actual live presentations. And you also get those big poster presentation nights.
In this post:
- I’ll show you how to create a research poster, including a new approach I really appreciate.
- Grid based design and why planning your poster in content blocks is a good idea.
- A bunch of alternative poster styles that use the same underlying grid.
- Free research poster Canva templates, and some tools to help you design your next poster.

The research poster presentation mindset.
So imagine yourself in a room standing in front of a research poster surrounded by people just like you. The attendees at the session might be holding drinks and are continuously running into old friends. Some glance at your work and keep right on walking. Others might ask you a question or two as they peruse your poster.
And there you are, standing in front of your poster that you’ve agonized over. The one you had to carry in a big tube through a crowded airport and then inside a crowded airport shuttle.
A research poster isn’t some stand alone document or social media infographic. It’s your wingman. Your partner in crime. It stays by your side, supporting the communication of your work. A better poster design won’t just help you communicate, it can also make your time in that room feel a little less awkward.
The usual approach to research poster design.

Most research posters tend to just be adaptations of a research paper. As such, a lot of academics will simply take their paper title and put it at the top of the research poster. They will then create sections on the poster that mirror the sections in their paper.
Ultimately they end up with a research poster outline that looks just like a research paper outline. This is definitely not my preferred approach to research poster design. But if this is the way that you decide to create your poster, at least take some basic steps to ensure it’s readable.
Years ago, Stephanie Evergreen and Chris Metzner created a quick little guide on how to design a research poster for the American Evaluation Association’s Potent Presentations Initiative. Definitely check it out . Especially if you just want to polish a poster you’ve already created.
How to create a better research poster in less time.
I really like the poster approach outlined by Mike Morrison .
The gist, if you don’t feel like watching the video, is that research posters should be designed more like billboards than infographics.
Because during a poster session there is a lot of competing information. So instead of trying to capture and retain the attention of just a few attendees, focus on sharing a very specific point to a lot of attendees. And then use a QR code to link to the full paper and other more in-depth information.
What is the standard size for a research poster?
Okay this is kind of a trick question. There are standardish sizes, but the people who decide on the size are almost always the ones putting on the conference.
In the past at least, the American Evaluation Association has required a square 44 inch by 44 inch design. Other common sizes include 36 inch tall by 48 inch wide and 42 inch tall by 56 inch wide.
But before you start designing, always check the specific conference’s website and follow their design guidelines.
A research poster design process using Canva.
So for my research poster designs I’m going to use Canva.com .

Instead of starting with a base template, we’ll just click on the “Create a design” and click custom size. I’ll be creating a square 48 inch by 48 inch poster.

Designing research posters with a Grid.
Research posters pose a layout challenge. Everyone gets the same amount of space, you just have to choose how you will use that space.
I’ve created a couple of basic grids to use with my 48 inch square research poster. The grids themselves are just a series of square shapes.
A 3 by 3 grid is going to give me 9 total blocks.

A 4 by 4 grid is going to give me 16 total blocks.

The more blocks you have, the more flexibility you have in your design. But it also increases the complexity. Just remember that there is still a lot that you can do even with the simplest grids.
Using content blocks to design your research poster.
I like to consider each square in my grid as a content block. I can order my overall design by changing the colors of individual blocks, or by deleting them.
Let’s say I want to create a large 2 block by 2 block panel for my big message. I just delete those four blocks in the upper left corner.

Now I can start designing by adding content.

Since I’m not at the point where I have the content all figured out, I can either fake some content or use some Lorem Ipsum filler text. There are some fun ones on the web you can find with a Google search. For my templates I’m using some filler text from Office Ipsum .

What size font should I use on my research poster?
I’ve seen some guidance that you should use at least 24 pt fonts. I usually bump it up a bit more.
I’ll use a body font, one or two sub heading fonts, and a large main message font. For me that ended up being 32 pt, 48 pt, 64 pt, and 128 pt. I also just used Open Sans (as it’s a really versatile font and I plan to just share out the templates).
Research poster examples.
Okay, so now I’m just going to play around with the grids and different content types. None of this from a real presentation, but I think you’ll see the utility.
Let’s start with the 3 by 3 grid.
This one is really simple, it uses 4 blocks for the big message content in the top left. It uses 2 blocks for the sidebar 1, 2, 3, content. And it uses the final bottom three blocks to expand on the image.

Here is an alternative. It uses the same amount of content, but the order is switched around. I also added a different visual element to highlight the message in the middle.

Here is a third alternative. It uses a little less content (The 1,2,3 sidebar is reduced by about 225 words) but uses a big of negative space and color to make the big message stand out.

There is no perfect one way to create any design. Try different things out, pick the one you prefer. Each orientation will likely change the way the information is perceived at least a little, even with the same content. If you don’t trust your eye, ask others for their insight. But just remember that everyone’s taste is a bit different.
Now let’s play with the 4 by 4 grid.
So with the 4 by 4 grid I’m just going to use a lot of made up text and images. I just want you to get a sense of how this works, and the kinds of things that you can do.
In this example we use a series of charts (small multiple). This let’s you share a lot of data but still make it easy to understand. Each chart and caption sentence uses 1 content block (out of 16). I used the two in the upper left for the big point. I used the two in the upper right for an image and the signature content.

Sometimes you’ll have a lot more text to share. This entire fairly word heavy research poster is still under 1,000 words. If you push your word counts too high, you’re going to start making your poster super wonky.

Perhaps you are more a qualitative evaluator or researcher. The design process here is similar to designing a photo collage or scrapbook. You’re basically just mixing pictures and quotes.
For this poster, the middle section takes up 4 blocks. Then there are 6 picture blocks and 6 text blocks. Each text block has just over 100 words (including the subtitle).

Finally, sometimes you just want to make a big point and shout it across the room. In this example I increased the font size to 250. We still have some smaller 100 word blocks on the bottom, but this poster is really designed to deliver a big point then lead your audience an external document or website.

Research poster templates.
So do you want all the Canva templates I shared in this post? Including the 3 by 3 and 4 by 4 grids You can get access to them here :

Want the PowerPoint Research Poster Templates Instead?
Since I used a few premium Canva stock images I didn’t feel comfortable sharing the Power Power Templates. But here is the thing. All you have to do is go into Canva and save the set as a Microsoft PowerPoint.
If you don’t have Canva premium just switch out any premium stock photos before you download. This will make it a free download and not violate Canva’s terms.

Design tools that can help support the research poster design process.
Canva stock icons.
Canva has an integrated icon library. There are millions of icons which you can check out here .
Canva Images
Canva has an integrated stock photo library. You can also peruse the stock images here .
Canva Color Wheel
I wrote a whole post the other week on Color featuring a bunch of Canva tools . If you don’t already have colors set before you start your design, I suggest you check it out.
Canva Presentation Templates
Lots of research poster presentations also require handouts. Why not try making a simple slidedoc to go alongside your poster? Just use a Canva Presentation Template but add a bit more text. Enough that the person with the handout can read through without having you there to explain everything.
QR Code Monkey
Need to create a QR code for your poster? Here is a nice free site > qrcode-monkey.com

Data Visualization Made Easy
Join my newsletter to get access to articles and resources on how you can use simple methods and tools, like Canva, Flourish, and Datawrapper, to improve your data communication skills.
Canva for Academic Presentations and Posters: Creating a Scientific Poster with Canva
- Getting Started
- Basic Editing
- Additional (Fun) Tips and Tricks
- Creating a Scientific Poster with Canva
Using Canva to Create a Scientific Poster
Canva is an excellent option for creating posters for presenting scientific research. To create a poster:
- Log into Canva ( www.canva.com ). See the "Getting Started" tab for information on setting up an account.
- Click Create a Design .
- In the search bar, type " poster ." Select the size you need. Keep in mind that landscape (where the width is greater than the height) is better for posters that will be viewed online.
- If you need to, you can resize your poster by clicking the Resize button in the upper left. (NOTE: if you are presenting your poster at a conference, check the required dimensions before starting your project.).
- Use a design template (by browsing through them using the search button) OR start with a blank design .
- If you have a lot of charts and graphs, you might want to start with a blank design.
- Add text, elements, and graphics. Drag them around to arrange them on the poster. As you drag items around, the system shows gridlines to help you align elements.
- Keep in mind that the size of your poster will be much bigger than your screen. Slide the percentage bar at the bottom right to 100% to zoom into full size. The text should be large enough to read from 5 feet away .
- You can print your poster through Canva, or download it to a PNG file and have it printed elsewhere.

YouTube Video
This YouTube video gives a great overview of using Canva to create a scientific poster.
Additional Instruction
- How to Design a Research Poster Using Canva (Chris Lysy)
- Designing Your Poster in Canva (Canva Design School)
- << Previous: Additional (Fun) Tips and Tricks
- Last Updated: Jan 30, 2024 1:22 PM
- URL: https://uscmed.sc.libguides.com/CanvaForPresentations
We explain and teach technology, solve tech problems and help you make gadget buying decisions.
How to Create Presentations in Canva
Canva recently introduced new tools to create docs, whiteboards, videos, websites, and presentations. As such, you no longer need to rely on traditional software solutions like Google Slides, PowerPoint, or Keynote to create an upcoming business presentation. You can easily create presentations in Canva using its familiar suite of editing tools.

Canva offers real-time collaboration, several export options, a present tool, AI add-ons, and much more to make a professional PPT. Canva also lets you make instant presentations with pre-filed slides. Without further ado, let’s get started.
Pick Up an Aspect Ratio and Template
Before you start, make sure to pick a relevant aspect ratio for your presentation. If it’s a traditional PPT, go with a 16:9 aspect ratio. If you plan to show your PPT on mobile, use the 9:16 aspect ratio.
Tablet users can start with a 4:3 aspect ratio. Canva also offers some ready-to-use templates to get started. We highly recommend starting with a template to save some time.

You can also filter templates via style, theme, feature, and color. For example, you can check company, marketing, corporate, marketing, school, and other templates. Most templates are free to use, while some may require a Canva Premium subscription.
Under templates, you also find an option to create instant presentations. You can enter a prompt and check Canva’s suggestions to get started.

Customize a Page With Editing Features
Once you pick up a template, you have the option to add all pages to your presentations. You can click ‘Apply all pages’ and check every slide at the bottom. You can always select a slide and hit delete to remove it from your presentation.

Canva lets you change every aspect of the template with different text styles, filters, and image editing tools. You can change color, tweak transparency, copy style, and more.

We suggest spending some time with editing tools to customize your Canva presentation and add some personal touches.
Add Graphics, Stickers, and Images
Your presentation will not seem as interesting without graphics, stickers, images, and videos. Unlike Google Slides or PowerPoint, you don’t need to import media files to Canva to complete your slides. You can easily add relevant elements from the sidebar.
Step 1: Open a slide in your Canva presentation.
Step 2: Select Elements from the sidebar. Add graphics, icons, stickers, tables, videos, and more.
Step 3: You can explore the AI image generator and turn your creative ideas into images and videos with a single click.

You can add simple descriptions and even turn generated images into videos. Canva also offers a long list of graphics packs in several categories. The possibilities are endless here. It’s up to you to make a compelling slide using useful tools.
Tweak Page Animation
Once you create a page, tweak its animation to make a smooth transition between pages.
Step 1: Select a slide in Canva.
Step 2: Click Animate at the top.
Step 3: Check basic, exaggerated, photo movement, and other animation types from the left sidebar.

You can also tweak the animation intensity, which is great.
Add Presenter Notes
Do you plan to present your Canva PPT on a video conference? You can add notes to each slide so they appear during the Presenter view (more on that later).
When you create a PPT, select a slide and hit Notes at the bottom. Enter your notes that you want to remember or talk about during a video meeting.

Collaborate and Edit in Real Time
Similar to Google Slides and Microsoft PowerPoint, Canva lets you share and edit a presentation in real time. You can take inputs from your colleagues and create a share-worthy presentation in no time.
Step 1: When you are done making changes to your presentation, click Share at the top.
Step 2: Enter people, groups, or your team. Expand the collaboration link menu and select Anyone with the link.
Step 3: Expand the permission menu and select Can edit.

You can also share a link with view or comment-only permission. Select the Copy link and share it with your co-workers.
Enable Presenter View
Presenter view is a thoughtful touch from Canva to give presentations over a Google Meet or Teams call.
You can open a presentation in Canva and select Present at the top. Click Presenter View and check two windows opening up on your computer.

One window shows your presentation with notes open on the sidebar. Another window displays the current slide you are sharing with others over a call.

Download and Share Your Presentation
As expected, Canva gives several options to share and export your presentation. When you complete your presentation, click Share in the top-right corner and expand Download.
You can convert a presentation to PDF, PPTX (Microsoft PowerPoint compatible), MP4, JPG, PNG and SVG formats. Check our dedicated post if you wish to print your Canva presentation .

Use Canva Like a Pro
Canva has done a solid job, granting users access to rich tools to create a convincing presentation. We can’t wait to see how the Australian startup enhances our PPT experience with AI features in the future. Speaking of which, we would love to see a feature similar to ‘Design Ideas from Microsoft PowerPoint’ on Canva. Do let us know if you use Canva for presentations in the comments below.
Last updated on 07 January, 2024
The above article may contain affiliate links which help support Guiding Tech. However, it does not affect our editorial integrity. The content remains unbiased and authentic.

DID YOU KNOW

Parth Shah is an evergreen freelance writer covering how-tos, app guides, comparisons, listicles, and troubleshooting guides on Android, iOS, Windows, Mac, and smart TV platforms. He has over five years of experience and has covered 1,500+ articles on GuidingTech and Android Police. In his free time, you will see him binge-watching Netflix shows, reading books, and traveling.
More in Internet and Social

How to Change the Author Name for Comments in Adobe Acrobat

How to Use Director Mode on Snapchat
Join the newsletter.
Get Guiding Tech articles delivered to your inbox.
Home Blog Design How to Use Canva and PowerPoint for Presentations
How to Use Canva and PowerPoint for Presentations

Creating the perfect presentation design is a challenge that speakers often aim to achieve, only to find themselves lacking graphic design knowledge. Although high-tier options like Adobe Photoshop and Adobe Illustrator help users worldwide to put their ideas into pixels, the reality is they are not user-friendly interfaces for people outside the graphic design industry, namely business professionals, marketers, and educators. Hence, the need to find an alternative for making powerful graphics to use in our presentations – and here’s where Canva comes into the picture.
This web-based graphic design tool has quickly become the preferred choice of teachers, social media influencers, and small business owners due to its free-tier plans and pro plans at a convenient subscription-based fee.
In this article, we will see how to use Canva presentation in PowerPoint and how to export Canva to PPT, to create visually appealing presentations.
Table of Contents
Canva vs. Microsoft PowerPoint: Pros and Cons for Presenters
Designing with canva, how to export a canva presentation to powerpoint, how to use canva-made graphics in powerpoint, final words.
Although presenters often see Canva as an alternative to PowerPoint, the reality is that they differ in one single aspect: Canva is a graphic design tool, whereas PowerPoint is a presentation design software. Some of the tools available in PowerPoint are not there in Canva, and vice versa.

Going into more technical aspects, here are the Pros and Cons of working with either software as a presenter.
Pros of Canva as a Presentation Tool
User-friendly interface.
Canva’s drag-and-drop feature makes it easy for non-designers to create presentations by using its library of shapes, graphics, text styles, and other resources.
Wide Range of Templates
It offers a vast library of Canva templates, which can be easily customized in their online editor, saving time on design. There’s a con associated with this point, which we shall discuss later.
Magic Studio for Canva was released mid-Q3 this year with the idea of powering designs with AI tools. This tool is available in Canva search features and in the editor at the bottom right corner, which features the list options:
- AI text generation
- Suggested graphics to match your design
- Suggested photos to match your design
Collaboration Feature
Allows multiple users to simultaneously work on the same presentation, which is great for small team projects. Compared with PowerPoint, it does not require all users to be Premium to collaborate online.
Web-Based Platform
Being an online platform, it allows users to work from any device with Internet access without needing software installation. This particularly helps users with legacy computers who cannot install current versions of Microsoft Office.
Integrated Stock Library
Provides access to a broad selection of stock photos, illustrations, and icons within the platform. Just like with the Canva templates, there’s also a con to this point.
Customization Options
Users can upload images and fonts, enabling brand consistency across presentations. Note: The upload fonts feature is only available for Canva Pro users.
Photo Editing and Animation Features
Canva lets users tweak their graphics with simple-to-use controls. These options help us to adjust opacity, apply photo filters, add animation effects, add bevels and shadows, and more.
Cross-Platform Compatibility
Can export presentations to various formats (as a PDF document, as a video presentation in MP4 format, or even as images), making them viewable on different devices and platforms. The export options allow us to post directly into social media, create printables, post to the web, etc. While some export formats require an upgrade to a Canva Pro subscription (like the ability to export to SVG format), the basic export features are enough for simple presentations and beginners.
Cons of Canva as a Presentation Tool
Limited offline functionality.
Requires an internet connection for full functionality, which can be a limitation in areas with poor connectivity, for business people working on an airline flight, while using Airplane mode, or for people traveling in other zones without Internet access.
Fewer Animation and Transition Options
Unlike PowerPoint, the available options for animations and transitions are limited. Users can find this reiterative, which may be unappealing to using these effects in our presentations.
Premium Content
Although the Canva library is extensive in terms of assets, the reality is that most of these elements are only available for premium users. This applies to templates, shapes, images (mostly), and exporting options. Resizing the graphics you create in Canva to repurpose your design is only available to premium users.
Template Overuse
Popular templates can be overused, making presentations look similar to many others. This is of particular interest to business professionals, as people tend to easily associate some designs as being made with Canva.
Design Decisions
Unlike using a PowerPoint template , you have to work your way with Canva content, as the PPT templates tend to be quite generic and do not offer tools for data representation. Consequently, you have to know how and where to introduce those elements on your own rather than working with a presentation template that already assigned the space for such graphics.
Lack of Advanced Multimedia Integration
Integrating complex multimedia elements like videos is not as seamless as in some desktop applications. You won’t find options to link to source elements; you need to upload the content to your personal Canva library and manually add the resource to the slide. Presenters can also lose third-party integrations via plugins for some multimedia resources.
Pros of PowerPoint as a Presentation Tool
Widespread use and familiarity.
PowerPoint is the leading market tool for presentations, making most audiences and presenters are familiar with it at a basic operational level. This can help us to outsource technical issues quickly rather than aiming to use web-based interfaces to share Canva-created content.
Offline Access
PowerPoint can be used offline, which is ideal for people traveling, areas where the Internet connection is unreliable, or simply because we want to focus on creating the slides rather than facing distractions via the Internet.
Integration with Other Microsoft Office Tools
Seamlessly integrates with other Microsoft products like Excel and Word, making it easy to import data and documents. This is ideal for creating complex graphics for data representation, where the content can be synced, importing databases, working with Gantt Charts in software like Microsoft Project, and more.
Also, Microsoft PowerPoint has the same text editing capabilities as Microsoft Word – a striking contrast with Canva’s limited features.
Templates and Design Options
This is PowerPoint’s forte: the capability of using third-party presentation templates, like the ones provided by SlideModel . Users can buy pre-designed slide decks from professional vendors and ease the need to make design-related decisions. On top of that, Microsoft already includes some basic templates with its 365 subscription.
Advanced Features
Offers a broad range of features, including detailed animations and transitions, which can enhance presentations. For example, the ability to work with SVG graphics allows presentation designers to make pixel-perfect presentations without losing image quality. This is available to all users, unlike Canva, which requires a subscription to unlock certain elements.
Multimedia Capabilities
Supports embedding of various multimedia elements like audio, video, and images directly into presentations. You can use hyperlinks to embed content or work with third-party plugins for specific tasks.
Extensive Support and Resources
As a long-established tool, users can find tutorials everywhere, support communities, and additional resources available online.
Cons of PowerPoint for Presenters
Some features can be complex to use, and the interface may be overwhelming for new users. In particular, this is linked to editing PowerPoint Shapes and graphs, working with Slide Master , applying advanced animation effects and so on.
Unlike Canva or Google Slides, PowerPoint requires purchasing Office 365 or a standalone license.
Heavy Files
PowerPoint files, especially those with multimedia content, can become large and difficult to share via email. As a side effect, those heavy files can be complicated to handle in computers that lack sufficient RAM and processing power. Moreover, they require significant free disk space on your PC.
Time-Consuming
Creating a high-quality presentation with custom animations and graphics can be time-consuming. That’s the reason why we highly recommend users work their way with PowerPoint templates, and mix and match designs to create a unique slide deck .
Learning Curve
Users need to invest time in learning the software to fully utilize its advanced features. This applies to both acquiring the knowledge and practicing the skills you learned. And still, for some users, it feels frustrating not to achieve results relatively quickly.
In this section, we will learn how to use Canva to create graphics for a product presentation. The idea is to create placeholder graphics containing images of a product; then, we will export that content to continue creating our presentation in PowerPoint.
After creating our Canva account, we find ourselves at the Home screen. Go to Templates, and you will see something similar to this UI.

We can go straight to the Presentations (16:9) option or use the search bar to locate the template we want. In this case, we will opt for that scenario and search “Product.”
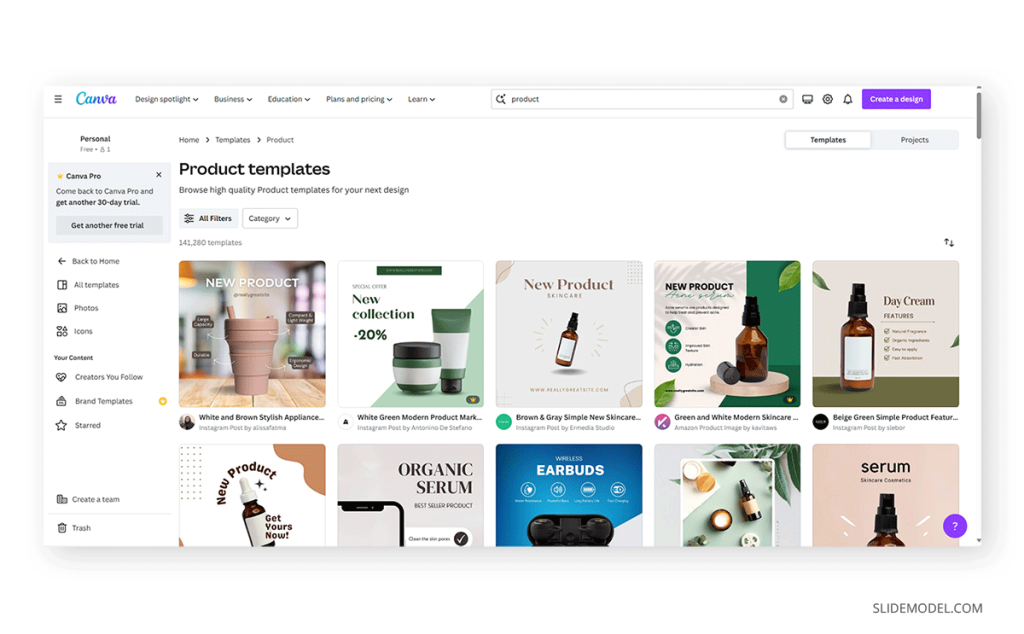
The images that show a little crown at the low right corner are premium templates, which means we cannot use them with a free account. We will pick a template that fits the needs of our presentation by clicking over it. At the contextual window that opens, select Customize this template .

The Canva builder may take a bit to load, especially if your internet connection is slow. You will find yourself with a window like this one, opened at the Design tab, which offers alternatives for other templates similar to the one you chose.

The Styles tab allows us to quickly change the layout, altering color themes and fonts. Sometimes, that can suit our needs immediately; sometimes, it requires extra work to customize to our preferences.

We can click on any element in this design and customize its content. Depending on the element type, the options are available for us. For this presentation, we will change the text and images, and alter font color at the button to make it stand out.

Next, it’s time to replace the images. We can drag and drop the image into Canva, or we can go to the Uploads button and add the content from there.

In this case, we’re using DALL-E-generated images for this product presentation, you can also use illustrations, photos, videos, or Midjourney illustrations . Once the images are uploaded, drag and drop them to replace the images in the placeholder areas. To complete this design, we removed the shape that came with the template – you can add a new shape by going to Elements > Graphics .

Learning how to use Canva for PowerPoint is pretty straightforward. Download your Canva design as a PowerPoint presentation, which you can do by accessing your design and going to the top-right corner to locate the button Share . Click on it, and then click on Download .
Under File Type , we will select PPTX , as it’s PowerPoint’s native format. Click on Download , and wait for the process of downloading the file to be completed. Depending on the graphic assets included, it can take a while.

At this point, don’t be surprised if you’ll be prompted to upgrade your Canva plan (if you don’t have a premium account). The reason is that Canva will charge you for exporting what they call premium graphics, and since most of the Canva presentation templates use premium graphics, this will be a limitation when exporting your Canva slides to PowerPoint.
A simple workaround is removing the premium graphics before exporting from Canva to PowerPoint. Although, take in mind this may affect the overall design of your presentation.
As you can see below, the PowerPoint file is entirely editable. Something to consider is that unless you have the font installed on your computer, PowerPoint will reassign to a generic font.

Remember the design we created before? Well, it’s time to use that image as part of a marketing deck presentation , which will represent a social media post to be used by the marketing team to promote the brand.
The first step is to download the design we created as PNG. We can close Canva after that.

We opened our PPT template, which is the Annual Marketing Plan PowerPoint Template , and customized the PowerPoint theme colors . Go to Insert > Pictures > This Device .

Select the image we created in Canva and upload it here. We will add some image shadow effects via Shape Format, and a textbox below that describes what the image is about.

And that’s how easily we can use graphics from Canva in our PowerPoint presentations. Remember, it’s best to work with PNG images rather than JPG to reduce file size and preserve image quality.
You can invite others to collaborate on your design by sharing a link to the editable design or by adding them via email as team members on your Canva account.
Canva uses standard cloud storage security measures to protect your data, but like any online platform, it’s important to use a strong password and follow good security practices.
There are two methods for this. You can upload a PPT template into Canva via the Canva Homepage by clicking on Projects , and then go to the Uploads folder. Drag and drop or click on Upload, as we’ve seen before. Once imported, you must click on that file to open it in the Canva editor. The second method is on the editor: go to the Uploads button and upload your PPT file as if it were an image or another media asset.
Yes, you can use SlideModel presentation templates in Canva. As a SlideModel subscriber, you can download .pptx files to import into Canva presentations. This way, you can enjoy the creative slide templates and graphics provided by SlideModel in your Canva presentations
Unfortunately, no, as Canva doesn’t have the same toolset to enable editing functions. That also applies to changing color, so we highly recommend you work with a final PPT file before switching to Canva.
Objects like charts, SmartArt, 3D objects, and WordArt aren’t supported in Canva and won’t be rendered if you upload a slide that contains them.
Yes, all users can download Canva presentations to PPTX format. In case the original Canva design isn’t a presentation file, like a banner or social media post, you won’t be able to resize for that output unless you have a premium account.
Yes, the file must be smaller than 70 MB, and you can import up to 300 slides.
Canva and PowerPoint can collaborate as complementary tools to help presenters overcome the limitations of each individual tool. It takes a while to create your desired workflow, but once that’s accomplished, you can elevate the quality of your PowerPoint or Google Slides presentations with Canva.
We don’t advise using Canva as an alternative to PowerPoint as the current state-of-the-art indicates it won’t support data representation or other PowerPoint stellar tools that make part of most PPT templates.

Like this article? Please share
Design, Microsoft PowerPoint Filed under Design
Related Articles

Filed under PowerPoint Tutorials • March 26th, 2024
How to Translate in PowerPoint
Unlock the experience of PowerPoint translation! Learn methods, tools, and expert tips for smooth Spanish conversions. Make your presentations global.

Filed under PowerPoint Tutorials • March 19th, 2024
How to Change Line Spacing in PowerPoint
Adjust text formatting by learning how to change line spacing in PowerPoint. Instructions for paragraph indenting included.

Filed under PowerPoint Tutorials • March 15th, 2024
How to Group in PowerPoint
Organize your slides’ content efficiently by mastering how to group in PowerPoint. 3 different approaches to grouping and ungrouping elements.
Leave a Reply

How to Print from Canva Yourself or With A Service [2024]
Canva is the most popular freemium online graphic design tool out there. Despite being (humorously?) seen as inferior to “real” graphic-design software like Photoshop , it offers a vast array of image and video editing options that include presentations, social media posts, poster design, AI image generation , and more.
While most print their designs by simply downloading it locally and using their printer, what many don’t know is that Canva offers a special custom print service. That’s why today, we’ll be taking a closer look at how you can print on Canva and the precise nuances of either option.
Table of Contents
Methods of printing with canva, ⤷ printing on windows, ⤷ printing on macos, 2. printing using canva’s special service, printing yourself vs. printing with canva (or other services), showcase your finest works.
If we were to break down printing on Canva at the top-most level, there is only one divide. Hence, there are 2 methods of printing with Canva:
- Printing using your device’s built-in app
- Printing using Canva’s special printing service
1. Printing using your device’s built-in application
A method that has been used ever since printing became commonplace, this involves downloading the design you created in Canva and printing it using the built-in application on your device. We’ll be addressing Windows and macOS devices in particular.
But first, here’s how to create and download your design on Canva on to your device:
Head on over to Canva . Start your new project by clicking on any one of the options present on the site.
Now, create a design of your liking. Try out all kinds of tools from the sidebar.
Once you’re done and ready to print, click on the Share button on the top-right corner of the screen.
A drop-down menu will appear. Click on Download .
Next, the Download menu will appear. Click on the File type drop-down and choose PDF Print from the options.
Then, configure the settings given below the File type drop-down.
⤷ Crop marks and bleed : Used to highlight the parts you intend to cut out after printing.
⤷ Flatten PDF : Places all the elements of your design in a single layer, preventing it from being edited and allowing for a smoother printing process.
⤷ Include notes : Downloads the notes you’ve made under page along with your design.
We suggest leaving these options disabled. Except for the Flatten PDF option.
Next, select your desired Color Profile by clicking on the drop-down.
⤷ RGB : This is suited for digital previews, like in presentations.
⤷ CMYK : This is much better suited for printing, as it has more prioritizes 4 different colors and is able to produce more vibrant colors
If you want to save these settings by clicking on the Save download settings checkbox. Click on Download .
Your design will be downloaded.
Some of these features may require you to have Canva’s paid plan . Anyways, now that the design has been downloaded, all that’s left is to print it.
Open up the File Explorer and navigate to your Downloads folder. Double-click on the downloaded design to open it.
By default, the PDF file should open up on Microsoft Edge . Click on the printer icon to open up the Print menu.
The Print menu will appear. Choose your printer from the Printer drop-down.
Click on More settings and make the required changes as per your specifications.
After you’re done making the required changes, click on Print .
Open up the PDF file you downloaded by just double-clicking on it in the Finder.
After that, click on the File option in the menu bar and from the drop-down menu, choose the Print option.
Make the changes based on your specifications.
Once you do that, click the Print button to start printing your design.
Canva also offers a paid printing service for professional prints for all kinds of things: yard signs, banners, water bottles, mugs, clothes, etc. This way you can technically just hand over your design to Canva themselves to print it for you. However, this feature is only available in select regions and the options can also vary on the region.
PRO TIP: If the issue is with your computer or a laptop/notebook you should try using Fortect Repair which can scan the repositories and replace corrupt and missing files. This works in most cases, where the issue is originated due to a system corruption. You can download Fortect by Clicking Here
To have Canva print your design, follow these steps:
After you’ve created a design, click on File near the top-left corner.
When the drop-down appears, bring your cursor over to View settings . From the additional options that appear, choose whether you want to enable these settings.
⤷ Show print bleed: Shows the part of the design that will be printed on the edges
⤷ Show margins: Shows the part of the design that is sure to be displayed in the print.
We suggest using these options to ensure that your print comes out as expected. These lines will not be displayed on the final print.
Next, click on Share on the top-right corner.
A drop-down menu should appear. Click on Print with Canva .
A variety of options will be made available for you. Choose what you want your design to be printed on by clicking on it.
If your design does not satisfy the required size for that object, this message will be displayed to you.
Once you’ve chosen your design, several options will be available for you. Depending on your choice, the options can differ. Adjust them according to your requirements. You can also see a preview of how the print will look.
The last option will be the amount of prints required. Click on How many? to adjust the amount.
Then, click on Continue .
If there are some problems present in your design, they will be pointed out to you. You can either fix them by yourself or click on the Automatically fix all issues switch to fix them automatically. Click on Continue to proceed.
Lastly, you’ll be taken to the checkout page. Enter your card details, home address, a coupon code (if you have one) and choose your delivery option. Finally, click on Place order .
After placing your order, you will receive an email confirmation message. You can also modify or cancel your order for 2 hours after placing it.
Printing by yourself is pretty common but when you want to get designs custom printed, things get a bit more complicated. You have to rely on third-party service s for this job and there’s no guarantee for whether the quality will be up to the mark or not. Canva is reliable and safe , with the best quality guaranteed. They also offer a refund or reprint, if contacted within 30 days after receiving the order.
Other services like PsPrint are also great options, which also offer professional prints for a wide range of options, while being trusted. However, the main disadvantage would be the limited design options. Since Canva is primarily a graphic design tool , you can create almost anything on it. However, services like PsPrint do not offer much in the way of designs, and rely upon you already having ready-made ones.
READ MORE: The Ultimate Guide to Designing and Printing Your Own T-Shirt at Home ➜
While it is a freemium service, it’s hard to believe that Canva offers so much even without its premium plan. Even their printing service is pretty affordable, and given the quality as per user reviews, well worth it. If you’re an artist or a graphic designer, we recommend using Canva’s print service to immortalize your best designs.
You have two options: download your Canva design and print it locally or use Canva’s print service for custom printing orders.
Delivery times vary: free shipping takes 1-2 weeks, standard delivery around a week, and express (business) shipping a few days.
PDFs retain formatting better than images and offer more options when it comes to printing, ensuring your final product looks as intended.
Canva stands out for its user-friendly interface and extensive customization options, unlike other services with limited design and customization capabilities.
The post How to Print from Canva Yourself or With A Service [2024] appeared first on Appuals .
 seen as inferior to “real” graphic-design software like Photoshop, it offers a vast array of image and video editing options that include presentations, social media posts, poster design, AI image generation, and more. While most print their designs by simply …")
- Popular products
- Discover all prints
- Canvas prints
- Acrylic prints
- Gallery prints
- Wall stickers
- Aluminium prints
- Wood prints
- Foam board prints
- Door stickers
- Door posters
- Colouring posters
- Gift vouchers
- New arrivals
- Bestsellers

Popular subjects
- Discover all posters
- Movie posters
- Black and white posters
- Quotes posters
- Bauhaus posters
- Pop art posters
- Line art posters
- Botany posters
- Animal posters
- Typography posters
- Exhibition Posters

- Discover all canvas prints
- Abstract art on canvas
- Africa canvas prints
- Landscapes on canvas
- New York canvas prints
- Canvas prints of paintings
- Canvas prints for the bedroom
- Canvas prints for the kitchen
- Living room canvas prints
- Watercolour canvas prints
- Nature canvas prints
- Black and white

- Discover more inspiration
- Bathroom wall art
- Vintage wall art
- Botanical prints
- Flower wall art
- Photography art prints
- Bedroom wall art
- Illustrations
- Nursery wall art
- Living room wall art
- Kitchen wall art
- Our favourites
- Wall calendars

- Popular artists
- New artists
- Discover all artists
- Vincent van Gogh
- Alfons Mucha
- William Morris
- Claude Monet
- Henri Rousseau
- Gustav Klimt
- Fox & Velvet
- Animal Kids Collection
- Joaquín Sorolla y Bastida
- Maxine Shore
- Walter Fröhlich
- HandsOffMyDinosaur
- Anthony Butera

Moscow Posters

Moscow City Street Map On Canvas by Michael Tompsett Print
See More by Trademark Fine Art
Rated 0 out of 5 stars.

Select Size:
Not Selected
19" H x 14" W x 2" D
24" H x 18" W x 2" D
32" H x 24" W x 2" D
47" H x 35" W x 2" D
Product Overview

Artist: Michael Tompsett
Description
- Made in the USA
Weights & Dimensions
Size: 19" h x 14" w x 2" d, size: 47" h x 35" w x 2" d, size: 32" h x 24" w x 2" d, size: 24" h x 18" w x 2" d, specifications, about the shop.
Rated 4.6 out of 5 stars.
More About This Product
Compare similar items.

by Trademark Fine Art

Cologne Germany City Map II On Canvas by Michael Tompsett Print
by Wrought Studio™

Roosters On Canvas by Eli Halpin Print
by August Grove®
Rated 4.5 out of 5 stars.9 total votes

Aspen Grove I On Canvas by Julia Purinton Print
by East Urban Home

Germany Cologne Old Town II On Wood Print
by Red Barrel Studio®
Ratings & Reviews
Our Community Guidelines help customers write honest reviews.
Unfortunately, this product has no reviews.
Shipping & Returns
Free fast delivery on select options, available delivery options:.
Fast Delivery
Expedited Delivery
Your order means a lot to us. That’s why we offer fast, safe and reliable delivery options for every item.
30-Day Return
Not loving it? We offer returns for most items within 30 days of delivery for a refund or store credit.
Customers Also Viewed
City Of Cologne Along The Rhine River With Cologne Cathedral And Great St. Martin Church On Canvas by Jan Becke Print
Unlike thin posters and paper prints, this canvas artwork offers the texture, look and feel of fine-art paintings. This artwork is crafted in the USA with artist-grade canvas, professionally hand-stretched, and stapled over North American pine-wood bars in gallery wrap style; a method utilized by artists to present artwork in galleries. Fade-resistant Epson UltraChrome archival inks guarantee perfect color reproduction that remains vibrant for decades even when exposed to strong light. Add brilliance in color and exceptional detail to your space with this contemporary and uncompromising style!
- Please note, this is a flat print of the original artwork and is not embellished.
- 100% Made in the USA. Hand-assembled by highly trained craftsmen.
- Ready to hang right out of the box. Absolutely no assembly is needed.
Cologne Skyline In Summer With View Of The Cologne Cathedral And Great St. Martin Church Along The Banks Of The Rhine River On Canvas by Jan Becke Print
- Ready to hang right out of the box. Absolutely no assembly needed.
Munich, Bavaria, Germany Travel Poster On Canvas by Markus And Martina Bleichner Painting
Great art deserves to be on canvas! Unlike thin posters and paper prints, Giclée canvas artwork offers the texture, look and feel of fine-art paintings. This artwork with artist-grade canvas, professionally hand-stretched, is a method utilized by artists to present artwork in galleries. Fade-resistant archival inks guarantee perfect color reproduction that remains vibrant for decades even when exposed to strong light. Add brilliance in color and exceptional detail to your space with this contemporary and uncompromising style!
- Hand-assembled by highly trained craftsmen
So Gentle, So Furious On Canvas by Ursula Abresch Print
by Mercury Row®
Rated 4 out of 5 stars. 353 total votes
Bring a dynamic feel to your coastal living room, dining room, or home office with this striking photograph reproduction on canvas. Entitled “So Gentle, So Furious” by artist Ursula Abresch, this rectangular piece is made in the USA and printed on wrapped canvas. This photographic piece features a close-up view of crashing ocean waves, rendered in shades of blue and white.
- Artist-quality canvas
- UV and fade-resistant archival inks

Berlin Cathedral (Berliner Dom) And Museum Island Along The Spree On Canvas by Jan Becke Print
'Heidelberg Germany Skyline III' Graphic Art Print on Wrapped Canvas
Contemporary, rustic, modern or traditional whatever your style may be, this manufacturer has got your walls covered. They offer a huge variety of high-quality and wall art to compliment any décor. Their abundance of art themes ranges from fascinating abstracts to breathtaking landscapes, in an assortment of sizes and frames. Whether it's displayed in the bedroom, living room, kitchen or office. Their professionally handcrafted wall décor will be admired for years to come.
- Ready to hang, gallery-wrapped art piece features a multicolored landscape of Heidelberg on a distressed background
- Giclee (jee-clay) is an advanced printmaking process for creating high quality fine art reproductions virtually indistinguishable from the original piece
- Gallery wrap is a method of stretching an artist's canvas around the sides of a hidden frame for a frameless presentation of the finished painting
- Solid wood frame for durability and stability
- Hang anywhere with the attached sawtooth hanger
- Hand-stretched in the USA
Berlin Cathedral (Berliner Dom) Along The Spree River On Canvas by Jan Becke Print
Rated 5 out of 5 stars. 1 total vote
Dortmund Germany Skyline II On Canvas by Michael Tompsett Print
- Ready to hang, gallery-wrapped art piece features a multicolored landscape of Dortmund on a distressed background
'Bremen Germany Skyline III' Graphic Art Print on Wrapped Canvas
- Ready to hang, gallery-wrapped art piece features a multicolored landscape of Bremen on a distressed background
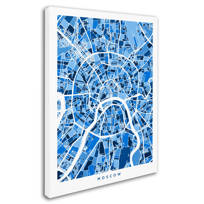
This ready to hang, gallery wrapped art piece features a street map of Moscow. Giclee (jee-clay) is an advanced printmaking process for creating high quality fine art reproductions. The attainable excellence that Giclee printmaking affords makes the reproduction virtually indistinguishable from the original piece. The result is wide acceptance of Giclee by galleries, museums, and private collectors. Gallery wrap is a method of stretching an artist's canvas so that the canvas wraps around the sides and is secured a hidden, wooden frame. This method of stretching and preparing a canvas allows for a frame less presentation of the finished painting
More to Explore
Looking for design inspiration? Shop our curated collections !

Moscow Posters
1 - 72 of 740 moscow posters for sale

Results: 740

Cavalier King Charles Spaniel Poster

Sunset Near Moscow Idaho-palouse Series Poster

The Bar Of The National Hotel In Moscow Poster

Golden Retrievers Poster

Moscow Poster

Sebastian Coe Crosses Finish Line Poster

Moscow River At Dusk Poster

Moscow Kremlin And Cathedrals Poster

Moscow Metro Station Poster

Moscow Cityscape In Winter Poster

Moscow. St.basil Cathedral Poster

Old English Sheepdogs Poster

Saint Basils Cathedral Poster

Saint Basils Cathedral, Moscow, Russia Poster

Two Black Labradors Poster

Russia, Moscow Space Monument, Low Poster

Russia, Moscow, Red Square And Kremlin Poster

Beautiful Moscow Metro Station Poster

Sunset Over Moscow Poster

Palouse Hay Field Near Moscow, Idaho Poster

Moscow Skyline At Night Poster

Moscow Cityscape At Sunset. Aerial View Poster

Moscow City On Sunrise Poster

Moscow View Poster

Moscow. Sparrow Lenin Hills Poster

Moscow Kremlin And Moskva River At Dusk Poster

Moscow City At Dusk #1 Poster

Moscow City At Sunny Day Poster

Moscow Skyscrapers At Sunset Poster

Moscow Metro Poster

Moscow City At Sunset Poster

Moscow City View Poster

Moscow. St.basil Cathedral, Minin And Poster

Moscow Cityscape Poster

Moscow Panorama. Fisheye Shot Poster

Moscow. St Basil Catedral At Night Poster

Moscow On Fire, 15th September 1812 Poster

Moscow In The 17th Century. The All Poster

Moscow, Spasskaya Tower And St. Basil Poster

Moscow City At Dusk Poster

Moscow Skyline Poster

Moscow Night View Poster

Moscow City Poster

Moscow Kremlin Poster

Moscow Night Poster

Moscow Skyline #1 Poster

Moscow City Skyscrapers Poster

Moscow Cityscape In Sunset Light Poster

Moscow Fireworks Poster

Moscow City At Dusk #2 Poster

Moscow City At Night Poster

Moscow Skyline. Aerial View Poster

Moscow Kremlin Towers Poster

Moscow Skyline. Aerial View. Fisheye Poster

Moscow December Poster

Moscow City On Sunset Russia Poster

Moscow Skyline At Dusk Poster

Moscow. St.basil Cathedral, Minin And #1 Poster

Moscow International Business Center Poster

Moscow Kremlin And Arbat Street Poster

Moscow In The 17th Century. Bookshops Poster

Moscow Patio Poster

Moscow II, 1916 Poster

Peonies In Vase Poster

Saint Basils, Moscow At Night Poster

Labrador Dog Breed With Her Puppy Poster

Leon Trotsky Addressing Troops On Their Poster

Portrait Of The Author Count Lev Poster

Moody Cityscape Of Moscow – Luzhniki Poster

Russia, Moscow Oblast, Moscow, Red Poster

St. Basils & The Kremlin At Moscow - Poster
Phone Cases
Totes & Pouches
Panoramic Horizontal

We've shipped over 1 million items worldwide for our 500,000+ artists. Each purchase comes with a 30-day money-back guarantee.
IMAGES
VIDEO
COMMENTS
Canva's free poster maker has thousands of templates designed by our team of professional designers. Templates are your shortcut to great design: You'll have a custom poster in minutes. We've got poster templates for every need—from concerts to retail, conferences and quotes. Or design from scratch to create something entirely unique.
How to use Canva to Make a Poster for Presenting Scientific Research Papers at ConferencesTry Canva pro for free: https://partner.canva.com/c/2231695/619765/...
Unlock your creativity and learn how to create stunning poster designs using Canva. In this step-by-step tutorial, we'll guide you through the process of des...
A bunch of alternative poster styles that use the same underlying grid. Free research poster Canva templates, and some tools to help you design your next poster. The research poster presentation mindset. So imagine yourself in a room standing in front of a research poster surrounded by people just like you.
Discover the ease of creating stunning posters with Canva.com 2024 in our step-by-step tutorial video! Whether you're a beginner or just looking to brush up ...
You can also record your live presentation. With Canva Live, you can get real-time feedback, poll your audience, answer viewer questions, and receive emoji reactions. Canva support includes free video tutorials and courses on a wide range of topics. Best of all, Canva is easy to use without any sort of graphic design experience.
Canva Pro Design By Kicki E Johansson Tips for Designing Effective Posters. Designing a poster that stands out and captures the audience's attention requires careful planning and execution.
Part 1: Design Your Poster on Canva. 1. After creating a free Canva account, choose "use custom dimensions" in the top right corner. 2. Next, enter the dimensions you would like to use for your poster* and select the green "Design!" button. I want to create a 48 x 36″ poster so I entered 48 for the width and 36 for the length.
To create a poster: Log into Canva (www.canva.com). See the "Getting Started" tab for information on setting up an account. Click Create a Design. In the search bar, type "poster." Select the size you need. Keep in mind that landscape (where the width is greater than the height) is better for posters that will be viewed online.
Step 1: Open a slide in your Canva presentation. Step 2: Select Elements from the sidebar. Add graphics, icons, stickers, tables, videos, and more. Step 3: You can explore the AI image generator ...
How to Create a Poster in Canva. In this video on How to Design a Poster in Canva, we'll show you how to create a poster in Canva. This guide will show you h...
Exporting a Canva presentation to PowerPoint. As you can see below, the PowerPoint file is entirely editable. Something to consider is that unless you have the font installed on your computer, PowerPoint will reassign to a generic font. Example of Canva presentation in PowerPoint (100% editable) How to Use Canva-made Graphics in PowerPoint
Elevate your interview game with our modern, geometric-patterned presentation template, perfect for business professionals looking to make a memorable impact. This sleek slideshow template, featuring a dynamic yellow and grey color scheme, is designed to guide you through crafting compelling interview preparations and tips. Ideal for job ...
Skip to start of list. 26,020 templates. Create a blank Presentation. Beige Scrapbook Art and History Museum Presentation. Presentation by Noisy Frame. Cream Neutral Minimalist New Business Pitch Deck Presentation. Presentation by Take Care Creative. Brown and Beige Aesthetic Modern Group Project Presentation.
Canva is the most popular freemium online graphic design tool out there. ... it offers a vast array of image and video editing options that include presentations, social media posts, poster design ...
from 12,95 €. Moscow Russia Map. Poster. from 12,95 €. Premium quality Matching frames Secure payment 100-day-returns Affordable shipping Buy great pictures of Moscow on premium posters now!
Let's explore how to create posters in Canva. Posters need to grab your audience's attention and convey powerful messages, this video will show you the steps...
The result is wide acceptance of Giclee by galleries, museums, and private collectors. Gallery wrap is a method of stretching an artist's canvas so that the canvas wraps around the sides and is secured a hidden, wooden frame. This method of stretching and preparing a canvas allows for a frame less presentation of the finished painting
Design, present, inspire with Canva Presentations. Reimagine Presentations with cinematic visuals that captivate your audience - no matter how or where you're presenting. With features to collaborate smarter, create stunning data visualizations, and deliver confidently, Canva Presentations bring impact to your ideas. Create a presentation.
Moscow map print poster canvas | Russia map print poster canvas | Moscow city map print poster canvas (7.5k) $ 17.50. FREE shipping Add to Favorites Moscow Mule Signature Drink Sign, Signature Cocktail Sign, Minimalist Wedding Bar Menu Sign, Wedding Drinks menu, Editable Template | ALMA (495) Sale Price ...
Buy Moscow posters from the Getty Images collection of creative and editorial photos. All Moscow posters are produced on-demand using archival inks, ship within 48 hours, and include a 30-day money-back guarantee. Customize your Moscow poster with hundreds of different frame options, and get the exact look that you want for your wall!